Create and Send an Invoice
As a carrier or a broker handling loads for another broker or shipper, after delivery, you can create an invoice with the appropriate line items and documents that you need to send to the original broker or shipper for payment. You can create invoices for loads that were originally tendered or offered by the original source broker (or shipper) using Velocity+. (The Velocity+ solution for shippers is commonly known as Unite Shipper Portal.)
Tip: As a best practice, submit invoices on a frequent cadence. For example, some carriers might wait to submit their invoices to brokers once or twice each week while others submit them daily. To optimize speed, efficiency, and cash flow, aim for daily or real-time invoicing on-demand as loads are delivered in Velocity+.
-
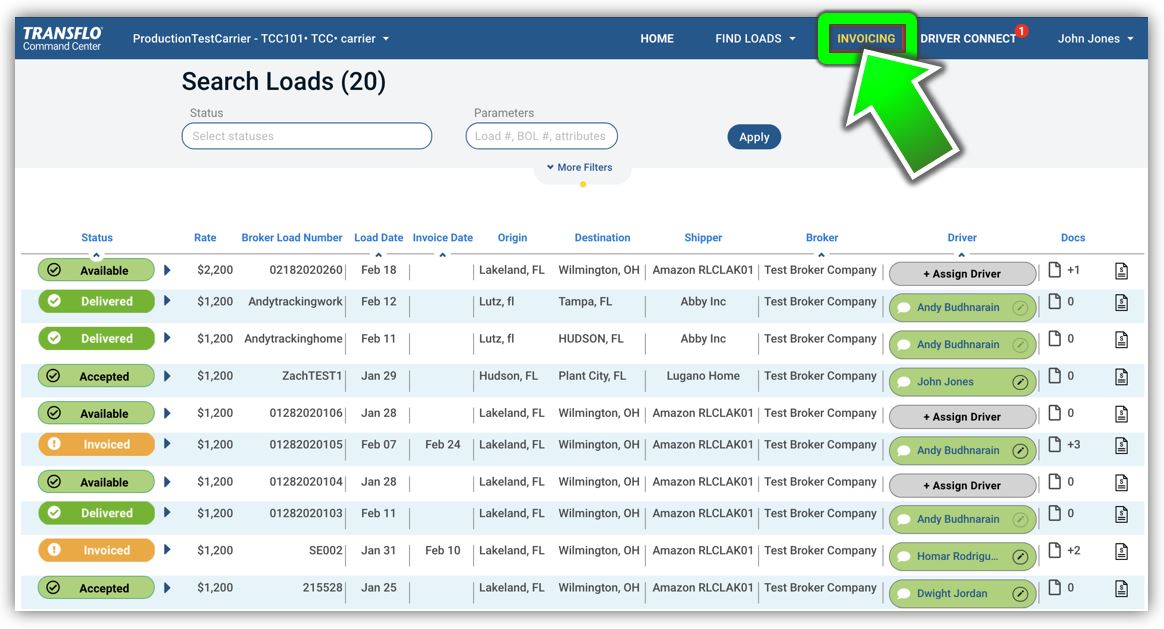
In the top menu bar, click Invoicing.
-
On the resulting Search Loads page, enter your search criteria. The same search filters available on the FIND LOADS page are available here on the INVOICING page.
-
Since only delivered loads can be invoiced, select Delivered in the Status field and click Apply.
- Click the Status column header to sort the rows by status. When you filter on Delivered loads, the results include both delivered loads that have been invoiced and those waiting to be invoiced. Sort by status to more easily separate invoiced loads from the fresh recently delivered loads that you can now invoice.
-
-
At the far right side of the delivered load that you want to invoice, click
 Create Invoice.
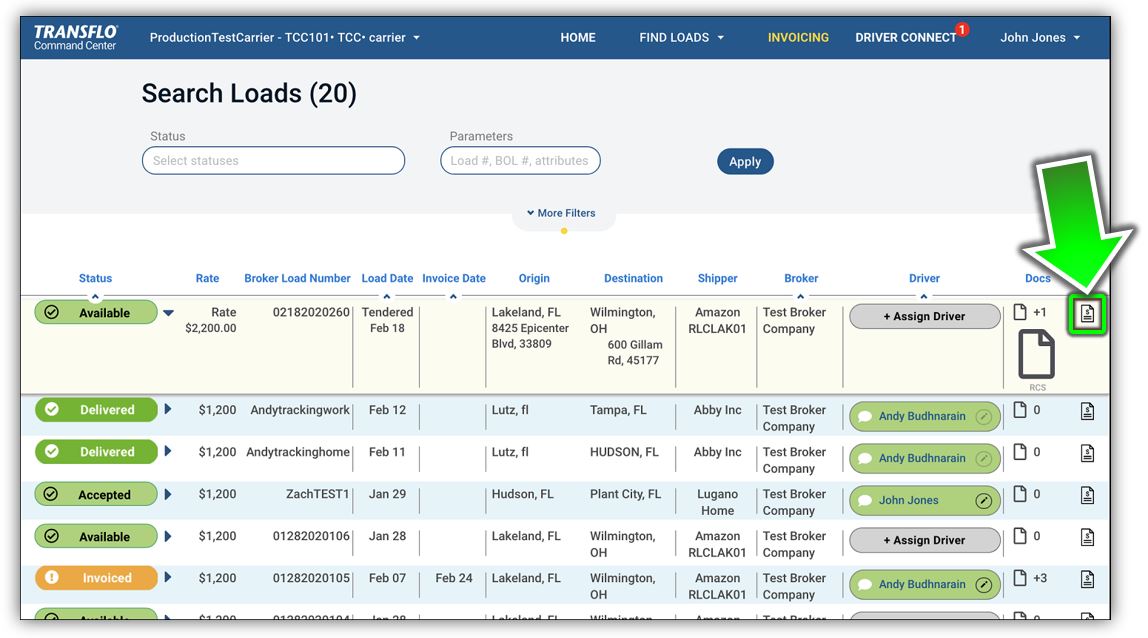

Tip: You can create an invoice only for loads in Delivered or Invoiced status.
-
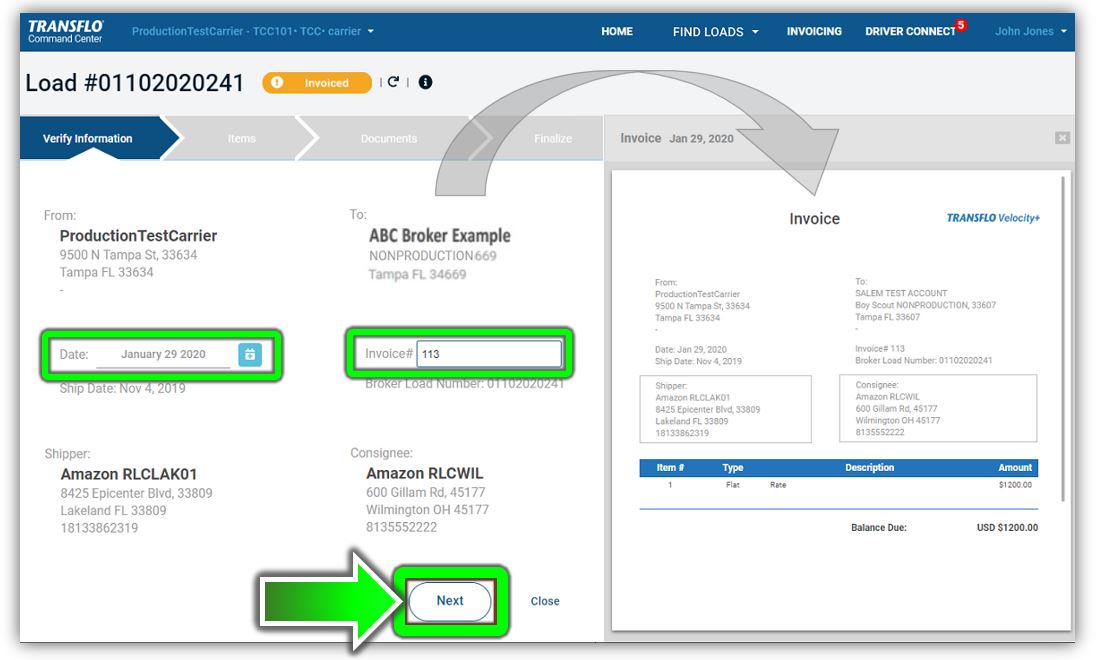
On the Verify Information page:
-
The data on the left fills the invoice preview on the right.
-
Verify the Date to appear on the invoice. If necessary, change the date.
-
Verify the Invoice# you want to appear on the invoice. If necessary, enter a different invoice number.
-
When you are ready to save and continue, click Next.
-
-
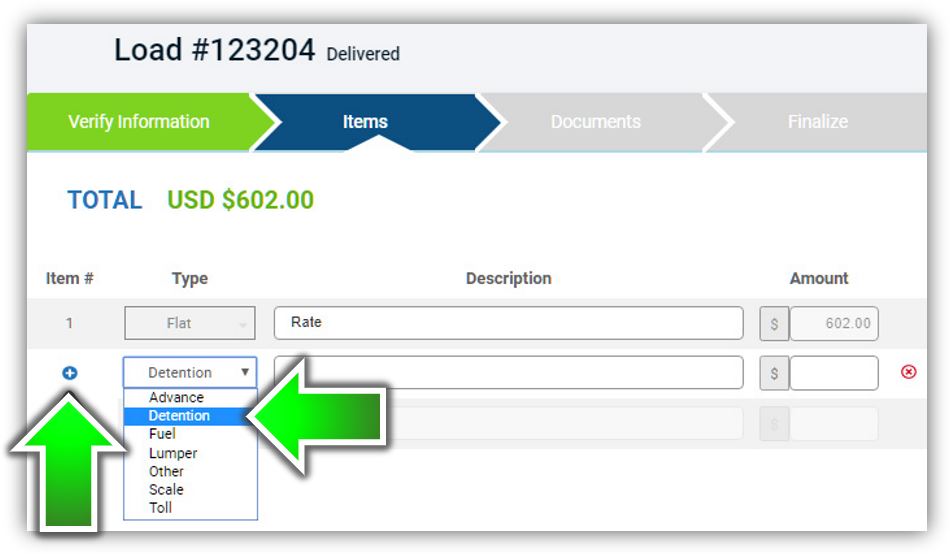
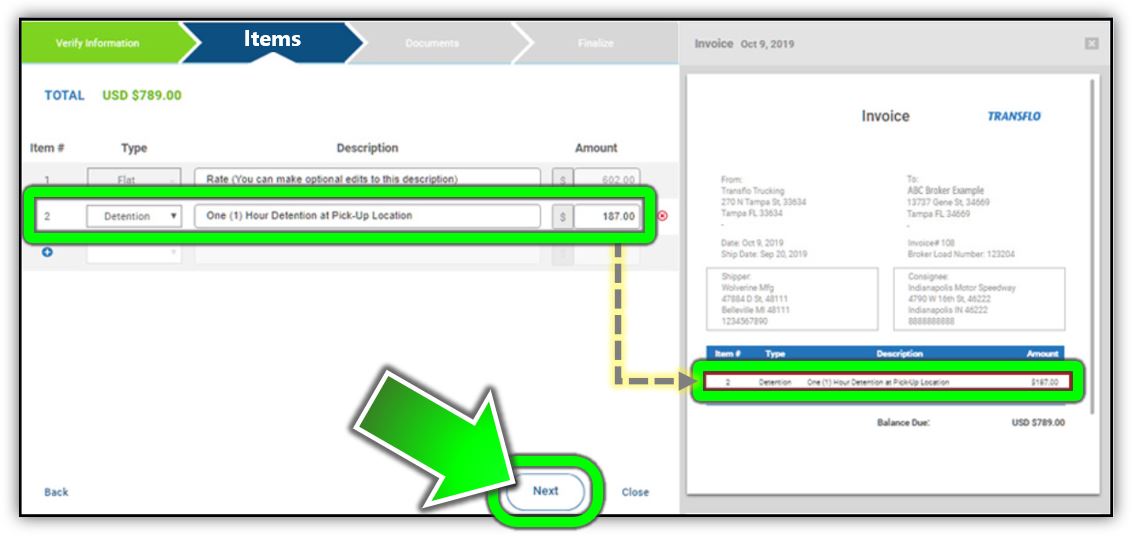
On the Items page:
-
Review the invoice TOTAL at the top left. This value appears as the Balance Due in the invoice preview at the bottom right.
-
Review line Item #1 and confirm the Description and Amount are correct. You can edit the Description field. The Amount field for line 1 cannot be changed.
-
To add a line item, click
 Add Line Item and select a Type of invoice rate item (for example, Detention).
 -
Press the Tab key and enter values in the Description and Amount fields. Each new line item appears on your invoice in the preview panel at right.
-
(Optional) To remove a line, click
 Remove Line Item.
 -
When finished adding line items to your new invoice, click Next.
Tip: A Back link appears in the lower left corner so you can return to a previous page later if you need to edit this invoice.
-
-
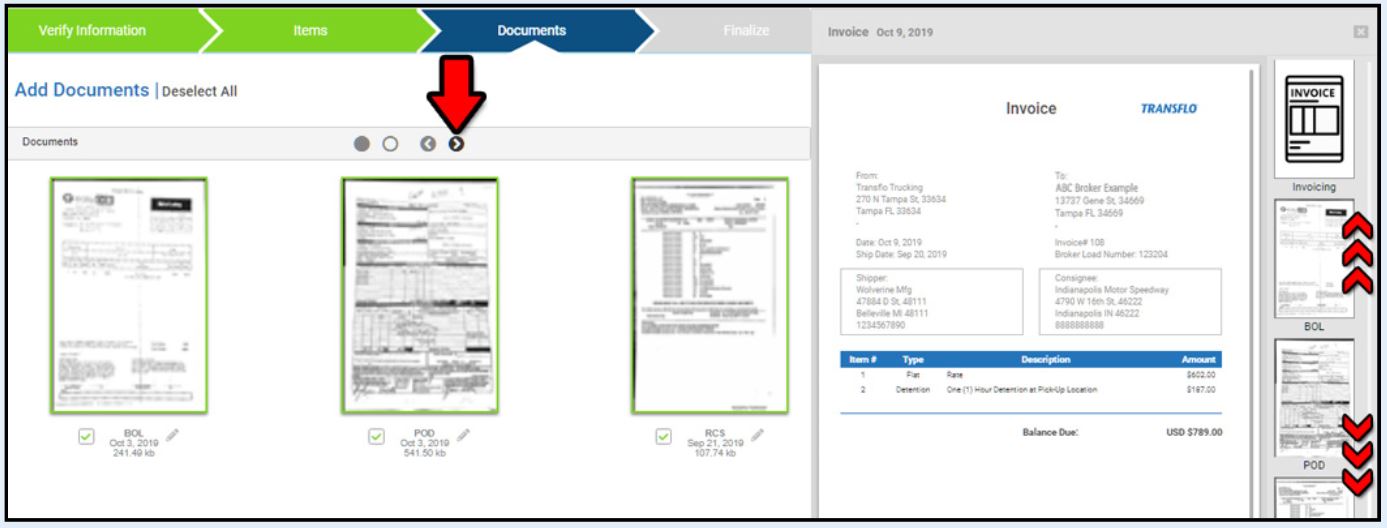
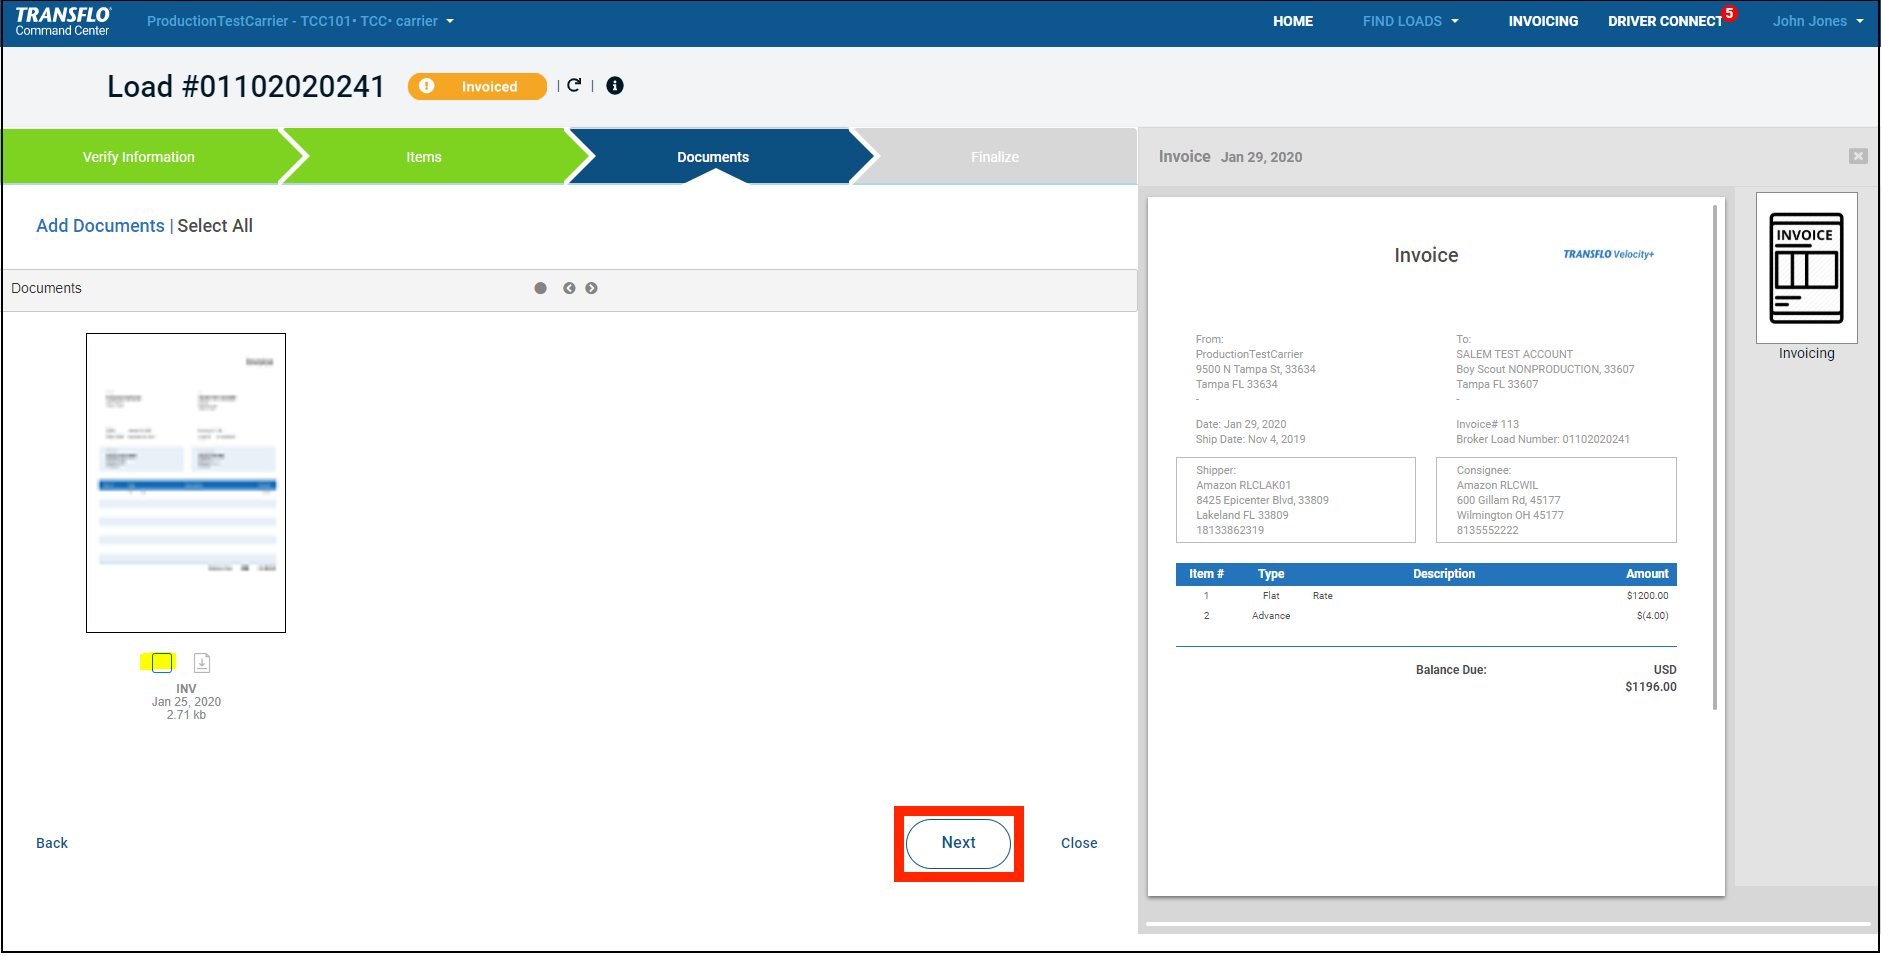
On the Documents page, all documents are selected by default:
-
To cycle through all the documents if they do not fit on one page, click the < Previous and Next > navigation buttons. You can also scroll up or down through the selected documents at far right.
-
Click on a document to deselect it or clear the check box for any document that you do not want to send with the invoice. Or, if you click Deselect All at the top, click the document or its check box for each document that you want to send with the invoice.
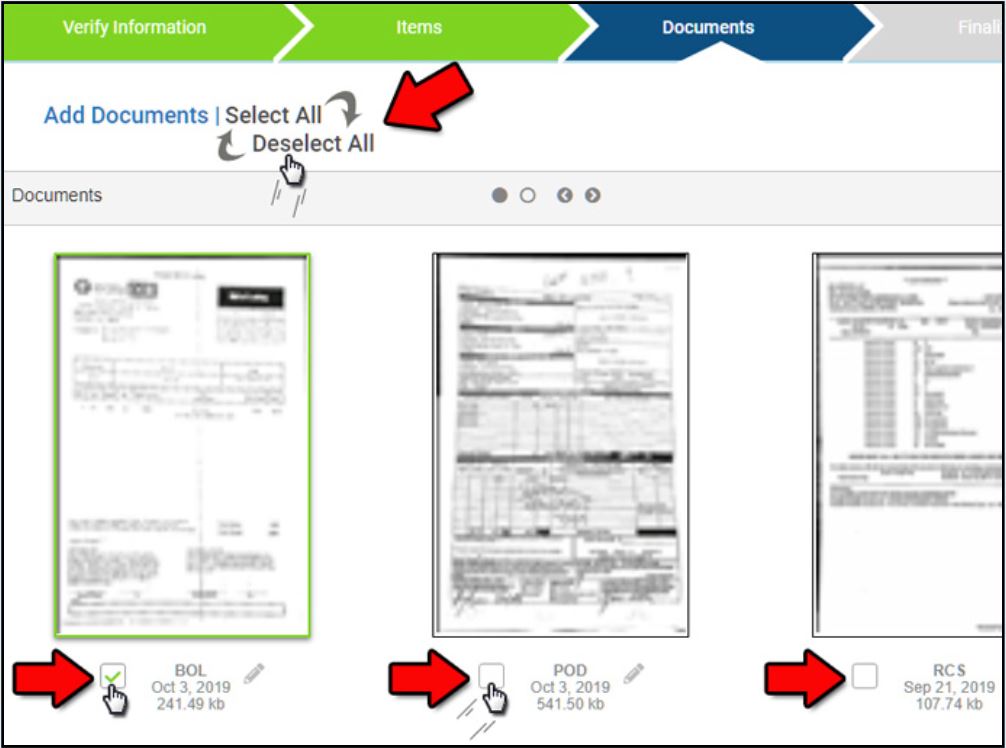
Tip: Whether you prefer to click Select All (and then uncheck some docs) or Deselect All (and then check some docs) is up to you. Either way, click the document or the check box under each document to include it, or click it again to clear its check mark and exclude it from the invoice package.
-
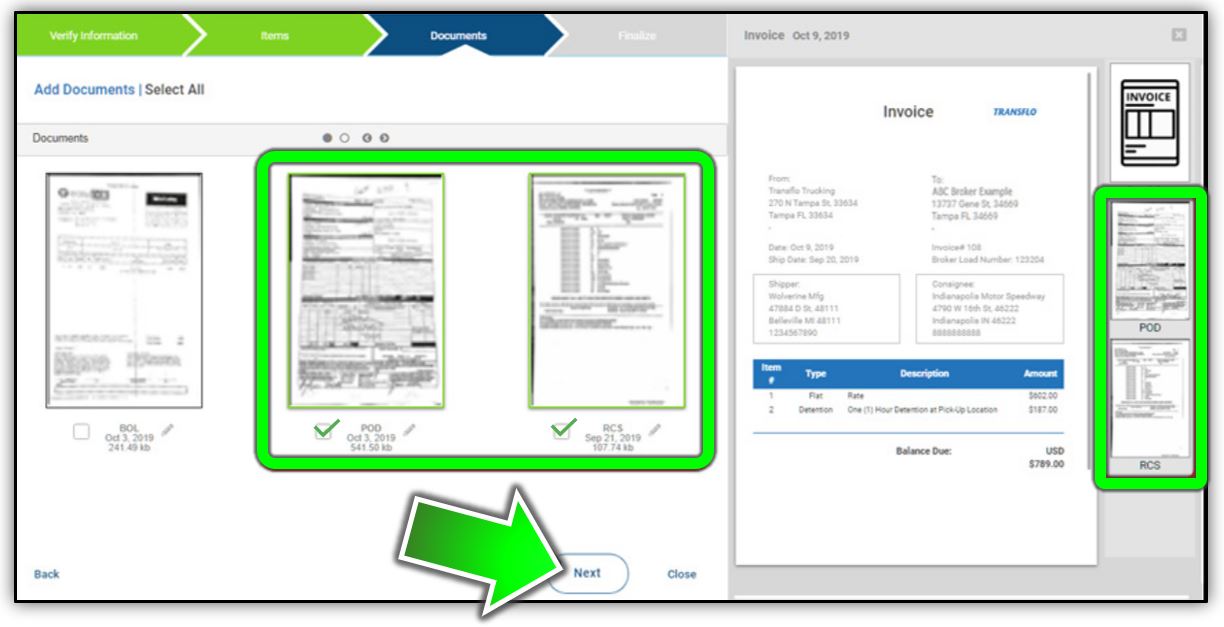
Confirm your document selections. In this example, your invoice package includes a POD and RCS. When ready, click Next.
-
-
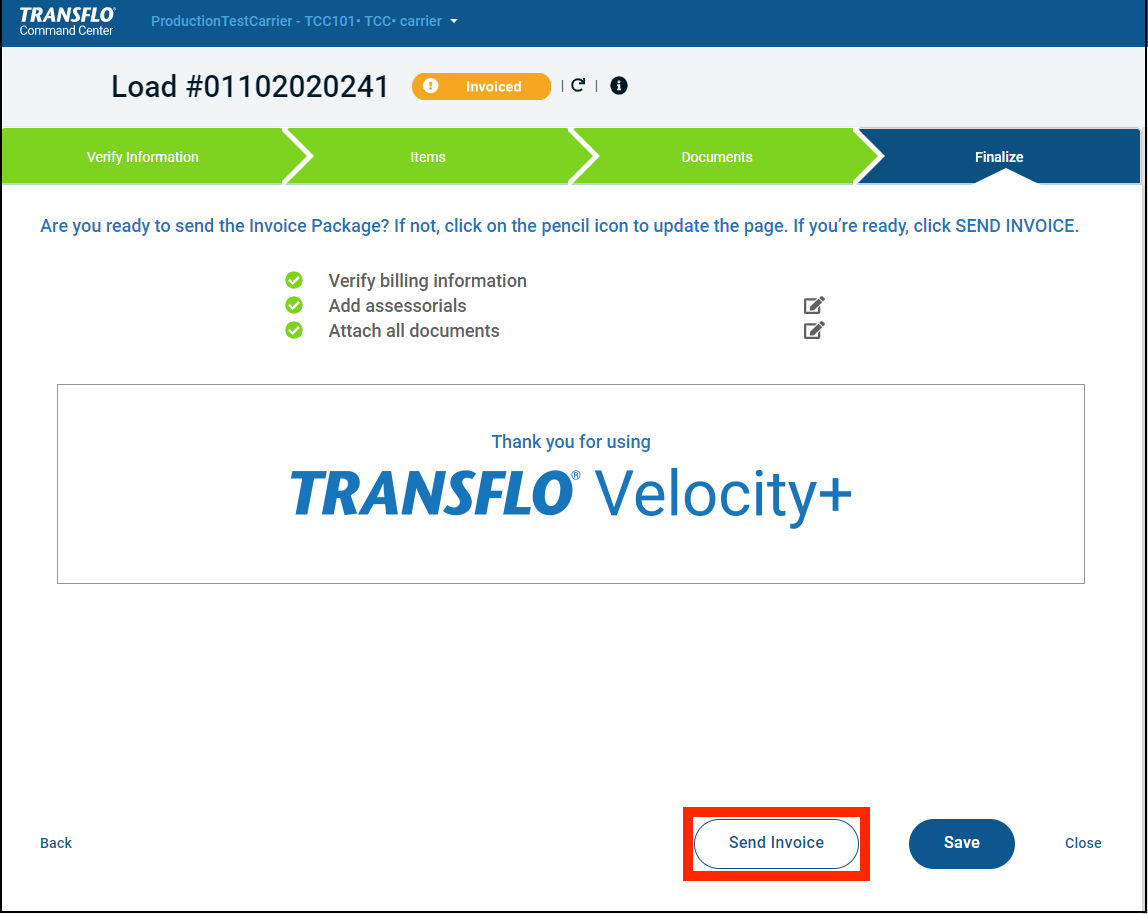
On the Finalize page, confirm the invoice package is ready.
-
If you need to go back and make changes, use any of the following equivalent options:
-
Click a tab at the top (for example, click Items).
-
Click Edit for assessorials (invoice line items) or documents.
-
Click Back one or more times.
-
-
When ready, choose one of the following options:
-
To save your work and follow up later, click Save.
-
To send the package to the broker, click Send Invoice.
Tip: Even if you forget to save, the application saves your progress through invoice creation at each stage where you clicked Next. Click Create Invoice again to resume where you left off.
-
-
-
After you click Send Invoice, a message confirms the invoice package was sent successfully. Click OK to close the message.
-
You also see the following details in the list:
-
Load status has changed to Invoiced.
-
The Invoice Date has been inserted.
-
The number of documents is updated (for example, from +2 to +3).
-
-
Click on the page icon with document count to open the Document Viewer again for the same load. For example, click +3.
-
Your new invoice (INV) package now appears on the Documents page.
Tip: Expand an invoiced load in the list. Without a paid date, you know this load has been invoiced and is an aging receivable, awaiting payment. When the invoice is later paid by the broker, the paid date appears below the invoice date.
-
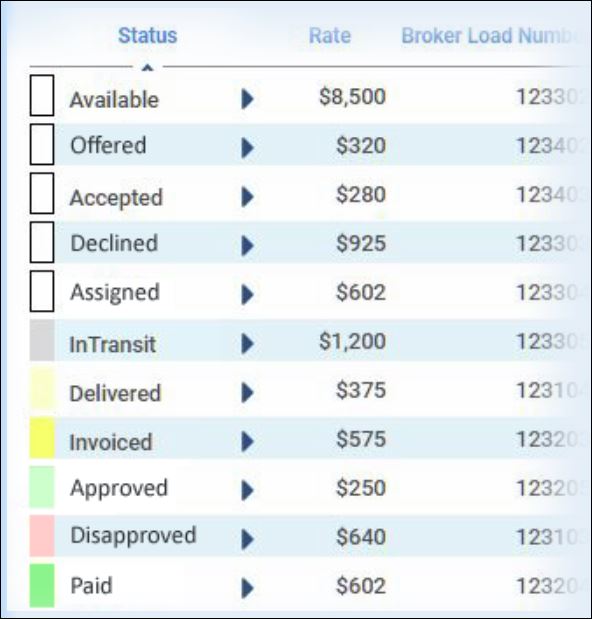
Refer to the following legend to identify the invoicing status of different loads by the color of the icon in each row on the INVOICING page.
-
View uploaded documents for the load on the Documents screen. Documents can be checked or unchecked, and viewed in more detail on the right.
-
A green check mark in the box indicates that the document will be included in the final invoice package.
-
When finished viewing documents, click Next.
-
On the final screen, you can Add assessorials and Attach all documents to the invoice if necessary.
-
Click Send Invoice to send the completed invoice to the recipient broker or shipper.
-
Once the invoice is sent, a confirmation number appears on the screen. Click OK to return to the Loads page.
You can save an invoice and complete it later. The system also auto-saves your last invoice.
-
When you click Create Invoice on a load for the very first time, the system creates a new invoice.
-
When you click Next to advance past the first screen, the system saves that invoice.
-
Then, if you click Create Invoice again for the same load, the system automatically opens your last saved invoice.
-
If you click Create Invoice for a load that has already been invoiced, the system creates a second invoice.
Refer to the following legend to identify the invoicing status of different loads by the color of the icon in each row on the INVOICING page.
![]() View a demonstration of these steps in one or more Transflo videos:
View a demonstration of these steps in one or more Transflo videos: