DMS Workflow Queues and Work Items
This article covers the use of the Viewer Form and the Document List as you process your Transflo DMS workflow queues.
TRANSFLO® Workflow Web Client is a powerful tool for processing your Workflow Queues. It has a Document List that gives you a list of documents associated with the work items in your queue. Use Viewer Form to view images of the documents.
To work your queues:
-
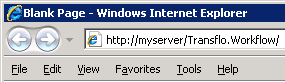
Open your browser and type http://myserver/Transflo.Workflow in your browser’s address bar, where myserver is the name of the computer that is hosting your TRANSFLO® Workflow website. After entering the URL, click Enter.
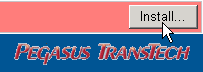
The first time you open this page, the TRANSFLO® Document Viewer plug-in will not be installed. To install the plug-in click the Install button, in the top right-hand corner of the web page and follow the installation instructions.
-
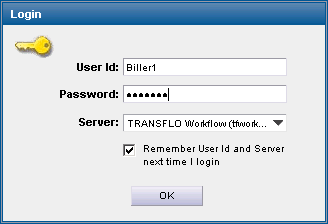
Log in to your TRANSFLO® Workflow Web Client.
-
Enter your User ID in the User Id text box
-
Type your Password in the Password text box.
-
Select the TRANSFLO® Workflow server, from the Server drop-down.
-
(Optional) Check the Remember User Id and Server next time login check box, so that you don’t have to type in your User ID and select the server every time you log in.
-
-
Click on the Work Queues menu button. Click on the Work Queue menu button, at the bottom-left section of the page.
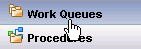
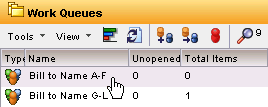
A list of Work Queues that you have access to is listed above the Work Queue button.
-
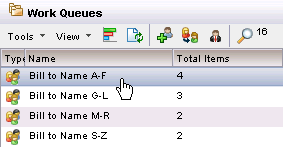
Click on a queue in your Work Queues list. Double-click on theWork Queue you wish to process.
-
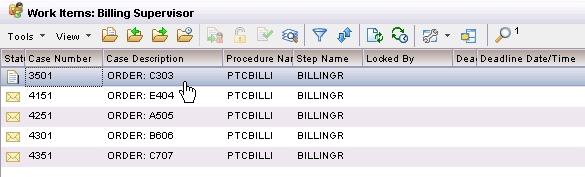
Double-click on a work item in the Work Items list. Double click on a Work Item in your Work Items Details Pane, to the right of the Work Queue List.
-
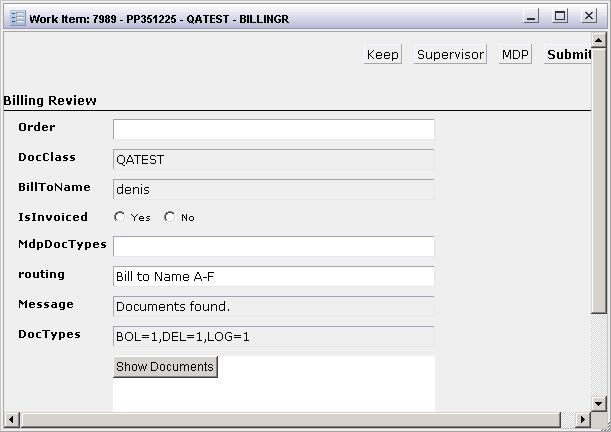
The Work Item window, Documents list, and the Document Viewer pane open.
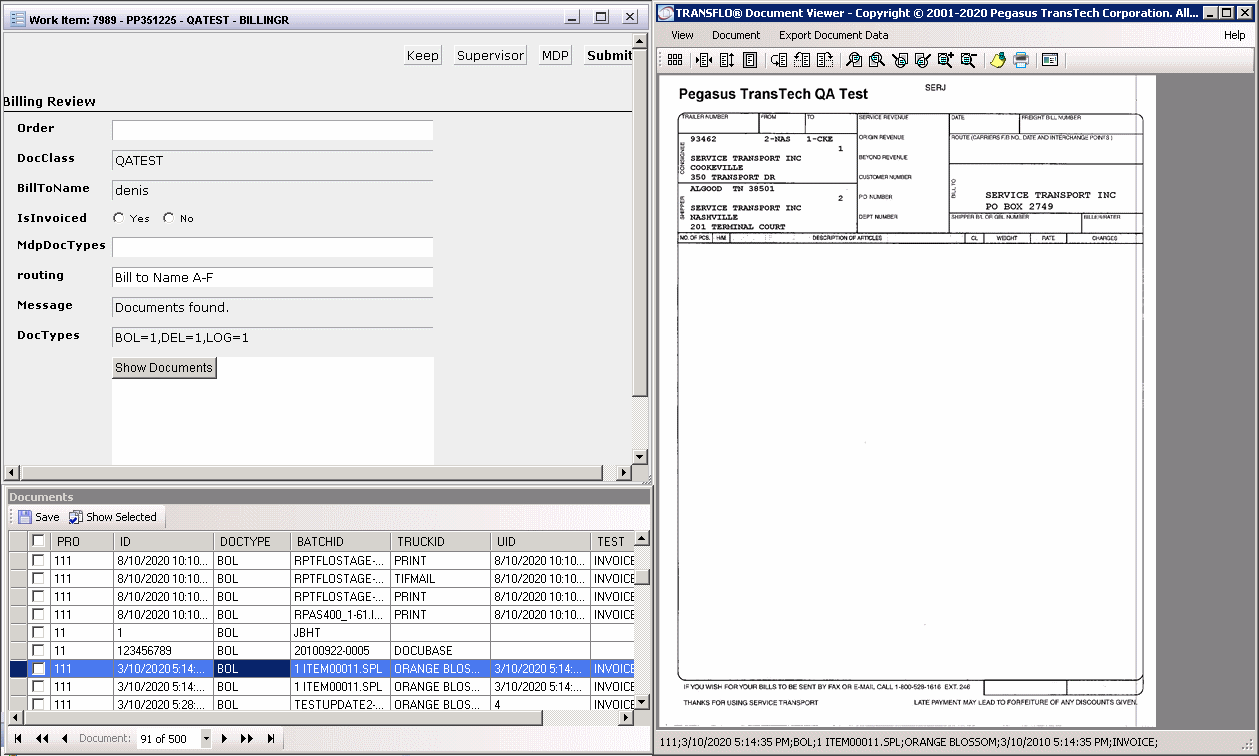
Near the top of the form are information Fields about the Work Item. These cannot be edited. Below the read only Fields are Fields that you can edit.
-
Window sizes and positions are saved after you close the document viewer, log out, or close your browser. If your administrator changes these settings for your profile, your next session will have the newly-configured window sizes and positions.
-
You can move the Document Viewer and the Viewer Form windows anywhere on your screen.
-
The Document list can be “docked” to your Viewer Form, so that they behave as one window. To do this, drag the Document List window to the Viewer Form and drop it on one of the docking arrows that appear in the Viewer Form.
-
The Case form was set to floating in the Layout Options settings.
-
-
At the top of the Work Item form, there are several navigation buttons. The most common ones are:
-
The Keep button is a standard button that is used to keep the Work Item in your Queue.
-
The Submit button is also a standard button that is used to move the Work Item to the next step in your Workflow Procedure.
-
The Supervisor button is used to send the case to a Supervisor for review.
-
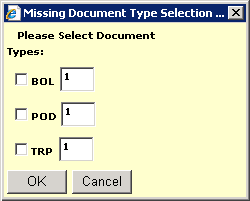
The MDP button is used to access the Missing Document Processor.
-
-
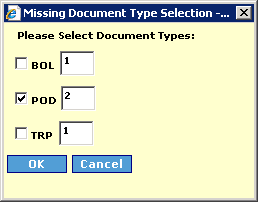
If documents are missing click the MDP button. A dialog box appears, requesting you to select the missing Document Types and the quantity that are missing. This will then send the item to the Missing Document sub-process, to wait for the document to be scanned into the system.
-
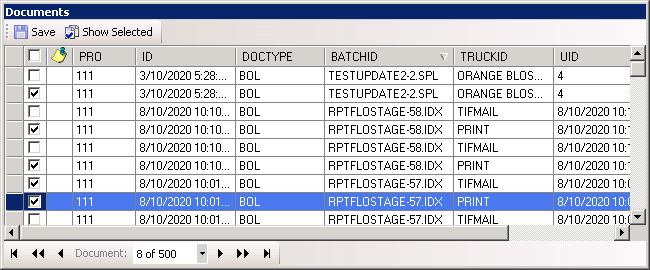
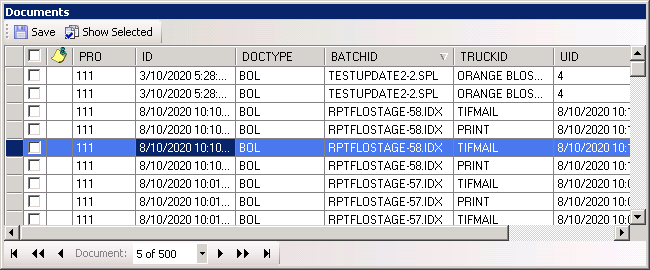
When you open a work item, a Document List opens with a list of Field Values, for all of the documents associated with the Work Item. Narrow down the list, by clicking on the check boxes of the documents you wish to show and clicking on the Show Selected button.
-
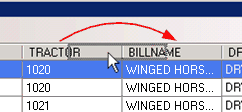
Change the order of columns by clicking the header and moving it.
-
Sort the list by clicking on the header of the column you want to sort the list by.
-
-
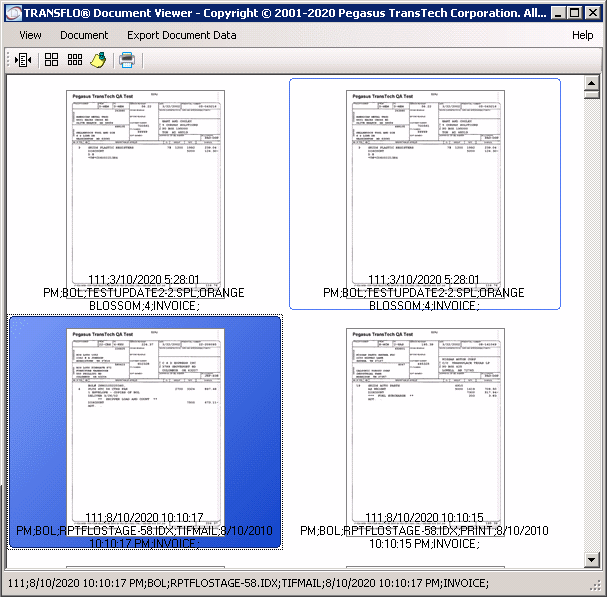
Highlight a row by clicking on it. The associated image of the document is selected in the Viewer Form. You can Rotate the image and Zoom, with various toolbar buttons.
-
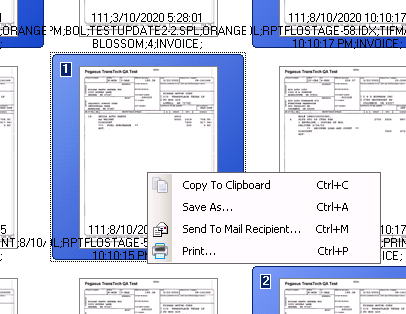
Click on the Show Multiple Images icon. Multiple images are displayed in the Viewer Form. Select multiple images and right-click on one of them. A context menu opens that allows you to:
-
Copy the images to the Windows® Clipboard.
-
Save the images as separate TIFF files on your local drive.
-
Print the images
-
Email the images.

-
-
Select Send to Mail Recipient... from the context menu. Select one of the following options:
-
Separate Document: Attach each document as a separate TIFF images to the email.
-
Multi-page TIFF image: Combines the images into a Multi-page TIFF file and attaches it to the email.
-
PDF Document: Combines the selected images into a Multi-page PDF file and attaches it to the email.
-
-
Select a single document in the Viewer and click on the View Document Notes
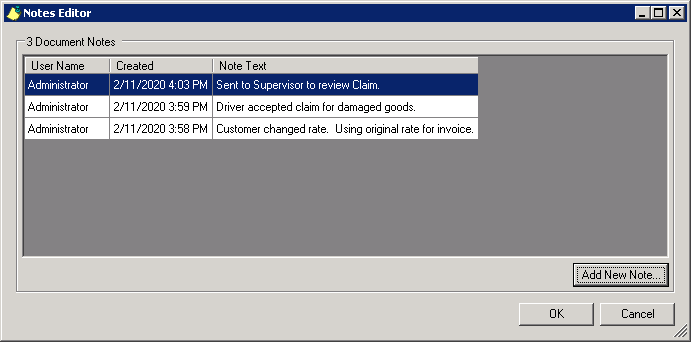
 icon in the toolbar. The Notes Editor opens with the existing notes for the selected document.
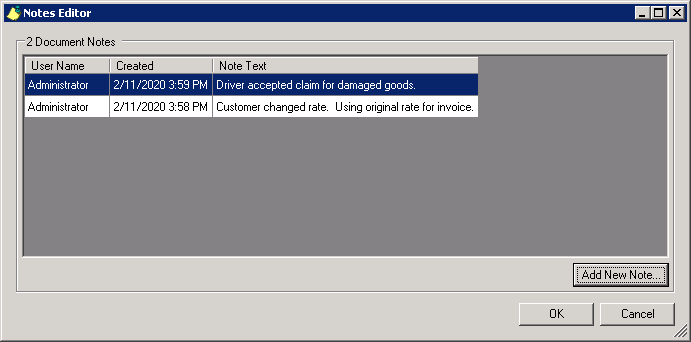
-
Click on the Add New Note... button. The Add new note window opens. Type a new note and click the OK button. The new note is added to the list.
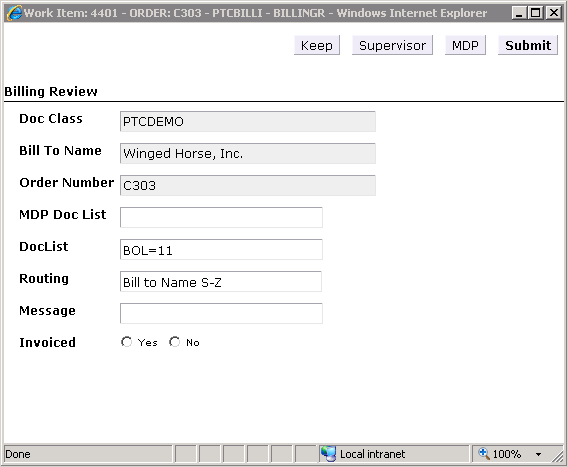
The Work Item Form
The Work Item form contains information that pertains to the entire work item. If you have permission, you can view Read Only information and change Case-related information. You can also determine the next step action for the Work Item.
-
Information Fields about the Work Item have a gray background. These cannot be edited.

-
Fields that you can edit have a white background.

-
At the top of the Work Item form, there are several navigation buttons. The most common ones are shown in the image below.

-
The Keep button is a standard button that is used to keep the Work Item in your Queue.
-
The Submit button is also a standard button that is used to move the Work Item to the next step in your Workflow Procedure.
-
The Supervisor button is used to send the case to a Supervisor for review.
-
The MDP button is used to access the Missing Document Processor. When this button is clicked, a dialog box appears, requesting you to select the missing Document Types and the quantity that are missing. This will then send the item to the Missing Document-sub-process to wait for the document to be scanned into the system.
Note: The images shown here for the Work Item Form are only samples. Your forms may be different, depending on how your Workflow Procedure and Forms are designed. A Supervisor will have a different set of buttons. An example of this would be a button to terminate the Case.
-
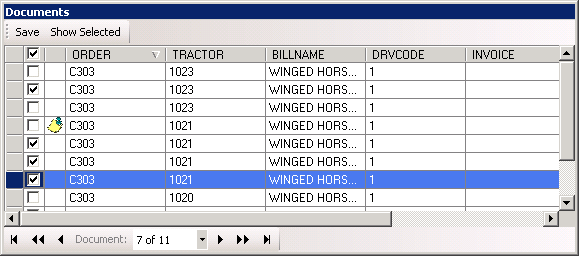
The Document List
The Document List and the Viewer Form work together. Changes made in Viewer Form can affect the Document List and vice versa.
The Document List contains all of the images in the Imaging System that pertain to the open Work Item.
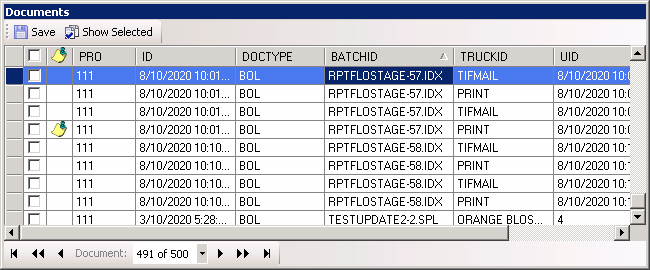
You can narrow down the number of items shown in the list, by selecting check boxes next to the desired rows and clicking on the Show Selected button. The Show Selected feature also limits the images that are visible in the Viewer Control.
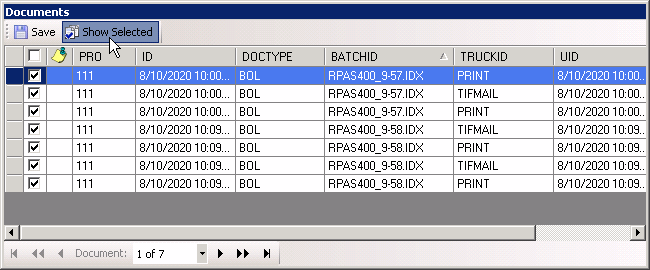
You can show all of the items again, by clicking on the check box on the header row and clicking on the Show Selected button.
The Notes icon  next to a row indicates that there is a note for the document.
Sort the Document List
To sort the Document List by a column click on its header. This sorts the list in ascending order. Clicking the header again sorts the list in descending order. Clicking on the header a third time removes the sort.
The direction of the sort is displayed by the up  or down
  arrow, to the right of the header text.
Set the Order of Columns
When the browser is closed and reopened, your columns appear in the default order configured by your Workflow Administrator. The order of the columns can be changed. To do this, drag and drop the header to your preferred position.
Column positions remain the same for the case in the current session.
Edit Data
If you click on a cell twice you can edit the value. This is not the same as double-click. Wait a second between clicks.
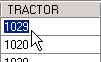
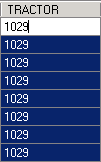
Press the Shift and F2 keys simultaneously to change all values in the column to the value you changed.
If your Document List has more than one page or rows, when you save your changes, the Document List will refresh and take you to the top of the list. You may have to scroll down, to find the row you were editing.
To save your changes to your Imaging System, tab out of the cell you are editing and click the Save button.
Navigation Buttons
You can click rows in the Document List or use the Navigation buttons to select documents in the Viewer Form.Navigation buttons are provided at the bottom of the Document List to allow you to quickly navigate to a document. You can also type the row number for a document to navigate directly to that row.

The navigation tools are explained below.
| Icon | Description |
|---|---|

|
Selects the first document on the first page. |

|
Moves up a page of documents. |

|
Moves up one document. |

|
Selects the document located at the row number entered or selected from the drop-down. |

|
Moves down one document. |

|
Moves down a page of documents. |

|
Selects the last document on the last page. |
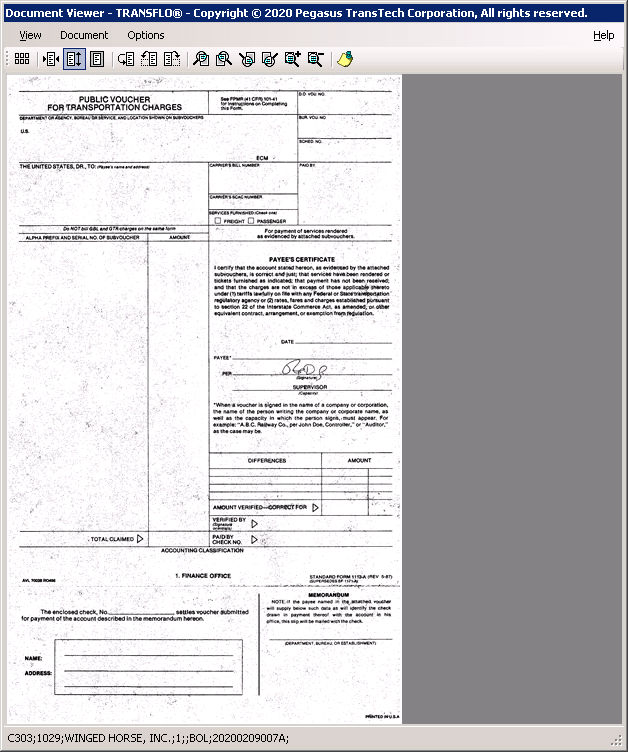
The Viewer Form
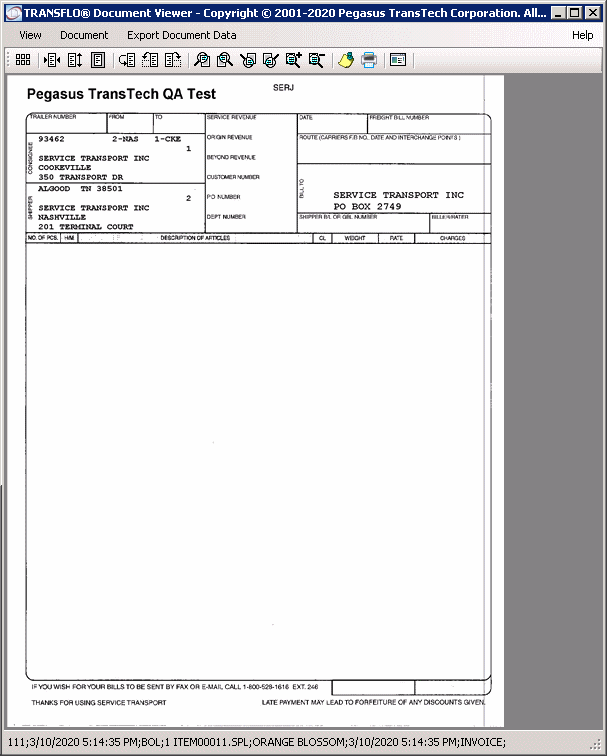
The Viewer Form allows you to view images of the documents that are highlighted in the Document List.
Documents in the Viewer Form can be viewed in Single Page mode.
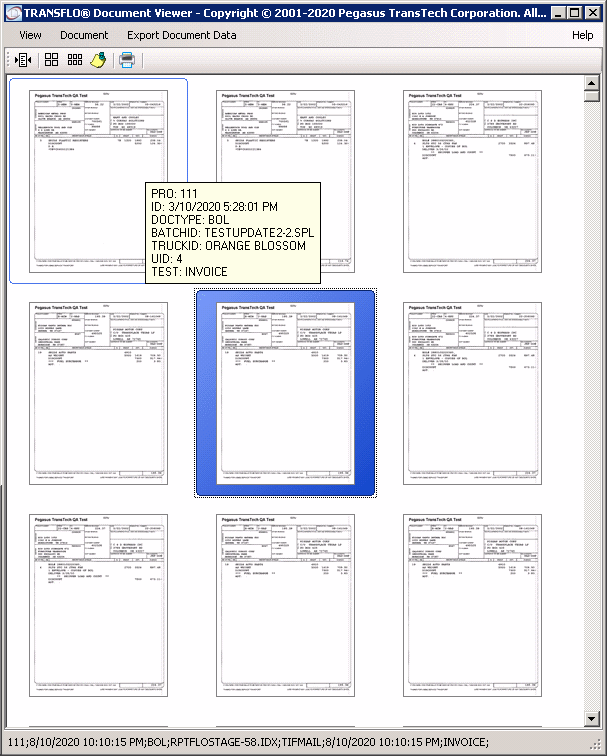
Documents in the Viewer Form can also be viewed in Multiple Page mode.
Hovering your mouse over a document will display its Field data, in a pale yellow box.
Selecting a document in the Viewer Form will select the same document in the Document List.
The opposite is also true.
Selecting a document in the Document List will select the same document in the Viewer Form.
The Viewer Form has several menu options that are described in the following table:
| Menu | Option | Shortcut Key | Description |
|---|---|---|---|
|
View |
Single Document |
|
Shows images in Single Document view. |
|
Multiple Documents |
Ctrl + I |
Shows images in the Multiple Document view that you used last. |
|
|
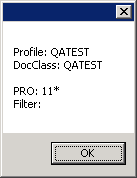
Information |
|
Opens a dialog box that lists the Profile you are using, the DocClass, the BATCHID, and the Filter.
|
|
|
Preferences... |
|
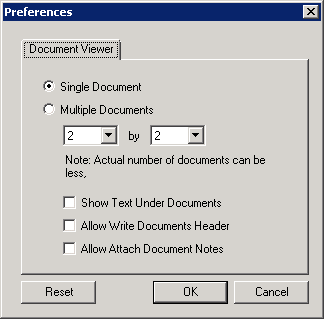
Opens the Preferences dialog box. The preferences you may choose are: 1. Single Document view. 2. Multiple Documents view allows you to customize the number of Documents that can be seen in Multiple View. The maximum values are 9 by 9. The actual number of document may be less, depending on the size of the Document Viewer window. 3. If you wish the Index Fields to display beneath the images, check the Show Text Under Documents check box. 4. If you want Index Fields to be written to the image files, check the Allow Write Documents Header check box. Known Behavior: If Allow Write Documents Header is selected, JPEG images will be converted to Black and White TIFF images before the image header is written to the image. This may result in degradation of the image quality. 5. For Document Notes to be attached to email messages along with the image files, check the Allow Attach Document Notes check box. 6. The Reset button. resets all of the preferences that were last configured by your System Administrator.
|
| Menu | Option | Shortcut Key | Description |
|---|---|---|---|
|
Document |
Save Documents and Data |
Ctrl + S |
Saves changes you made to your document's orientation and data. |
|
Zoom out |
|
Re-sizes the document image to fit to page. |
|
|
Save As ... |
Ctrl + A |
Saves the selected image(s) as files on your local hard drive. |
|
|
Copy to Clipboard |
Ctrl + C |
Copies the selected image(s) to your Windows® clipboard. |
|
|
Send to Mail Recipient |
Ctrl + M |
Opens an email with the selected document image files as attachments. |
|
|
|
Ctrl + P |
Prints selected images. |
|
|
Export Document Data |
Excel 2007 Document |
|
Exports all rows in the Document List to an Excel 2007 Document. |
|
Excel 2003 Document |
|
Exports all rows in the Document List to an Excel 2003 Document. |
|
|
Document |
|
Exports all rows in the Document List to a Portable Document Format (PDF) Document. |
|
|
HTML Document |
|
Exports all rows in the Document List to a HTML Document. |
|
|
MHT Document |
|
Exports all rows in the Document List to a MIME HTML (MHT) Document. |
|
|
RTF Document |
|
Exports all rows in the Document List to a Rich Text (RTF) Format Document. |
|
|
Help |
About |
|
Opens a dialog box with the version of the product and the copyright notice. |
Viewer Form Toolbars
The Single Page view of the Viewer Form has a comprehensive toolbar.

Note: Clicking the Save button after performing Rotate Left, Rotate Right and/or Rotate 180° actions may change the position of the document in the Document List and will take you to the top of the list.
The buttons on the toolbar are explained below:
| Button | Name | Description |
|---|---|---|

|
Show Multiple Images |
Changes the Viewer Form to Multiple Page. |

|
Fit to Width |
Re-sizes the image, so that it fits just inside the image display area horizontally. |

|
Fit to Height |
Re-sizes the image, so that it fits just inside the image display area vertically. |

|
Fit to Page |
Re-sizes the image, so that it fits entirely within the image display area. |

|
Rotate 180° |
Rotates the image 180°. |

|
Rotate Left |
Rotates the image 90° Counter Clock Wise. |

|
Rotate Right |
Rotates the image 90° Clock Wise. |

|
Zoom to Upper Left |
Enlarges the upper-left portion of the current document image in the viewing area. |

|
Zoom to Upper Right |
Enlarges the upper-right portion of the current document image in the viewing area. |

|
Zoom to Lower Left |
Enlarges the lower-left portion of the current document image in the viewing area. |

|
Zoom to Lower Right |
Enlarges the lower-right portion of the current document image in the viewing area. |

|
Zoom In |
Enlarges the view of the current document image by 10%, within the display area. |

|
Zoom Out |
Reduces the view of the current document image by 10%, within the display area. |

|
View Document Notes |
Opens dialog box, where you can view and edit document notes. |

|
Print Document |
Prints the open document. If the document is a multi-page TIFF, the Print Document icon prints all pages in the multi-page TIFF. |

|
Open With |
Opens the Document with the external application registered in Windows for the file type. |
The Multiple Page view of the Viewer Form has a separate toolbar.

The buttons on this toolbar are explained below:
| Button | Name | Description |
|---|---|---|
|
|
Show Single Images |
Changes the Viewer Form to Single Page mode. |
|
|
View 2 x 2 |
Shows 4 images at a time in the viewer. |
|
|
View 3 x 3 |
Shows 9 images at a time in the viewer. |
|
|
View Document Notes |
Opens dialog box, where you can view and edit document notes. |
|
|
Print Document |
Prints the selected documents. If any of the selected documents are multi-page TIFFs the Print Document icon prints all pages in each multi-page TIFF. |

Creating and Viewing Notes
Workflow provides you with a means to read notes added to your imaging system and to add new notes.
To create and view notes perform the following:
1. In either Single Page or Multiple Page mode, select a document that has notes attached to it.
2. Click on the View Document Notes icon in the toolbar.
The Notes Editor opens, with the existing notes for the selected Document.

3. Click on the Add New Note... button.
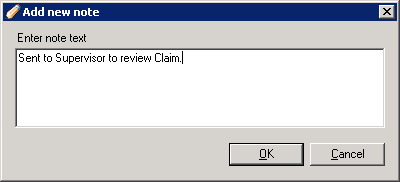
The Add new note window opens.

4. Type in a new note and click OK.
The note is added to the top of the list.
5. To sort the list of notes, click on the header of the field that you want to sort the list by.
6. Click Save on the Document List to save the notes to your image repository.
Multiple Document Selection Actions
The Viewer Form allows you to select a group of documents and perform various actions.
You can copy the selected Documents to the Windows® Clipboard, save the selected Documents to your local computer, send the selected Documents as email attachments, print the selected Documents and using your fax print driver fax the selected documents.
To perform any of these actions do the following:
1. Open a work item and open the Viewer Form in Multiple Page mode.
2. Hold down the Ctrl key on your keyboard and click the documents in the order you want them saved, emailed, printed, etc.
The order you selected the documents appears in the top-left corner of the image’s thumbnail.
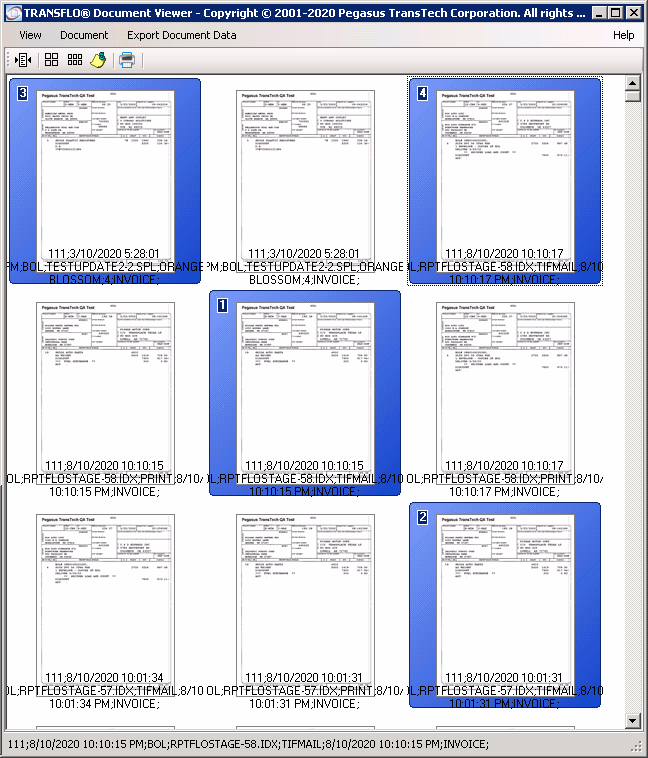
3. Right click on one of the items and select the action that you wish to perform.
4. Select an action from the context menu.
-
The Copy To Clipboard option will copy the current image to the Windows Clipboard.
-
The Save As... option allows you to select a folder and save the documents as TIFF files.
-
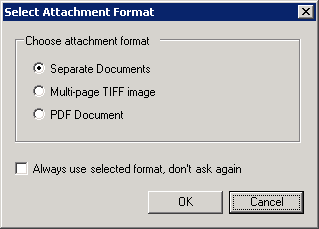
The Send to Mail Recipient... option opens the Select Attachment Format dialog box.

Note: The Outlook Express email client is not supported by Workflow, for sending Documents via email.
-
Selecting the Separate Document button, will attach each document as a separate TIFF images to the email.
-
Selecting the Multi-page TIFF image button, will combine the image into a Multi-page TIFF and attach this file to the email.
-
If you select the PDF Document button, the selected images will be combined into a Multi-page PDF file and attach it to the email.
-
The Print... option opens your printer’s dialog box and allows you to print the selected documents.
If you have a Fax print driver installed on your computer, you can also fax the selected documents.
Shortcut Key Combinations
The Document List and Viewer Form have several shortcut key combinations (Hot Keys) that can improve your efficiency.
These are described in the following table:
| Shortcut | Description |
|---|---|
|
[Ctrl] + [T] |
Filters Document List by the items selected with check boxes. |
|
[Ctrl] + [N] |
Show Notes pop-up window. |
|
[Ctrl] + [G] |
Pops up a dialog where you can enter the row number of the item you wish to highlight and preview. |
|
[F2] |
If the Field is configured to be editable, the selected Document List cell becomes editable. |
|
[Shift] + [F2] |
If the Field is configured to be editable, the selected Document List cell becomes editable, and the entire row is updated with the edited value when the [Enter] key is typed. |
|
[Ctrl] + [L] |
Switches focus from the Viewer Form to the Document List. |
|
[Ctrl] + [V] |
Switches focus from the Document List to the Viewer Form. |
|
[Ctrl] + [spacebar] |
Changes checked Document List rows to unchecked and unchecked rows to checked. |
|
[Ctrl] + [I] |
Toggles between show single and show multiple in the Viewer Form. |
|
[Ctrl] + [P] |
Opens the Print dialog box and prints the selected items. |
|
[Ctrl] + [M] |
Opens the email dialog box. |
|
[Ctrl] + [C] |
Copies the selected image as a bitmap to the Windows® Clipboard. |
|
[Ctrl] + [F2] |
Rotate image 90° clockwise. |
|
[Shift] + [Ctrl] + [F2] |
Rotate image 90° counter clockwise. |
|
[Ctrl] + [F4] |
Set the view to Fill the Window. This will zoom the image so that it will completely fill the window. |
|
[Shift] + [Ctrl] + [F4] |
Set the view to Fit to Window. This will zoom the image so that both dimensions of the image will completely fit into the Viewer Form. |
|
[Ctrl] + [F5] |
Zoom the image to show the upper-left quadrant. |
|
[Ctrl] + [F6] |
Zoom the image to show the upper-right quadrant. |
|
[Ctrl] + [F7] |
Zoom the image to show the lower-left quadrant. |
|
[Ctrl] + [F8] |
Zoom the image to show the lower-right quadrant. |
Notes:
-
The shortcut keys described here only work when the Document List or the Viewer Form has focus. Click inside an area or field to give it focus.
-
If you are using Internet Explorer 8, the very first time you type [Ctrl] + [F7] you will get the following message box asking you if you want to turn on Caret Browsing:

Select the Don’t show me this message again check box and click No. To perform the lower-left quadrant zoom, press Ctrl+F7.