Create, Activate, or Move a Storage Profile
Storage profiles provide a flexible way to manage the physical storage of your document images. A storage profile provides a description and pointer to the physical space where documents are stored, usually a hard drive installed locally or on a network. It can also be a folder on a hard drive.
Multiple Storage Profiles: A single Synergize repository can support multiple storage profiles. All profiles can be active for retrieval, but only one profile can be active for writing at any one time.
Multiple Synergize Servers or Other Servers: If you have multiple Synergize servers or you have set your storage location to a different machine, the location must be a network share. Furthermore, the security settings on the storage profile directory must be set to read/write for the various computers that may be trying to access the location. This includes all Synergize servers plus, for example, an image micro-service running on Synergize Enterprise Server (SES).
Tip: Never use mapped drives for Synergize storage profiles. A mapped drive is user-specific. Instead, use a Universal Naming Convention (UNC) descriptor for your network drives.
Example: \\distantcomputer\shareddrive\
In most cases you don't want to continually add drives to your existing configuration. Synergize supports multiple profiles and profiles can point to network folders. You can plan your large volume structure in advance.
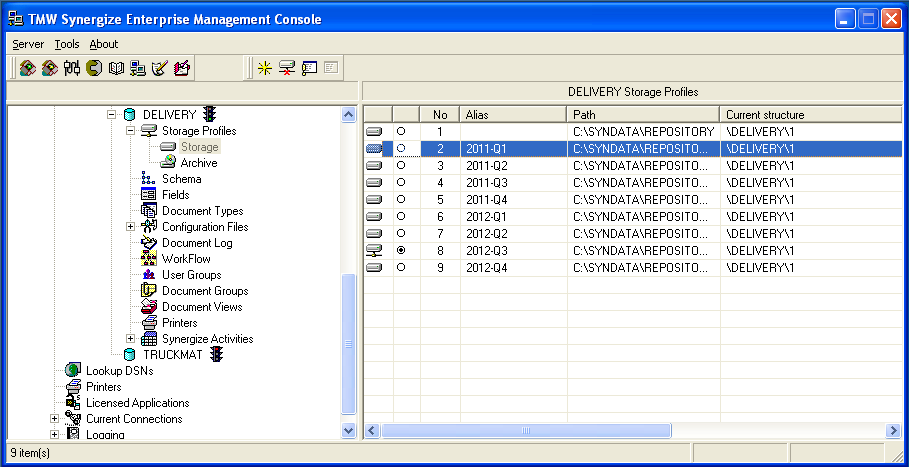
One example is to have Years as folders, with Quarters as sub-folders. Each Quarter can have its own storage profile. As part of quarter-end activities, you can activate the storage profile for the next quarter.
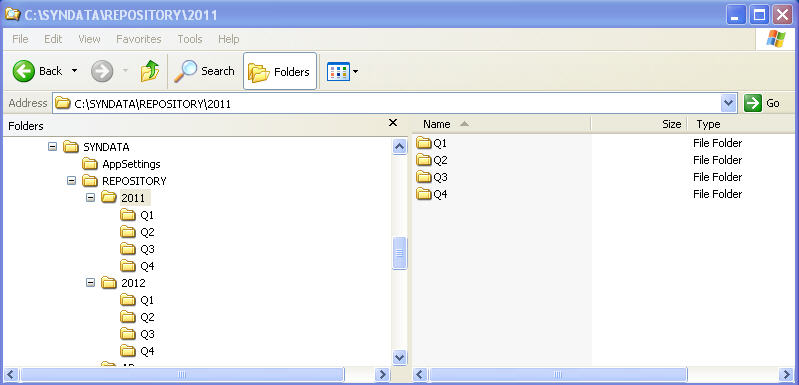
Create the entire structure in advance and activate each quarterly storage profile as needed.
-
In the Synergize Enterprise Management Console (EMC), navigate down through tenants and repositories to a specific repository.
-
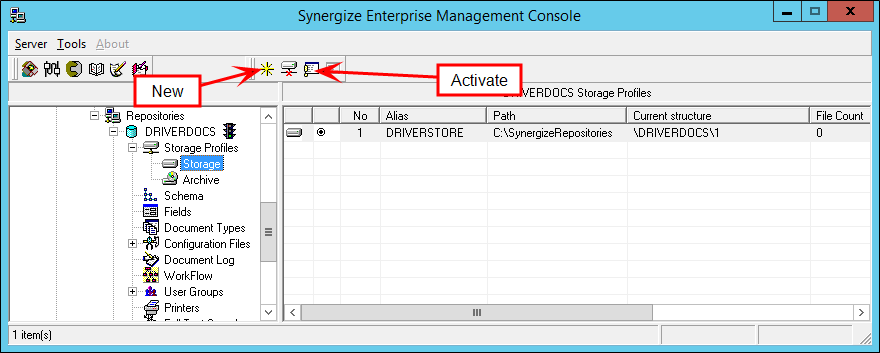
Select Storage Profiles and Storage.
Result: The New and Activate buttons appear on the screen with the list of storage profiles.

-
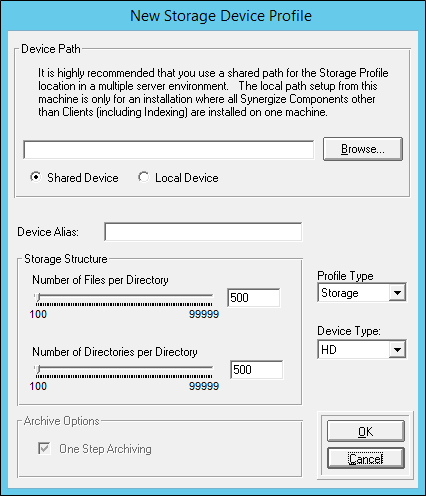
To define a new storage profile, click New.
-
Complete the fields in the New Storage Device Profile window. The key information to provide is the location of the physical storage. The dialog describes the only time a local path would make sense: in a deployment where all Synergize components except the client are on the same machine.
-
Click OK.

-
To activate the storage profile, select the profile and click the Activate button.

Tip: Because Synergize connects to the active storage profile device path each time a document is saved, no down time occurs when you want to change an active profile. From that point on, any documents are stored in the newly activated profile device path.
Active, current documents need to be available online. After a set of documents is no longer considered current according to your business rules, you may want to move it to near-line storage.
To move a storage profile device path, follow these steps:
-
Choose any of the following locations for the device path:
-
a file server
-
a network attached storage (NAS) device
-
storage area network (SAN)
-
another valid storage option
-
-
Copy the entire contents of the device path to the new location.
-
Verify the file and folder counts.
-
Ensure that the account running the Synergize services has the same rights and access to the new location as it did to the previous location.
-
Modify the profile to point to the new location.
-
Test and verify that you have access to the documents in Synergize.
-
Remove the documents from the old storage location.
Often when you provide access to the user on the machine, the user is not an actual person but an application pool or service account. Setting security for directories with application pools is one example (setting the storage profile device path and not the deployment directories) and using individual application pools for each service or app you need to grant access
1. In Windows Explorer, select the storage profile device path.
2. Right-click to access Properties > Security > Edit > Add > Locations > Select your machine > OK
3. Enter: IIS AppPool\AppPoolName > Check Names > OK
4. Grant all permissions. Allow > Apply > OK
Settings for Access from a Different Machine
There could be a specific situation where a disk location is local to one Synergize installation but shared with another on a different machine. In such a case, we recommend that you set up the storage location in the following way:
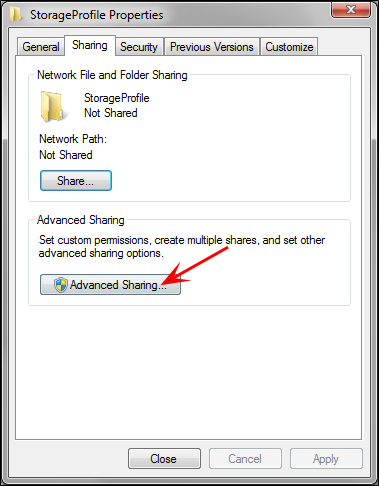
1. On the folder you intend to use as the repository's storage location, right-click and select Properties.
2. On the Sharing tab, select Advanced Sharing.
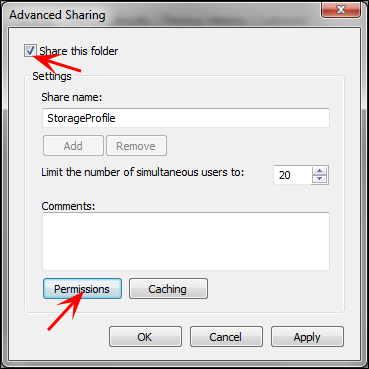
3. Check Share this folder and click Permissions.
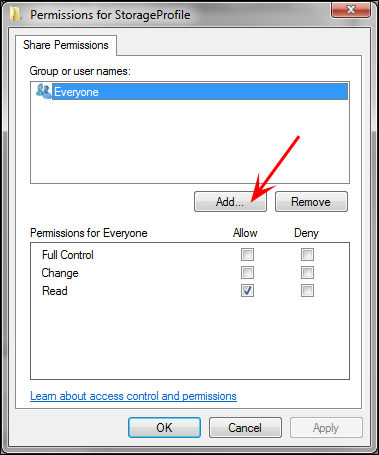
4. Now you need to add the computer that hosts Synergize to be able to read and write to this storage location.
Click Add.
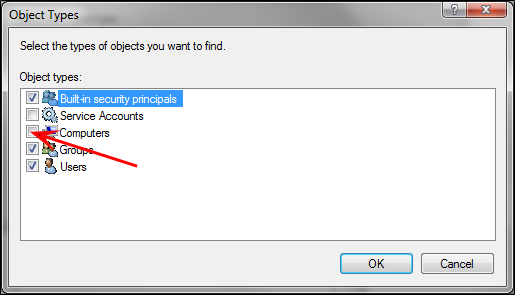
5. Normally, the only objects that are available are users, groups, or built-in security protocols.
To change this, click Object Type.

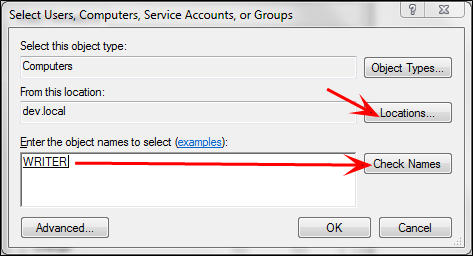
6. To reduce the search to find only computers, check Computers and un-check all other object types.
7. Update the From this location field, to specify the domain of the Synergize computer.
Then enter the actual computer name as an object name.
Click Check Names to have the system check the specified domain to ensure the computer name is valid for that domain.
Click OK when you have entered a valid name.
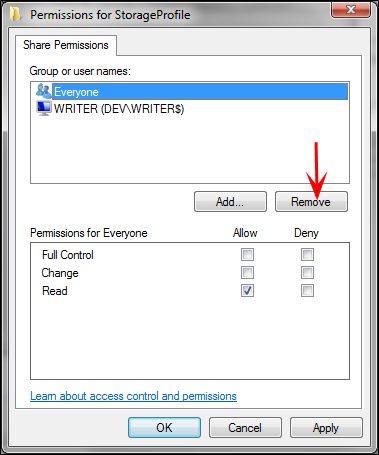
8. We recommend you remove Everyone, once you have specific groups or Users entered.
Also note that the computer you specified above should have Change and Read access allowed.
9. Ensure that the object also has security access. Note that advanced sharing settings are affected by security settings and vice versa. If you remove access for a computer or user on the Security tab, they will lose access on the sharing tab.
Conversely, if you do NOT share a folder with a computer or a remote user, they will not be able to access the folder on the network (even if they have local security access), by logging in to the computer and using its local resources from their remote location.