Upload an eBOL for a Shipment
As a shipper, you upload one or more documents for a shipment that describe all the detailed information about the load including the pick-up and drop-off location. With the Transflo Shipper Portal (Command Center), you can upload eBOL and other document types associated with a single-stop or multi-stop shipment. Drivers can reuse the eBOL as their ePOD after delivering the load.
As a shipper, you can upload an electronic bill of lading (eBOL) and other pages for a single-stop or multi-stop shipment to the Transflo cloud platform. Drivers can now easily search and find accurate information about the shipment.
-
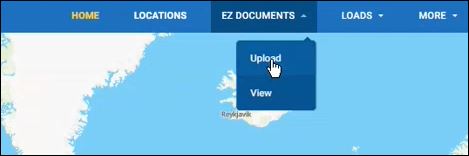
In the main menu, click EZ DOCUMENTS and then choose Upload.

-
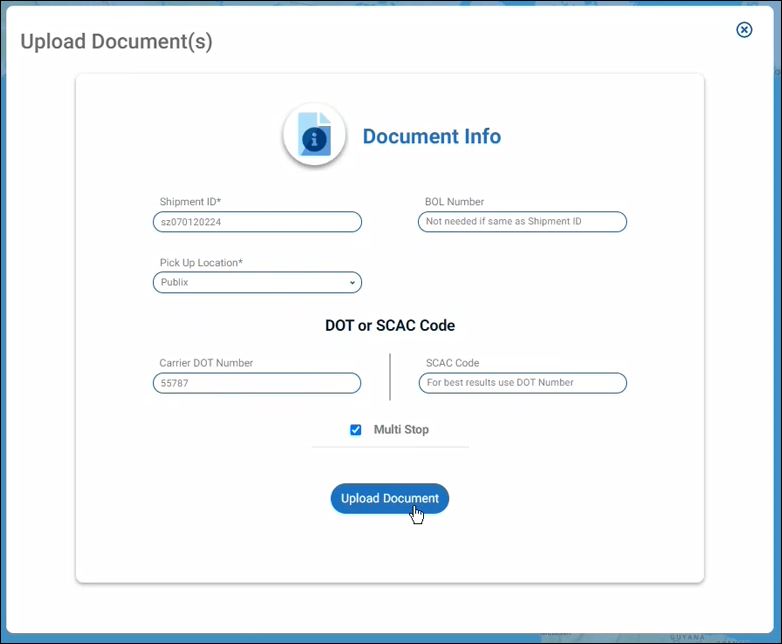
In the Upload Documents window, enter the following information:
-
Shipment ID: This unique identifier with alpha-numeric letters or numbers is used to track your shipment.
-
BOL Number: Enter an optional bill of lading number or skip this field if using the same number as the shipment ID.
-
Pickup Location: Select an entry in the drop-down list of your pre-defined shipper locations. If you have only one shipper location defined, the system auto-selects that location by default.
-
Carrier DOT Number: As an experienced shipper, you want to leverage the Transflo platform to connect with brokers, carriers, and drivers. Enter the designated carrier DOT number you want to associate with this single-stop shipment.

Tip: The Transflo Unite platform provides shippers with a seamless, touchless, and secure workflow between brokers, carriers, and their drivers. With 60,000+ carriers and 2.2 million professional drivers, our patented document processing network offers you access to one of the largest digital ecosystems in the global supply chain.

-
-
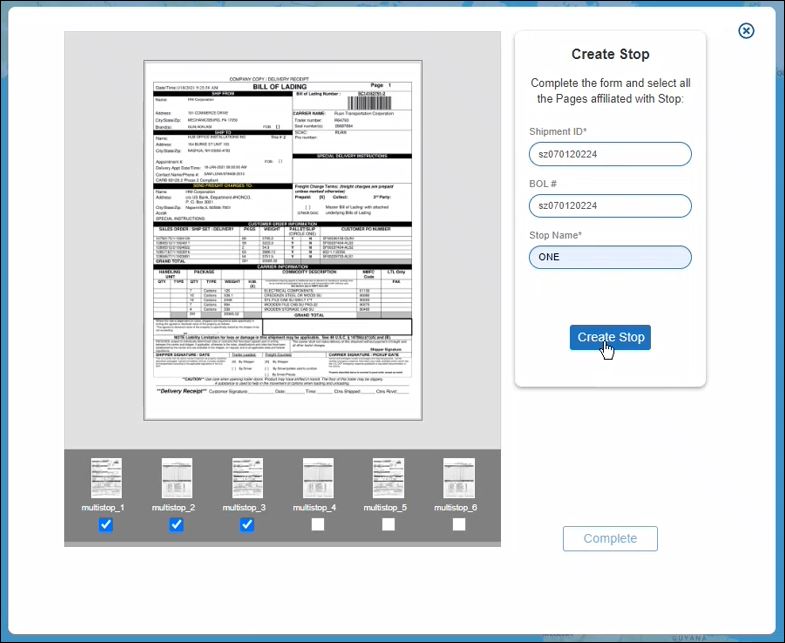
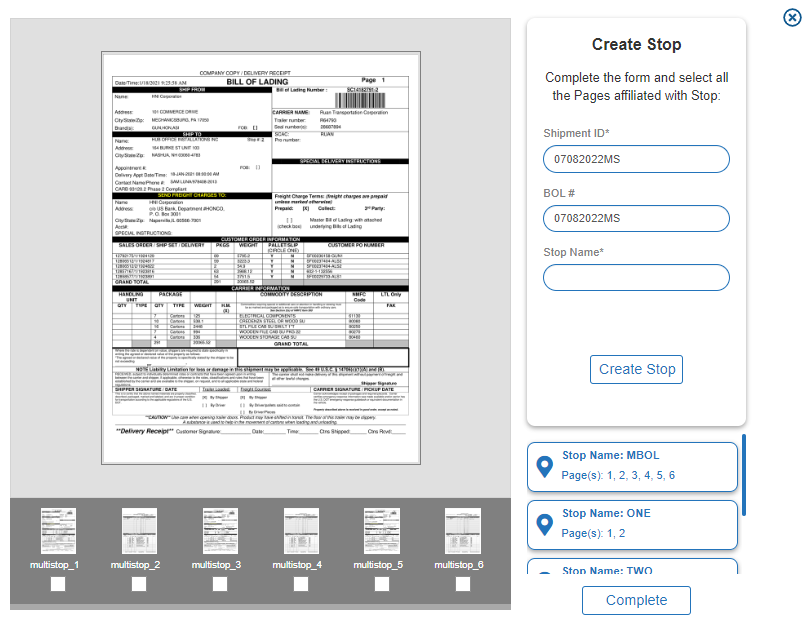
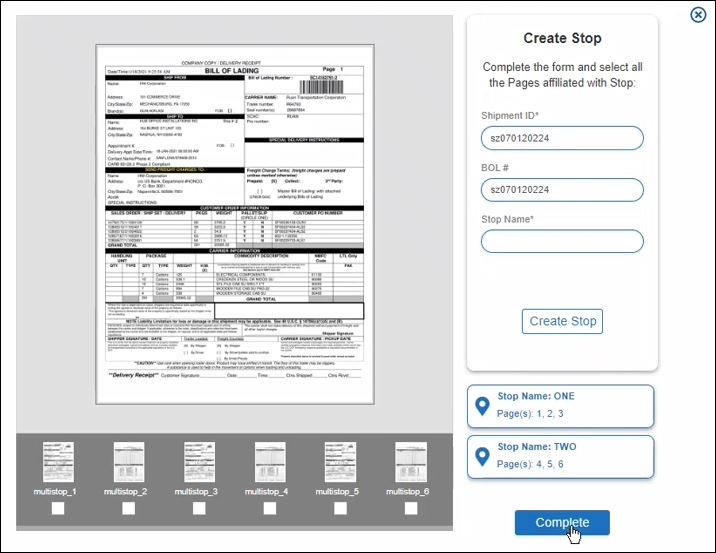
Leave the Multi-Stop check box clear for a single-stop shipment or select the Multi-Stop checkbox to indicate that your eBOL document applies to multiple stops. For example, you might upload an eBOL with six (6) pages. Pages 1, 2, and 3 apply to stop one and pages 4, 5, and 6 apply to stop two.

-
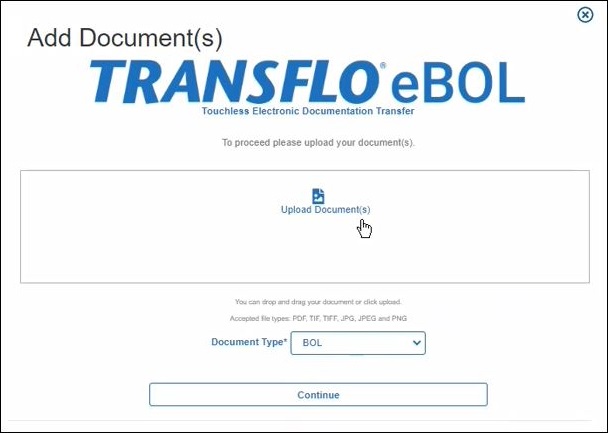
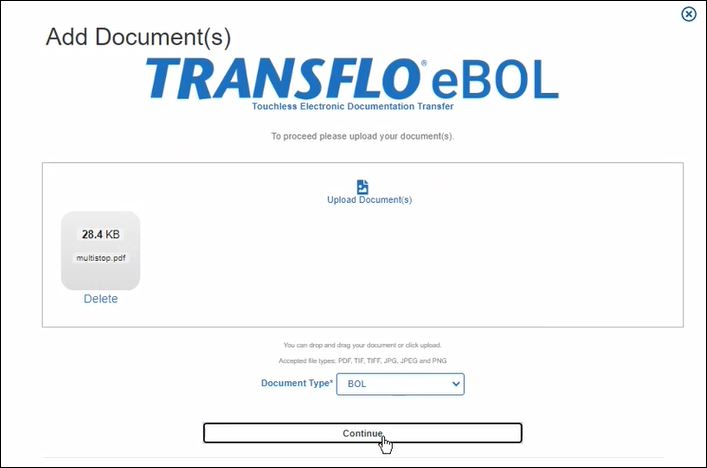
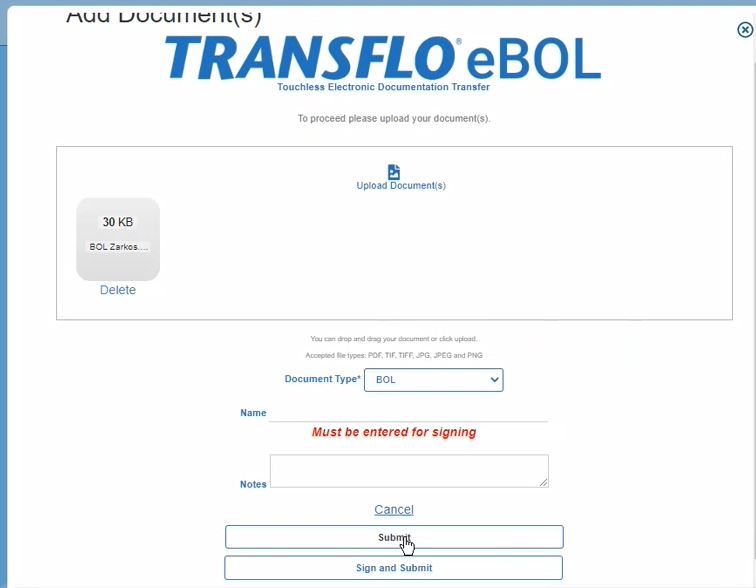
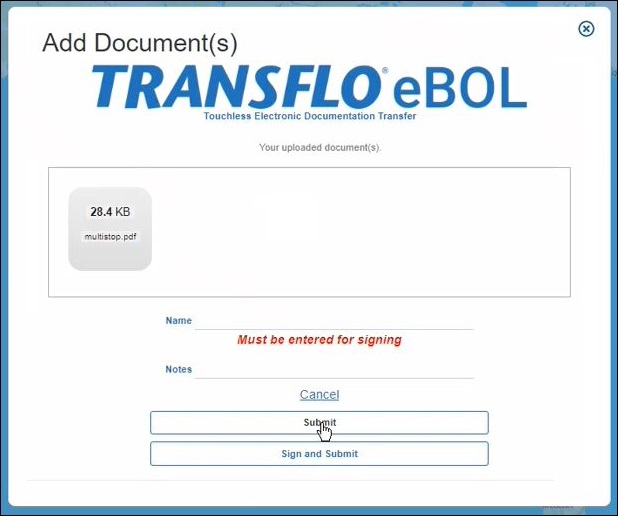
In the Add Documents window, click Upload Document, browse your file system for the document you want to include, and click Open.

- Your document now appears in the window.
- If you need to remove it, click Delete. Go back to the previous step to replace it or click Close to cancel.
- To keep it, set the Document Type (for example, select BOL), and click Continue.

- For a single-stop, follow these sub-steps:
- To defer signatures until later, tap Submit.

- (Optional) To sign the document now, tap it and then complete the Name field, enter any Notes, and then tap Sign and Submit. In a common series of steps not shown again here, select one or more pages, add your signature, tap Done, and then click Submit.
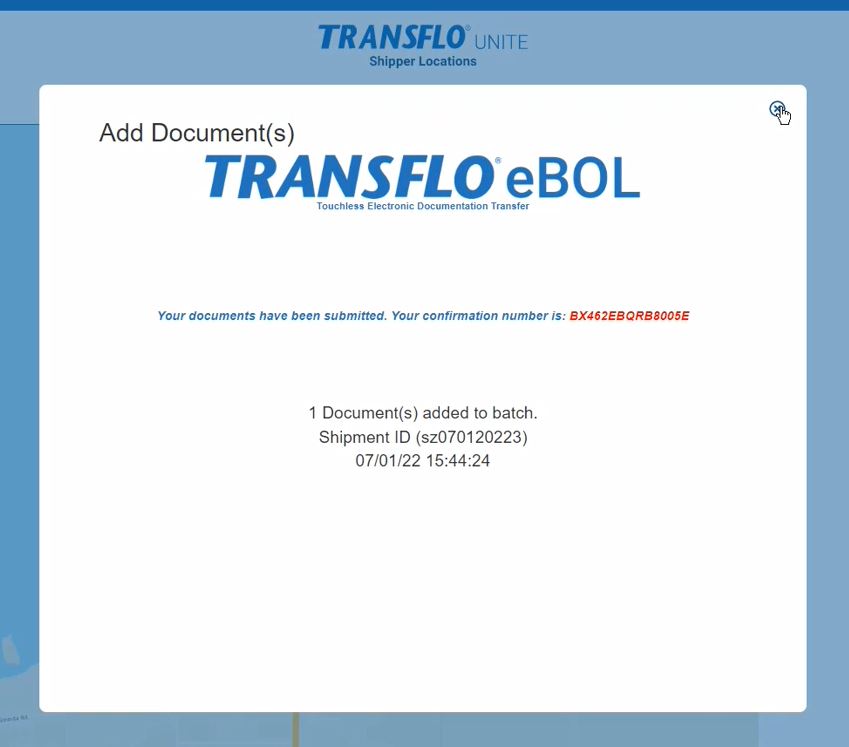
- Either way, after the previous step, your single-stop document confirmation number appears. Click Close.

- To defer signatures until later, tap Submit.
-
For multi-stop documents, follow these sub-steps:
-
Select one or more pages (check boxes at the bottom), enter a name for the associated stop in the Stop Name field, and then click Create Stop.

-
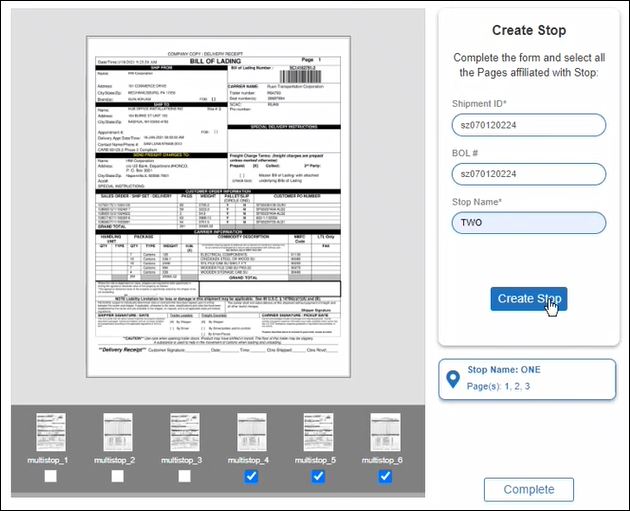
Select one or more pages for the next stop, give it a name and click Create Stop.

-
(Optional) To create a master bill of lading (MBOL), you can select all pages (all check boxes).

A master BOL (MBOL) is typically counted as the final stop. For example, after delivery and ePOD signatures are completed for stops 1, 2, and 3, a driver can submit a final MBOL for all three (3). The fourth and final stop can be a real location or a virtual stop.

-
When you have completed the associations between pages and stops, click Complete.

-
In the Add Documents window, click Submit. As a shipper or driver, you can also enter your name, click the document, and sign one or more pages.

-
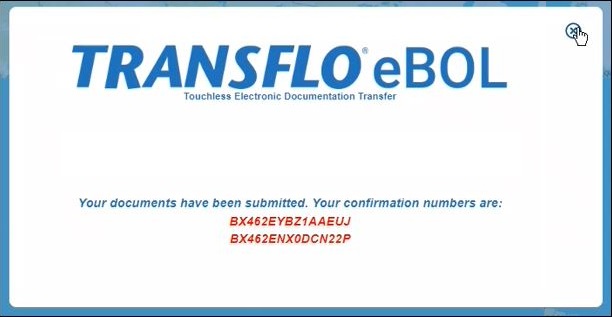
Whether you sign and submit or just submit the documents, a confirmation number appears for each stop you defined (effectively splitting your original document into multiple documents, one for each stop). Click Close.

-
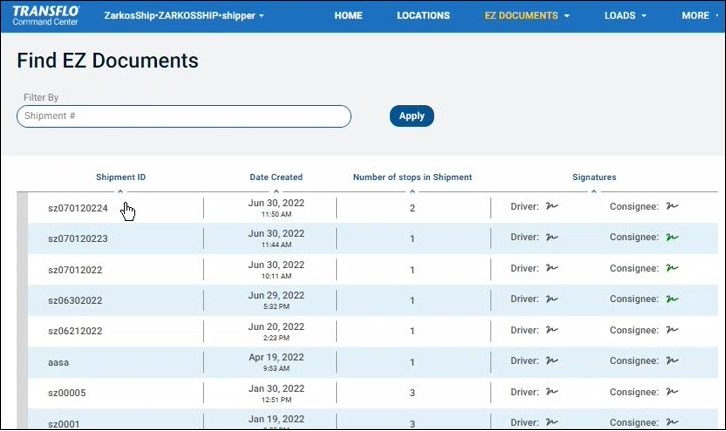
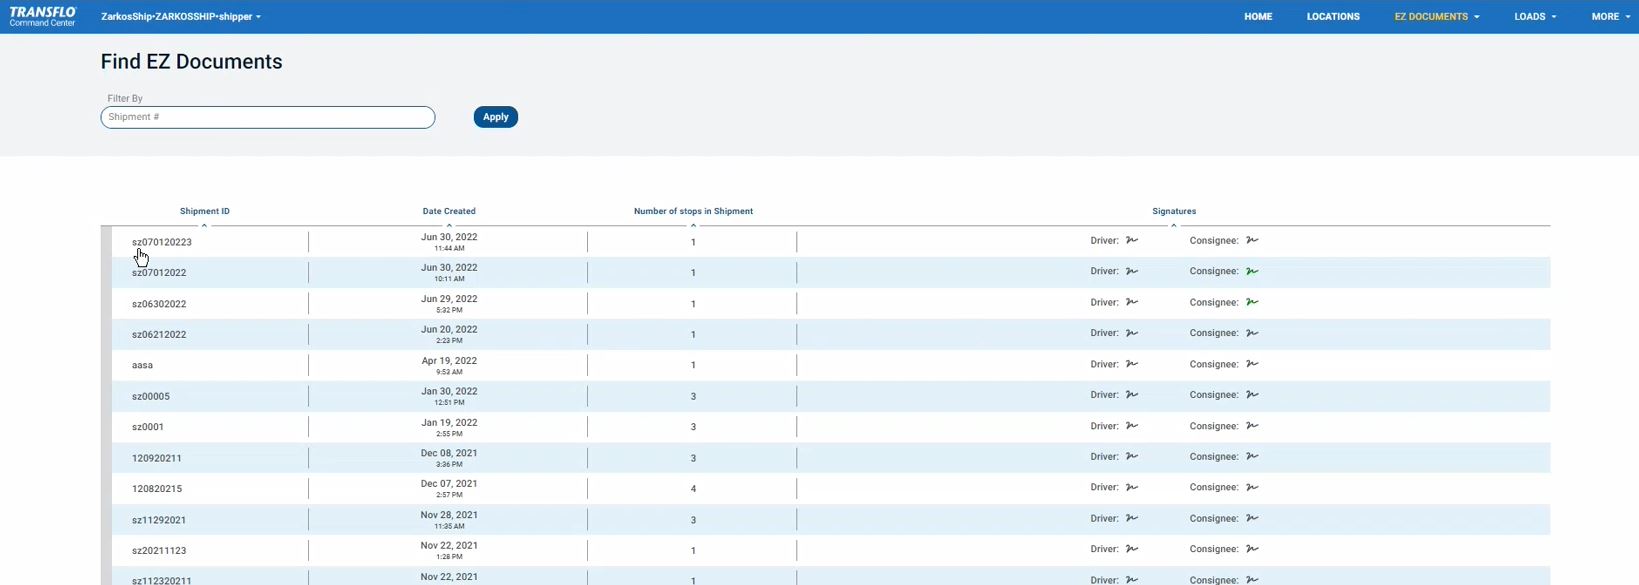
(Optional) Find your shipment and confirm that it shows the number of stops you just defined. Click the shipment ID or double-click the row to open the documents for the shipment.

-
-
At this point, a driver can now deliver the shipment.
-
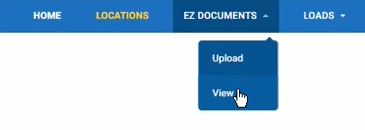
To view the document that you just uploaded and the associated shipment that was created, in the top menu bar, click EZ DOCUMENTS and then choose View.

-
Find the shipment and click on its Shipment ID.

-
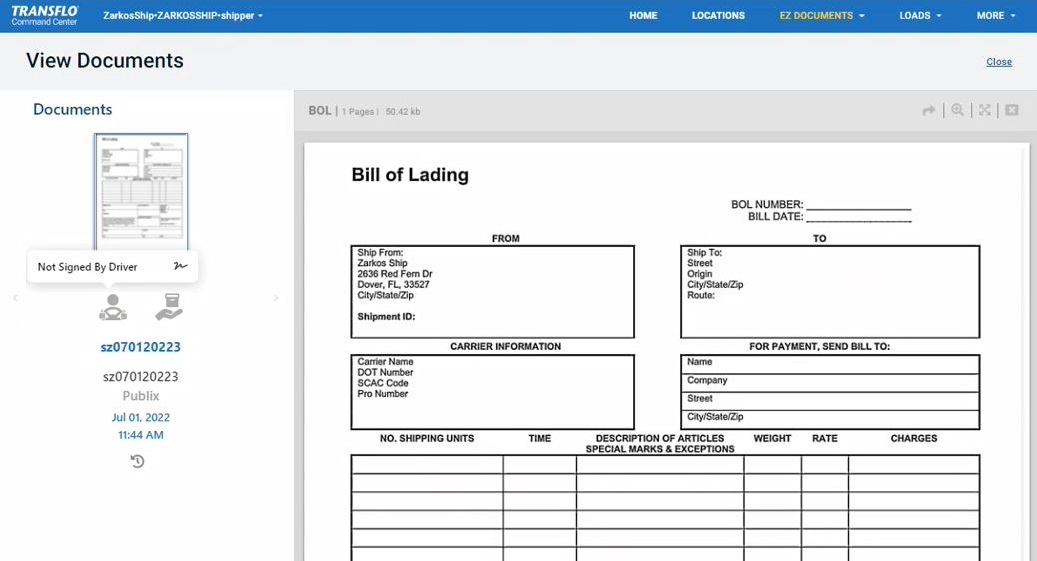
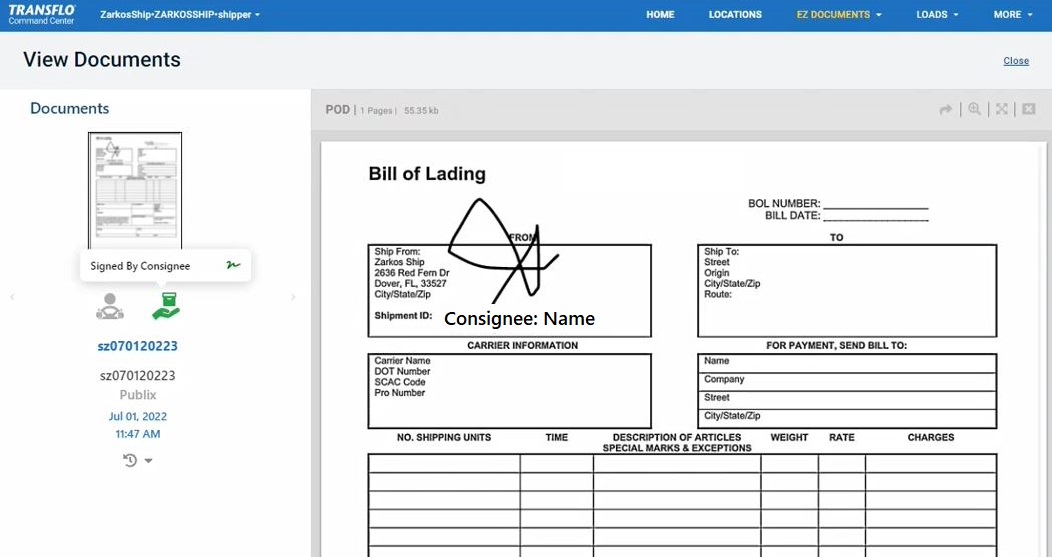
The View Documents page shows the documents and signature status for each stop.

-
On the View Documents page, when the document is signed by the driver and consignee over the next few hours or days, you see updated signature status with visual indicators.

Example: Position your laptop trackpad, touchscreen stylus, or mouse over the driver or consignee signature status icons. You can now see that the consignee has signed.