Velocity+ Admin Tasks
This article covers basic administrative tasks for carriers, brokers, and all users. This article provides steps that describe how to login, logout, determine your software release version, update your personal user profile, update your company profile, reset your lost or forgotten password, manage users, and set fleet permissions for brokers in the customer access management module.
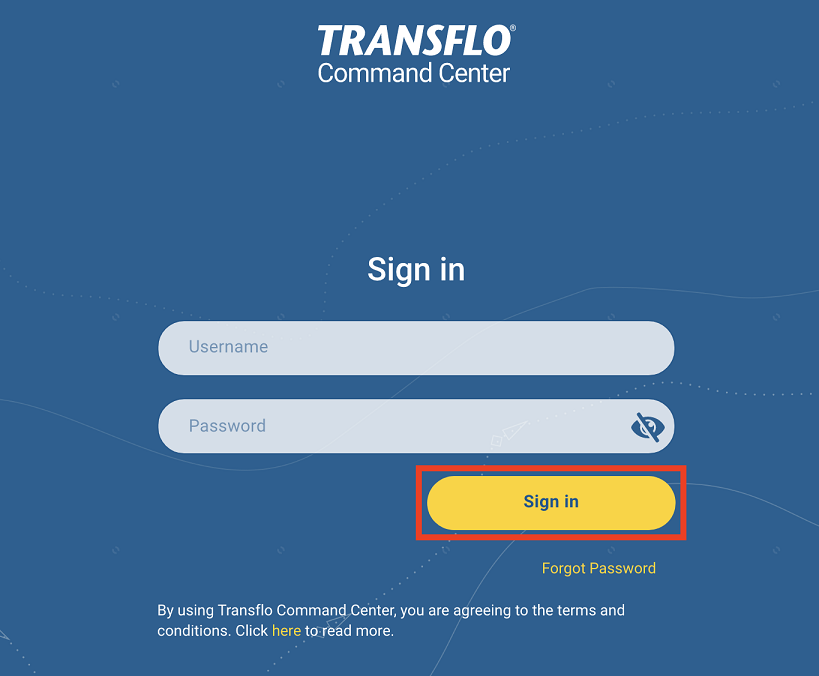
To log in or sign in to Velocity Plus Command Center:
-
In a web browser on a supported device, open the following link:
-
On the TRANSFLO Command Center Sign In page, enter your username and password and then click Sign In.

![]() View a demonstration of these steps in one or more Transflo videos:
View a demonstration of these steps in one or more Transflo videos:
Carriers
Brokers
Shippers
-
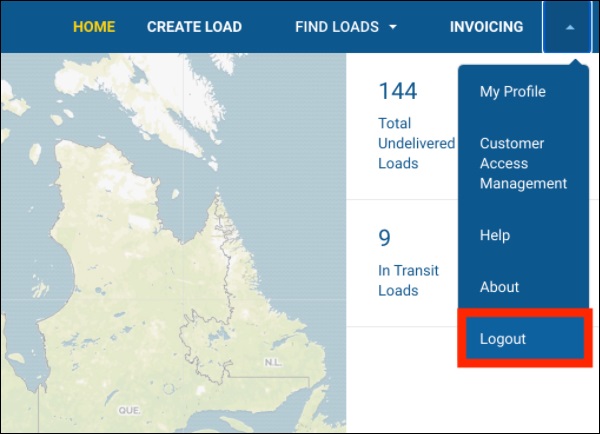
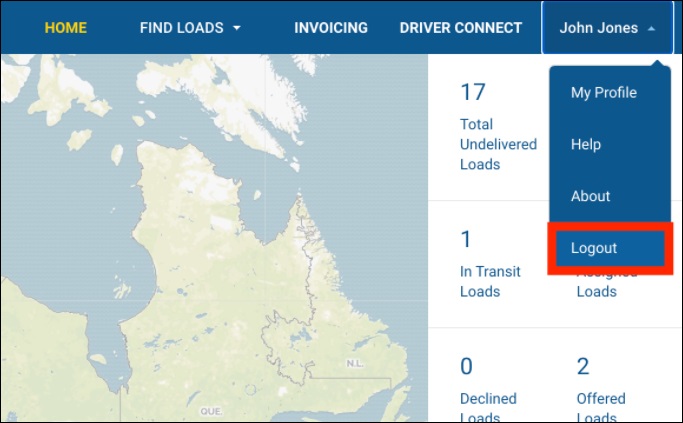
Click the top right menu item. Depending on your software configuration, you might be able to click a user name, a photo or avatar image, or just a small triangle.

-
In the resulting drop-down menu, click Logout to exit TRANSFLO® Command Center.

To reset your Velocity+ password, see Reset My Password.
-
As a driver, you can also tap Forgot Password on your Transflo Mobile+ app.
-
You can also reset your Transflo HOS, ELD, and Telematics password. See Reset My HOS Password.
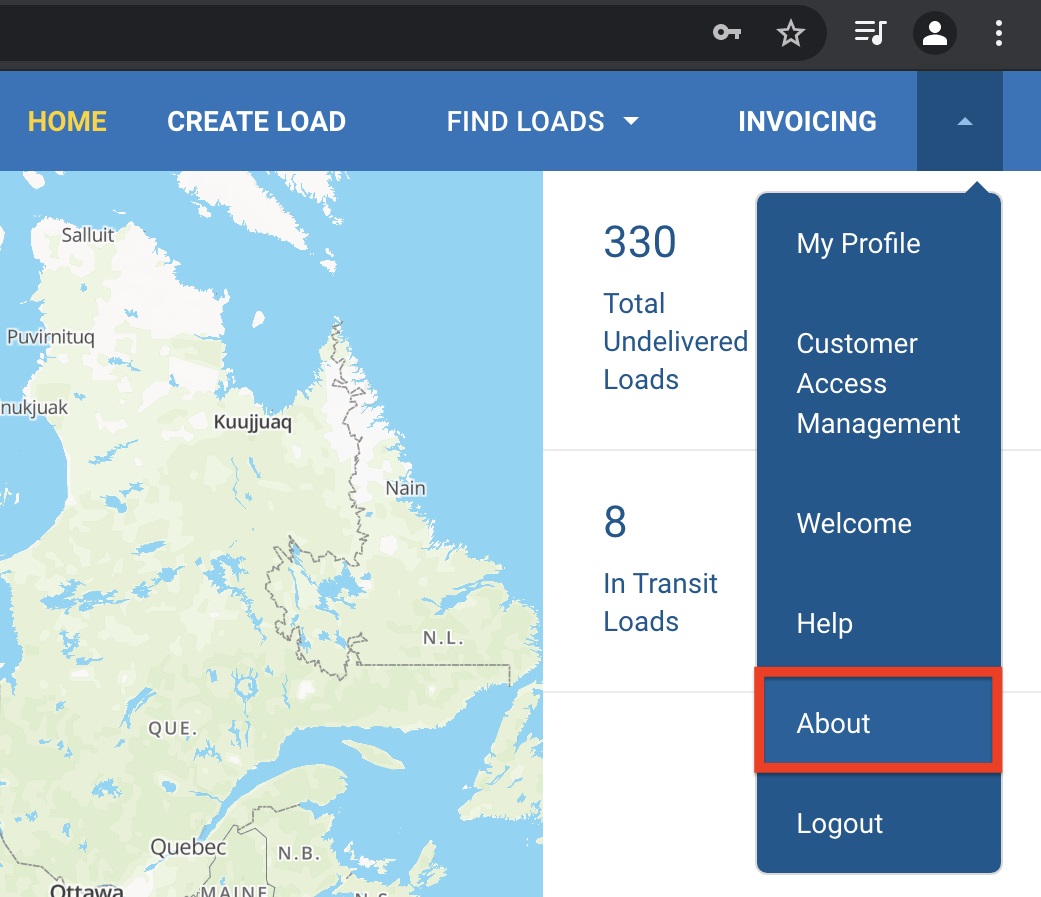
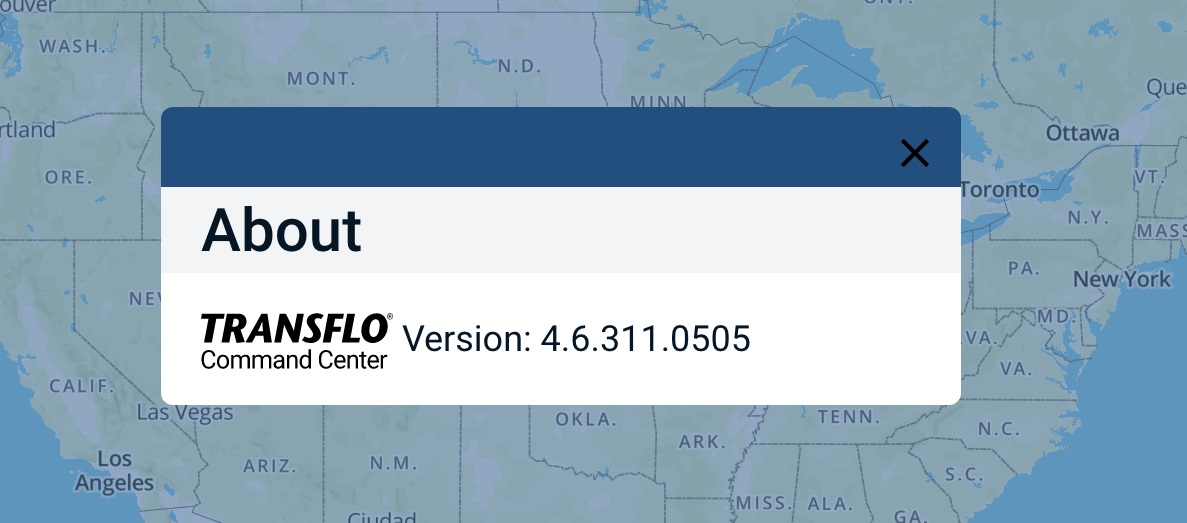
To determine what version of Command Center you are currently running (this information is essential if working with Support to fix any software issues), follow these steps:
-
Click the top right menu item. Depending on your software configuration, you might be able to click a user name, a photo or avatar image, or just a small triangle.
-
In the resulting drop-down menu, click About.

-
You can find the version number of TRANSFLO® Command Center in the pop-up message box.

-
To close the About box, click X Close.
-
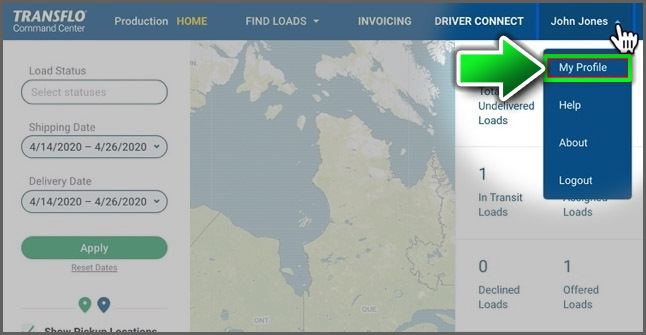
Click the top right menu item. Depending on your software configuration, you might be able to click a user name, a photo or avatar image, or just a small triangle.
-
In the resulting drop-down menu, choose My Profile.
-
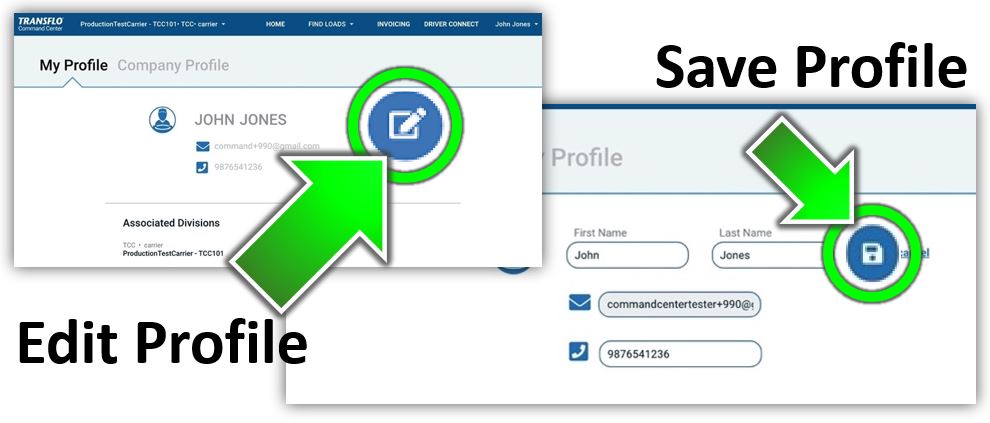
On the My Profile page, click
 Edit to edit your First Name, Last Name or Phone Number. The Email Address is the primary key identifier in the system and cannot be changed.
-
After you update your information, click
 Save.
Save.
![]() View a demonstration of these steps in one or more Transflo videos:
View a demonstration of these steps in one or more Transflo videos:
-
Click the top right menu item. Depending on your software configuration, you might be able to click your user name, your photo or avatar image, or just a small triangle.
-
In the resulting drop-down menu, click My Profile.

-
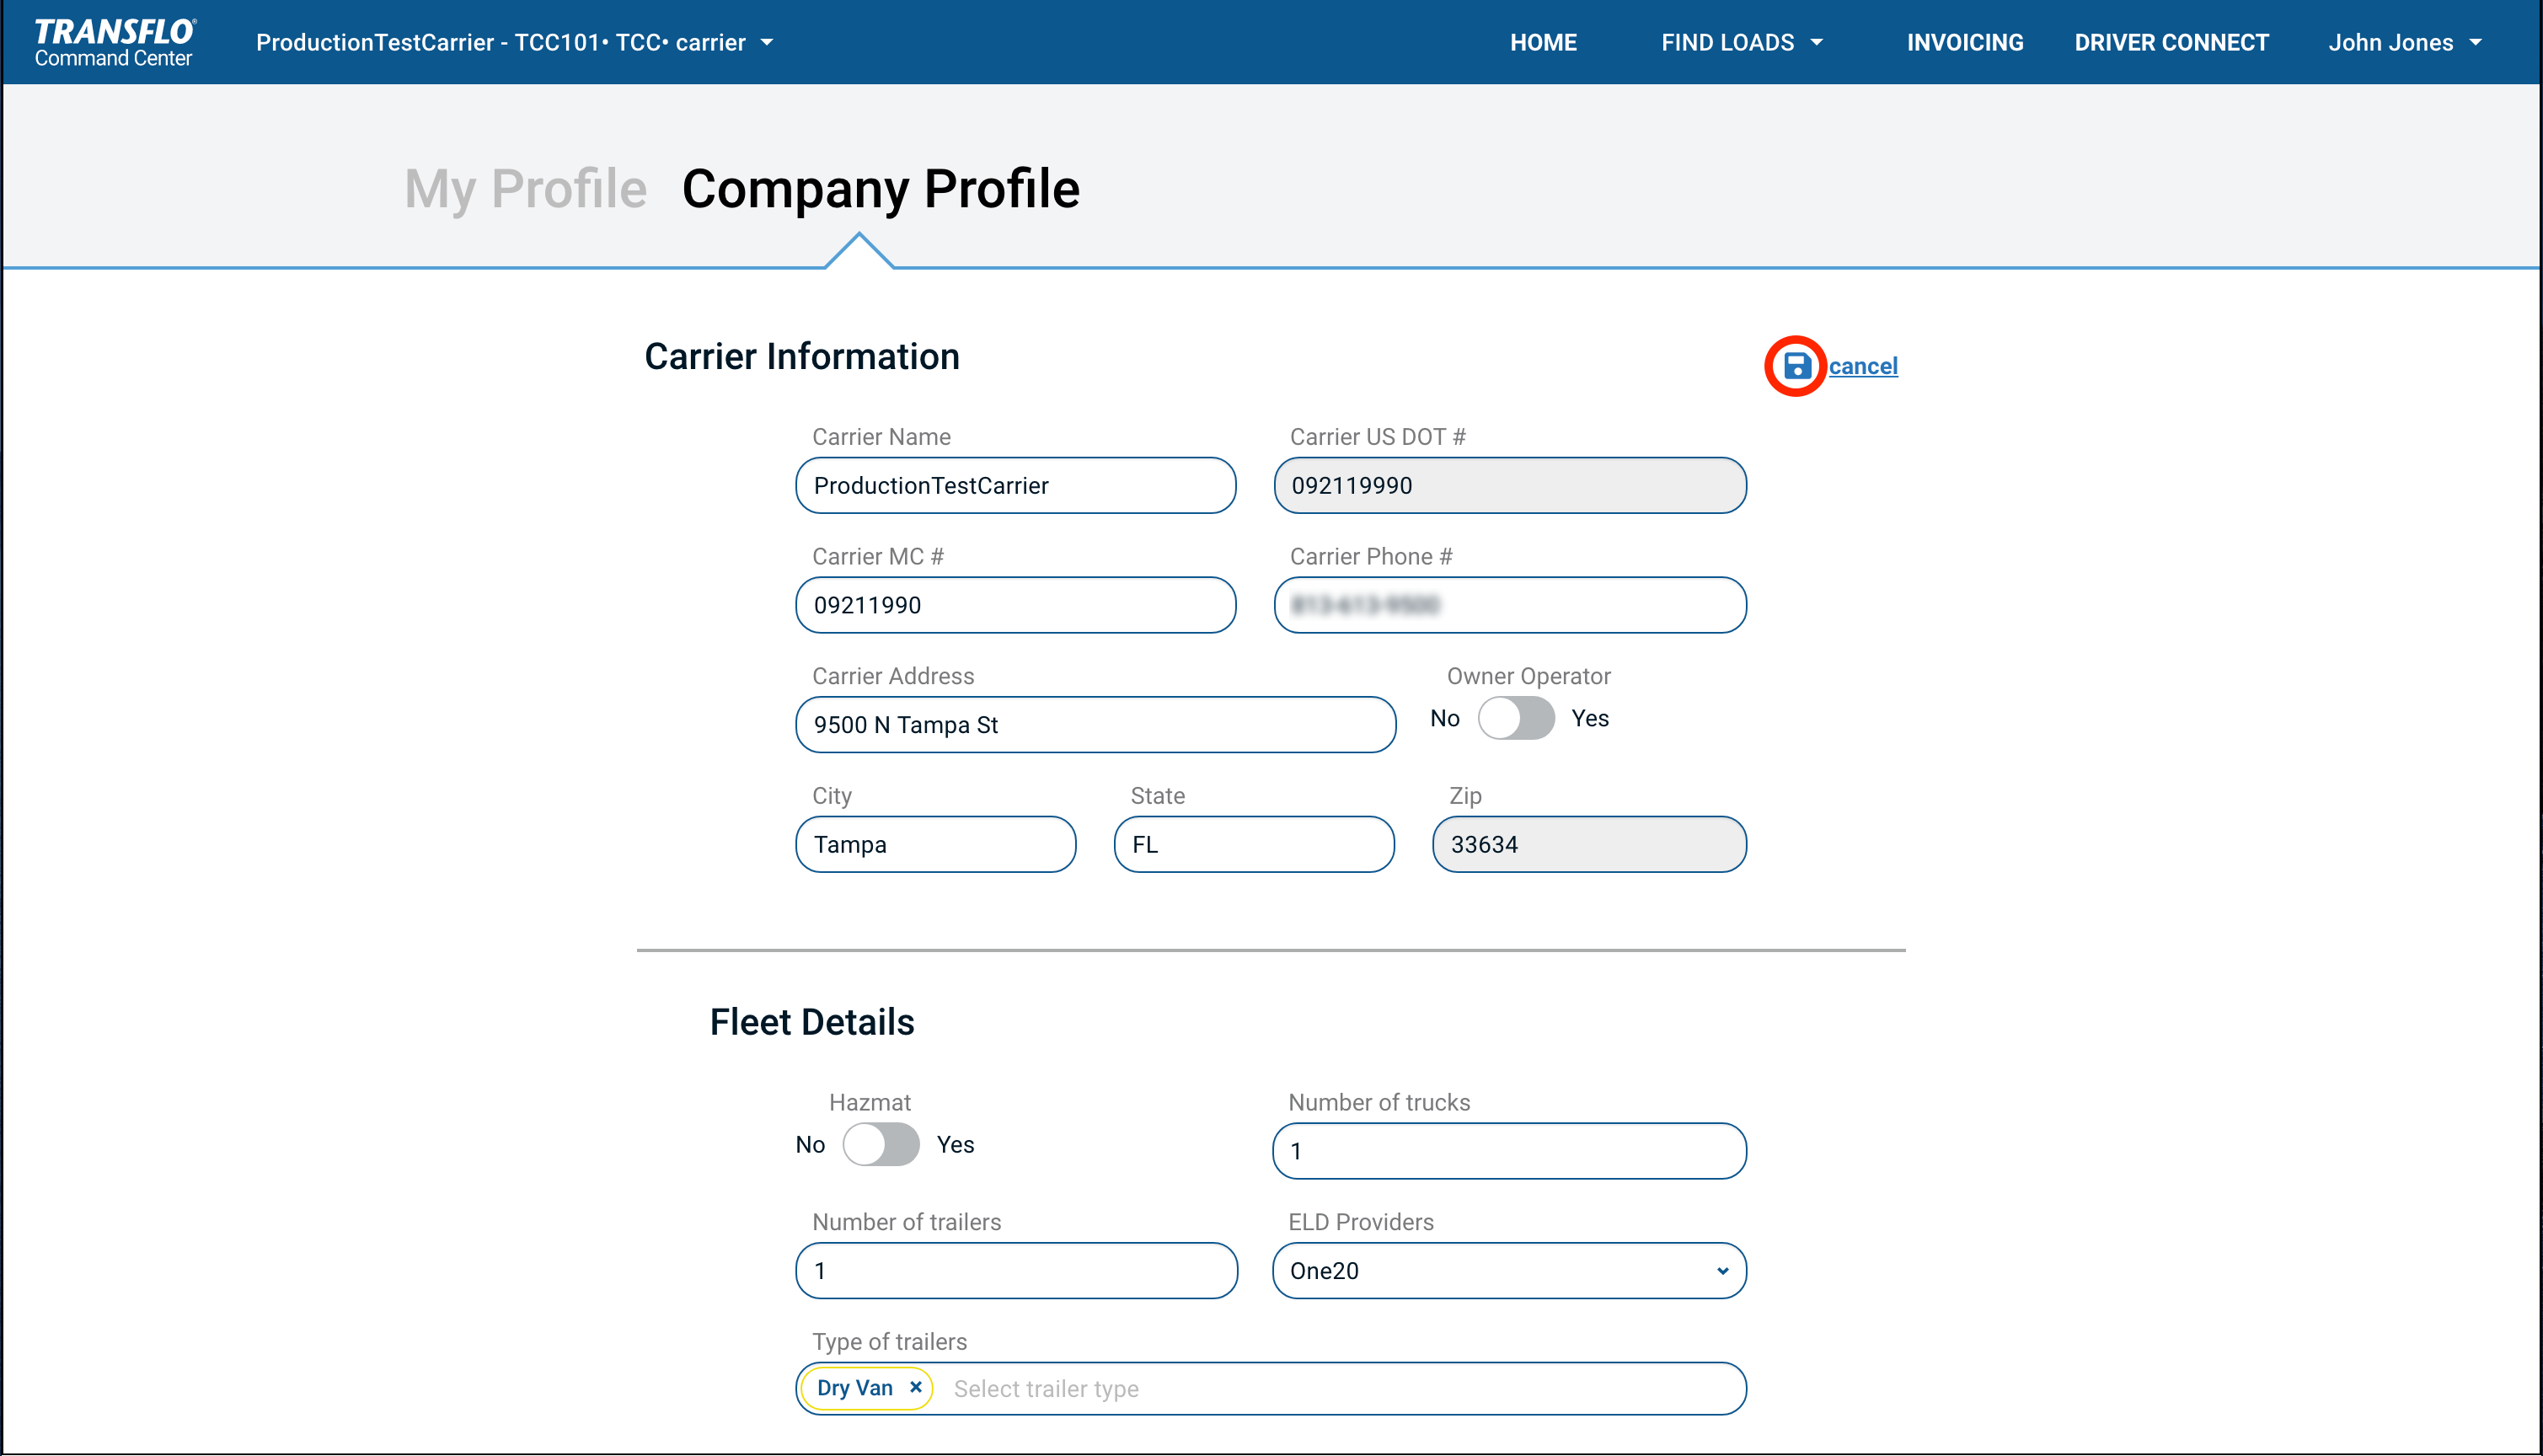
Click the Company Profile tab and then click
 Edit.
Edit. 
-
Make your updates to one or more fields on the Company Profile page and click
 Save.
Save.

![]() View a demonstration of these steps in one or more Transflo videos:
View a demonstration of these steps in one or more Transflo videos:
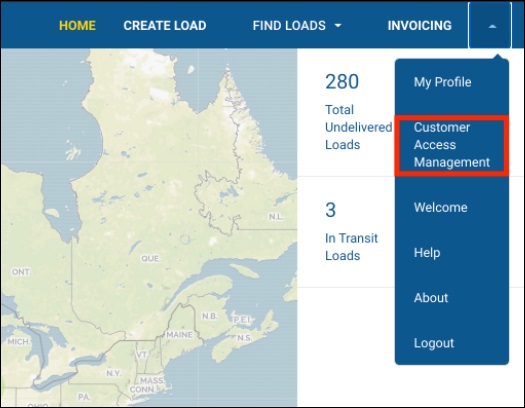
As a broker, you can manage the fleet customers that you serve in the Customer Access Management module inside Transflo Velocity+.
-
Click the top right menu item. Depending on your software configuration, you might be able to click your user name, your photo or avatar image, or just a small triangle.
-
In the resulting drop-down menu, click Customer Access Management.

-
The Customer Access Management page displays available carriers and brokers.
-
To refine the list of carriers and brokers (essentially these are other users just like you), enter a full or partial search string in the Find User field at the top of the page.
-
Click
 Expand Row (a down-facing arrow) at the beginning of a row to drill-down into more information about a carrier or broker.
-

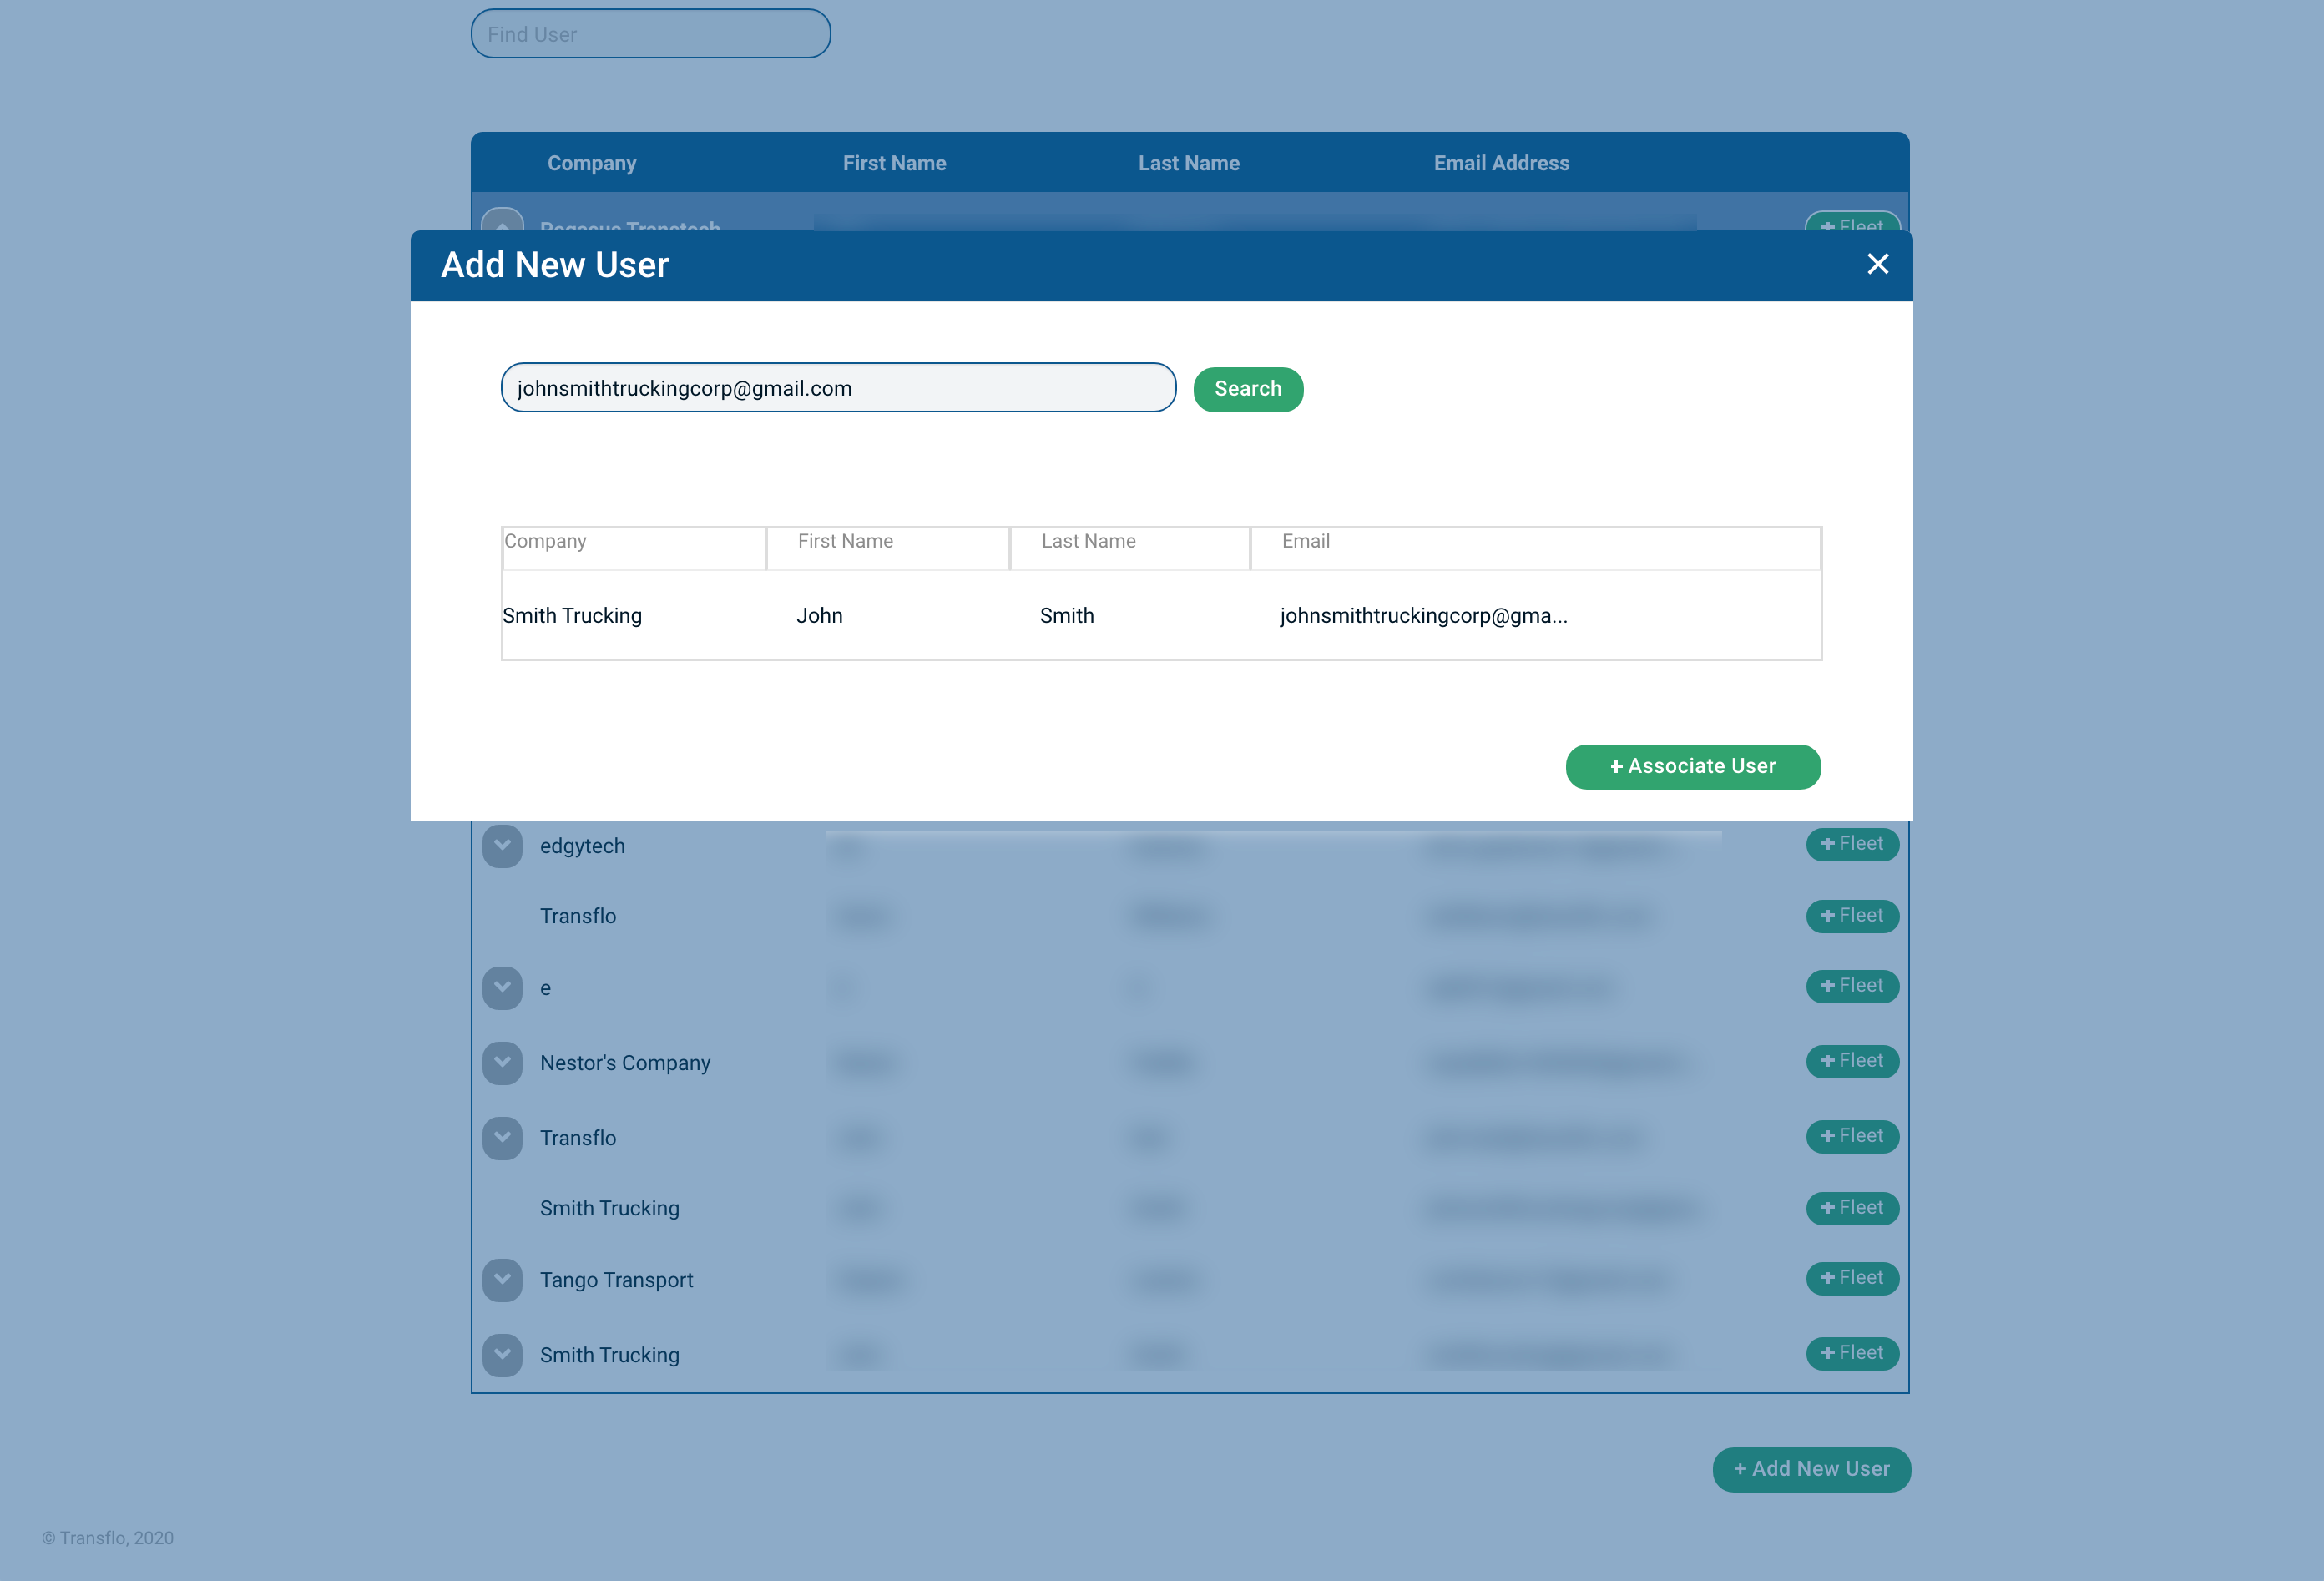
You can add a new user to your Velocity+ environment and associate the user with one or more fleets.
-
Click the + Add New User button.
-
Enter a valid Email address, and click the green Search button to display a list of fleets.
-
Click the green + Associate User button to add the new user.

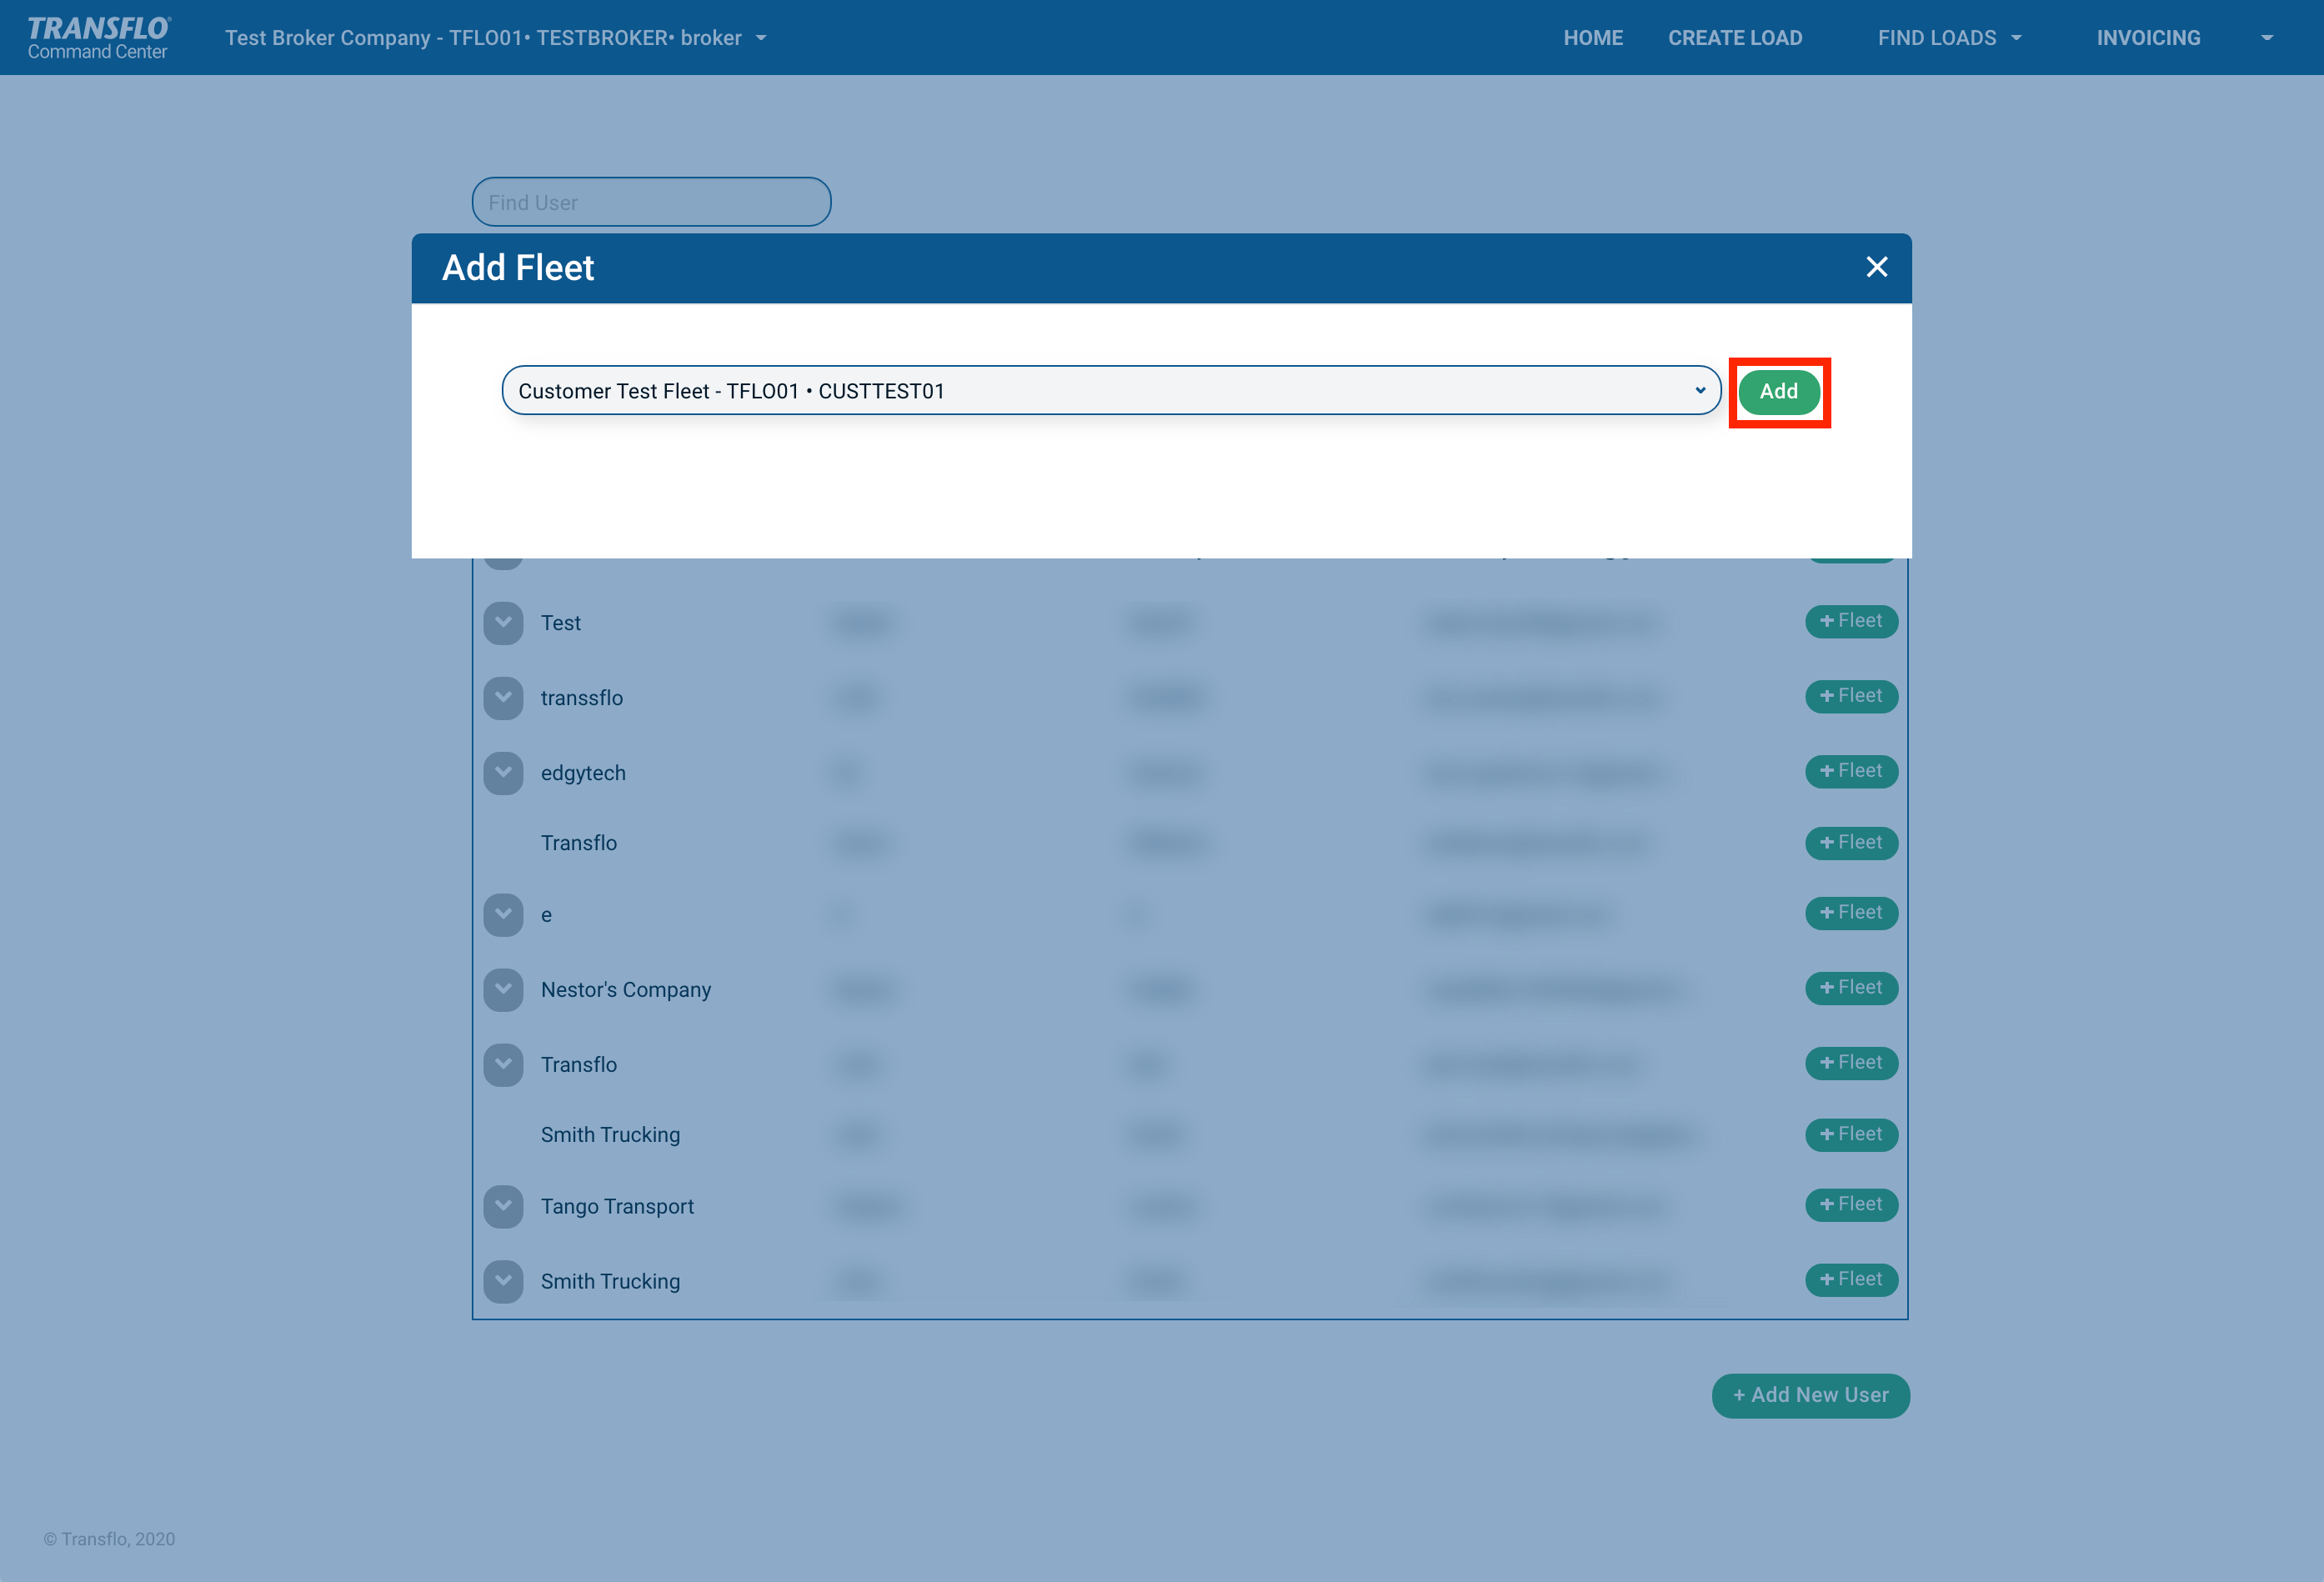
As a broker, you have the option to add fleets to your Customer Access Management account.
-
To associate a fleet, carrier, another broker, or shipper, click the green + Fleet button and then click the drop-down
 arrow and select a fleet from the list.
 -
After you select a fleet, click the green Add button.

-
The new fleet you just added appears under the company name.

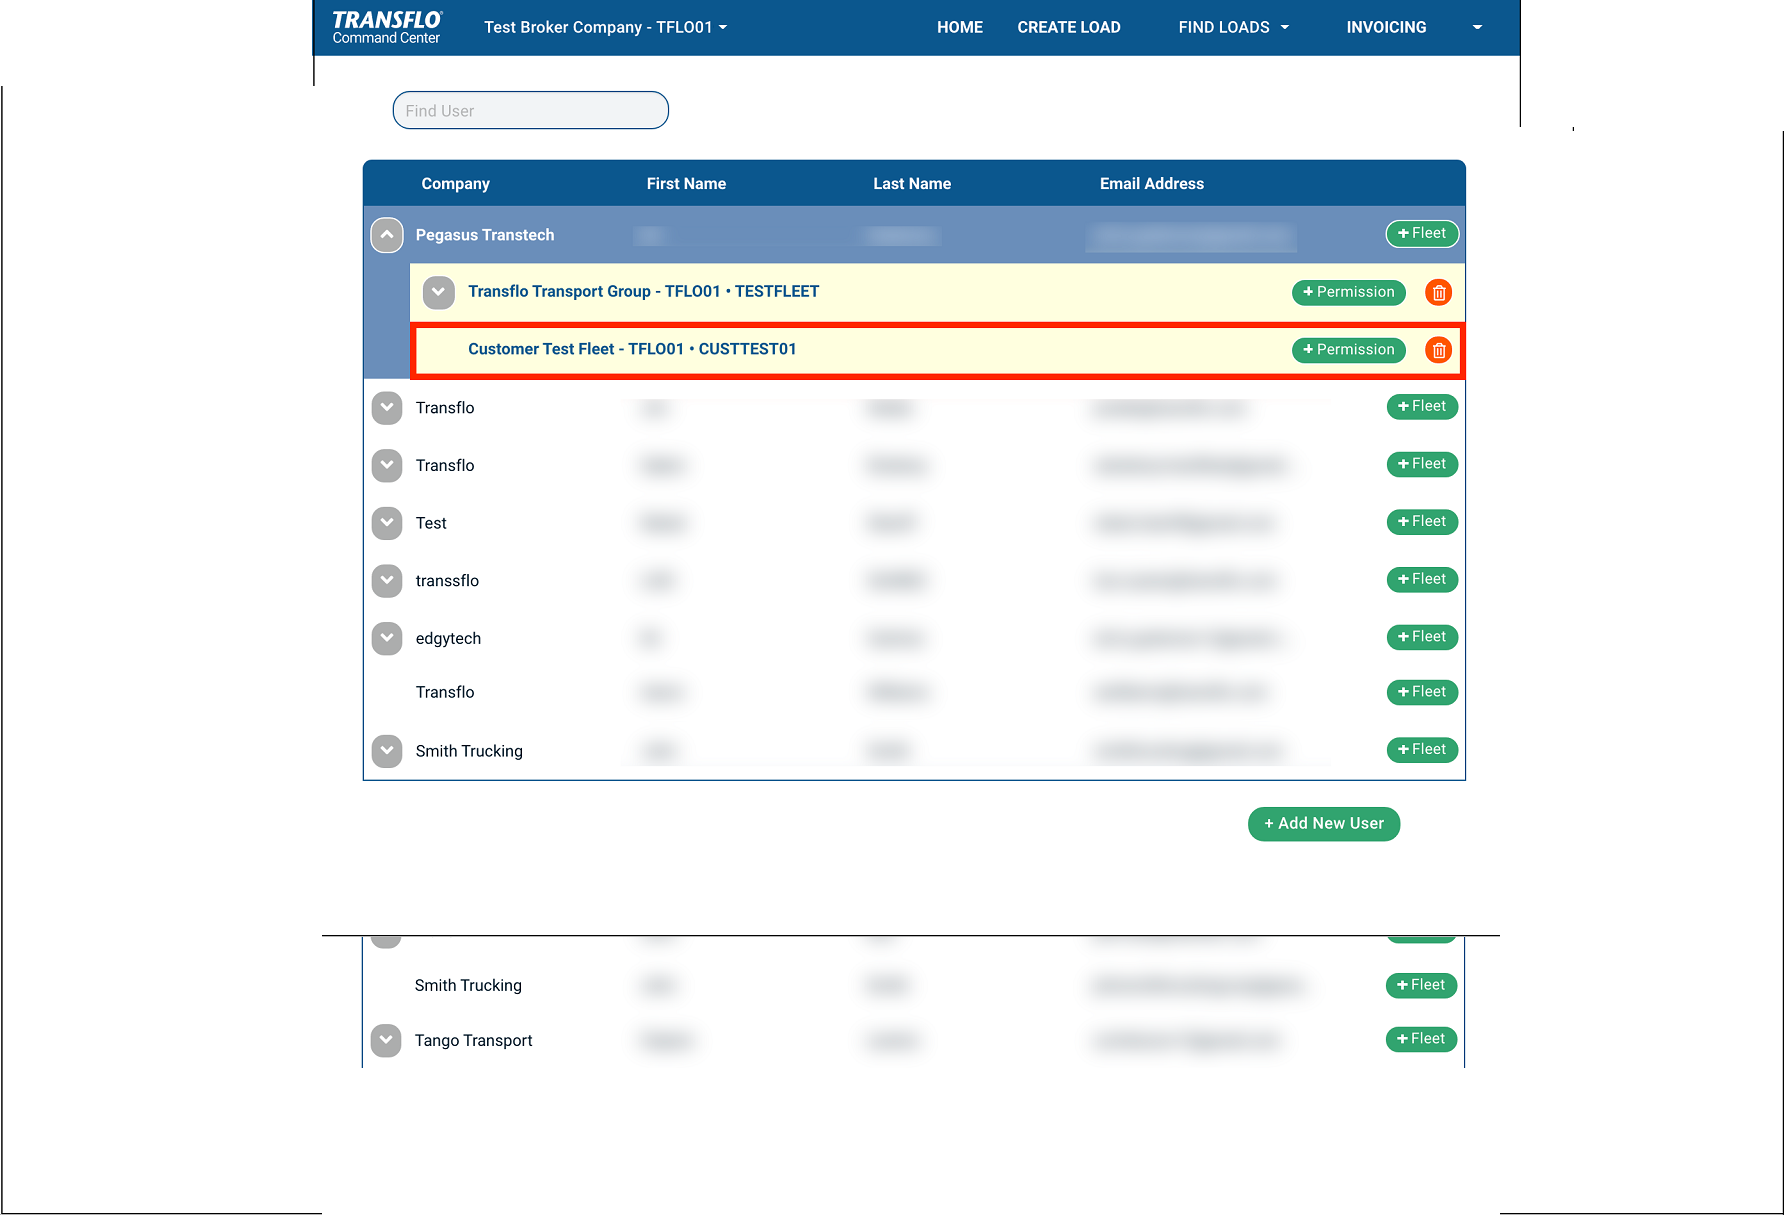
To remove a fleet, click  Delete to the right of the fleet name.
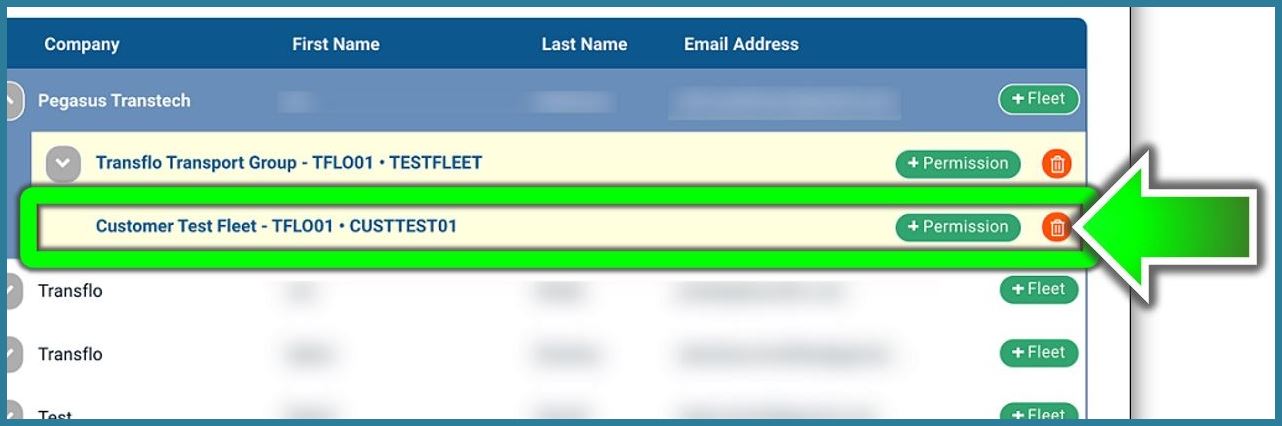
To add permissions to a fleet, follow these steps:
-
Click the + Permission button to the right of the listed fleet.
-
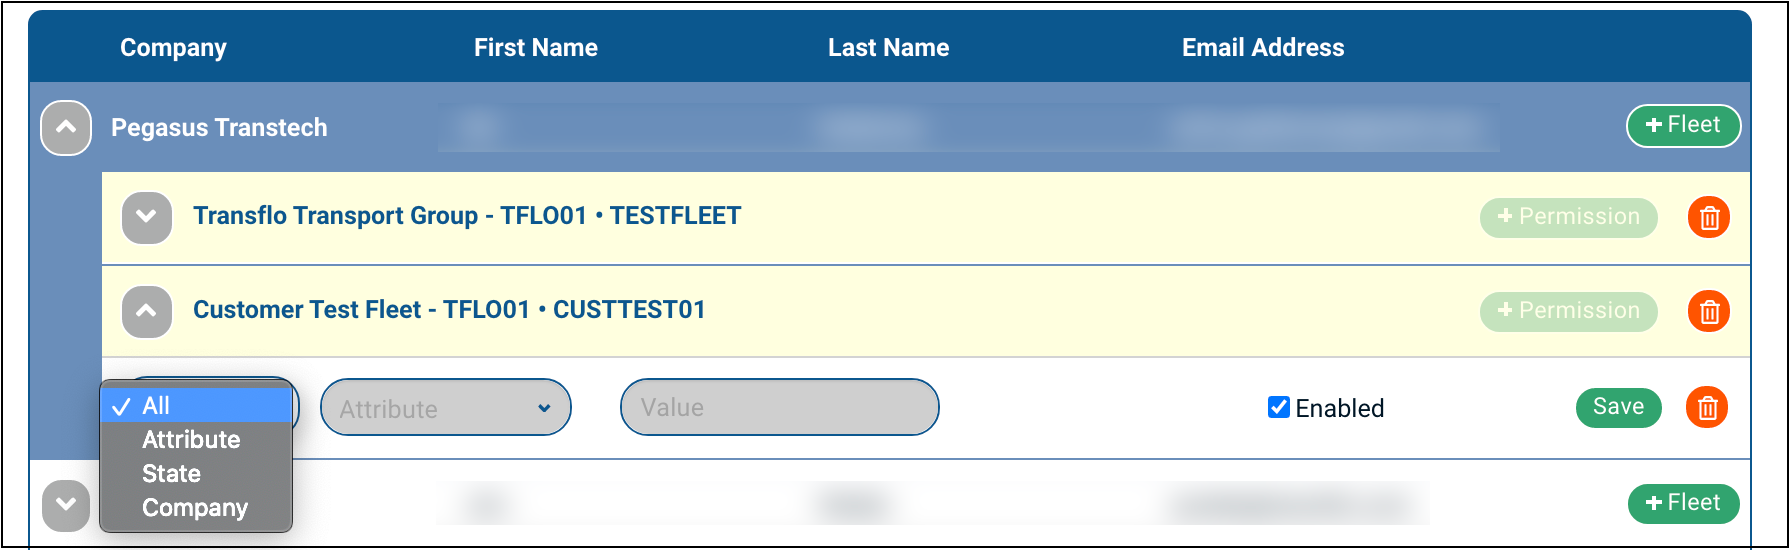
To filter by Attribute, State, or Company, click the drop-down arrow
next to All. Choosing All overrides any other configured permissions and therefore effectively negates all other permissions.
-
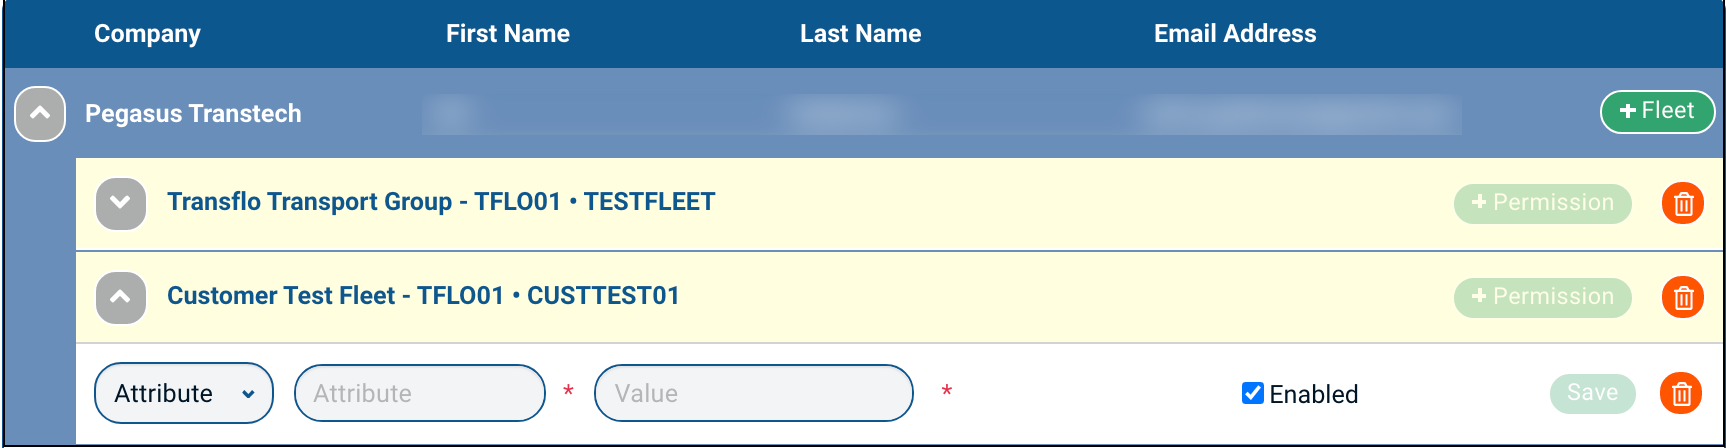
Select Attribute to view the fields for custom values. Enter the values for the Attribute fields.
-
The Enabled check box is selected by default. To disable an attribute, clear the check box for that row.

-
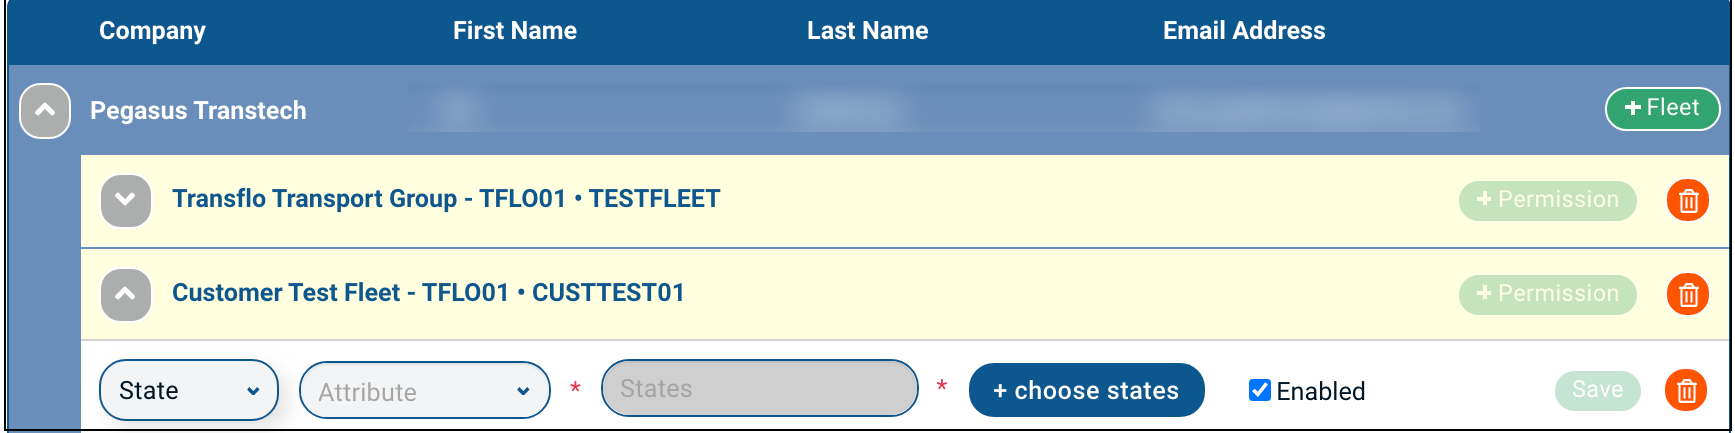
Set the State drop-down value to Pickup or Delivery.
-
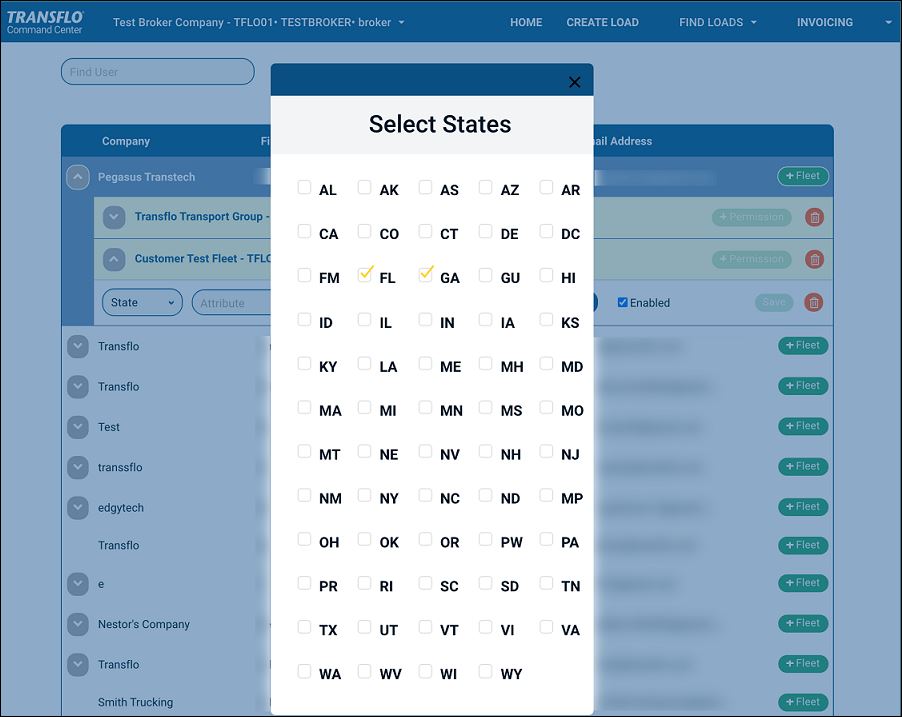
Click the blue +choose states button to select one or more states.

-
Select the checkboxes next to any of the states in the Select States menu.

-
Click the Company drop-down arrow
next to Attribute to choose Shipper or Consignee. -
You can add a custom name in the Value field.


![]() View a demonstration of these steps in one or more Transflo videos:
View a demonstration of these steps in one or more Transflo videos: