Configure Synergize After a Domain Name Change
Use this article to restore service after a domain name change. Users can no longer use Synergize until you update the Synergize Enterprise Management Console (EMC) and general security settings to reflect the changes in your domain, deployment ID, license, and security model.
Note: If using a version of Synergize older than version 13 the COM+ Application and COM+ Admin identities need to be re-entered.
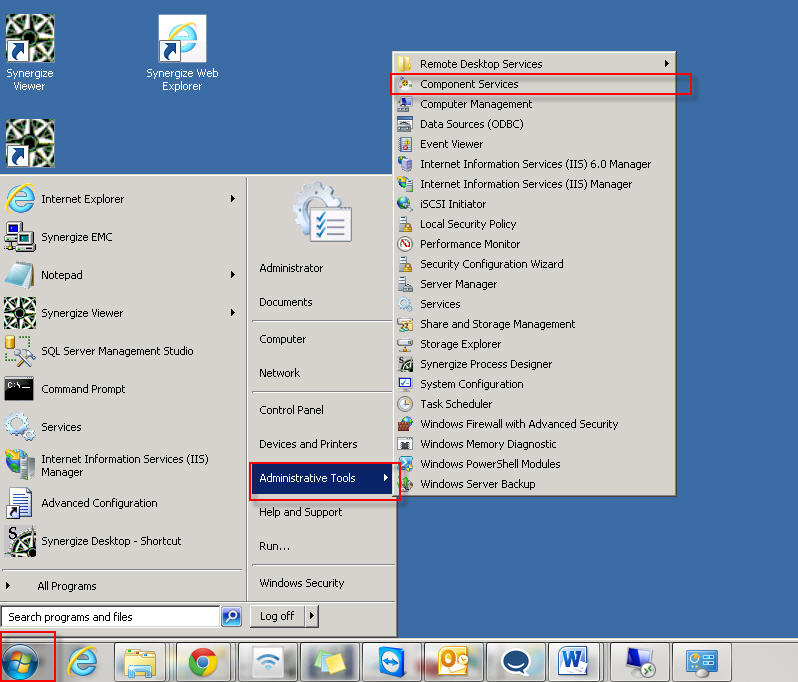
1. Open Component Services.
2. Navigate to COM+ Applications and look for Synergize and SynergizeMgmt objects.
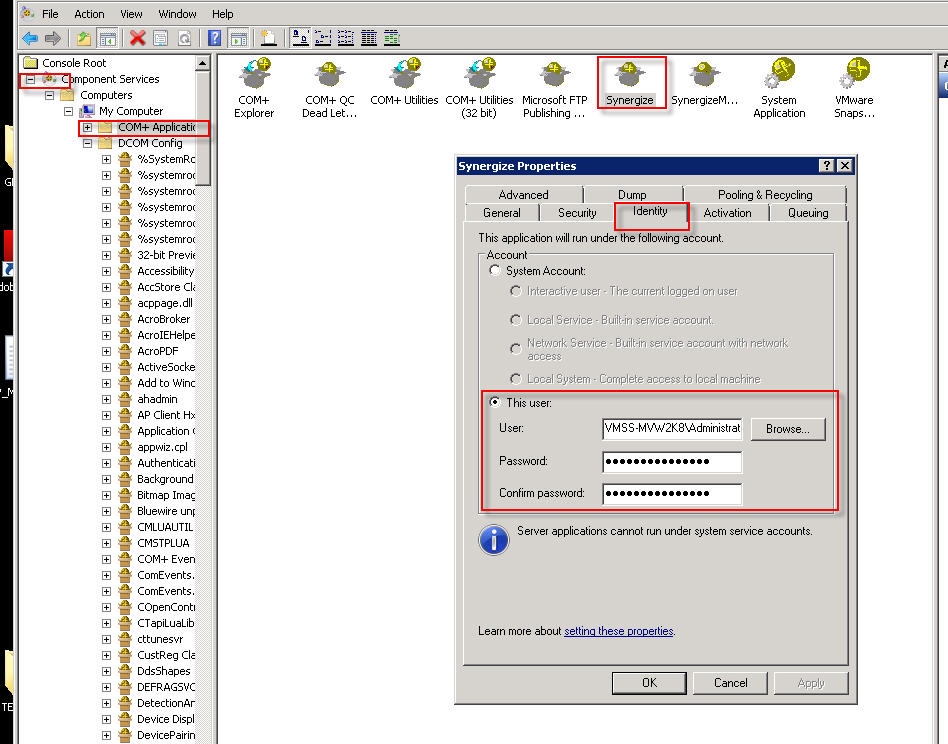
3. Select properties of Synergize and click the Identity tab.
4. Re-enter the credentials with new domain.
5. Repeat steps 3,4 to change identity password for SynergizeMgmt.
6. Launch Synergize EMC (Enterprise Management Console) as administrator and click SCS and click Stop (Make sure Stop is grayed out).
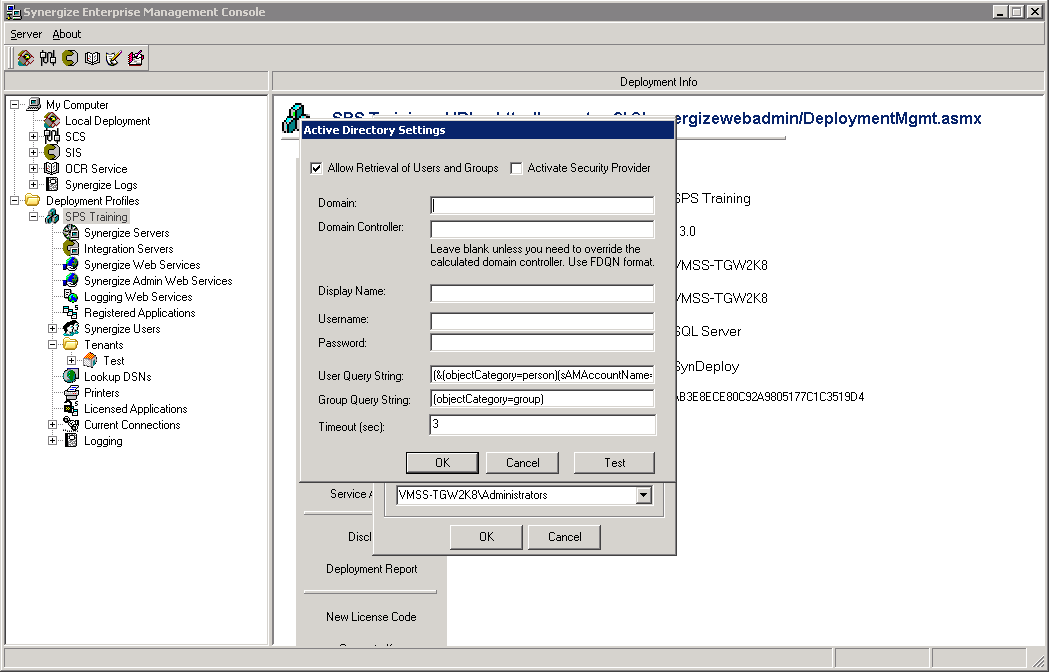
7. Select your Deployment Profile and click Security Model.
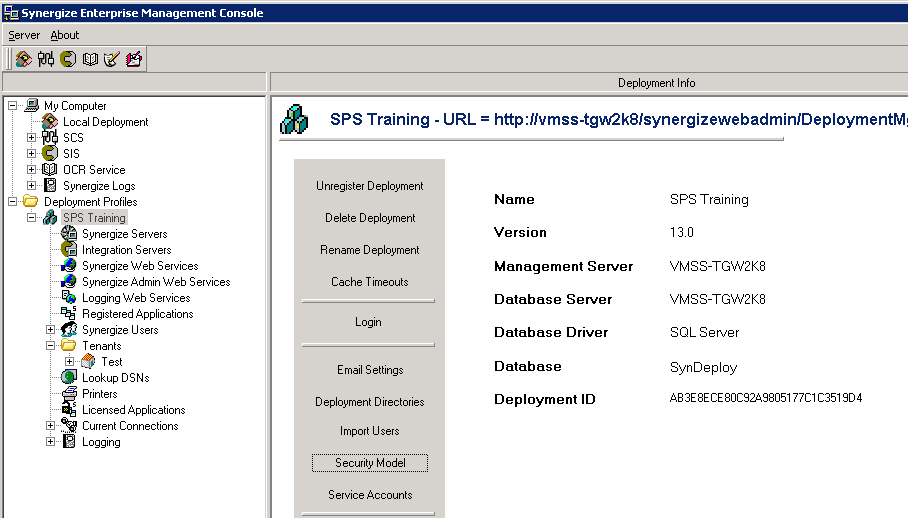
3. Select the current Security Provider change the domain name to the new domain where old domain is used.
-Make sure Activate Security Provider is checked.
4. Select Synergize Users and ensure the Synergize Username field is mapped to an account in the new domain. Repeat this step for all Synergize users.

5. Relaunch EMC to get new Deployment ID.
6. Please contact Microdea support to update your license with new Deployment ID.
7. Restart SCS to make new license effective.
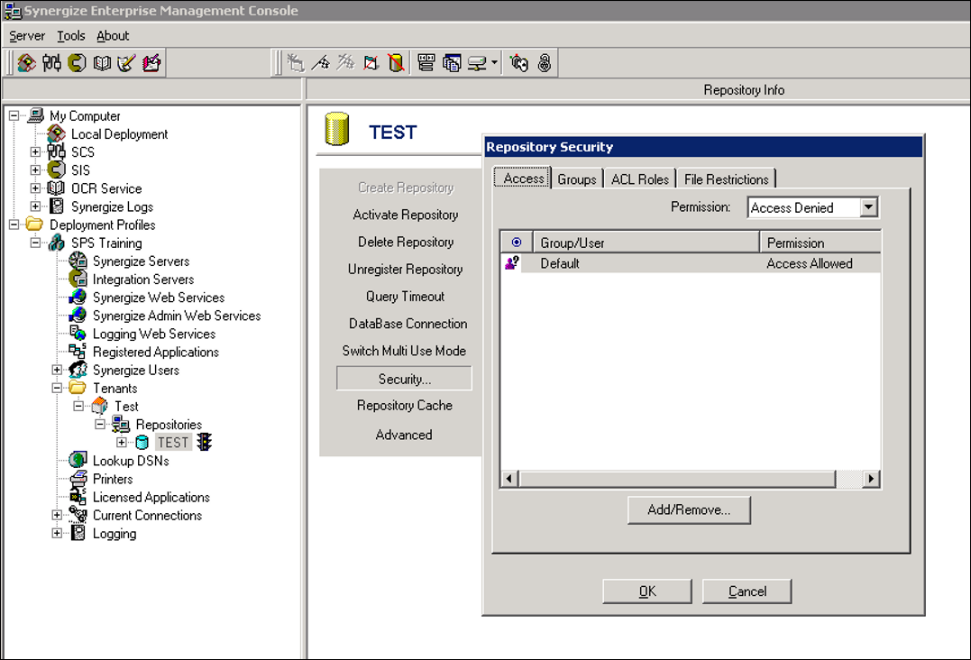
8. Navigate to Repositories and then for each repository, select Security... and update Access to reflect new domain if necessary, by removing old domain user/groups then adding the same users/groups with the new domain.
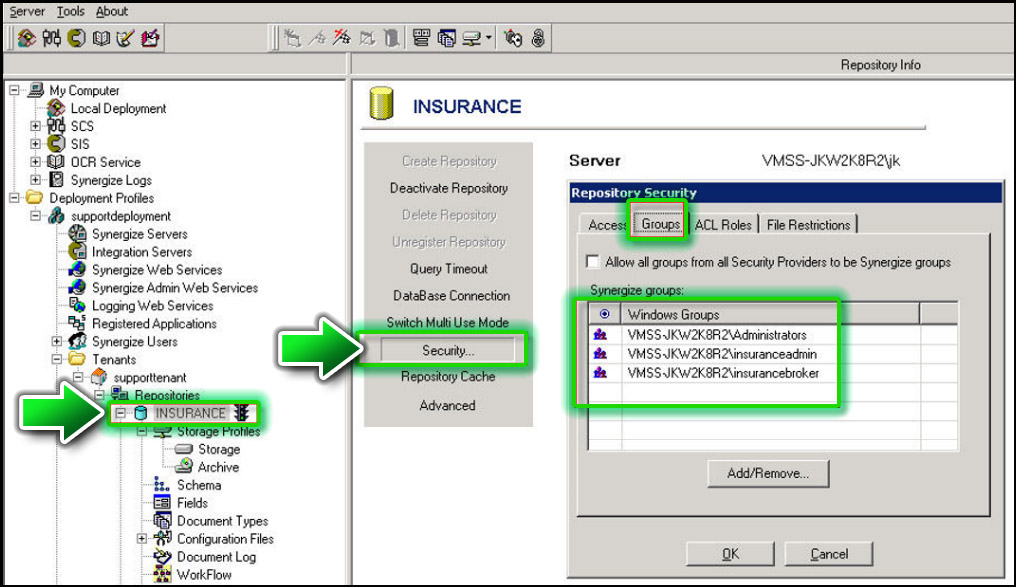
9. Navigate to Repositories and then for each repository select Security... and update Groups to reflect new domain if necessary, by removing old domain user/groups then adding the same users/groups with the new domain.
10. Navigate to Repositories and for each repository select Advanced. Select the Default ACL tab and then remove old domain users/groups. Add the same users/groups and ensure they are assigned the same permissions. Next to the Add/Remove button the drop down allows you to assign access permissions to users/groups.

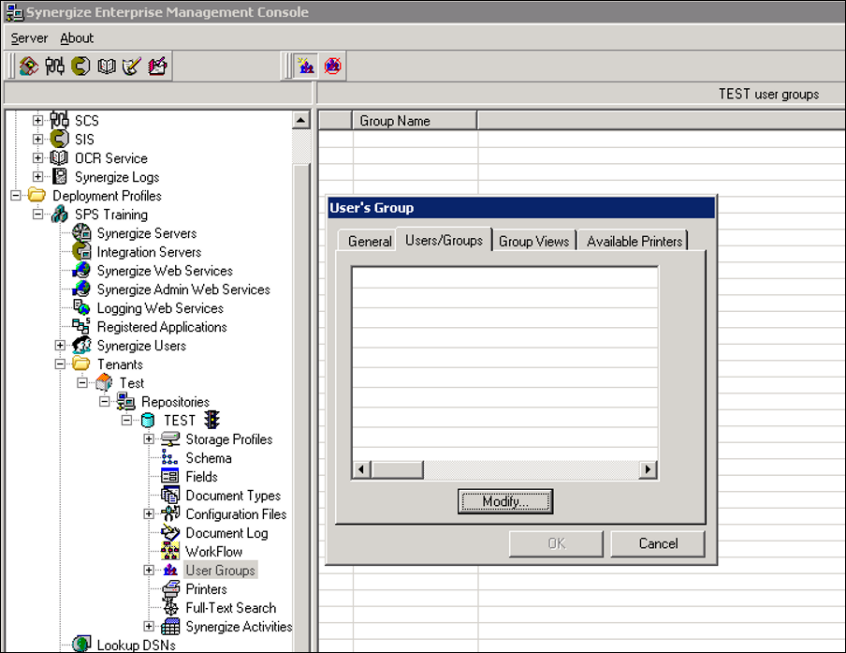
11. Check the User Groups for the repository and update the Users/Groups tab to reflect the new domain name by removing then adding the same the users/groups.
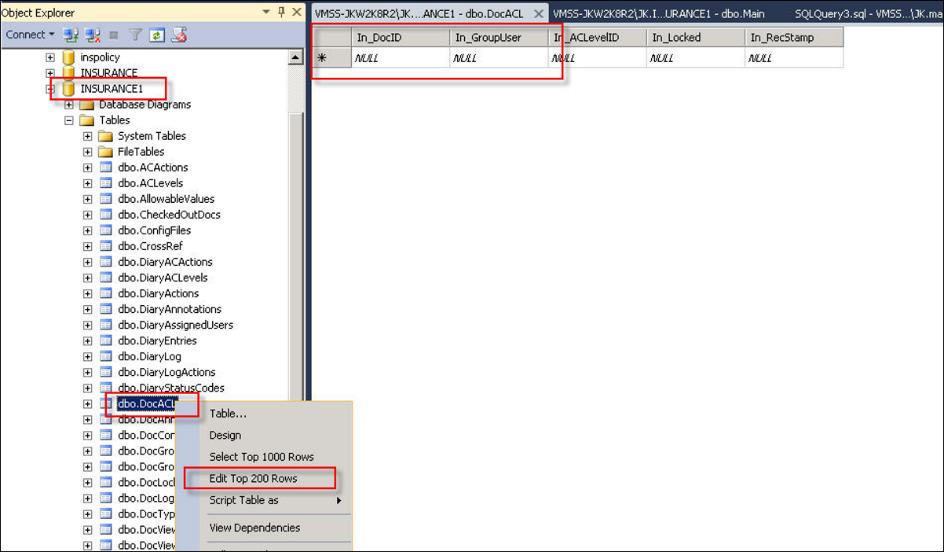
12. Delete all records from DocACL table.
- Connect to SQL
- Select your repository and look for DocACL Table and right-click "Edit Top 200 Rows"
- Select all rows and hit delete to delete all rows in DocACL Table.
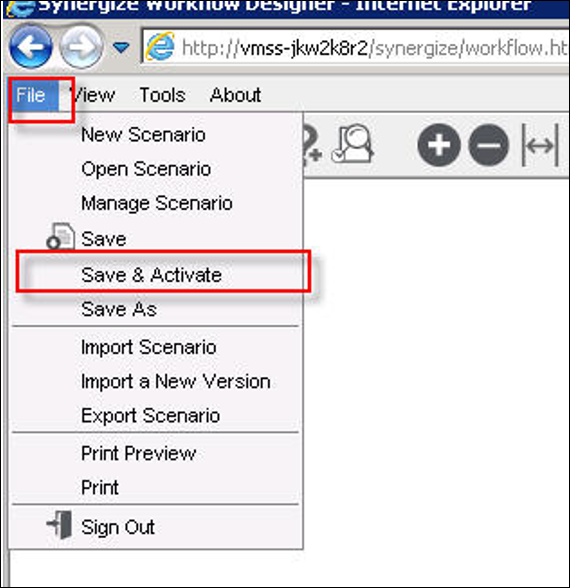
13. Open http://<servername>/synergize/workflow.html site in a web browser. Log in as Primary User and for each workflow scenario, click File > Open Scenario.
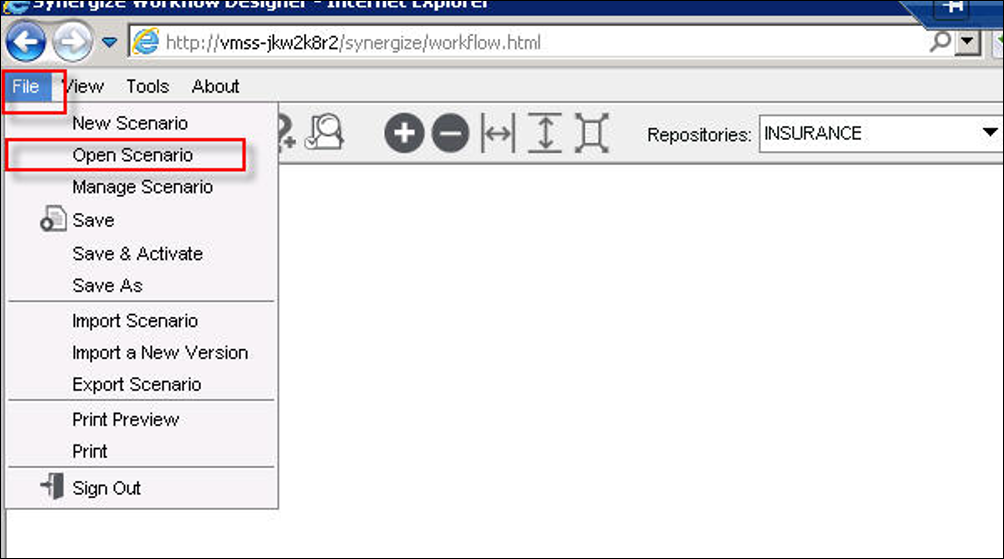
Select the latest version and click Open.

3 Select the workflow queue properties and click the Users tab.
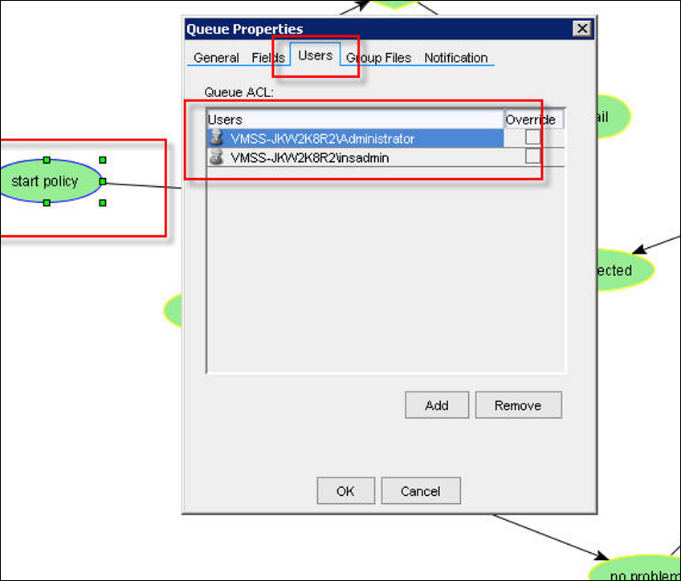
4. Add same users and groups from new domain and remove users/groups with old domain.
5. Repeat the last two steps for all workflow queues.
6. In the File menu, choose Save and Activate to apply the changes to the workflow.