Remove and Create COM+ Applications
Use this article if certain issues and tasks require that you re-create one or more Synergize COM+ objects. You can remove a COM+ application and then create a new one. As an administrator, you might be directed to this KB article from another KB article or Synergize documentation.
-
Verify no users or processes are connected and currently running when performing this task.
-
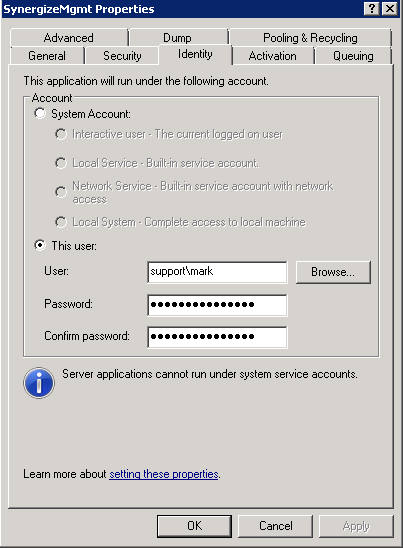
Identify which AD account is configured under the identity section. You must set the identity back to the same user after re-creating the application.
-
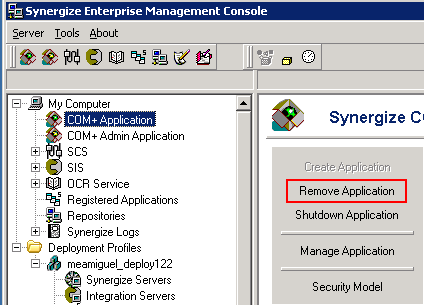
Log-in to the Synergize Application Server with Local Administrator rights and launch Synergize EMC.
-
Shutdown and Remove both COM+ Application and COM+ Admin Application. For each, click Remove Application:
-
Click Yes when prompted and verify that the application was removed successfully.
-
Click the Create Application button. Verify its status shows Created.
-
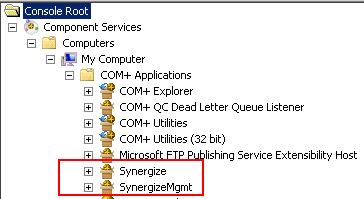
Go to Windows Start, All Programs, Component Services to open Windows Component Services.
-
Expand the Console Root node to show COM+ Applications.
-
Right-click the following two object nodes and choose Properties, Identity:
-
Synergize
-
SynergizeMgmt
-
-
Modify the identity of both Synergize and SynergizeMgmt applications. On the Identity tab of the Properties window for each object, under Account, select This user. Use a domain account with Local Admin privileges on the server where you are logged on and click OK.
-
Log in to Synergize Explorer to test the COM+ objects.