Backup and Migrate the SQL Database to a New Location
Use this article to migrate the SQL database from one HDD location to another. Perform these steps for all the databases (deployment and repositories).
Important! Please observe the following important notes:
-
The database and schema names must remain the same.
-
During this process, all Synergize users and applications will be disconnected.
-
It is highly recommended that you perform these steps during off-peak hours.
-
Let impacted users know that during this process, all Synergize users and applications will be disconnected.
-
Keep the database and schema names the same.
-
Stop Synergize Connection Service (SCS) before starting the process.
-
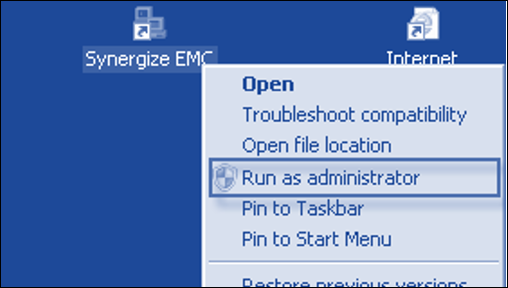
Open Synergize Enterprise Management Console (EMC) as admin.
-
Click SCS > Stop.

-
-
Back up all databases before you perform the steps below in case something goes wrong. To back up the database:
-
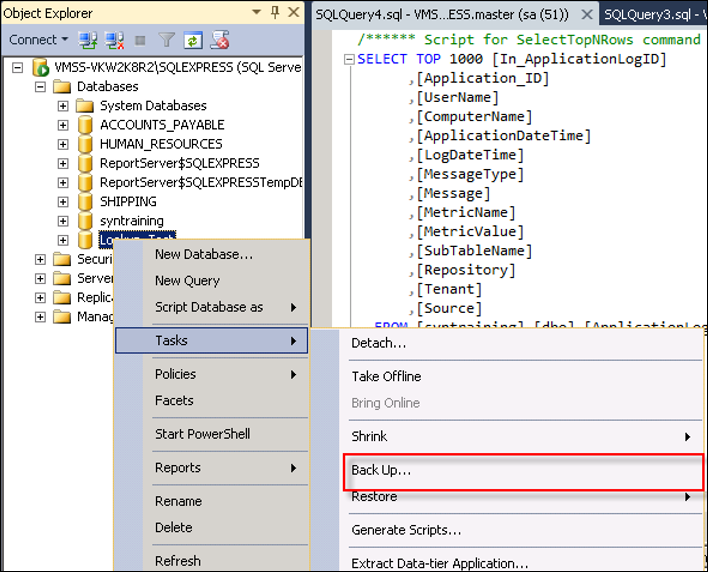
Open Microsoft SQL Management Studio.
-
Right-click the database and select Tasks > Backup.
-
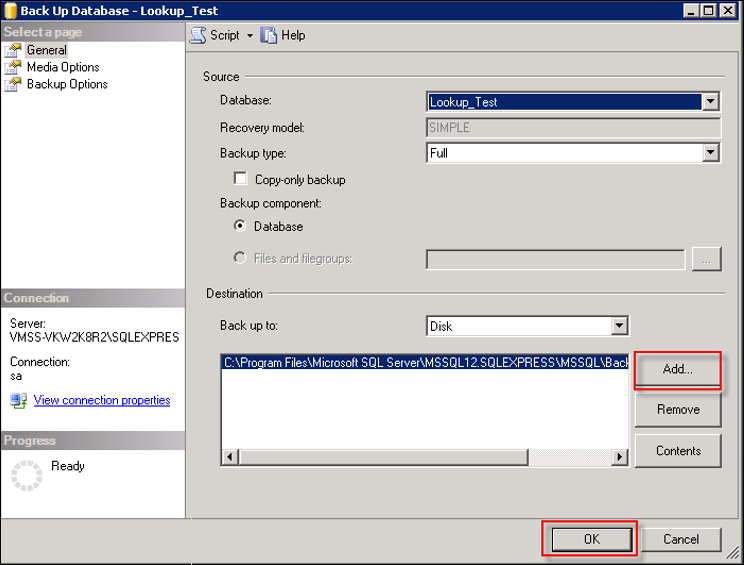
Click Add and select the directory where the file needs to be stored.
-
To start the process, click OK.
-
-
The default location where databases are stored after the backup process:
C:\ProgramFiles\MicrosoftSQLServer\MSSQL12.SQLEXPRESS\MSSQL\Backup
-
Locate the default location where databases are stored on the live system, for example:
C:\ProgramFiles\MicrosoftSQLServer\MSSQL12.SQLEXPRESS\MSSQL\DATA)
-
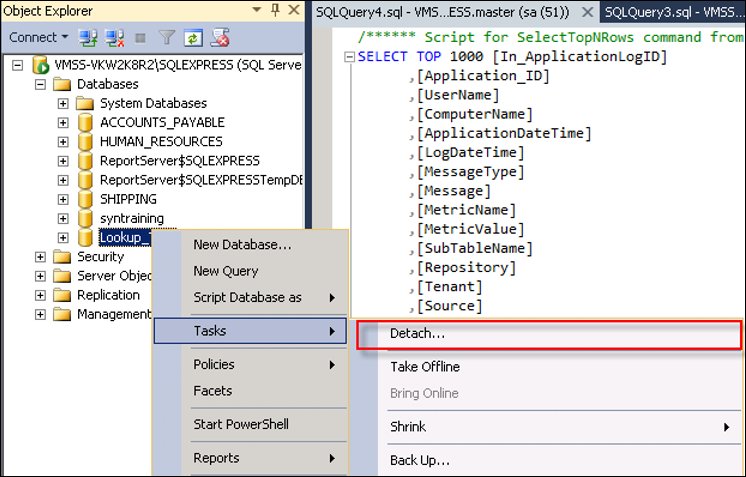
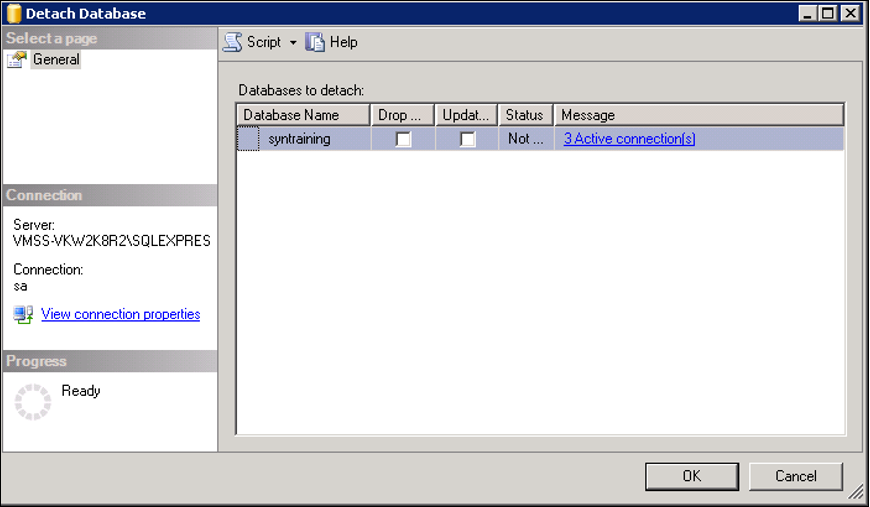
After creating a successful backup, detach the database in Microsoft SQL Management Studio by right-clicking the database and then selecting Tasks, Detach.
-
Select the Drop option if all the active connections need to be stopped while the detach process is on. Click OK to detach the database.
-
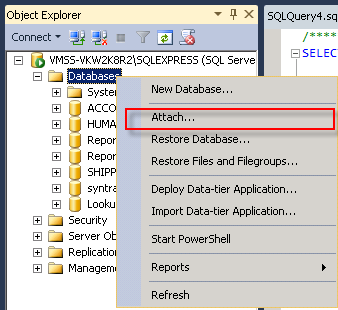
After the database has been detached, locate the database files again and move all files to the appropriate new location.
-
Open Microsoft SQL Management Studio again and right-click the Databases node and choose Attach in the pop-up menu.
-
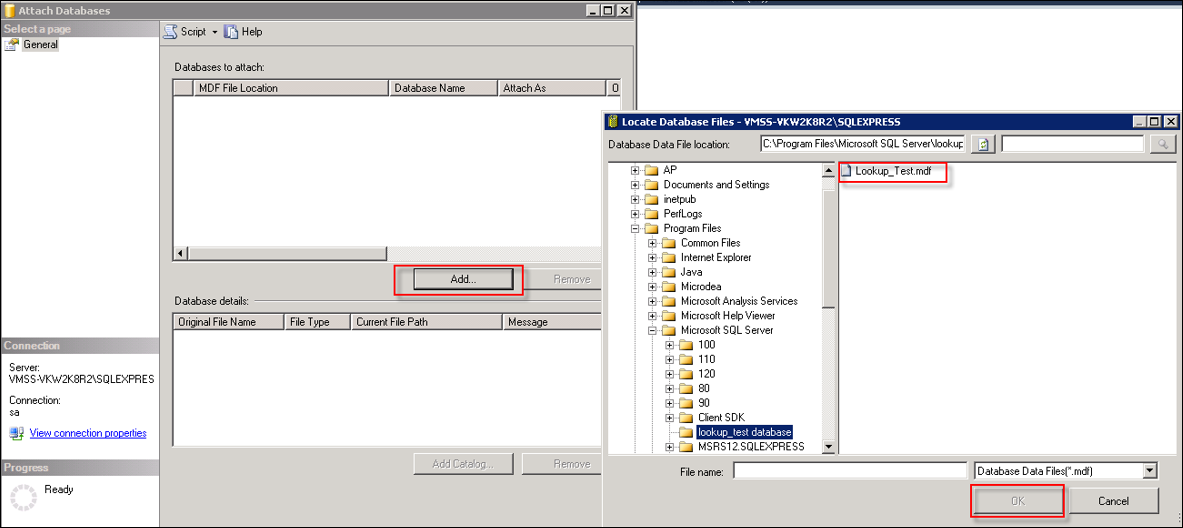
Locate the new directory. All the database files in that directory are listed.
-
Click Add and select the database files to attach. Click OK.
-
-
When the process is complete, start the Synergize Connect Service.
-
Verify that all database repositories are accessible prior to letting users back into Synergize.
-
Start SPS and all other application services.
-