Synergize Mobile Workflow
The Synergize Mobile Workflow mobile app works with the Synergize document management system. You must have a Synergize username with process workflow authority to use this app.
Currently the Synergize Accounts Payable solution is the only workflow supported by Synergize Mobile Workflow. This solution was designed for busy managers tasked with approving invoices, purchase orders, or other key documents in your business workflow. Whether you are on the road or just away from your desk for a moment, this app lets you manage approvals from any iOS or Android mobile device.
-
iOS Mobile Workflow Application: You can download the latest version of the iOS Mobile Workflow application from the Apple AppStore. The app can be installed on all iPhone & iPad devices running iOS v8+.
Click HERE to download the application.
-
Android Mobile Workflow Application: You can download the latest version of the Android Mobile Workflow application, from the Google Play Store. The app can be installed on all Android devices running Android 9 or newer.
A December 2024 Mobile Workflow app update for Android devices improved logic 1 and logic 2 approvals and improved performance on Android OS 13 and 14.
Click HERE to download the application.
With the Synergize Mobile Workflow app for Accounts Payable, you can quickly approve invoices while on the go:
-
Take advantage of early payment discounts.
-
Log in and instantly see your pending invoices.
-
Cut down on late penalties with faster approvals no matter where you are.
-
Eliminate phone calls between accounting and approvers to be more efficient.
-
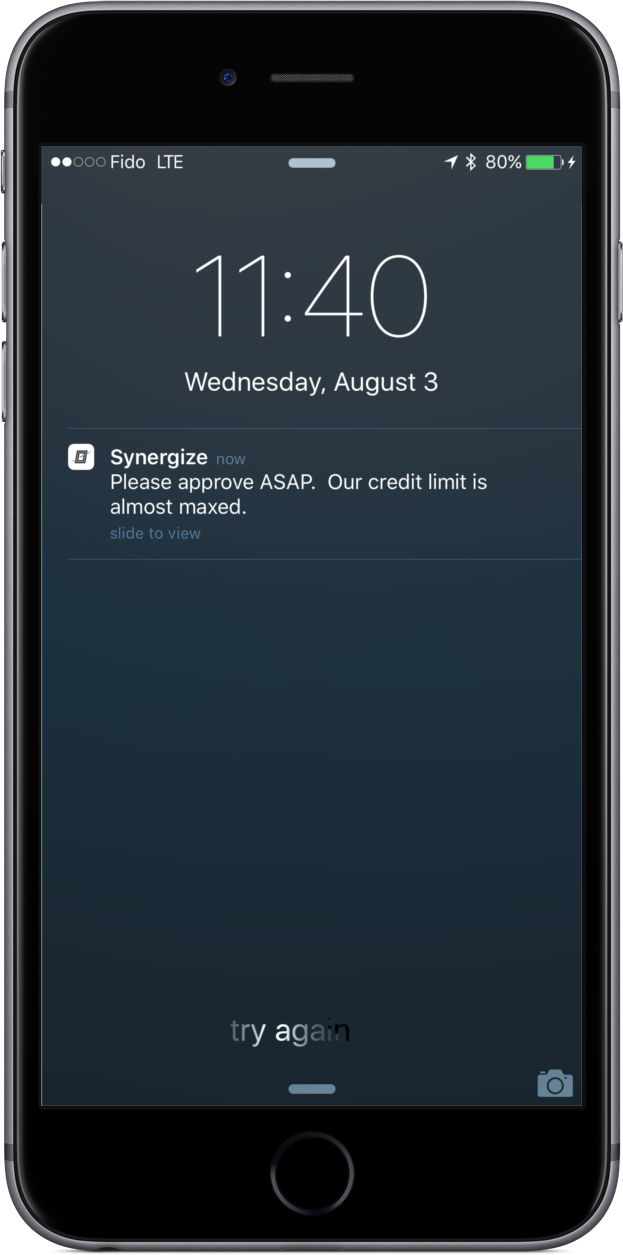
Receive push notifications and be alerted that an invoice requires action.
-
Verify key invoice details and view comments from previous users.
-
View the invoice to validate information provided by the vendor.
-
Approve, send back to the previous user or reject to initiate further action.
-
Find specific invoices quickly to easily respond to inquiries.
You must have access to the Synergize Document Management System in order to use Synergize Mobile Workflow for AP.
The following approval types exist in the Accounts Payable solution. Currently, only Logic2 is supported by Mobile Workflow.
|
Tag Name |
Approval Type |
Meaning |
|---|---|---|
|
Logic1 |
Simple Approval |
A pool of approvers exists. Any of them can approve as long as they have a high enough approval limit. If they don't, they can "approve above limit" and another approver still has to approve. |
|
Logic2 |
Sequential Approval |
Only Next Approvers for the Cost Center group are returned.
(This is the only type supported by Mobile Workflow). |
|
Logic3 |
Sequential Approval |
Only Next Approvers for the Cost Center group are returned. Approval only happens, if there is no next approver (final approver) and if the final approver has a limit above the purchase amount. (You can emulate the effect of Logic 3 by using Logic 2 and giving all approvers except the final approver a zero approval limit.) |
-
Tap the app to launch it.
-
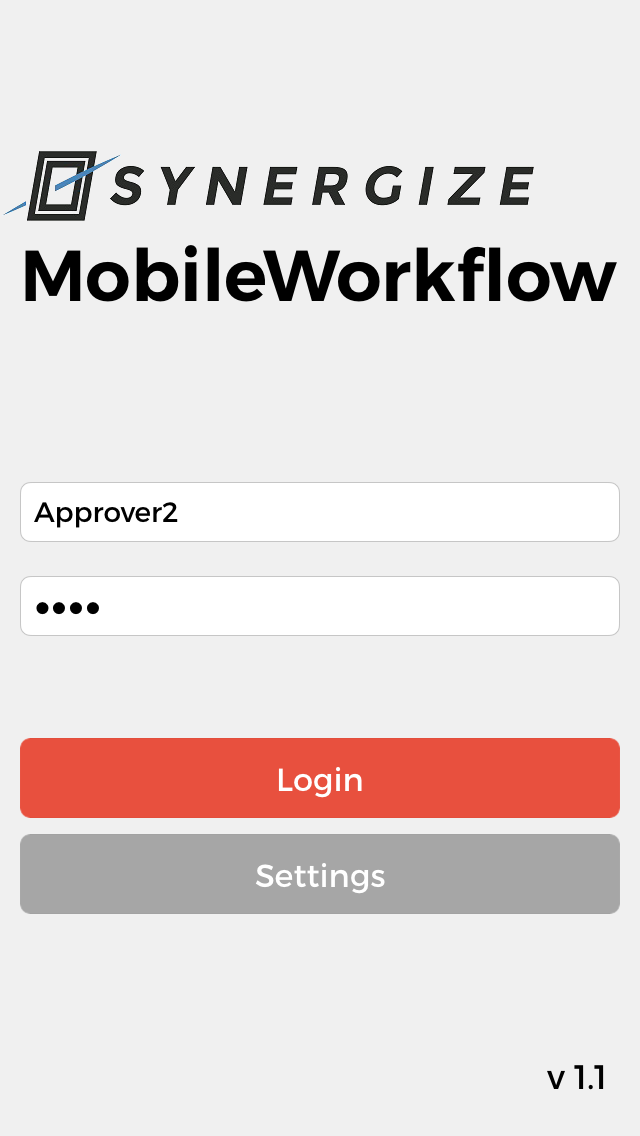
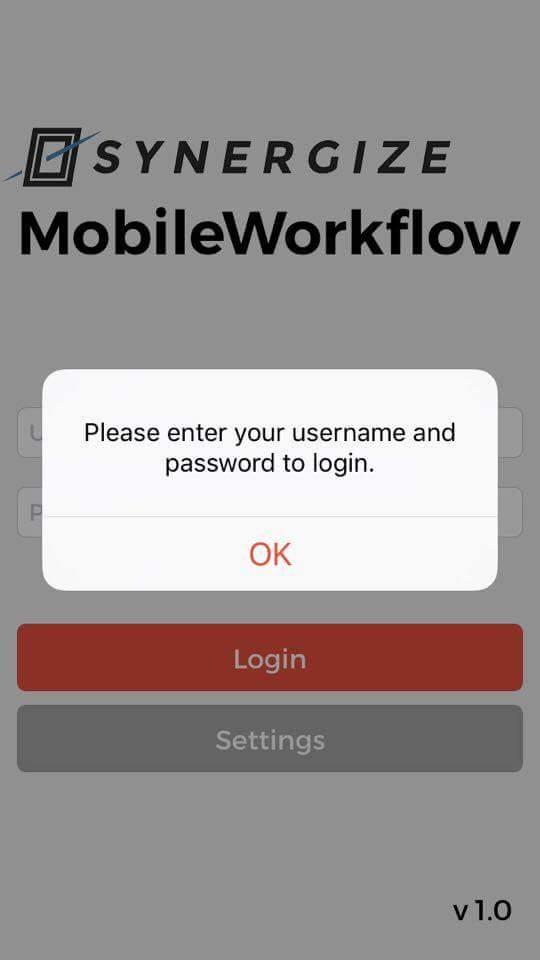
The login screen is the first screen to appear when the app is opened.
-
The screen shows two text fields (Username and Password) and two buttons (Login and Settings).
-
The number in the bottom-right corner shows the version number of the currently installed Mobile Workflow application.
-
-
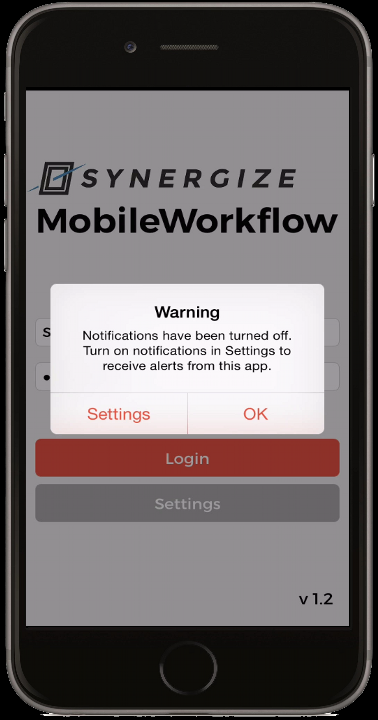
If you turned off notifications in your mobile device settings panel, you might see the following message at launch time.
-
To open your settings, tap Settings.
-
To log in, tap Login.
-
-
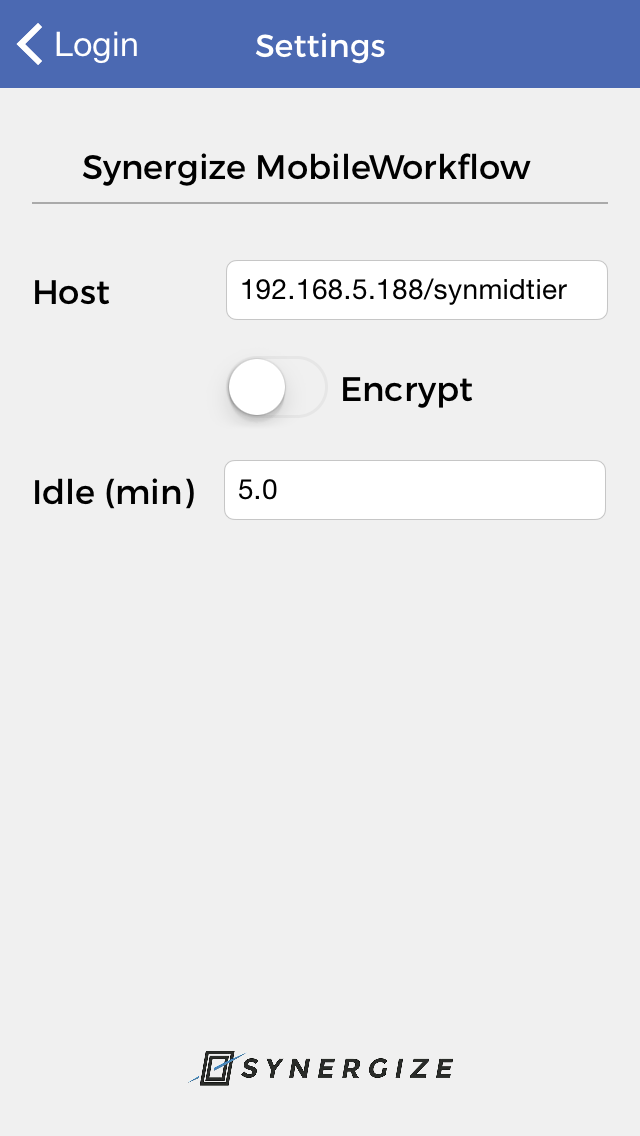
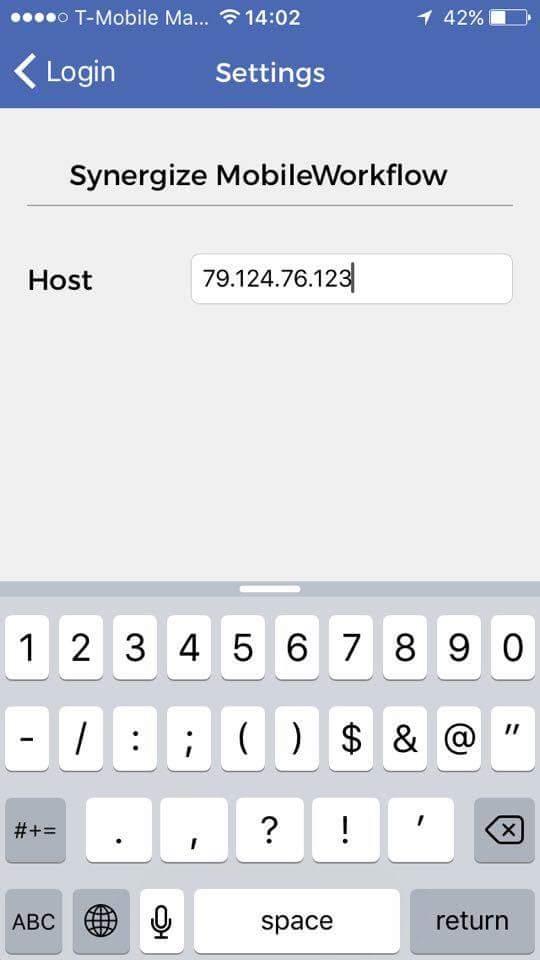
Before logging in for the first time, you need to set up your Host address which is the IP address of the Synergize Server on which you are running the workflow.
-
To do so, click on the Settings button to open the Settings screen.
-
Enter your IP address (with or without http://).
-
You can also specify whether encryption will be used or not.

-
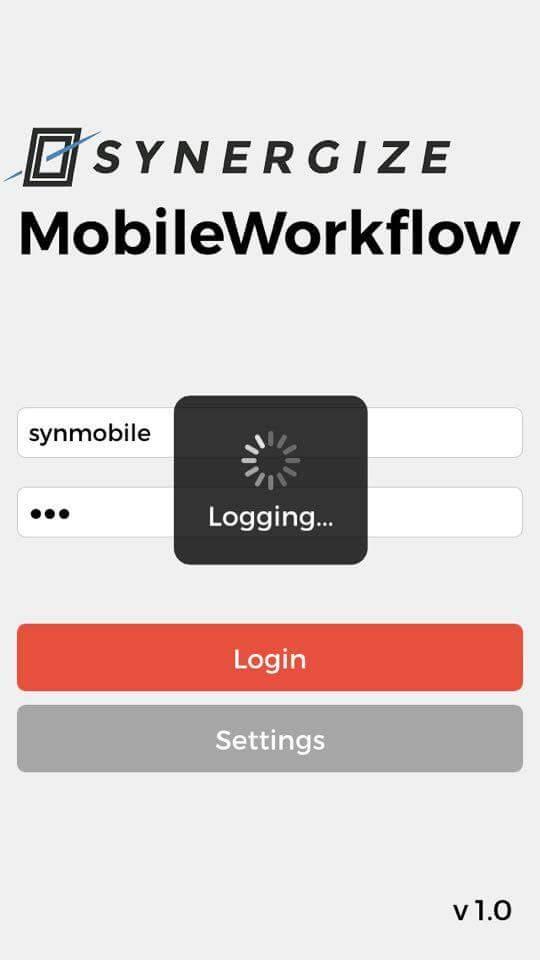
You can now go back to the Login screen and enter your credentials. Tap Login.
-
-
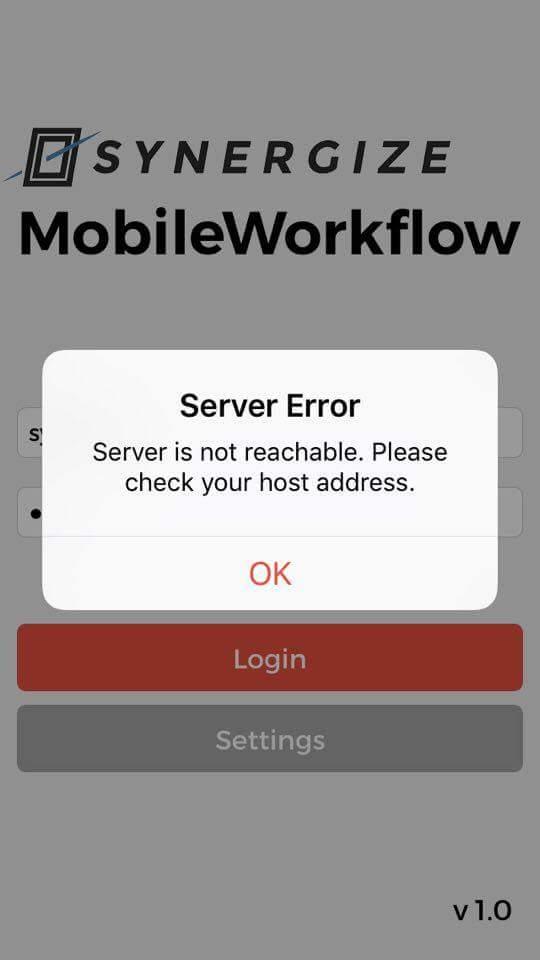
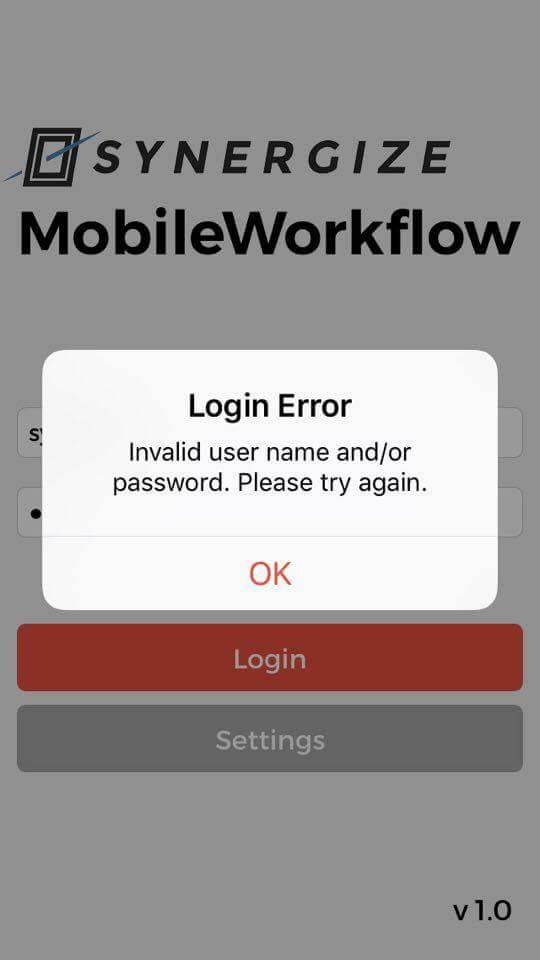
If you haven’t set up the correct Host address or you haven’t entered the correct Username and/or Password, you will not be able to login to the app. In each of the cases you will get one of the following errors:
-
Once logged in, your app will stay active for 10 minutes. After that time you will be redirected to the Login screen to log in again.
-
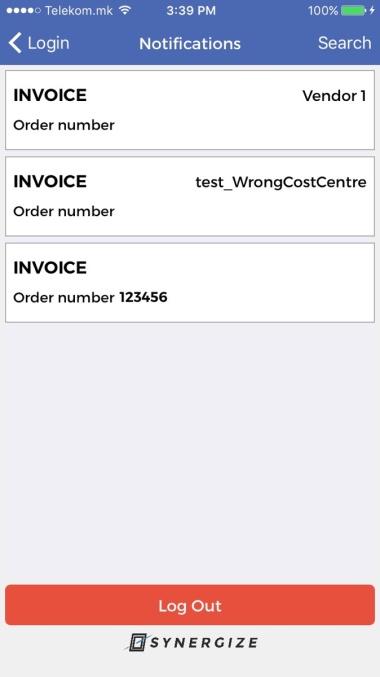
To terminate your session earlier, you can use the Log Out button at the bottom of the Notifications screen.
When the Mobile Workflow application is installed and launched for the first time, a message asks you about push notifications coming from the app.
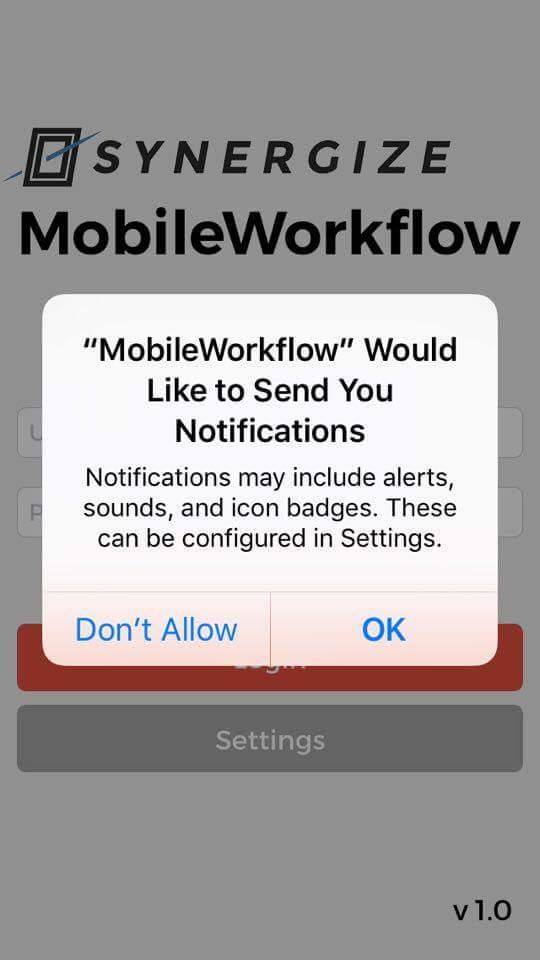
If you choose OK, you receive notifications for each document that comes into your approval queue. You can later change this setting, in the Settings options on your device.
Mobile Device Options:
-
If you have installed the app on multiple devices, push notifications related to your username are received on all the devices you have allowed to receive push notifications from the app.
-
You can register all of your devices and choose which ones will receive notifications about documents needing your approval.
-
You can review each document through the app and approve or reject it. You can also add comments about the document.
Note: If one device is shared by multiple users of the Mobile Workflow application, and push notifications are allowed for that device, then all the users will receive their push notifications on this same device.
If you have turned off notifications in your mobile device Settings panel, you may see the following message at launch time.
Note that you can enter your device settings panel directly by selecting Settings.
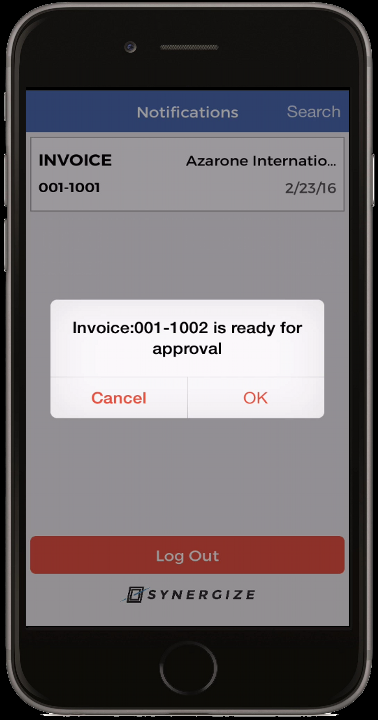
After successfully logging in, you see the Notifications screen.
Here you can see the list of all outstanding invoices requiring your action.
Each document is presented with the following information:
-
Invoice Number
-
Vendor Name and
-
Invoice Date
You can scroll down the list, in case the list of notifications is longer than the screen itself.
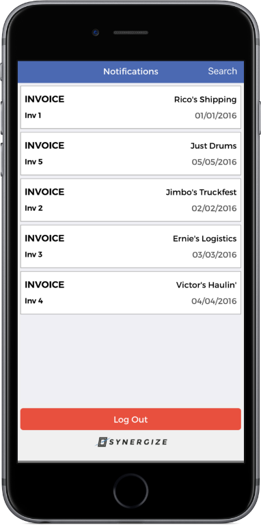
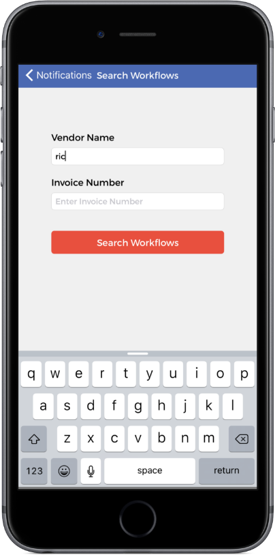
Select the Search function in the top right corner of the Notifications screen to access the Search Workflows screen. You can search documents by entering full or partial name for the Invoice, Vendor, or both Invoice and Vendor.
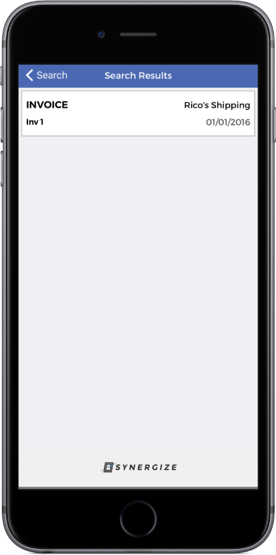
Selecting one of the listed documents from the Notifications screen or from the Search Results screen takes you to the document details on the Workflow Details screen.
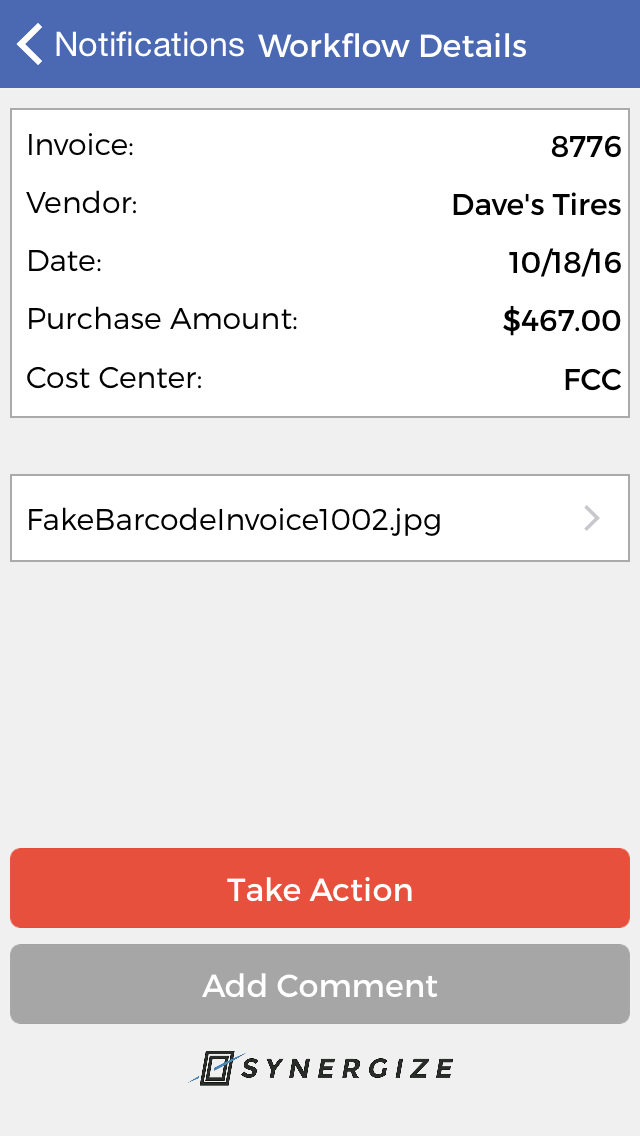
This is the main action screen, where you are able to see all details you need for the selected document, as well as open the document to preview it before making a decision or taking any action.
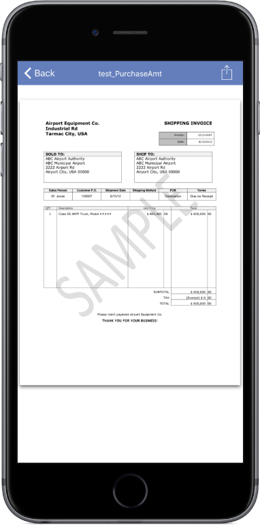
Documents are opened for preview in a separate screen, where you can easily scroll up and down the pages as well as zoom in on specific parts of the documents.
By hitting the Back navigation from the device, you return to the Workflow Details screen to take the appropriate action.
Two buttons appear at the bottom of the Workflow Details screen:
-
Take Action
-
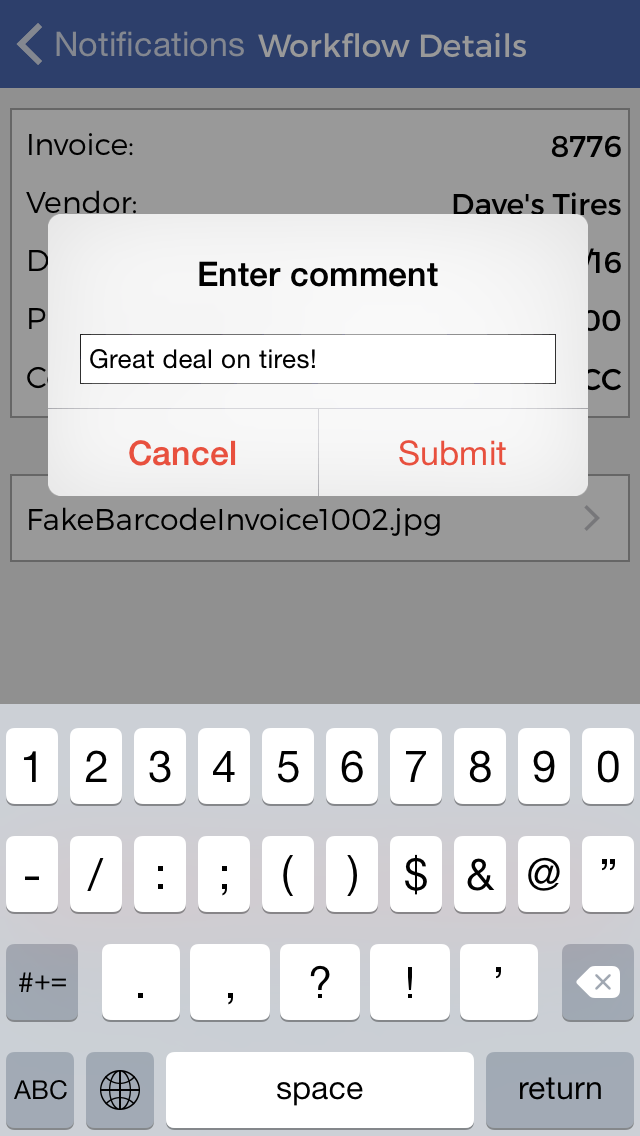
Add Comment
The Take Action button allows you to select an appropriate answer from the list of provided questions or statements related to the selected document
-
If the Purchase Amount is above any limit set for approvals, the Approve option is disabled but you can still approve the document by selecting the Approve (above limit) option.
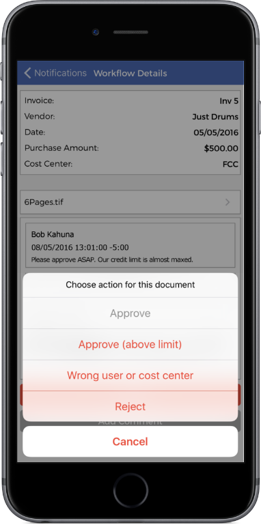
-
If you select Wrong Cost Center or Reject, the reason for the rejection is automatically entered and the document is sent back to the indexing queue.
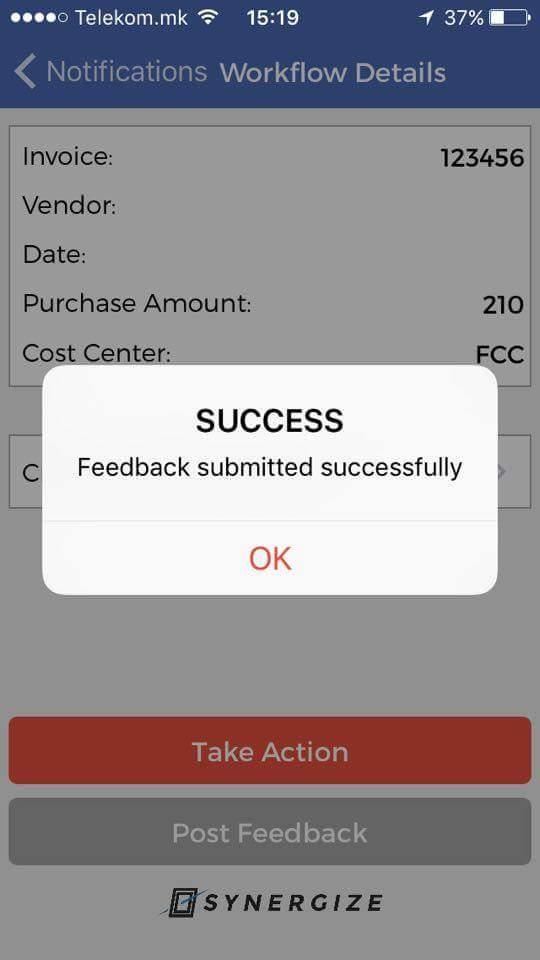
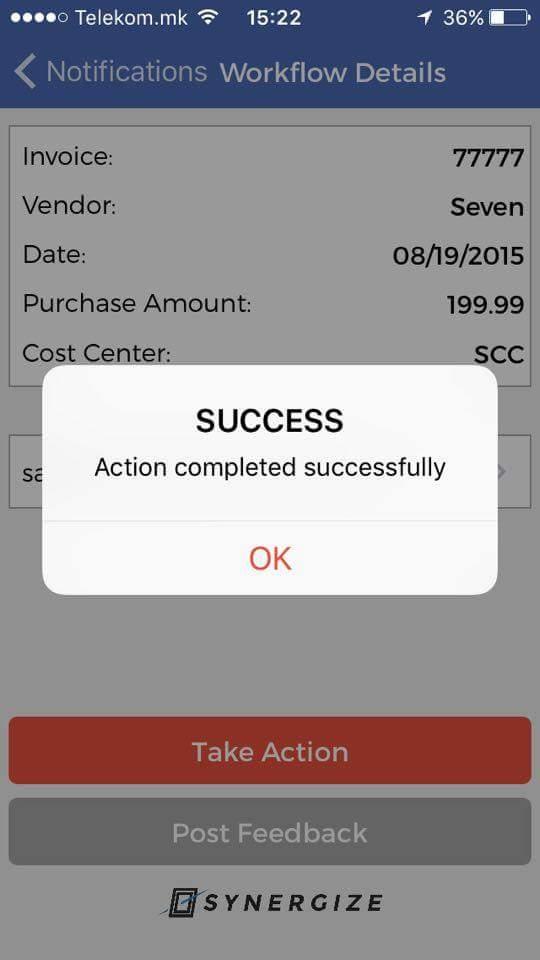
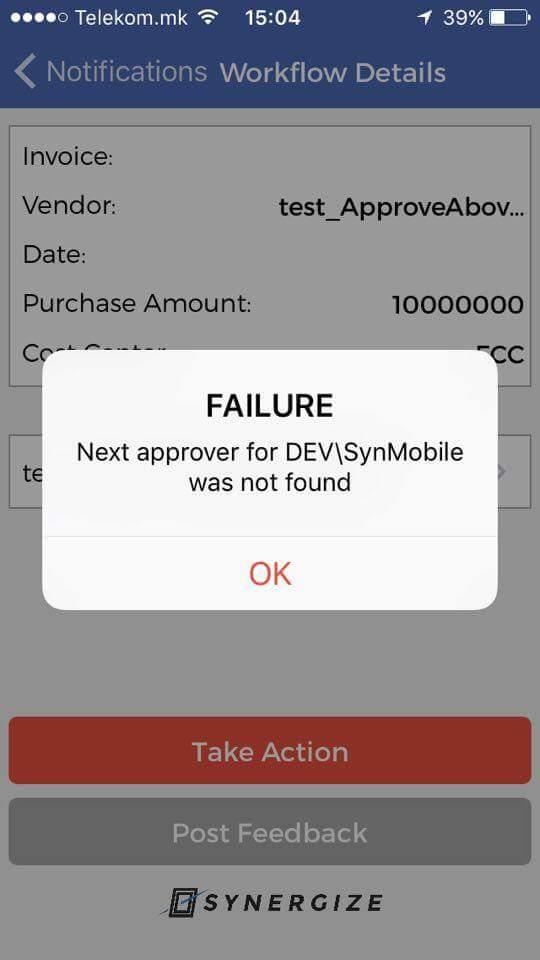
After taking any of the listed actions, you should see a Success or Failure message based on the result of the processed workflow, and then you return to the Notifications screen.
The Add Comment button allows you to make an annotation for the selected document, and defer the decision of what action to take.