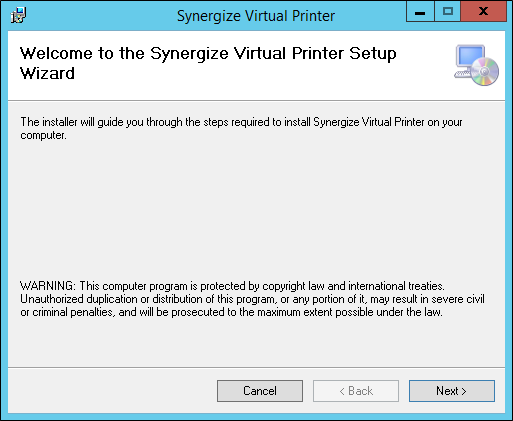
Install and Configure a Synergize Virtual Printer
Synergize Virtual Printer is a virtual printing solution that prepares a file for storage in the Synergize Repository. For example, the output is a PDF or a TIFF file that has the right bit-level and color depth. Synergize Virtual Printer is just like a physical network printer and operates like any other printer on your system. The printed file is output to a specified directory on your system and the filename reflects key information about the document such as the creation date and time stamp.
The installation program for Synergize Virtual Printer sets up the virtual printers which can then be configured. For example, you can select where to save the output files.
-
Click Next through most installation screens, entering the number of printers when prompted.
-
Enter the number of virtual printers you would like to configure. The maximum number of printers you can install is seven (7). Valid entries are 1 through 7.
You can rename the printers; by default the printers are called Synergize Printer 1 through 7.
-
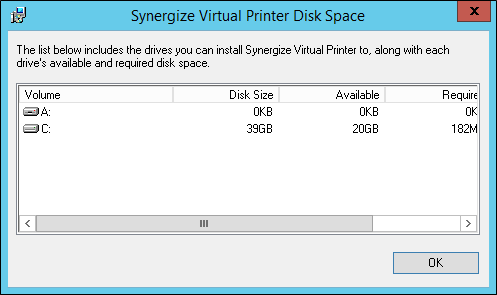
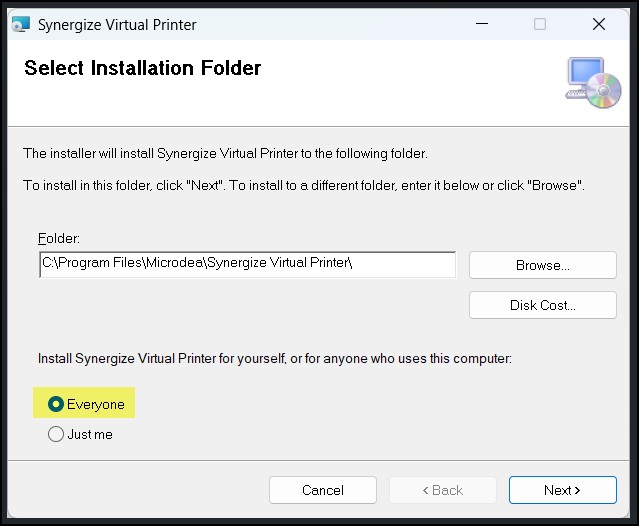
Provide an installation folder. Usually you can accept the default folder, by clicking Next. To install to a different disk, click Disk Cost to display the disk space window.
-
Choose a volume that has sufficient space to install Synergize Virtual Printer.
-
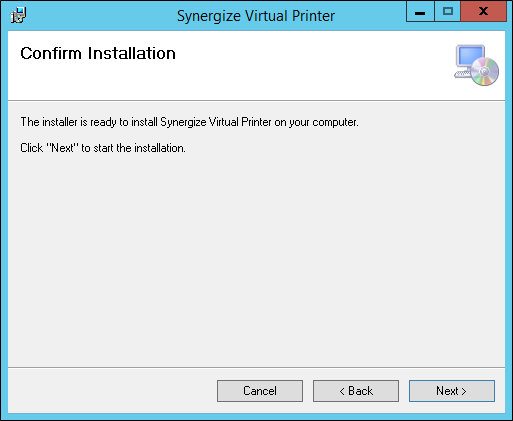
Click Next to start the installation process.
-
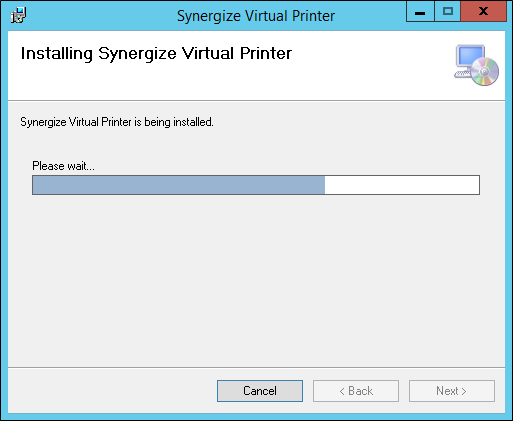
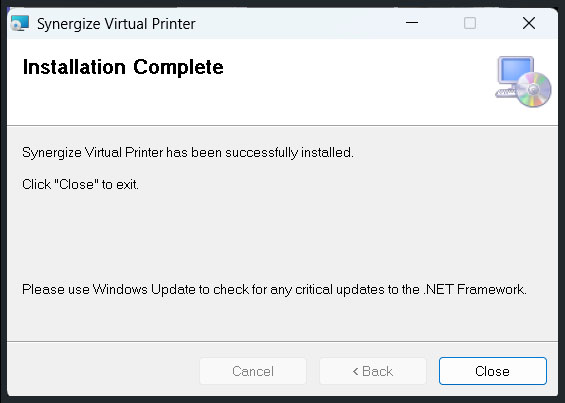
Wait for the installation process to end. Check the taskbar in Windows to see if a hidden window is awaiting your input to proceed (the icon on the taskbar is flashing). If not, click Next when the installation is complete.
-
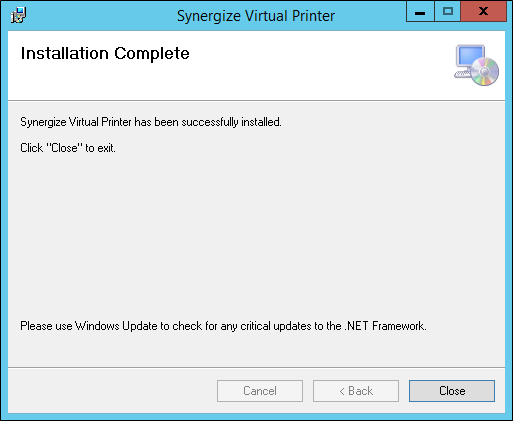
Click Close.
-
To make the 64-bit and 32-bit initialization files identical to start, copy the BuAiniTS.ini file from C:\Windows\System32\spool\drivers\x64\3\ to C:\Windows\System32\spool\drivers\W32X86\3\ (replacing the existing file with the same name).
There is one initialization file for 64-bit and one for a 32-bit environment. The printer server is assumed to be 64-bit but you can configure virtual printers on any Windows client.
The initialization file is just the starting point and will be the source of your initial preferences. From then on, your saved preferences can be customized, which means you can set up each printer differently. You can also reset any particular printer to "factory settings" (from the initialization file) by selecting Restore Defaults from the Synergize Printer configuration dialog.
As a print server Administrator, you can modify the defaults for the printers. What you are doing with this process is modifying the initialization file, which is downloaded for all users who connect to your shared printers.
Note: Remember to modify both the 64-bit and 32-bit initialization files. In the installation instructions there is a step designed to make the 64-bit and 32-bit initialization files identical to start. If this step has not been done, you need to copy the 64-bit initialization file to the 32-bit drivers directory before modifying it.
Users can potentially use the Printing Preferences menu item to make further personalizations. Users can go back to the default settings by selecting Restore Defaults from the Synergize Printer configuration window. Depending on the rights the users have on your print server, they should not be able to make further changes to the defaults you have defined.
-
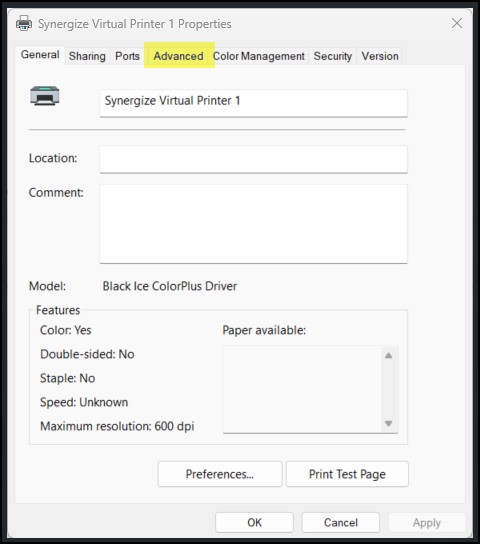
On the server, open the Devices and Printers dialog.
-
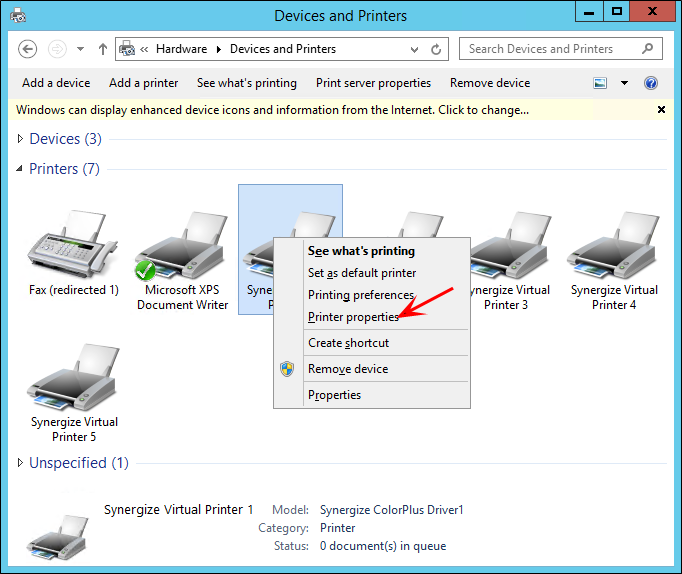
Right-click on any Synergize Virtual printer and select Printer properties.
-
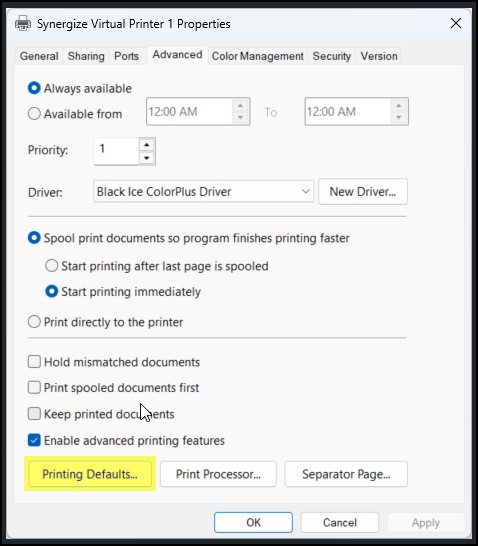
Select the Advanced tab. Click Printing Defaults.

-
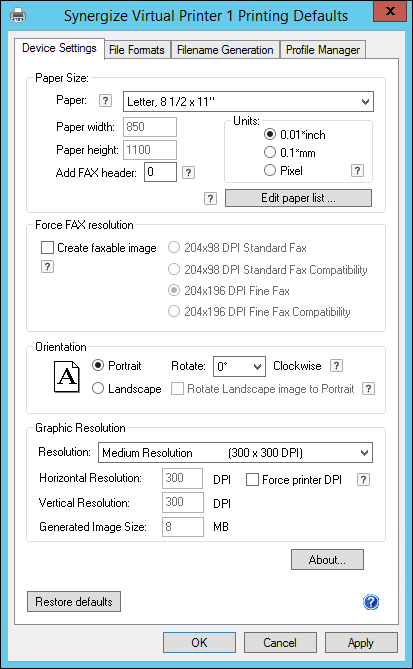
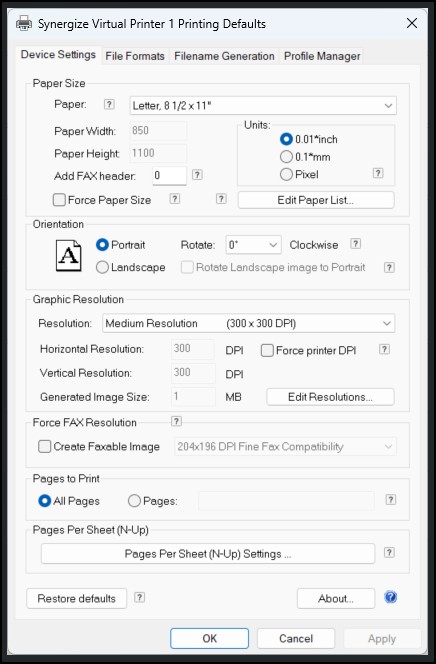
On the Device Settings tab, you can select default paper size, orientation, and resolution.
-
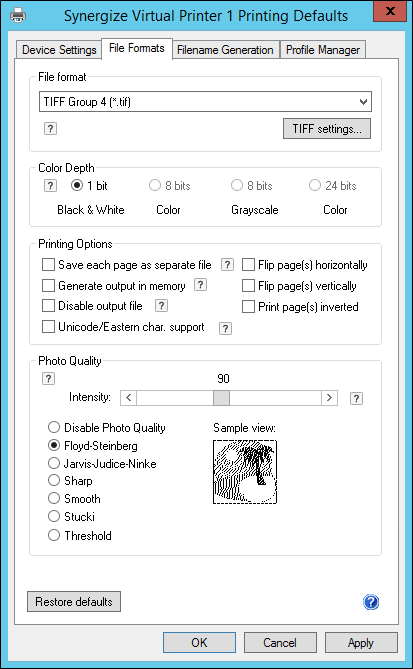
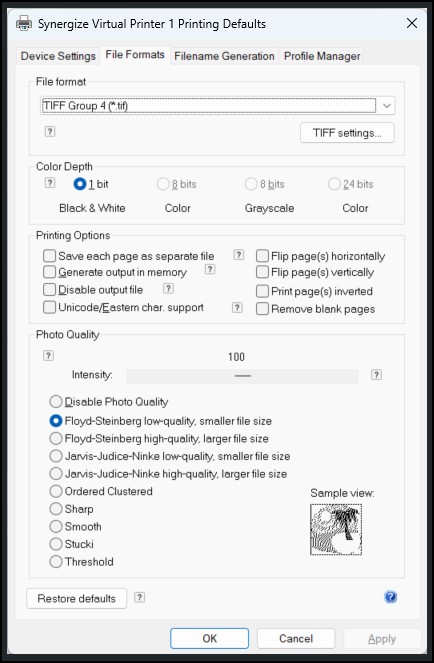
On the File Formats tab, you can select the kinds of files that are supported by default on this printer.
-
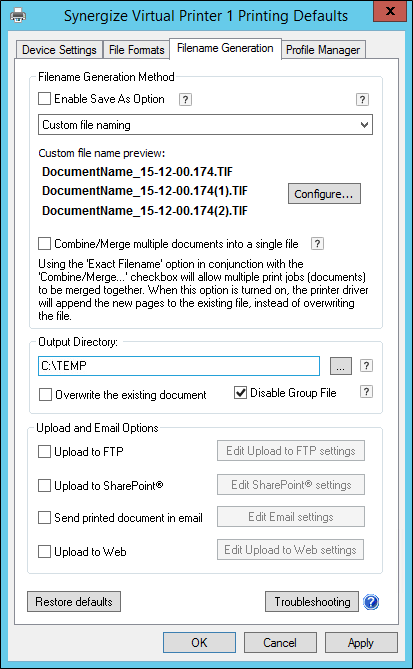
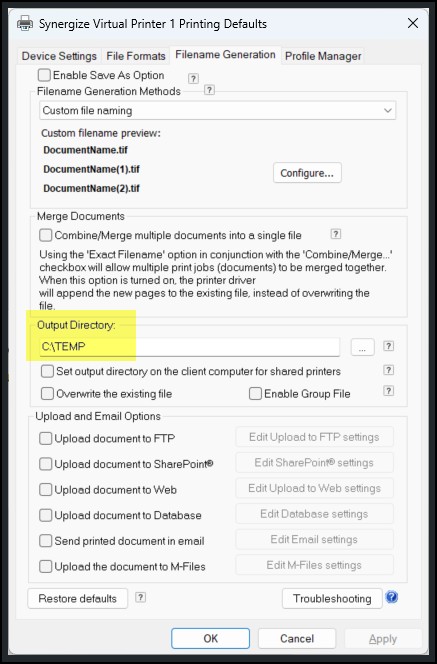
On the Filename Generation tab, you can specify how the virtual output will be named.
-
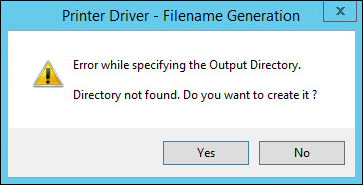
On your first time through the tabs, if the default C:\TEMP output directory does not exist, once you try to move to the next tab, you may see the following prompt.
-
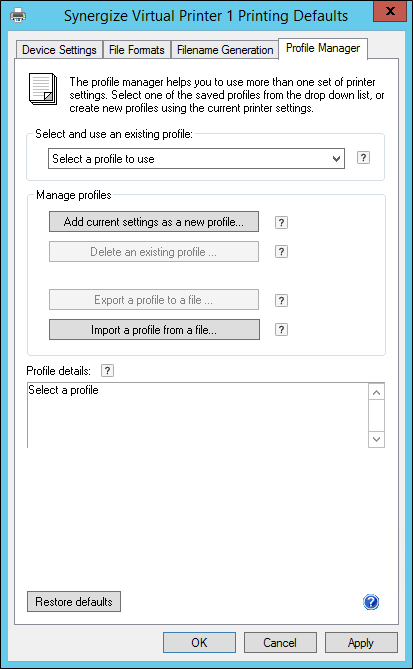
On the Profile Manager tab, you can save the settings you have made as a specific profile that you can load later.
During or after installation, you may experience problems with Synergize Virtual Printer. The following troubleshooting steps may help resolve the problems.
Windows 7 or Windows Server 2008 R2
You may experience a failure during installation, if your operating system needs a hotfix for the printer DLLs to work successfully. If the installation does not fail, this hotfix is probably already applied.
Please contact TRANSFLO® to acquire the hotfix as it has not been made generally available by Microsoft yet. Ask for the Synergize Virtual Printer Hotfix for Windows 7 and Windows 2008 R2.
Upgrade an Existing Installation of Synergize Virtual Printer
If you have issues installing the newest version of Synergize Virtual Printer, it may be due to changes in the program that leave some files and settings from the old installation. There is a cleanup tool that addresses these problems.
Please contact TRANSFLO®, for more information.
As an administrator, you can install and configure multiple Synergize virtual printers for your network users.
As of October-December 2025, the latest version of the virtual printer installer was 2.5.0.
-
Contact Transflo Synergize Support to initiate a request to receive a secure link to the installer.
Our Synergize Support Help Desk is available Monday to Friday
9:00 AM to 8:30 PM EST (6:00 AM to 5:30 PM PST)
Call: 813-386-6000 Extension: 3 or open a new help ticket by email at Synsupport@transflo.com
Support staff can download the latest Transflo Synergize virtual printer package installer at the following secure internal online path:
\\ntprogs\progs\GA Releases\Synergize Virtual Printer\
-
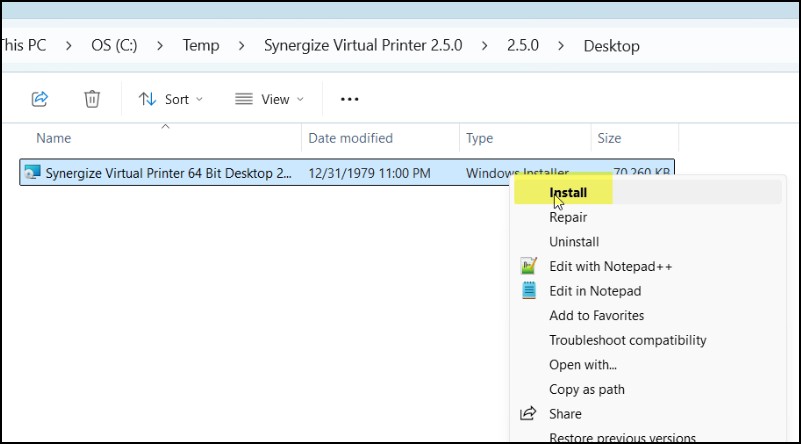
Right-click the Synergize Virtual Printer 64-bit Desktop 2.x installer file and choose Install.
-
Click Next through the initial series of installation screens:
-
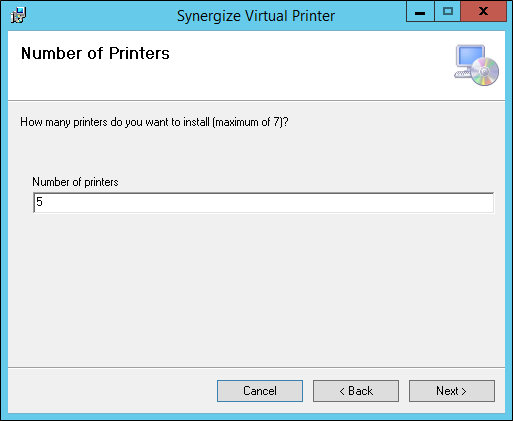
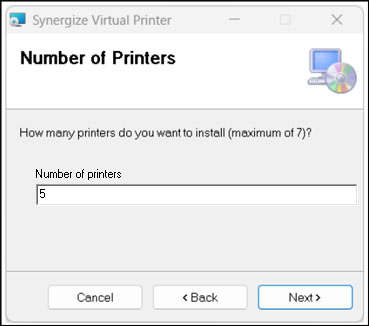
On the Number of Printers screen, enter the number of virtual printers you would like to configure.
-
The maximum number of printers is seven (7).
-
We recommend installing a minimum of 5 printers.
-
Adding extra printers will require you to uninstall the Synergize Virtual Printers that were previously installed.
-
-
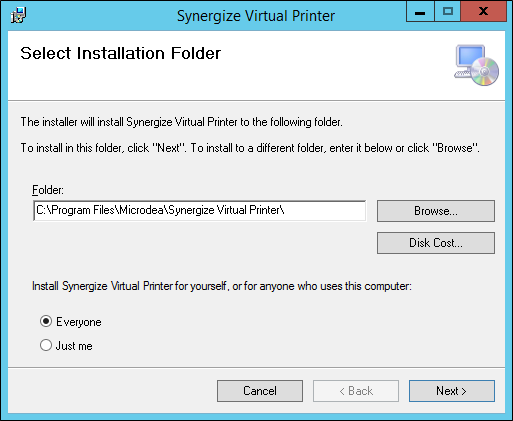
Leave the default installation folder. Start the installation process by clicking Next.
-
Check the taskbar in Windows to see if there is a hidden dialog awaiting your input to proceed (the icon on the taskbar will flash). Otherwise, just click Next until the installation is complete.
-
When the installation process is complete, click Close.
-
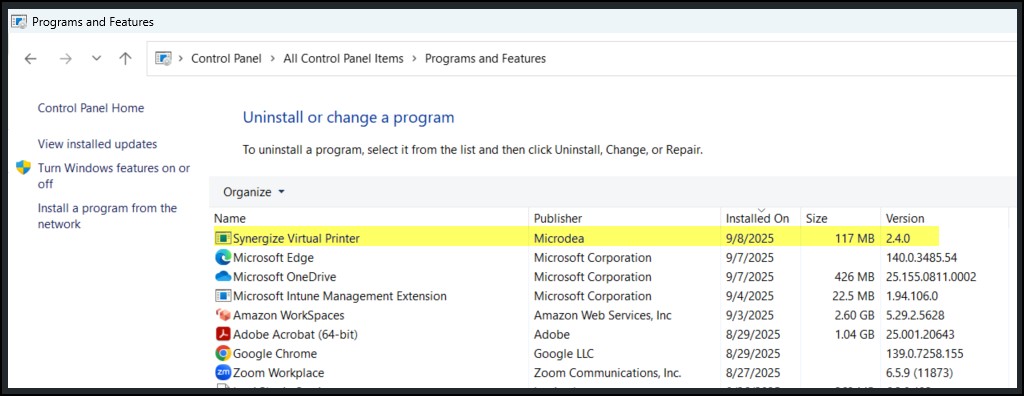
Verify that Synergize Virtual Printer appears in your list of programs in Windows 10 or 11. The newest version is 2.5.0 as of October 2025. To prevent conflicts, uninstall older versions such as 2.4.0.
After installation, set up defaults for your networked Synergize virtual printers.
-
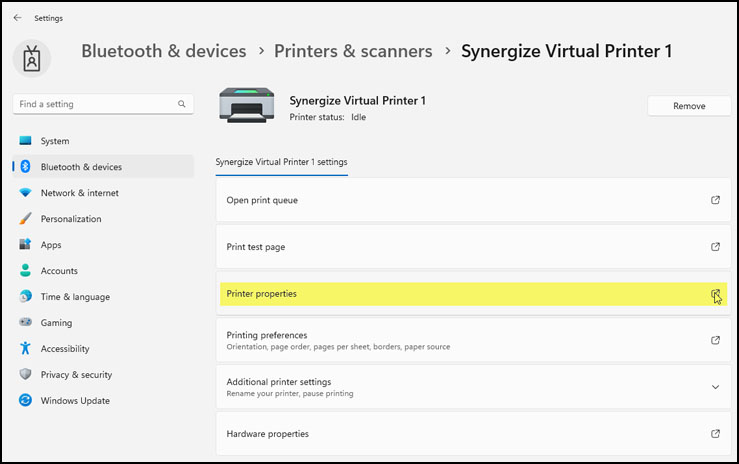
On the server, open the Devices and Printers window, right-click a Synergize virtual printer, and select Printer properties (if using the legacy Windows 10 control panel). In Windows 11 settings, click Bluetooth and devices and then Printers and Scanners. Select a Synergize virtual printer and then click Printer properties.
-
(Optional) To set your printing preferences for the current local user, click Preferences on this screen (the General tab, not the Advanced tab).
-
To set printing preferences for all network users (recommended), click the Advanced tab and then click Printing Defaults.
-
On the Device Settings tab, select the default paper size, orientation, and resolution.
-
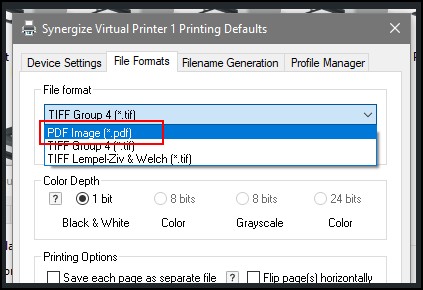
On the File Formats tab, select the types of files, color depth, and quality settings that are supported by default on this printer.
-
On the Filename Generation tab, specify how the virtual output will be named. Update the Output Directory to the Watch directory for your Bulk Print or SPS process.
-
On the Profile Manager tab, you can save the settings you have made as a specific profile that you can load later.

-
Click Apply or OK. After you close all windows for settings, test the virtual printer to confirm it is working as expected.
To support the optional PDF file format, follow these steps:
-
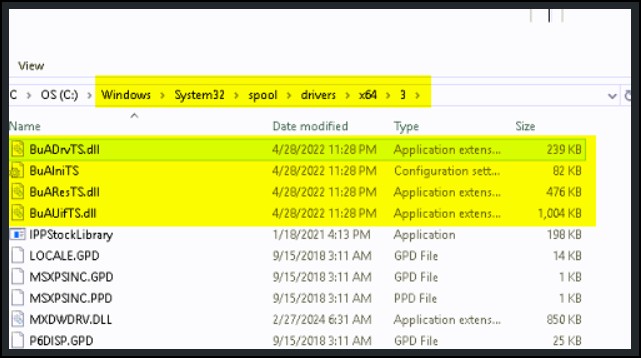
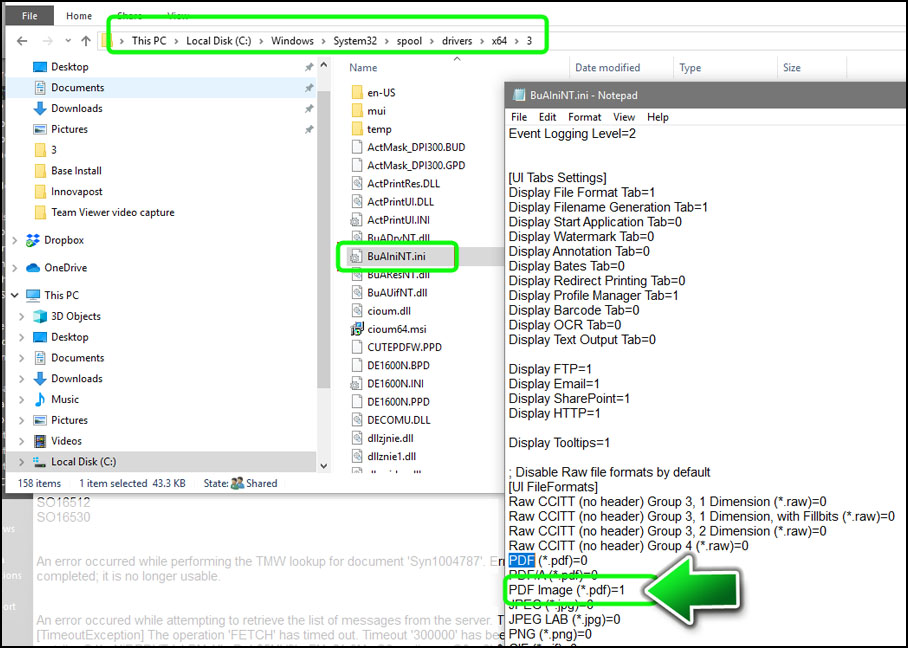
On the Windows print server, navigate to the following path:
C:\Windows\System32\spool\drivers\x64\3\
-
Edit the following .ini file in a text editor such as Notepad:
-
Edit BuAIniNT.ini for a server install
-
Edit BuAIniTS.ini for a client install
-
-
Set the following entry:
PDF Image (*.pdf) = 1
-
Repeat the steps to configure the printing defaults. When setting the supported file format you can now select PDF.
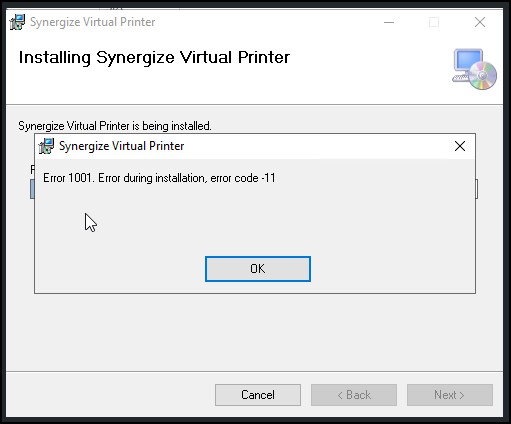
If the following Error 1001: Error during installation, error code -11 error message appears when installing a Synergize virtual printer in a TMW cloud environment, one possible solution is to run the Black Ice cleanup tool.
-
If you get this error message, click OK.
-
Download the following cleanup utility on the app server:
GA Releases\Synergize Virtual Printer\Black Ice Cleanup Utility
-
Run the tool on the AppServer. If it was successful, the reinstall worked properly.
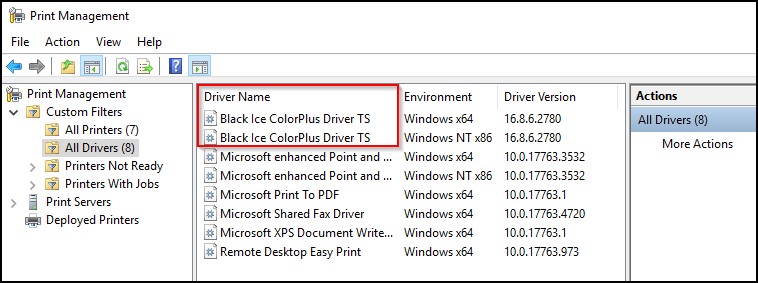
-
If the Black Ice Cleanup Utility doesn't work, launch Print Management, right-click the Black Ice ColorPlus Driver TS entries, and remove the driver packages.
-
Make sure all the Black Ice .dll and .ini files have been deleted. If they still exist, delete them manually.