Install, Register, and Configure Velocity Client
Transflo Velocity Client is our optional 32-bit Microsoft Windows software for small carriers, owner-operators, and drivers who need to invoice a broker after delivering one or more loads.
TRANSFLO Velocity® Client for Microsoft Windows 10 or 11 is an end-to-end business solution for carriers and brokers who want to improve cash flow, make data-driven decisions, eliminate paperwork, and establish stronger digital ties across their business. Velocity Client provides carriers with an alternative to the Transflo Mobile+ app that millions of drivers use with their smart phone or tablet. As a carrier, you can use Velocity Client software to scan and send load documents and invoices to your brokers for payment.
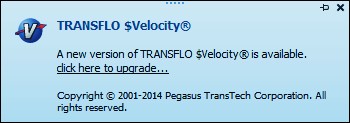
Transflo Velocity Client users with version 3.5 or 3.6.1 are prompted to upgrade to the newest release (as of March 2024 through November 2025, build 3.6.2.44 remains the newest build). All functionality remains the same; however, to enhance platform security, Velocity Client 3.6.2 supports Transport Layer Security (TLS) 1.2 and higher. TLS cryptographic protocols provide communications security over a computer network, typically between a website and a browser. By adopting these advanced encryption protocols, we are protecting data transmitted through our system with the latest security standards, safeguarding sensitive information from potential threats, and ensuring the privacy and integrity of all user data. This upgrade aligns with industry best practices (such as PCI-DSS) and reflects our commitment to providing a secure and reliable platform for our customers.
Tip: Transflo Now and Velocity Client are very similar Windows applications with distinctly different purposes:
-
Transflo Now is for drivers to send load paperwork to their fleet or company.
-
Transflo Velocity Client is for carriers to send load documents and invoices to a broker or payment provider for payment.
-
Transflo Velocity Connects provides a more robust carrier-to-broker solution for Windows Server to support more users and work teams.
To install TRANSFLO Velocity® Client, follow these steps:
-
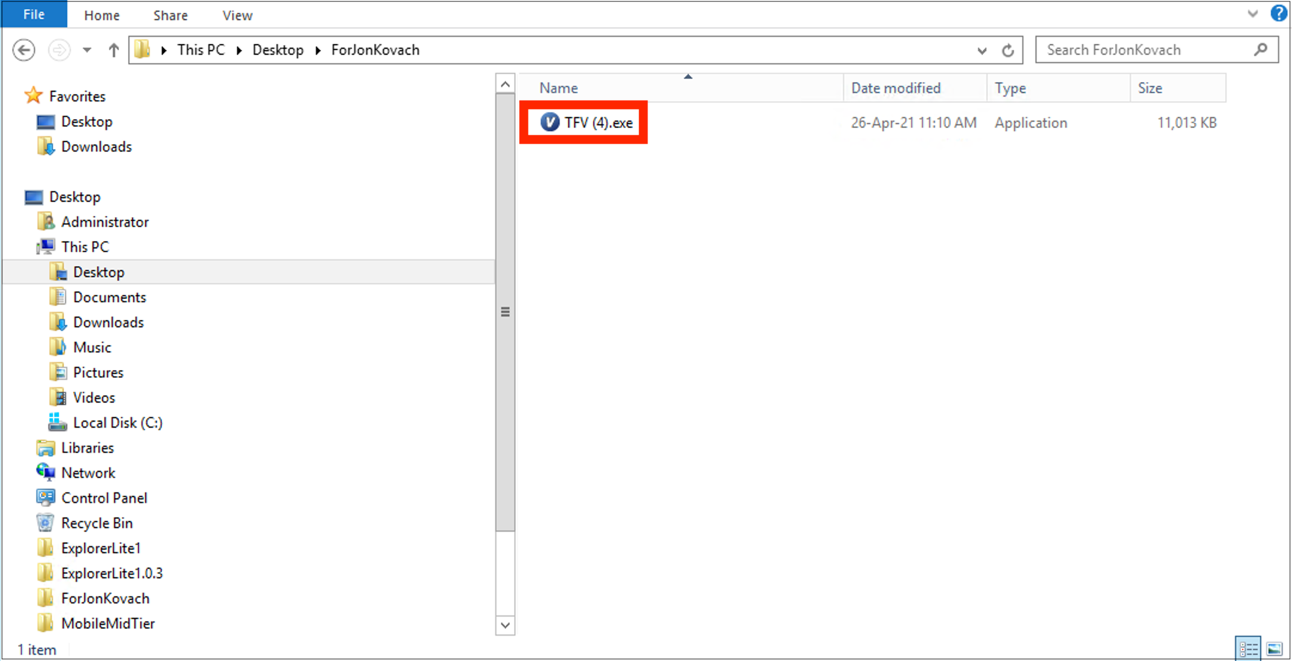
Double-click the .exe file provided to you by your system administrator. Contact your administrator or open a new account with Transflo to purchase a license for your users.
As of February 2024, the current software can be downloaded at the following link:
https://info.transflo.com/transflo-velocity-client-setup
Tip: Instead of directly downloading and installing the latest release, you can download, register, activate, and start using any 3.x release and then look for automatic upgrade messages to update your software to the newest release. For example, after you download 3.6.1, you can upgrade it to 3.6.2.
-
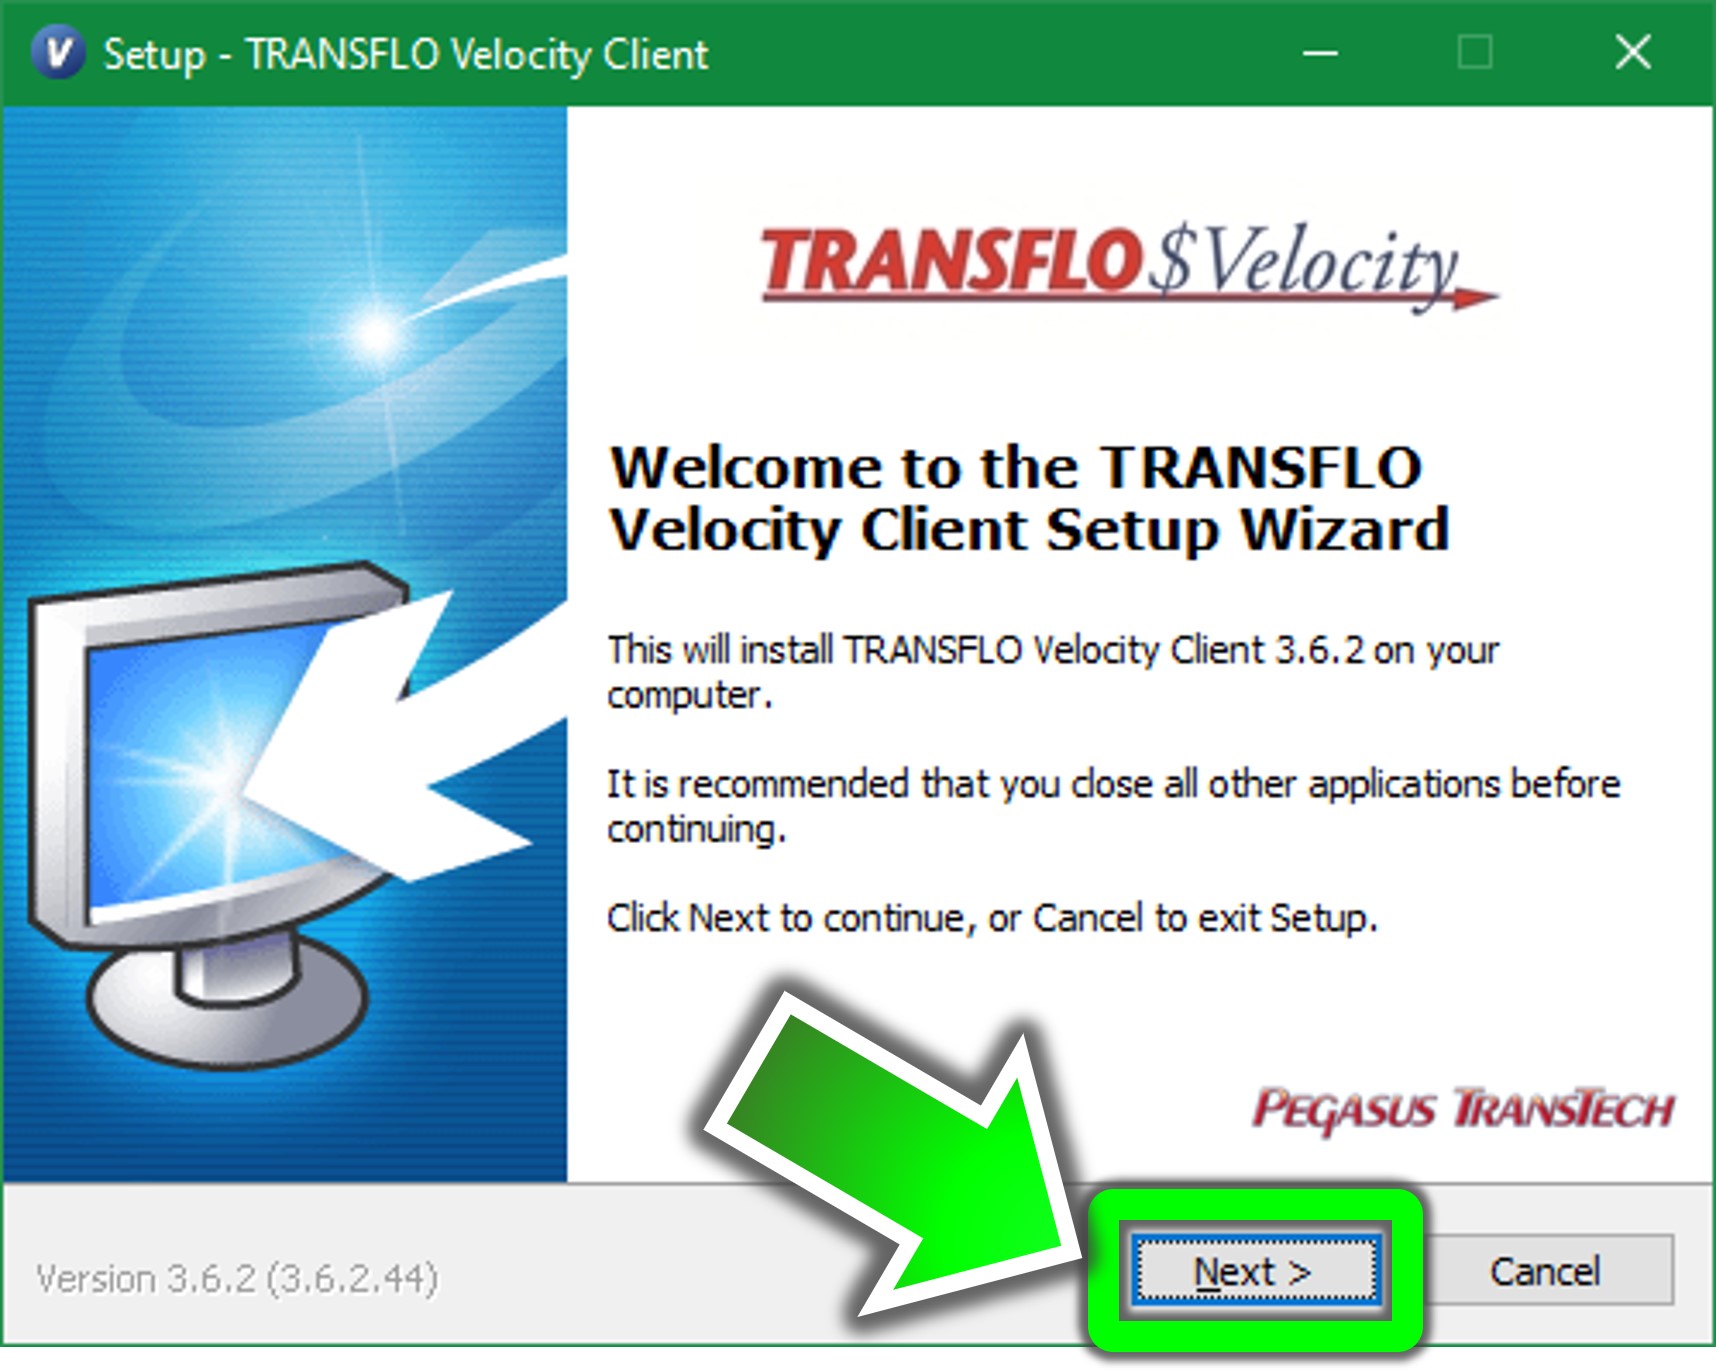
In the resulting TRANSFLO Velocity® Client setup window, click Next.
-
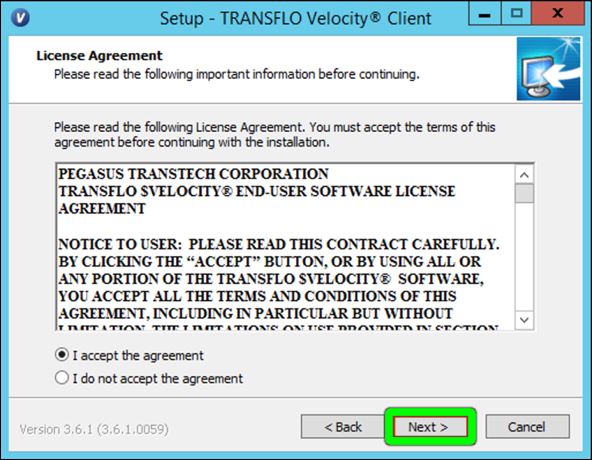
Scroll down to read the license agreement. Select I accept the agreement and then click Next.
-
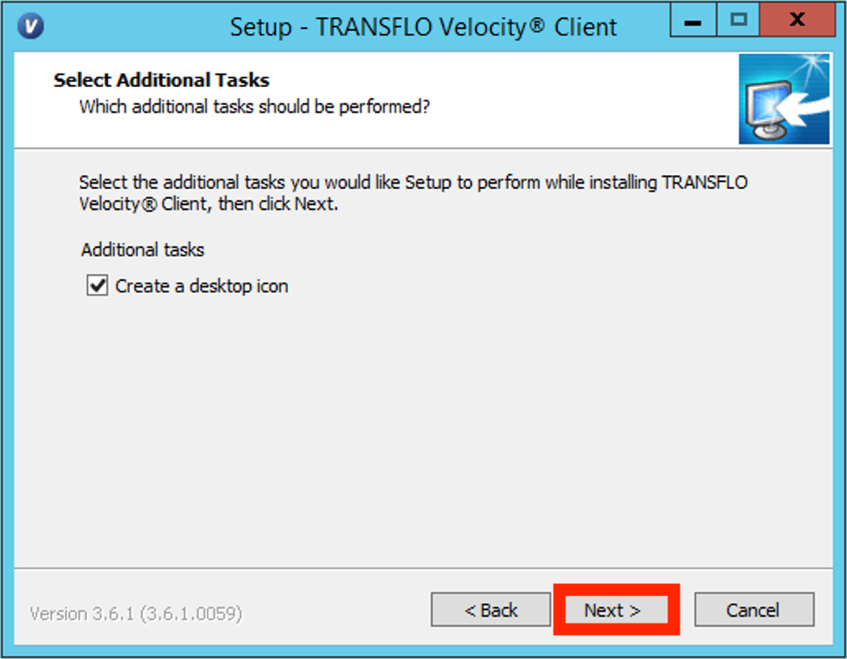
On the Select Additional Tasks window, to create a desktop shortcut, select the Create a desktop icon check box and then click Next.
-
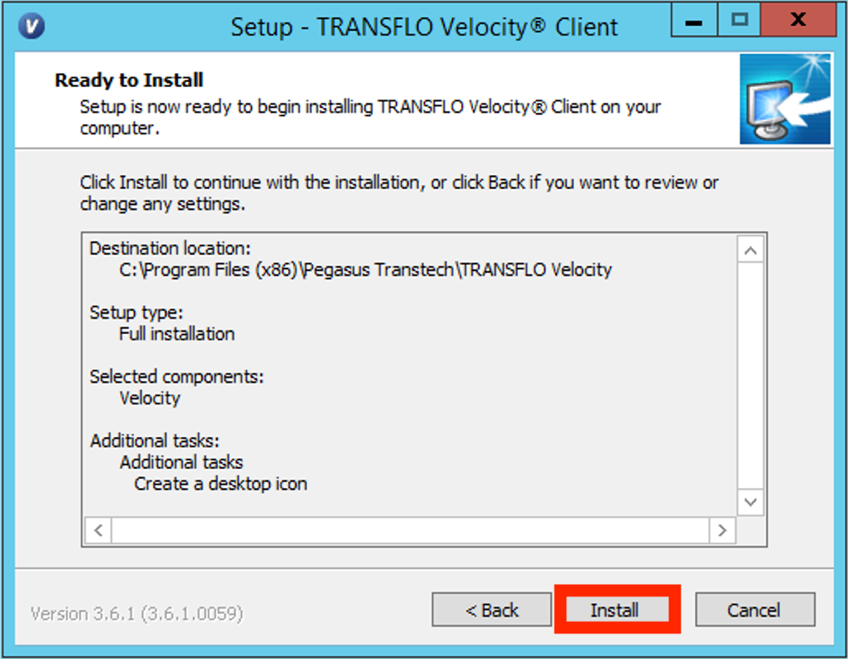
TRANSFLO Velocity® Client is now ready for installation. Click Install.
-
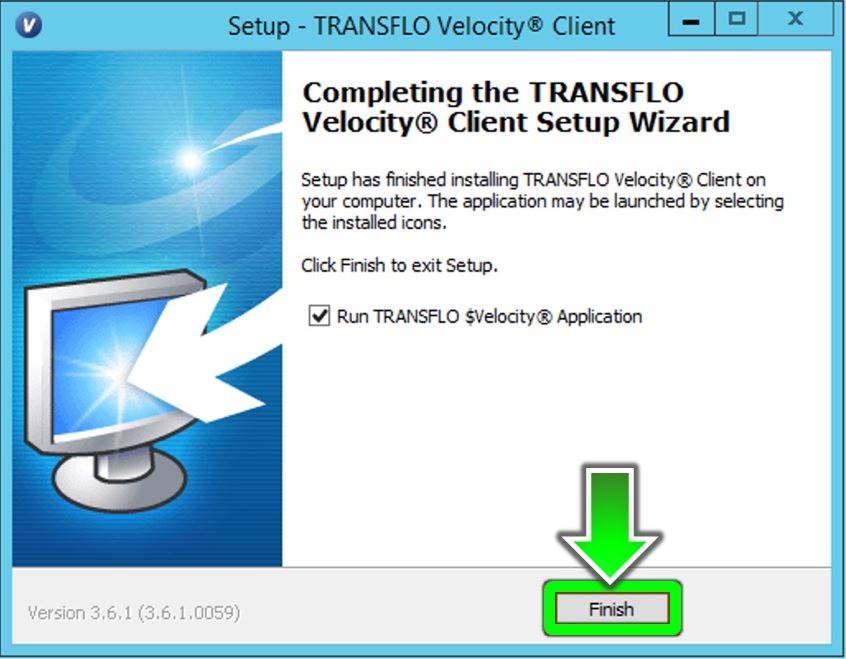
After TRANSFLO Velocity® Client has been installed on your machine, to open the program, select the Run TRANSFLO $Velocity® Application check box. To exit the setup, click Finish.
After installing TRANSFLO Velocity® Client, the next step is to complete your registration.
1. When you first open TRANSFLO Velocity® Client, the User Registration window appears.
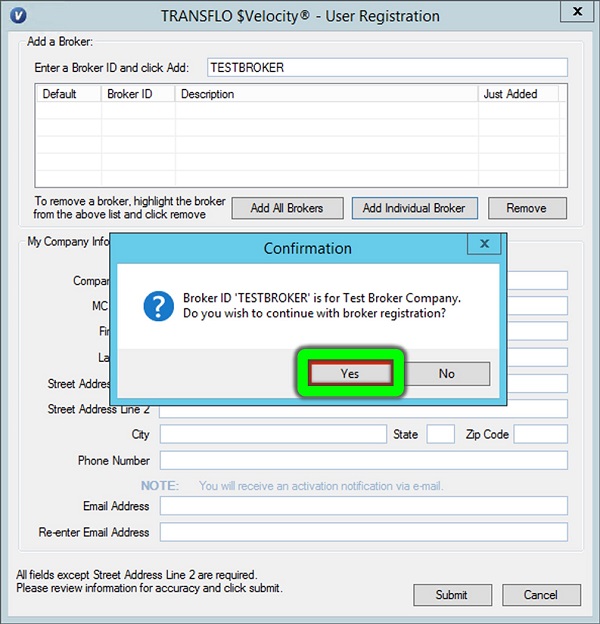
Enter your Broker ID in the first field, then click the Add Individual Broker button.
2. The Confirmation pop-up appears. Click Yes.
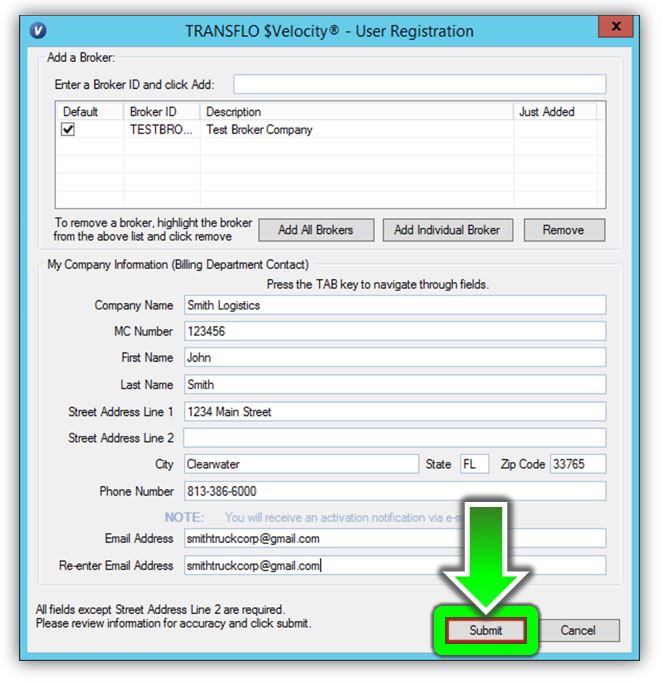
3. Enter your company information into the blank fields.
Note: All fields except Street Address Line 2 are required. You will not be able to submit your registration, until these fields are completed.
Once complete, click the Submit button.
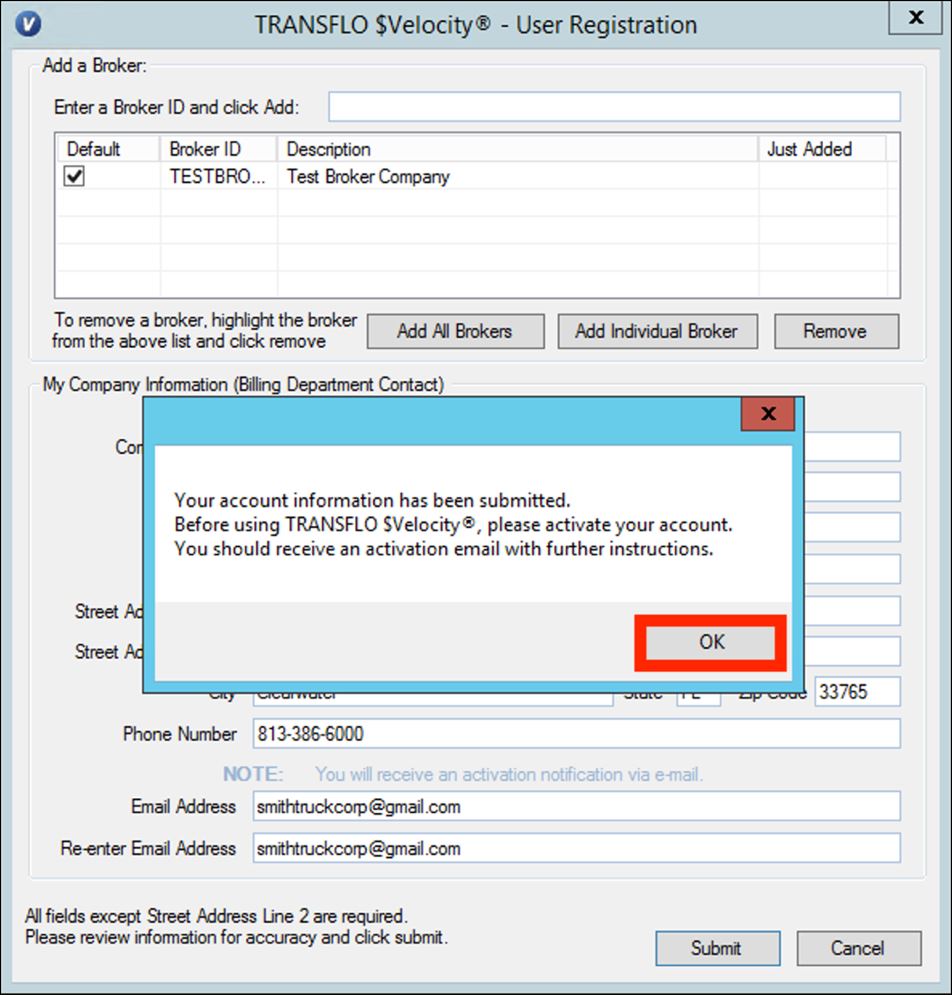
4. After you submit your registration, the Activation pop-up appears and prompts you to check your email for confirmation.
Click OK.
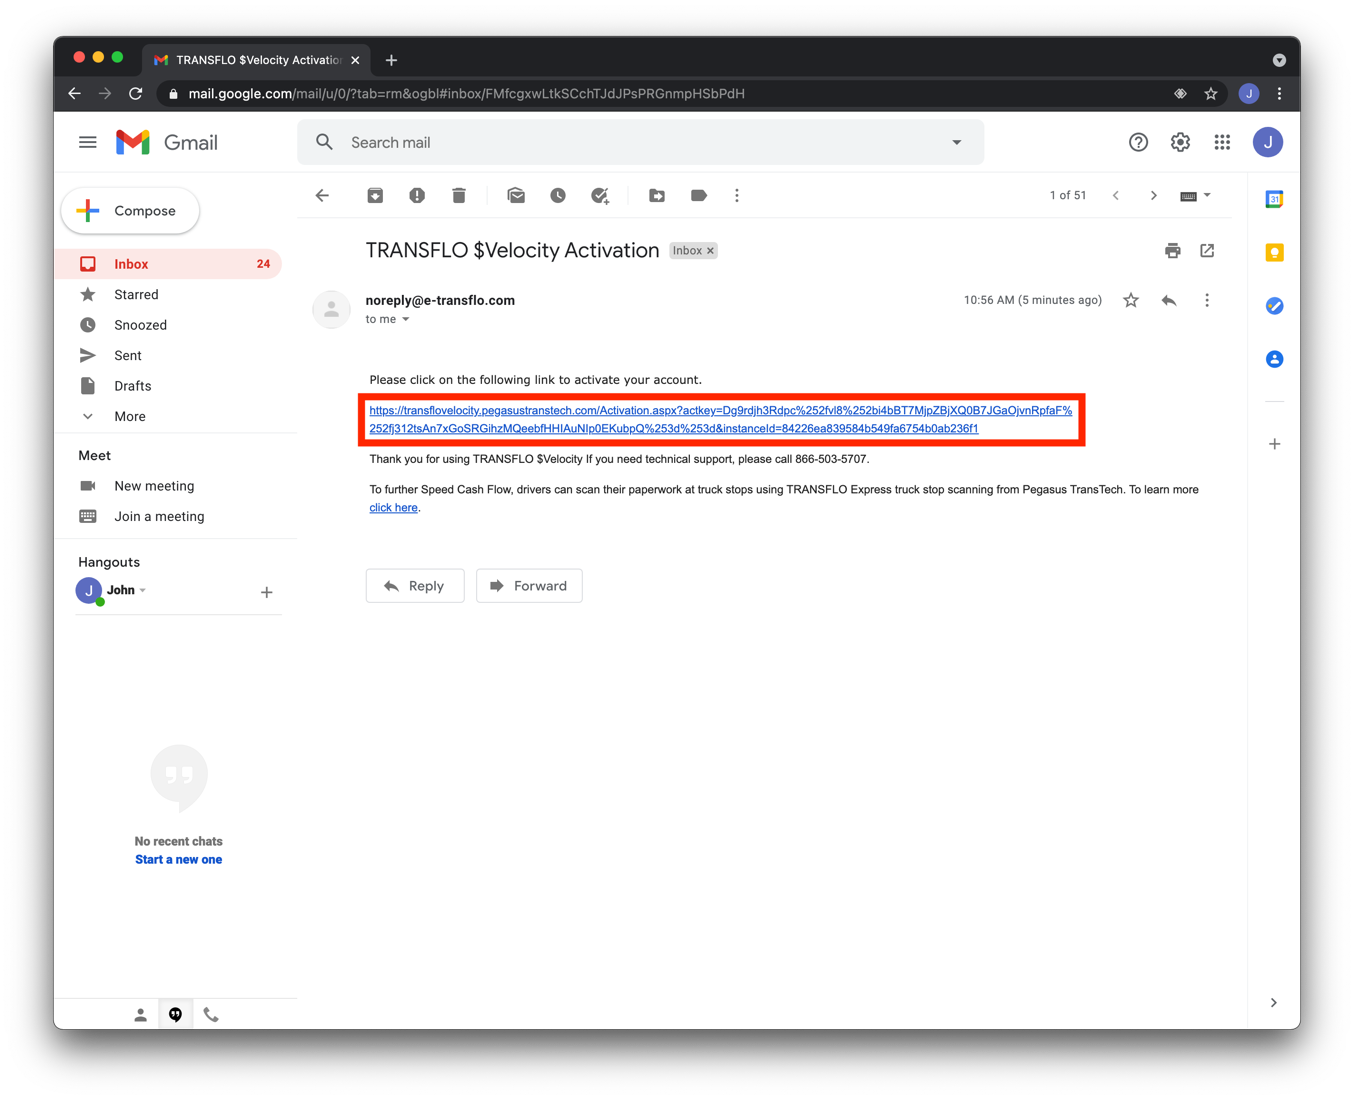
5. From your Email Client, open the email sent from noreply@e-transflo.com and click the activation link.
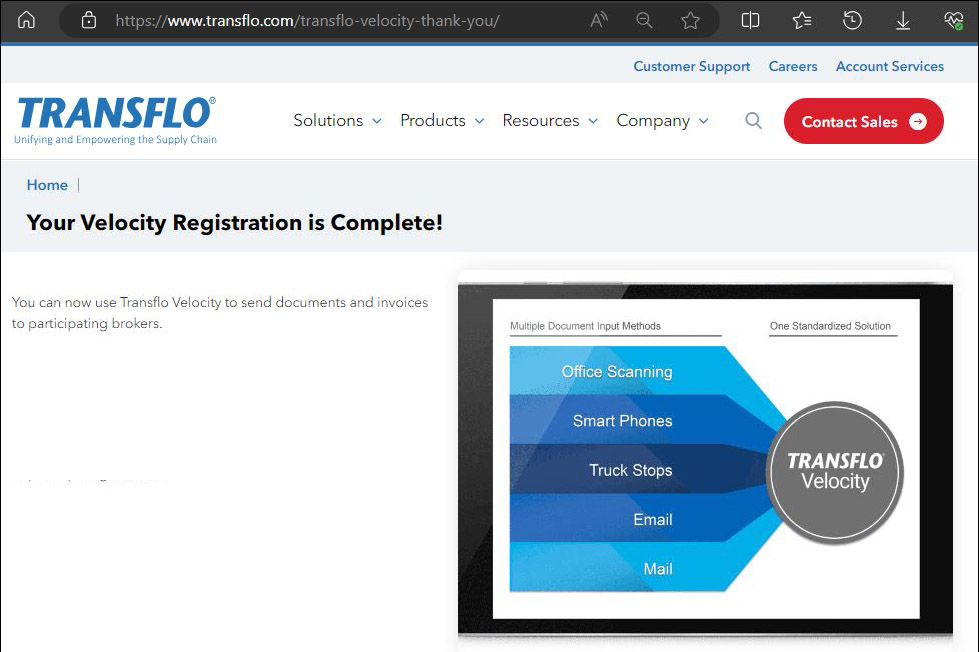
6. The Velocity Thank You Page appears. You are now successfully registered with TRANSFLO Velocity® Client.
-
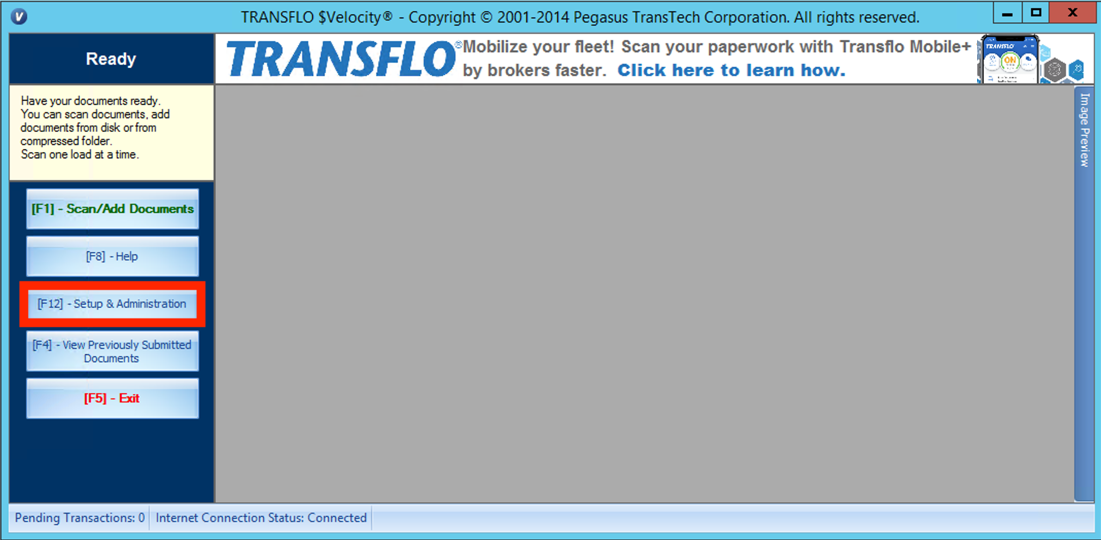
On the Home page, click the Setup & Administration button or select the F12 key on your keyboard.
-
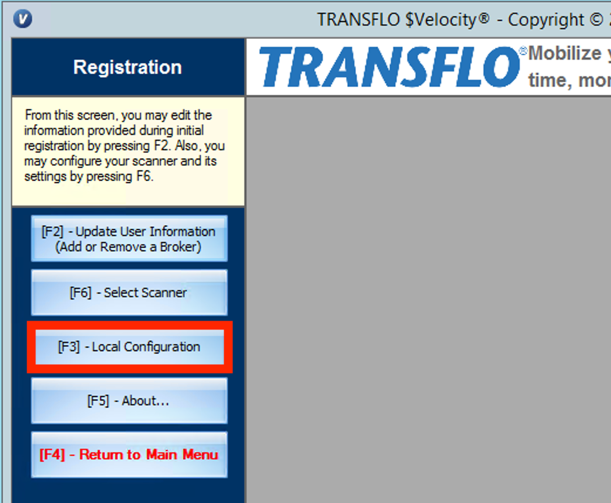
On the Registration page, click the Local Configuration button or press the F3 key.
-
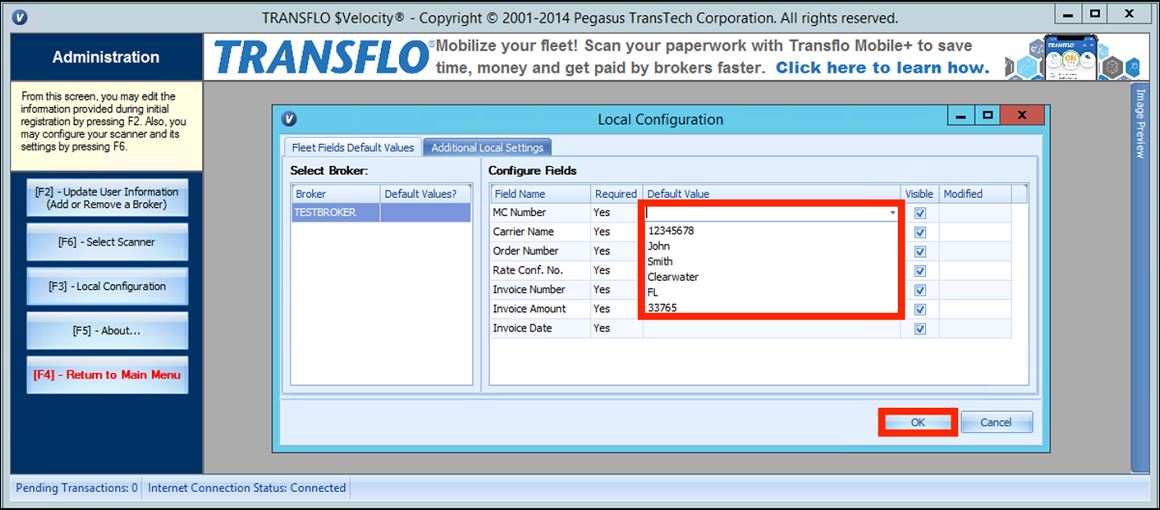
The Local Configuration pop-up appears with the Fleet Fields Default Values tab open.
-
You can click the drop-down menu next to any of the Default Values, to select a value or input a custom value.
-
Once complete, click the OK button.
-
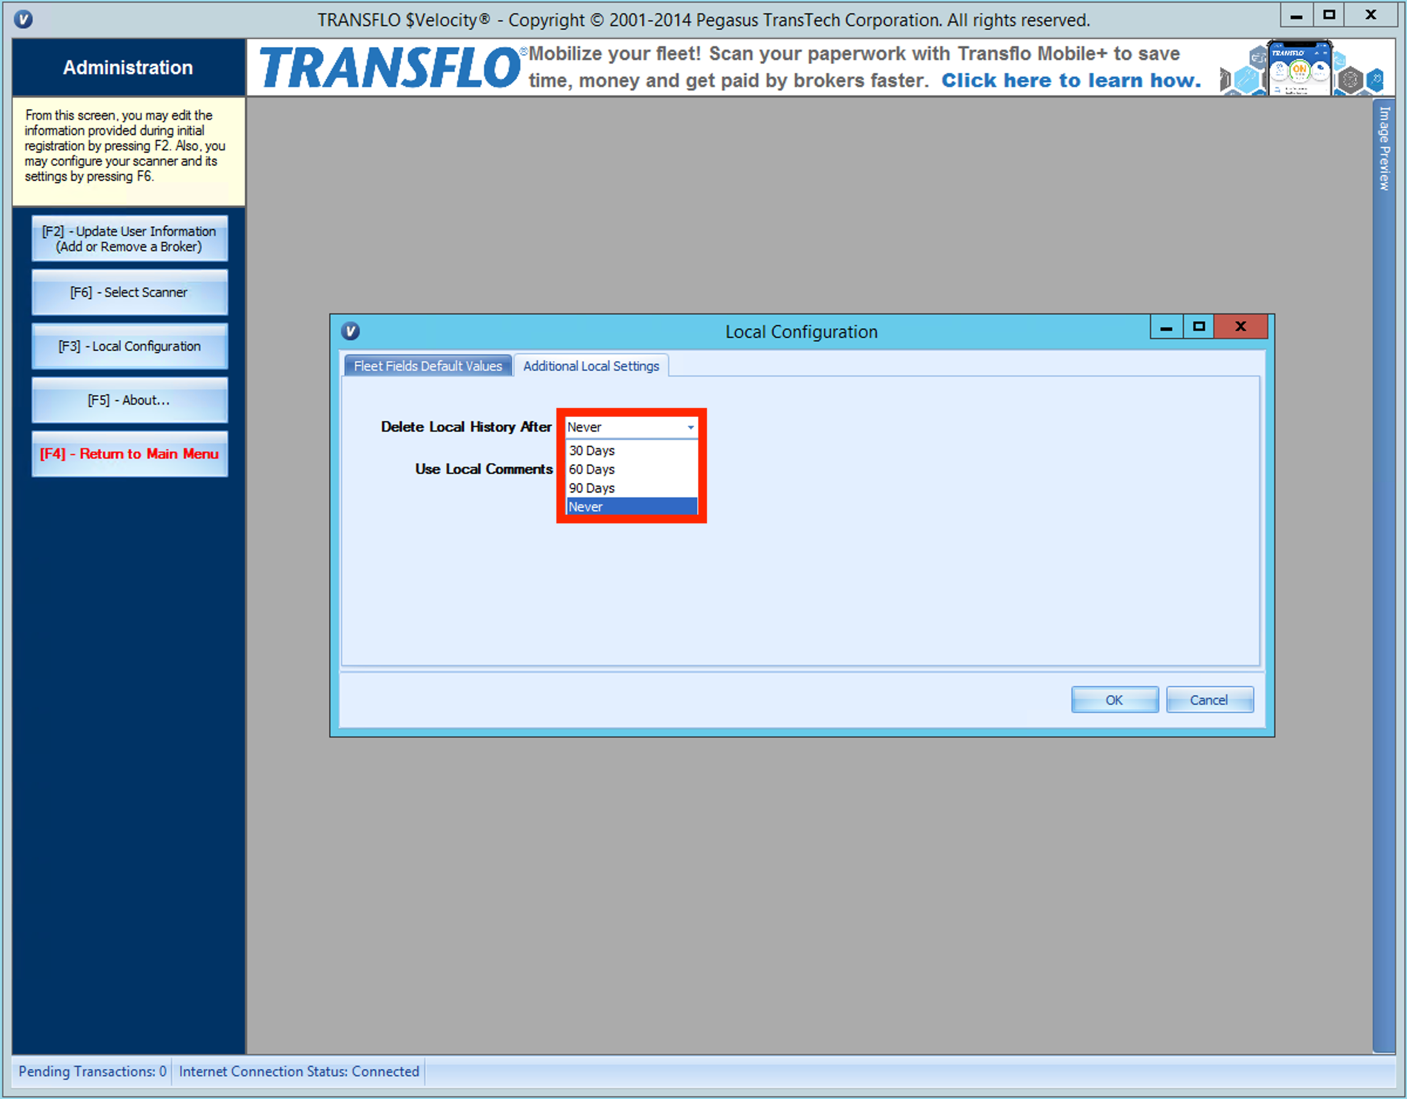
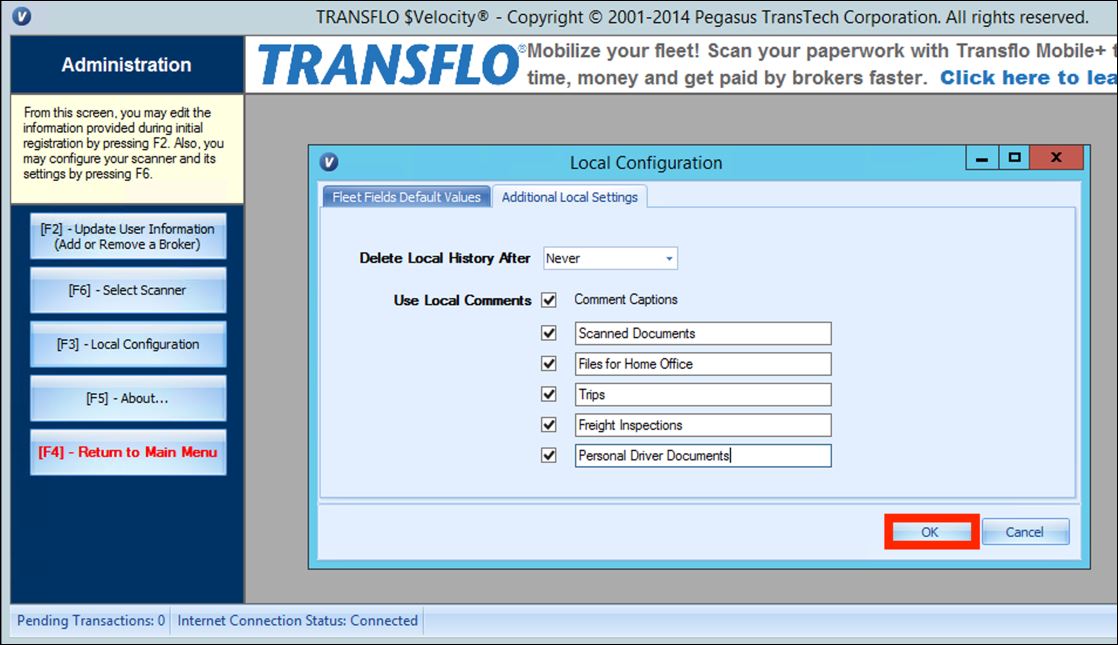
Click the Additional Local Settings tab.
-
You can click the drop-down menu next to Delete Local History After and select a time frame, for the deletion of documents in the application.
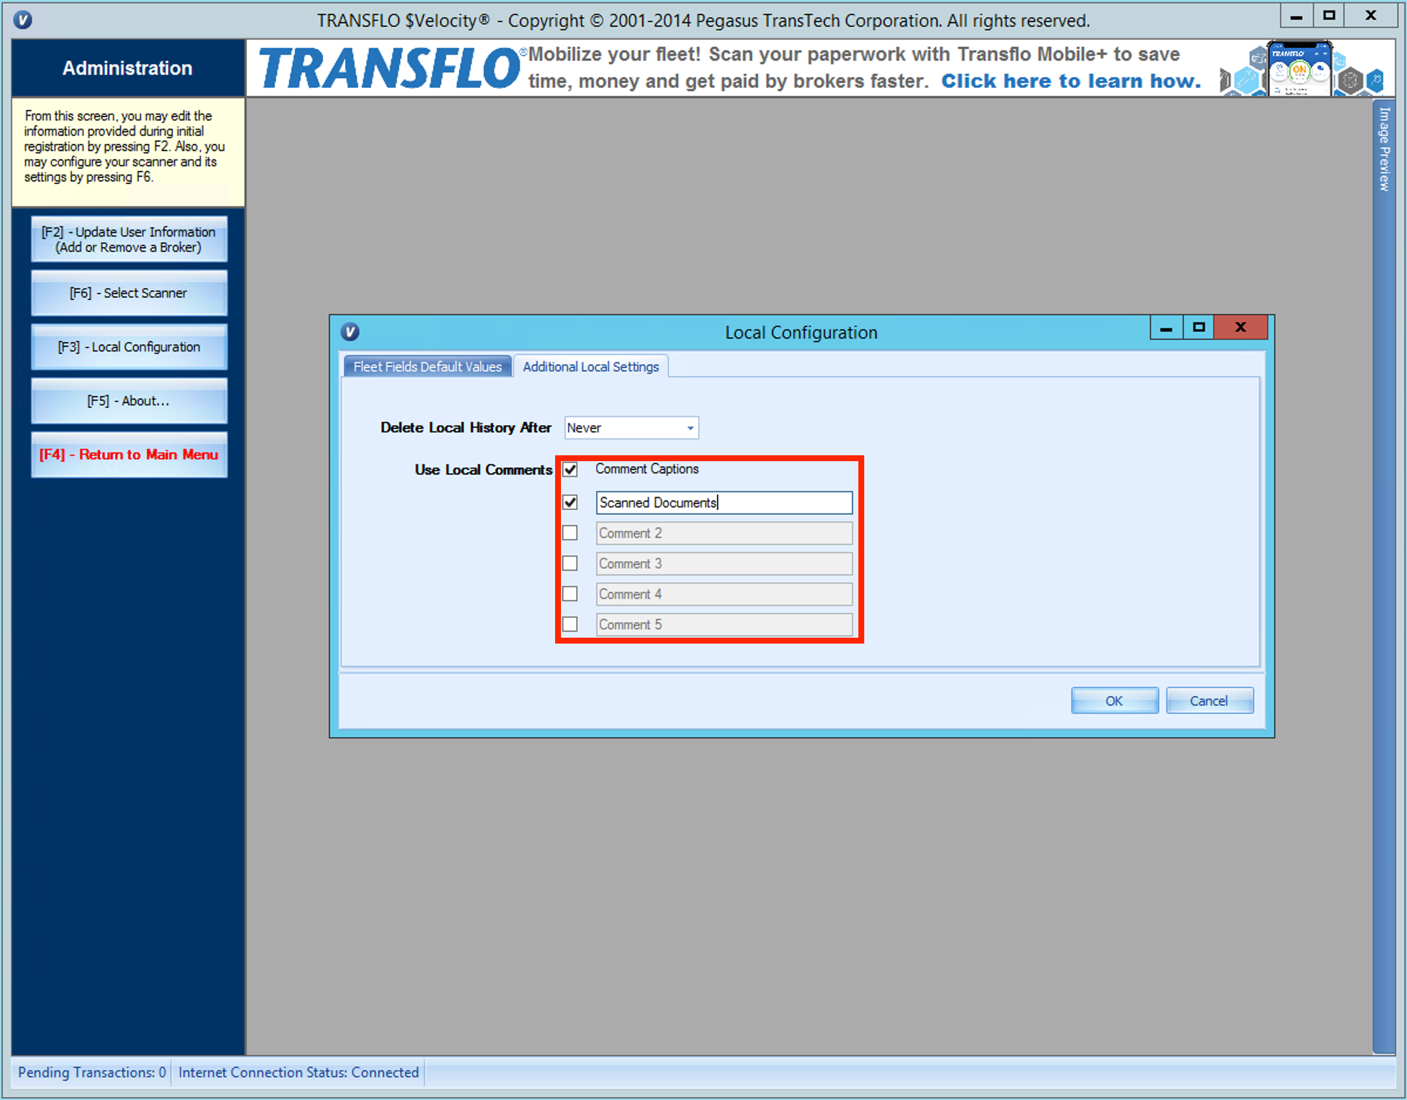
- After choosing the deletion time, click the check box next to Use Local Comments, to add any additional comments to documents. You can add up to 5 comments, per document.
-
After you select a deletion time and any comments, click OK.
