Transflo Now! for Windows
Use this article to download Transflo Now and install, setup, and use the optional Transflo Now software application for Microsoft Windows to scan and send your load documents. Officially branded Transflo Now! (with the exciting exclamation mark!), this software is like having anytime access to your own Transflo Express kiosk anywhere you want to go with your scanner and laptop or PC.
This software requires that your fleet operation be registered in advance for TRANSFLO Now! service. You will need a fleet ID to register and submit documents. Contact your fleet or owner-operator to acquire your fleet ID.
Tip: For added convenience, instead of using traditional desktop scanners and software, you can scan and send documents using the Transflo Mobile+ app.
Tip: If you are a carrier or broker agent and want similar features in a 32-bit Windows application that allows you to invoice a broker for payment after a delivery, contact Transflo to learn more about Velocity Client software for carriers or Velocity Connects for Windows Server.
A more modern cloud software service is available as Velocity Plus Command Center for carriers, brokers, or shippers. The shipper solution is also known as Transflo Unite Shipper Portal.
And we are also improving our next-generation SaaS portal (log in at https://portal.transflo.com) where you can find new Workflow AI editions for carriers, brokers, and factors!
The Transflo Now! software application for Windows 10 or 11 gives drivers the freedom to scan paper load documents for their trucking carriers, brokers, shippers, and fleets and send electronic documents from their truck, cab, home, office, or any location using a PC or laptop computer and a standard TWAIN-compliant scanner.
TRANSFLO Now! works with Microsoft Windows 10 or 11 and any TWAIN compatible scanner. TWAIN is the standard interface between software programs and image-capturing devices such as scanners. Nearly all scanners in the marketplace contain a TWAIN driver.
Summary of Steps:
-
Download and install the latest software (3.5.1.236 as of November 2024 and verified May 29, 2025) at the following link:
https://transflonow.pegasustranstech.com/install/transflonowsetup.exe
-
Complete the Registration screen with your Fleet ID. (Your fleet manager can give you the correct company Fleet ID or you can find it on your TRANSFLO Express cover sheet barcode.)
-
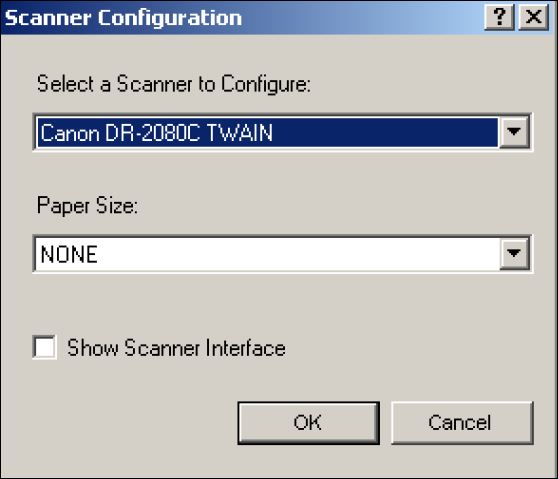
Select Setup and Select Scanner and enter your scanner information.
-
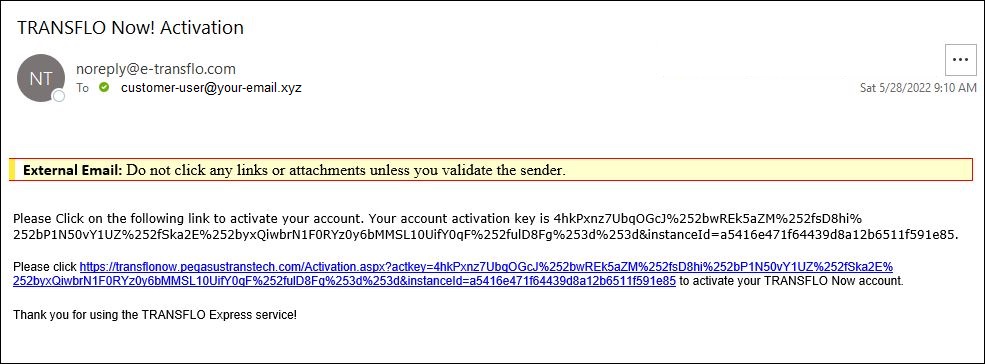
Click on the activation link you received by email to complete your registration.
Tip: If you want all these features in a mobile app for Android or iOS smart phones or tablets, download the Transflo Mobile Plus app.
This solution uses the same infrastructure as the Transflo Express truck stop scanning service, delivering high quality images straight into your load pickup, delivery, and invoicing workflow!
-
Free!
-
Easy to download and install.
-
Fleet ID ensures accurate delivery; fleets can configure indexing at a batch or document level.
-
Easy to use with no training required; works with a wide variety of scanning devices.
-
Documents are delivered the same way they would be from a truck stop.
-
Users receive a confirmation code by email.
-
Users have a document history review screen to view the status of all transactions.
-
Documents can be viewed online for up to 14 days after submission. Drivers and fleet staff can access documents through an online confirmation viewer at www.transfloexpress.com. Simply enter the confirmation code to see a PDF or TIFF image.
This software will only work if your fleet is signed up for TRANSFLO Now! service. You need a fleet ID to register and submit documents. Contact your fleet to acquire your fleet ID.
TRANSFLO Now! for your Microsoft Windows computer runs on a laptop, PC, or workstation. It also runs on newer touch-screen tablets but requires a keyboard or mouse; it does not support touch-screen functionality. If you are interested in TRANSFLO Mobile+ for your smart phone or tablet, visit our Transflo Mobile product page.
TRANSFLO Now! is compatible with Windows XP, Vista, Windows 7, Windows 8, Windows 10, and Windows 11. It is not compatible with Windows RT. TRANSFLO Now! will work on Microsoft Surface devices that have Windows 8.1, 10, or 11 and may require compatibility mode for some features or might not support some features.
To install Transflo Now!, be ready or have someone in your IT department or helpdesk to help you do the following steps:
-
Download the software installer.
-
Follow the instructions on the screen.
-
Complete the Registration screen where you will need to enter your Fleet ID. (Your Fleet Manager should have your company Fleet ID or you can find it on your TRANSFLO Express Cover Sheet barcode.)
-
Select Setup and select your scanner and enter the scanner information. TRANSFLO Now! works with any TWAIN compatible scanner. TWAIN is the standard interface between software programs and image-capturing devices such as scanners. Nearly all scanners include a TWAIN driver.
-
Click on the activation link sent to your email after you receive it to complete your registration.
To download and install Transflo Now, follow these steps:
-
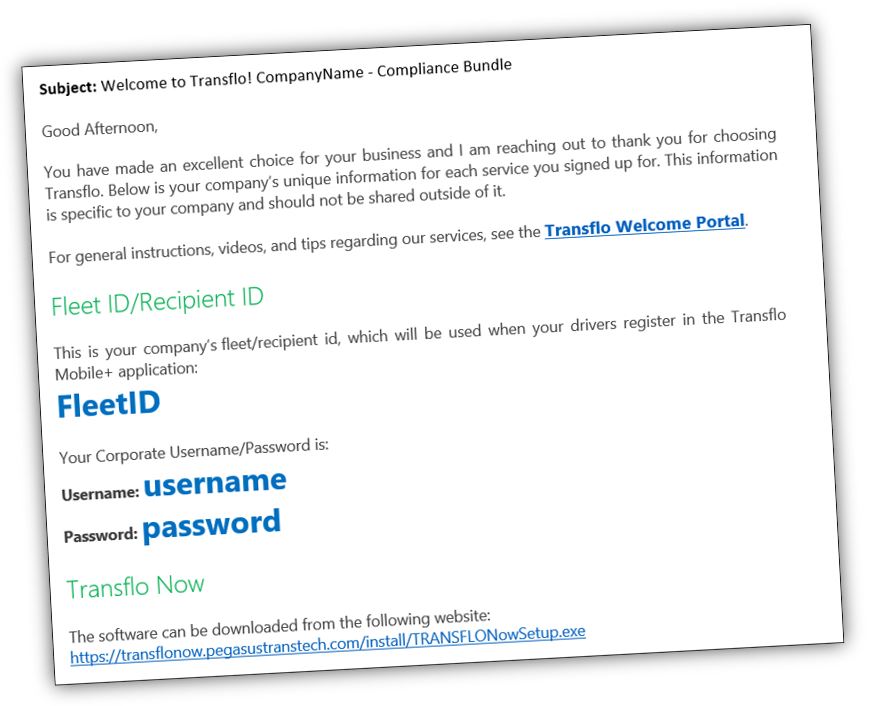
Contact Transflo to register your fleet or owner-operated company. Click the link provided in your Welcome e-mail to download the software.
As of September 2024, you can also use the following direct link:
https://transflonow.pegasustranstech.com/install/transflonowsetup.exe
-
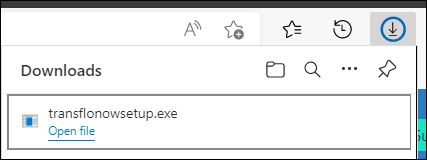
Save the setup file in your Downloads folder or click Open file.
-
If you save the setup.exe application file, click its icon or double-click to open it.
-
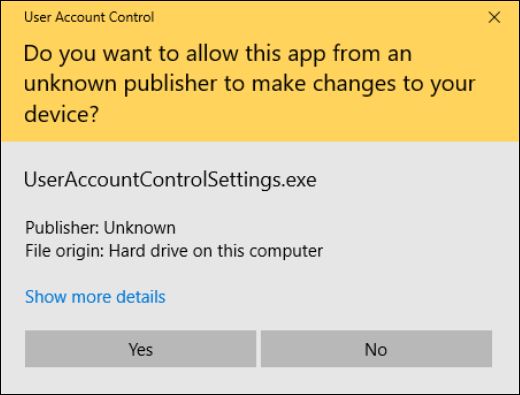
In the User Account Control window, click Yes.
-
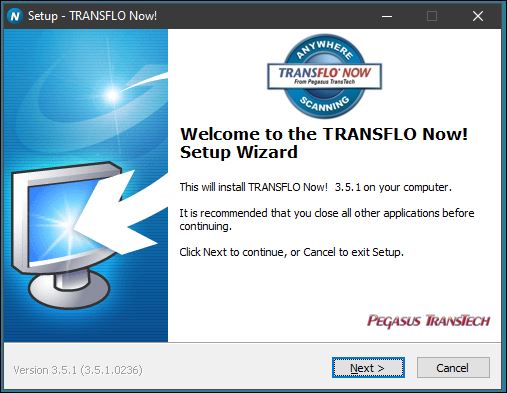
At the Welcome to the Transflo Now! Setup Wizard screen, click Next.
-
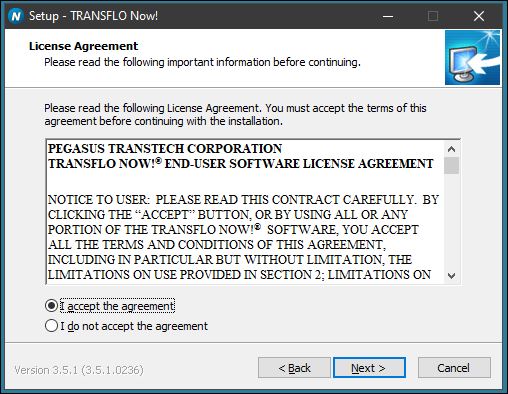
Scroll down to read the Pegasus Transtech End User License Agreement (EULA) and accept by clicking I accept the agreement. Click Next.
-
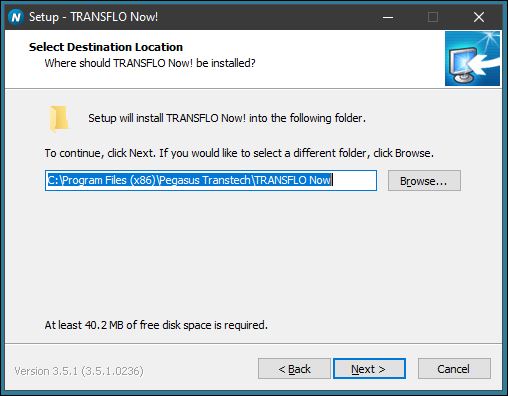
Click Next to accept the destination directory for the application. It is recommended that you do not change the destination directory.
-
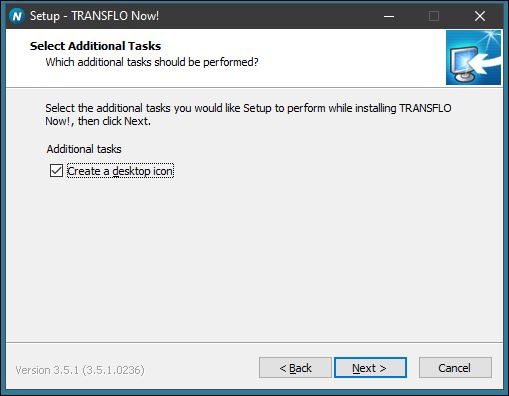
(Optional) Select the Create a desktop icon check box. If you clear this check box, you can always create a desktop icon later. If you create the icon, you can always remove it later or add a desktop icon again at any time. Either way, click Next.
-
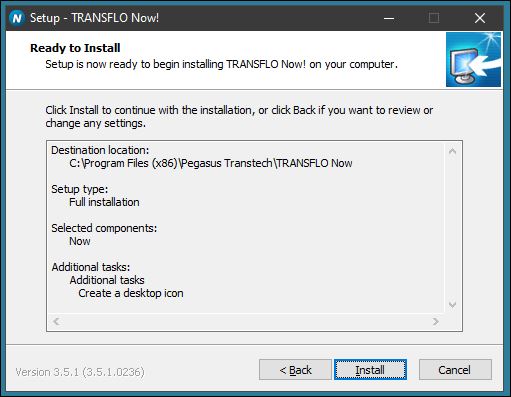
Review your settings. To make changes, click Back. To continue with the installation of Transflo Now! click Install.
-
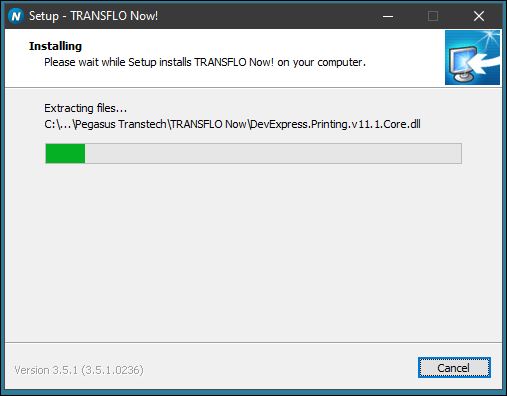
The installer shows you status details and a progress bar.
-
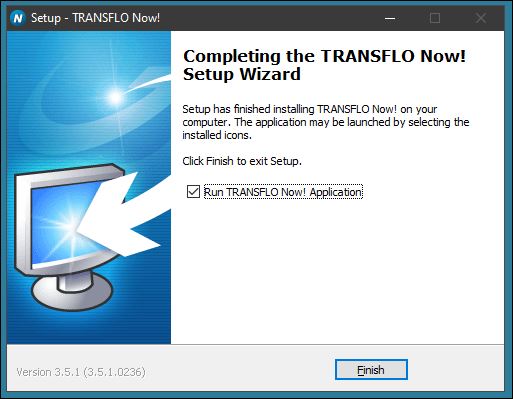
After the application has been installed, you see the following window. Click Finish.
-
If you see a command prompt, allow it to finish. Do not close the window.
-
If you are not connected to the internet when you run the Transflo Now! application, the following message box appears. You need to be connected to the internet to complete the registration before you can use TRANSFLO Now!
-
TRANSFLO Now! requires the free Microsoft .NET framework in order to work. If you are up-to-date on all Microsoft Windows service packs, you should already have this loaded on your computer as part of your Windows OS. If the application does not detect the .NET framework, it directs you to the Microsoft website and starts the free download process. Accept the default options to complete the download. Because the installer file is large (over 20 MB), we recommend that you use a high-speed connection.
-
Continue with the sections below to register and use TRANSFLO Now!
The Transflo Now! Client Configuration tool allows you to configure your Transflo Now! software.
-
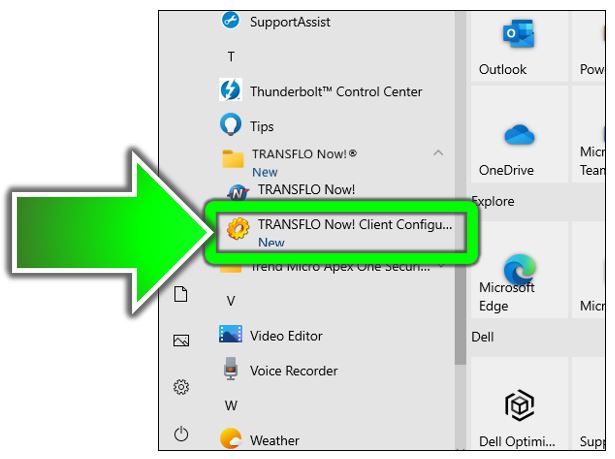
In the Windows Start menu, under your applications that start with the letter T, click Transflo Now! Client Configuration.
-
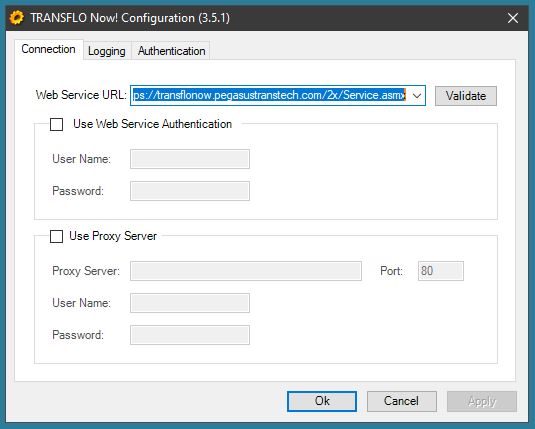
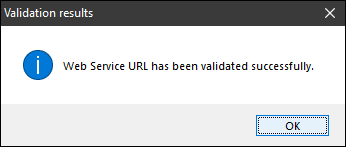
On the Connection tab, set the Web Service URL.
To see the default operations and formal definition, visit the following link for the default web service URL:
https://transflonow.pegasustranstech.com/2x/Service.asmx
-
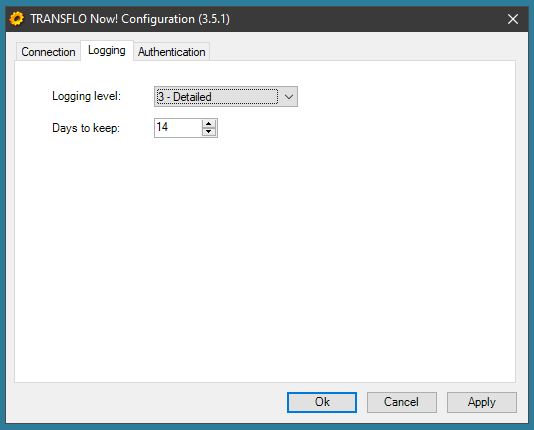
On the Logging tab, set the Logging level and Days to keep log entries.
-
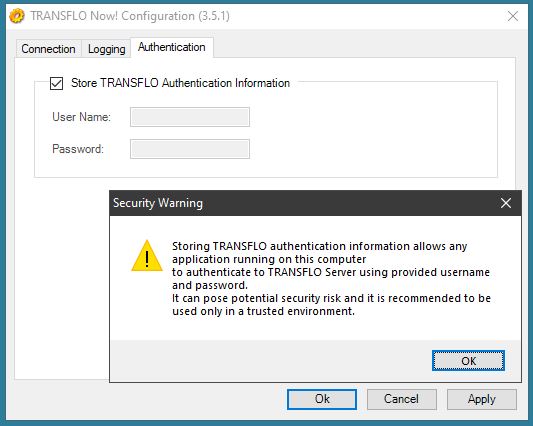
(Optional) On the Authentication tab, select Store TRANSFLO Authentication Information, click OK on the Security Warning message box, and then set the User Name and Password.
-
When finished, click OK, or click Apply and then review how your changes work in the application. Come back to the configuration tool and make changes if needed and then click OK.
After you install and configure Transflo Now! on your Microsoft Windows PC or laptop, follow these steps to start using the software to scan your BOL, POD, and other load paperwork and submit it to your company or fleet for processing.
-
Install the application and accept all default configuration options or specify your own options.
-
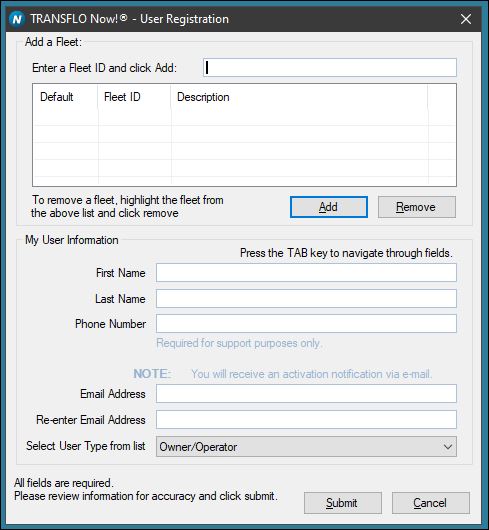
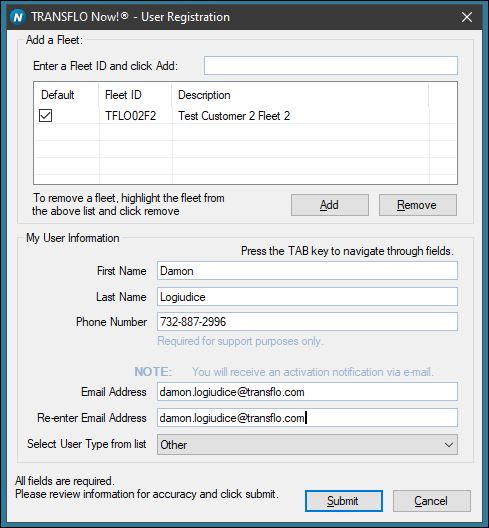
At the User Registration screen, enter the correct Fleet ID click the Add button. Your Fleet Manager should have your company Fleet ID or you can find it on your TRANSFLO Express Cover Sheet barcode.
-
If you are online, you should see the Fleet ID, Description, and Default box checked. If you enter an invalid fleet, or one that has not been activated for TRANSFLO Now! you receive a notification box indicating there is a problem with the fleet.
-
After you add the fleet, complete the fields in the My User Information section. Be sure to enter the email address correctly both times. Select your user type from the User Type drop-down list. Options include Owner/Operator, Company Driver, and Other.
-
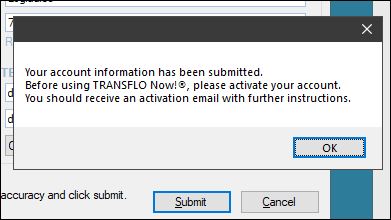
When you are ready to send your registration data, click Submit.
-
If you enter information when you are offline and attempt to click Submit, fleet validation is reset to pending status and a message reminds you to go online and connect again to complete, save, and submit your registration data.
-
The registration will not submit automatically when you go online. You must launch the application and click Submit again while online to get the activation email.
-
Check your email inbox for the activation link email. Open the email and click the link.
-
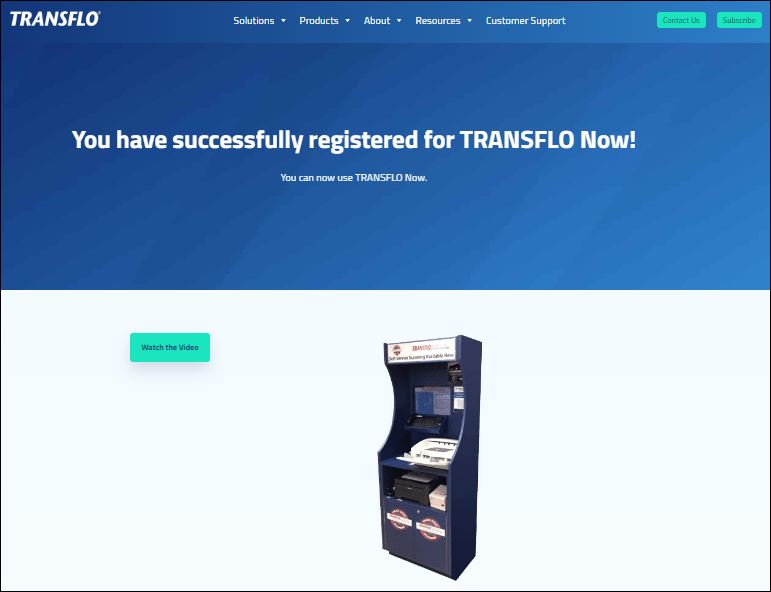
Your registration is complete and your Transflo Now! product is activated.
-
If you have not received your activation email from Transflo after 24 hours, try these sub-steps:
-
Check your email Junk or Spam folder to see if your email provider or application has quarantined the email as spam or junk mail, which can happen since the email is coming from a new automated sender.
-
Try adding a contact in your address book so noreply@e-transflo.com is recognized as a known entity and not a source of spam. That is the automated email account that sends your activation email.
-
Confirm you have internet access.
-
Open the Transflo Now! application and verify that the email address entered on the registration page is correct.
-
If it is correct, click the Submit button again.
-
If it is not correct, enter the email address in both fields and click the Submit button again.
-
Confirm you have internet access.
-
-
Verify you are checking the right email account inbox.
-
-
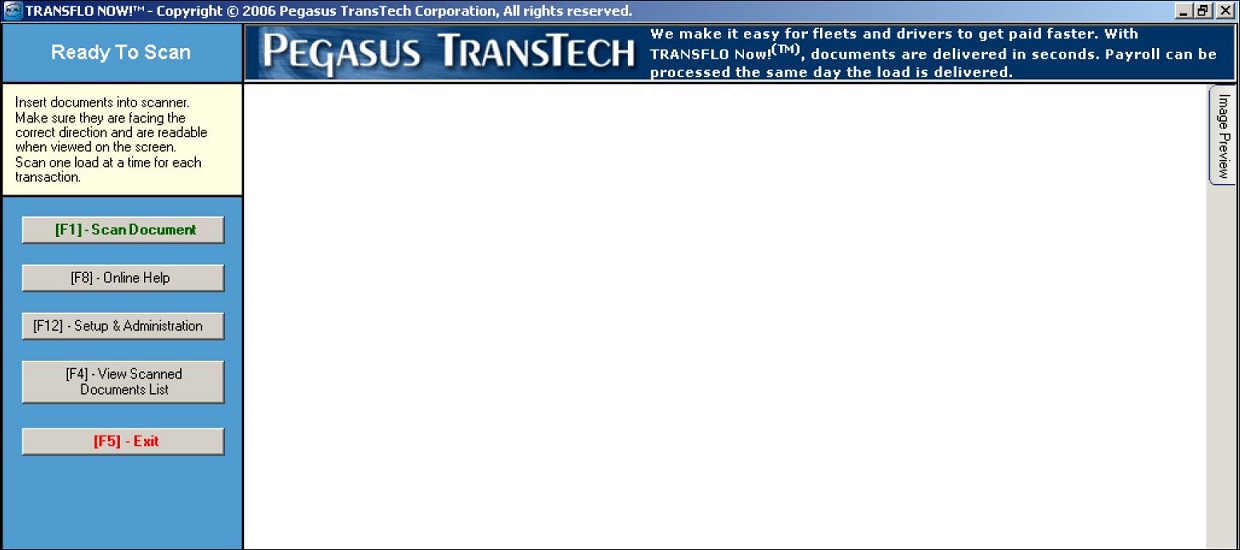
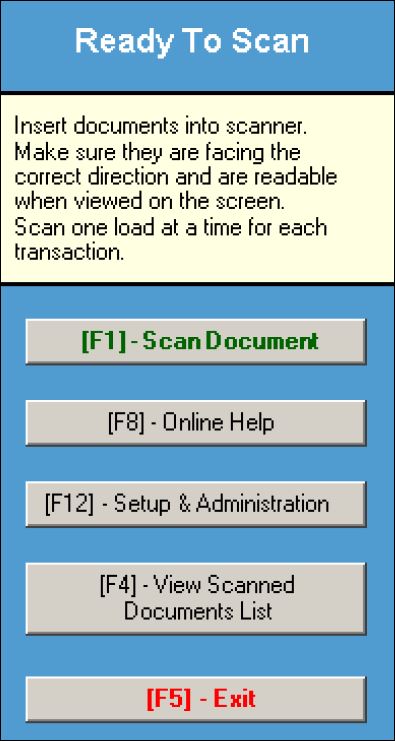
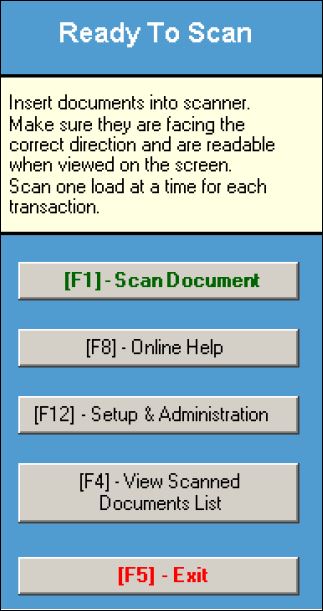
Once you have received and clicked the activation link, open the application. The Ready To Scan page should appear.
-
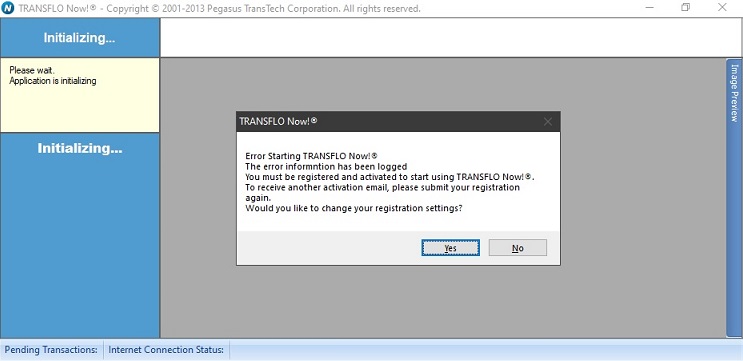
If you see the following error message, try clicking No and allow a few hours for the registration and activation to occur. If you restart your computer and Transflo Now still gives you this error message, click Yes, update your registration data and submit it again. Click the activation link and try running Transflo Now! again.
-
Before you can scan, you must set up at least one scanner. Install and configure the scanner correctly through Microsoft Windows. Follow the instructions provided by the manufacturer of your scanner.
-
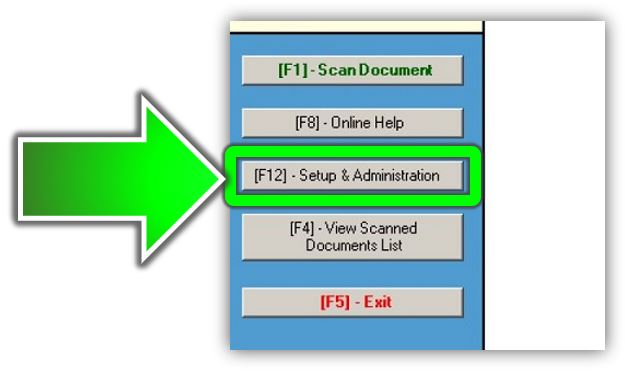
Click the Setup and Administration button or press F12.
-
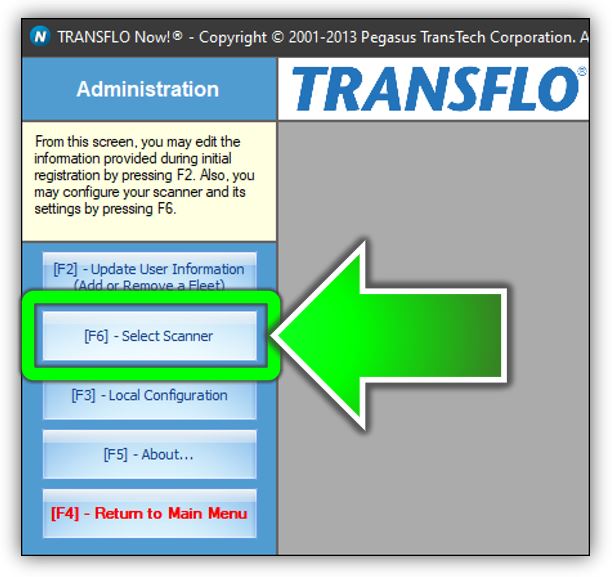
Click the Select Scanner button.
-
Select a scanner in the Select a Scanner to Configure field. Click OK.
-
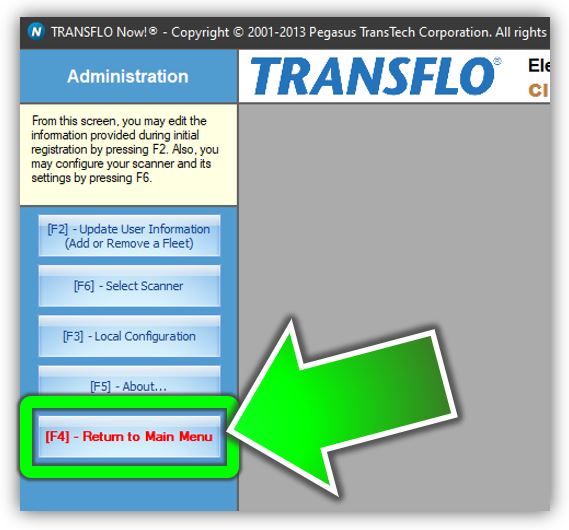
To go back to the main menu, press F4 or click Return to Main Menu.
-
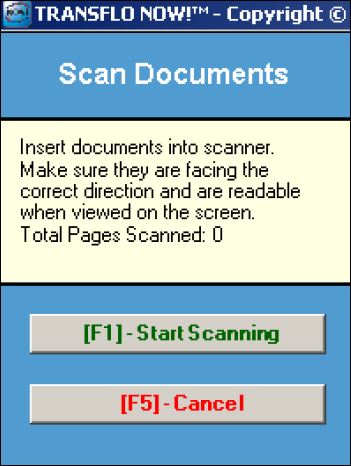
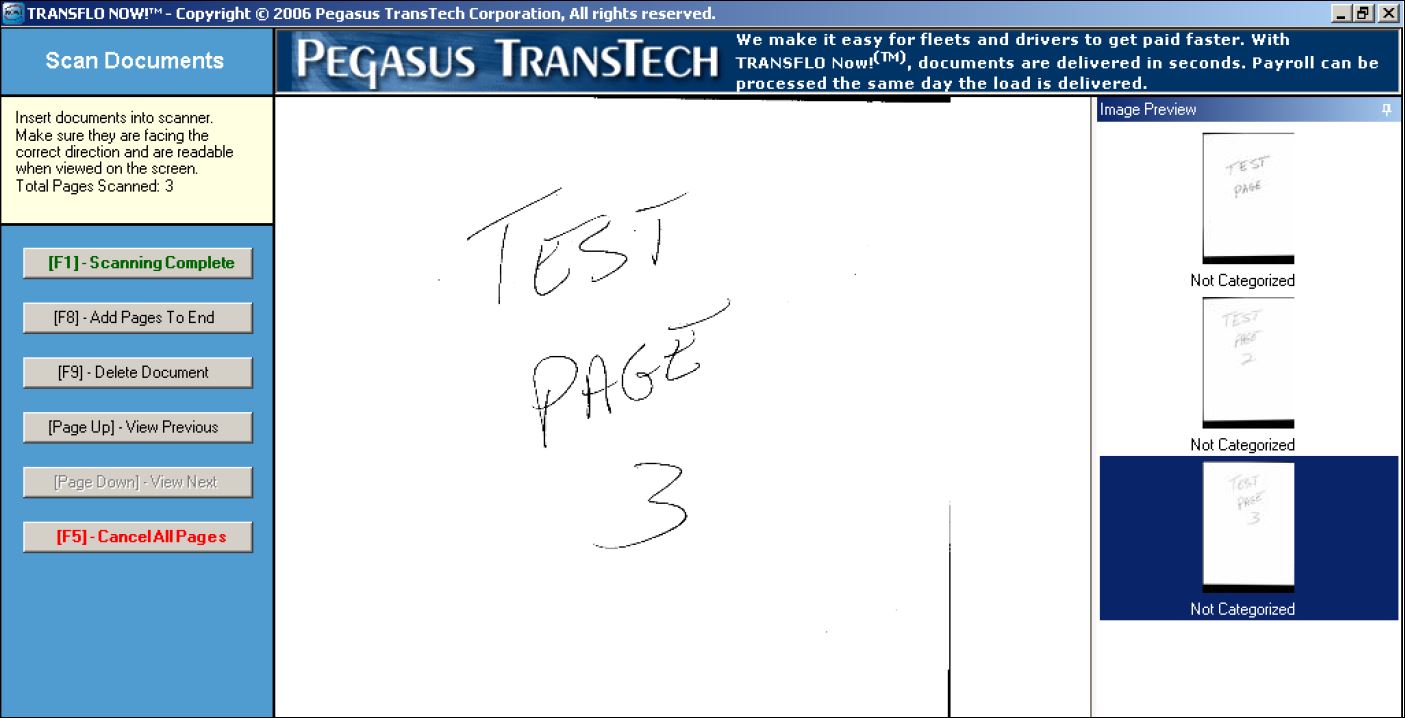
Now you are ready to scan. Click the Scan Document button or press F1.
-
Place your documents in the auto-feeder tray or directly on the scanner glass. Put the cover down.
-
Click [F1] - Start Scanning.
-
Once pages are scanned, the Thumbnail Viewer also known as the Image Preview pane, shows thumbnails of the scanned pages.
-
Choose one or more options:
-
Click Add Pages To End to scan more pages. Repeat the steps above until all pages have been scanned.
-
Click Delete Document to delete the current document.
-
Click Delete Current Page to delete the current page in a document.
-
Click View Previous (Page Up) or View Next (Page Down) to view any documents in the group.
-
Click the Image Preview tab on the right to view page thumbnails.
-
Click Cancel All Pages (F5) to start over or quit. In newer editions, this option was changed to Delete All Pages.
-
-
If all pages have been scanned and appear readable, click Scanning Complete.
-
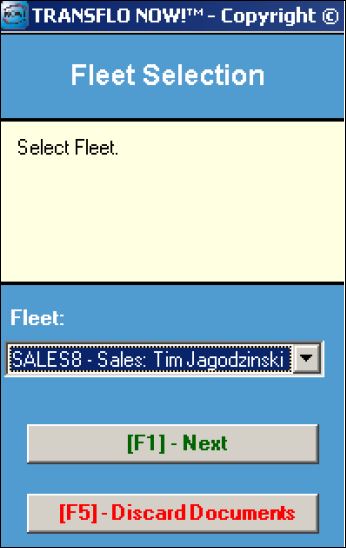
After you click the Scanning Complete (F1) button, the Fleet Selection page appears. Select a fleet from the list of fleets in the Fleet field and then click Next or press F1.
If you did not already set up the fleet you want to select, and it does not appear in the list of fleets, cancel this transaction. Click Discard Documents (F5). Go back to the registration page and add the required fleet as described near the start of this procedure.
-
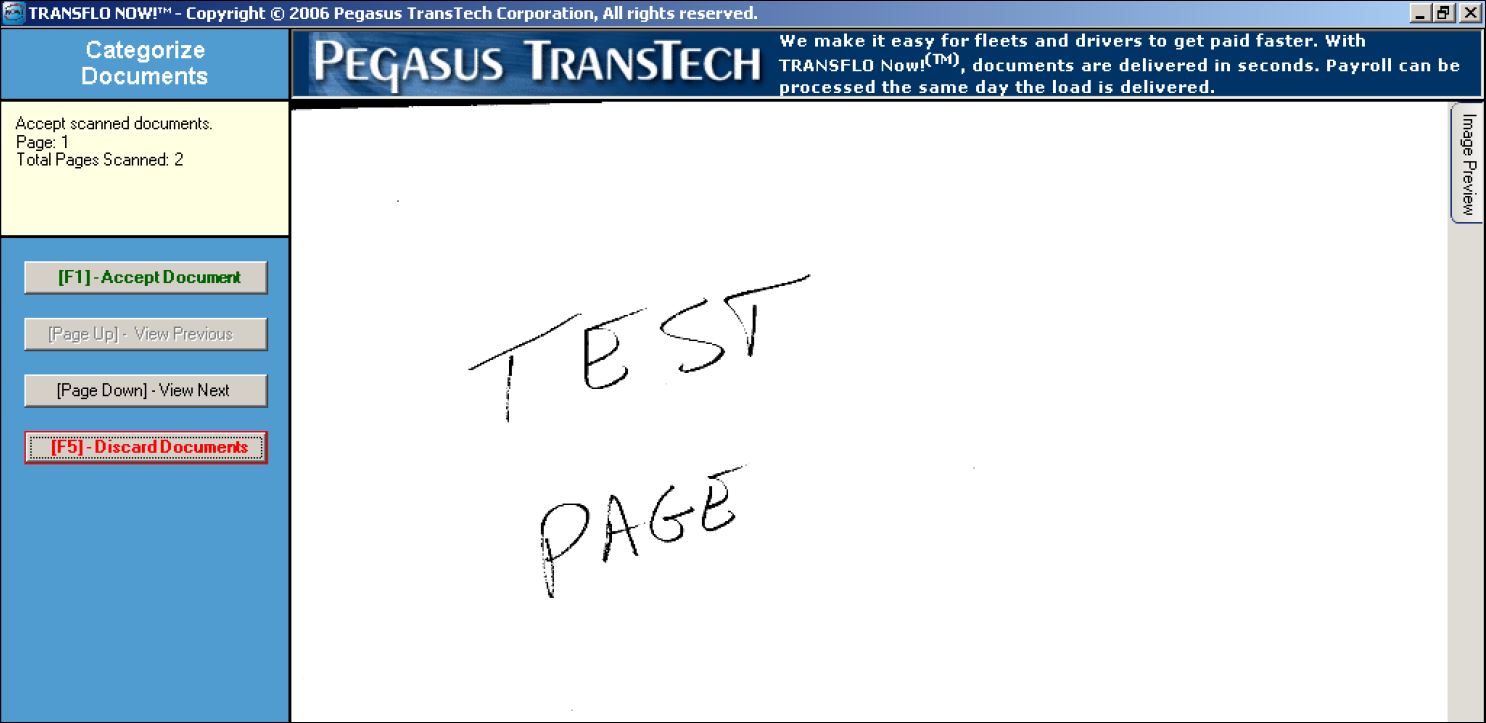
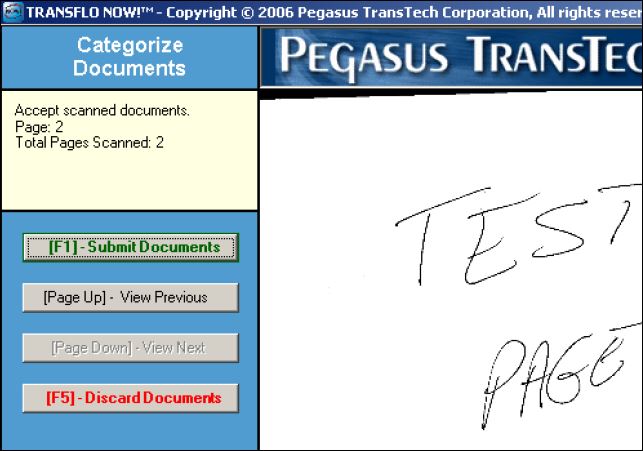
After selecting a fleet, you see the first page of your document. If this page looks acceptable, click the Accept Document (F1) button.
-
The next page in your document appears. Click Accept Document for each page in your document.
-
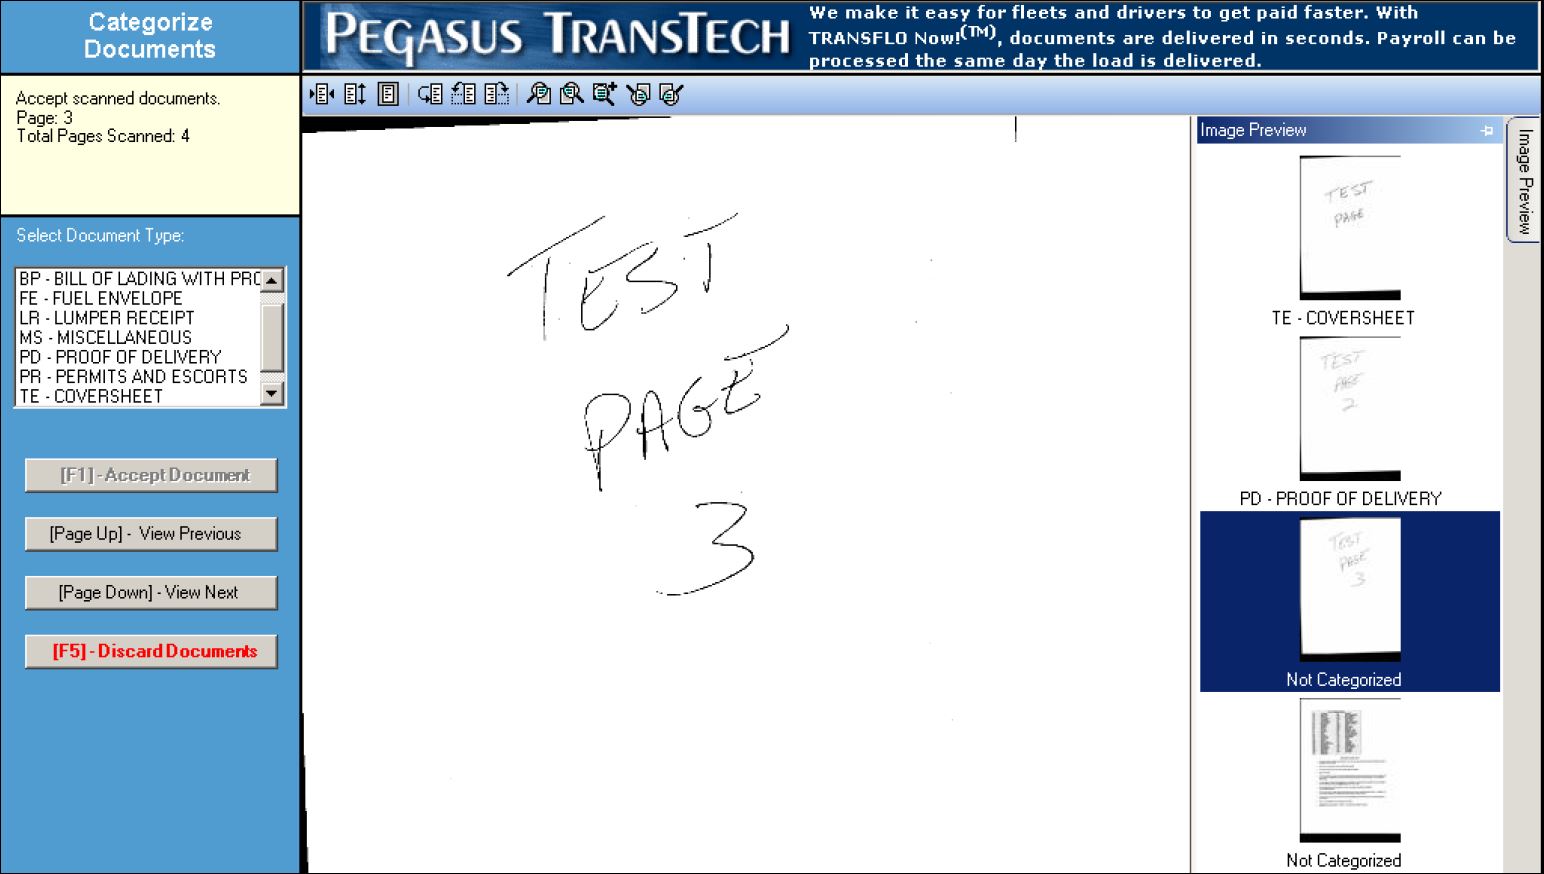
Review the image preview thumbnails on the right side of the viewing pane.
-
To view all pages press the Page Down and Page Up keys or click View Previous and View Next.
-
Each document is organized by category or document type. This indexing step is important because it is the primary way the software can distinguish between documents, for example, a bill of lading and a fuel envelope need to be handled in different ways. Document types appear under the thumbnails. To change the document type, click on the thumbnail to make the image appear in the main window and choose the correct document type.
-
If you do not want to transmit this document, to cancel instead click Discard Documents (F5).
-
-
When all pages have been accepted and assigned to a correct document type, press the Submit Documents (F1) button to send the set of documents to your company or authorized fleet recipient for processing.
-
When you submit your documents, you see a box appear indicating the set of documents has been successfully created and is ready for submission. Click OK.
-
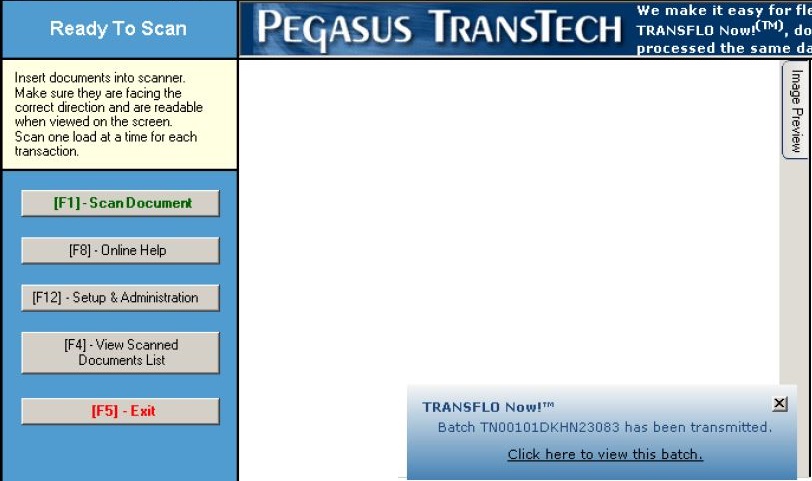
You can scan documents whether you are online or offline; however, to transmit documents to your fleet, you must be online. If you are online, you see a message box appear in the bottom right of your screen that contains a confirmation number for the set of documents you submitted and a link to view this set of documents on the TRANSFLO Express website.
-
A confirmation email is sent to the email address you set up during the registration process. The confirmation email contains a link to the TRANSFLO EXPRESS® Confirmation Viewer. Click this link to view the batch details and images. The link includes the confirmation number for the batch.
-
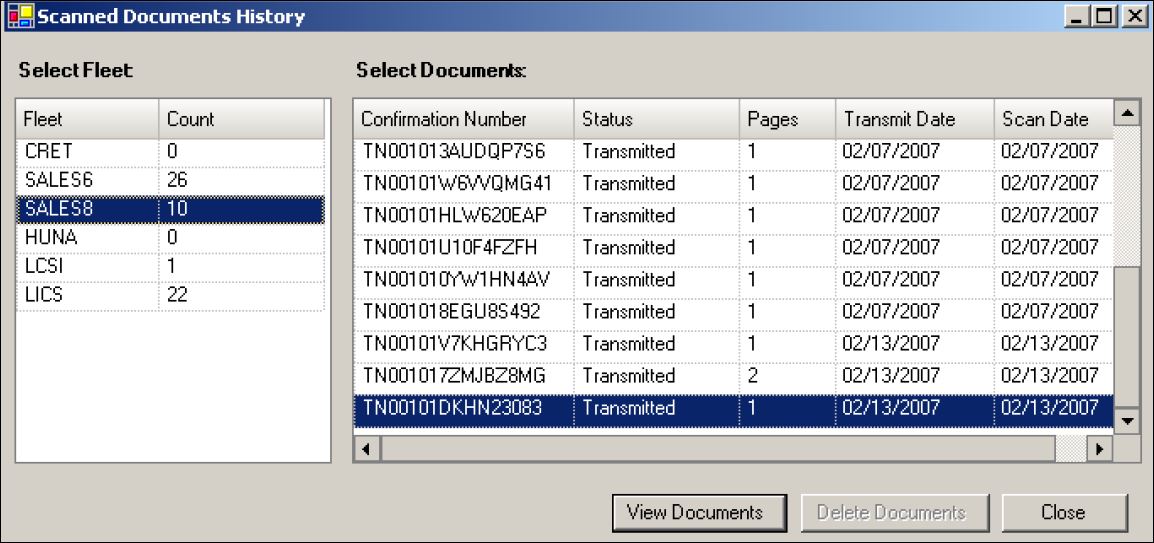
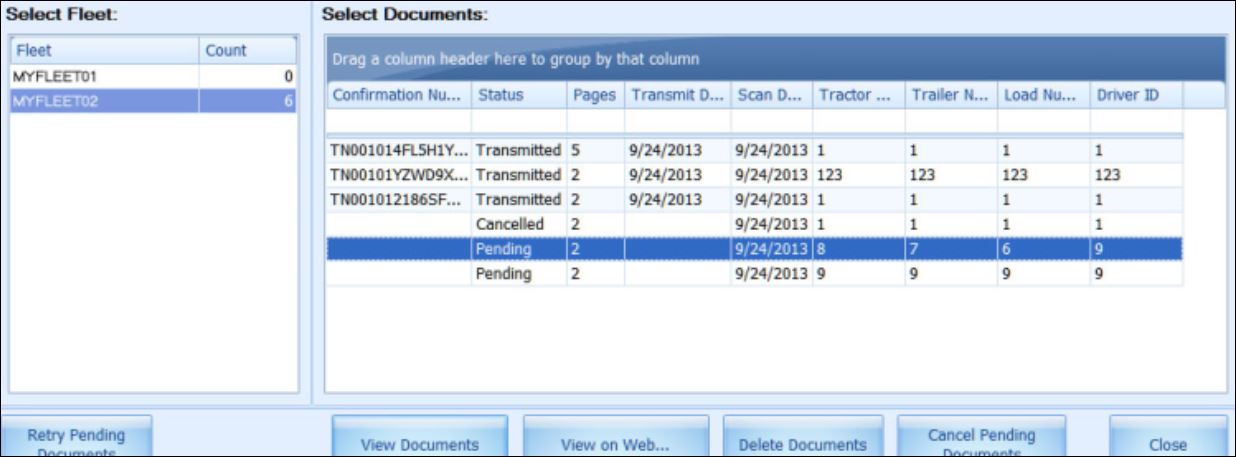
Another way to view documents in batches that you have scanned is with the TRANSFLO NOW! Scanned Documents History window. Click View Scanned Documents List (F4) on the Ready To Scan page.
-
Each transaction shows a status of Pending until it is successfully Transmitted. During this time, the confirmation number field for that row is blank. To view the images, click on the row containing the documents you want to view and then click View Documents.
Screenshots vary based on your version of Transflo Now! and Windows settings.
-
When the set of documents has been successfully transmitted, the status changes from Pending to Transmitted in the Scanned Documents History and the confirmation number appears.
