Transflo DMS Field Mapping
Field Mapping in the DMS Administration Tool is used to map document-level or batch-level data for use with Transflo system application queues such as Inbound Email or Rendition Scripting Agent (RSA). The user has the option to configure DMS Field Mapping for separate document classes and choose different applications for each batch. Once a field map is created, it can be used for multiple queues.
-
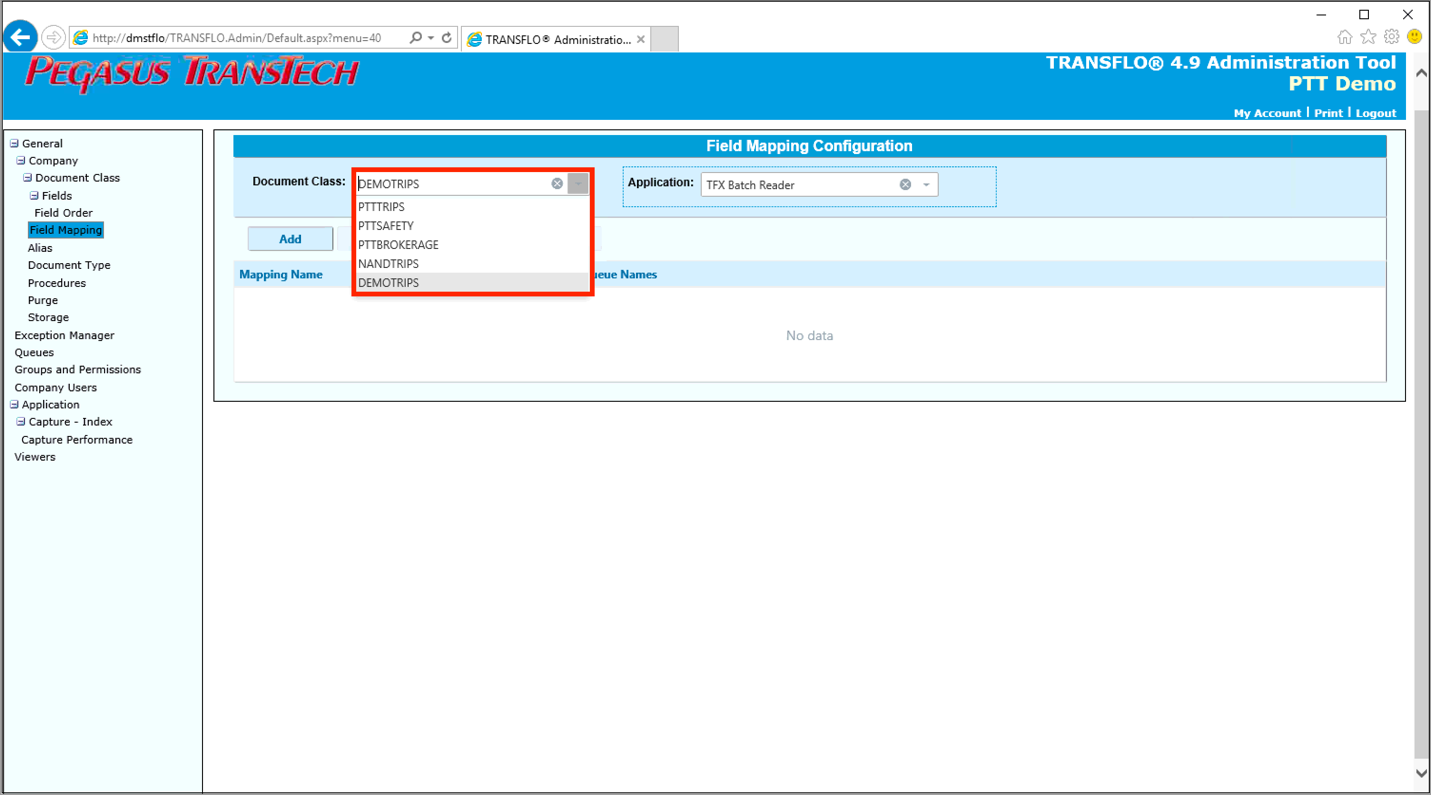
In the main menu, click Field Mapping.
-
In the Document Class filter field, select a document class from the drop-down list.

-
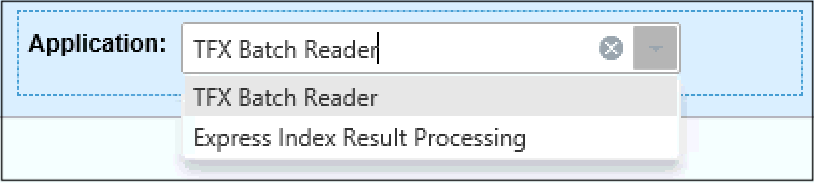
In the Application drop-down list, select the appropriate application that will be used to process the batch.

-
Click the blue Add button.
-
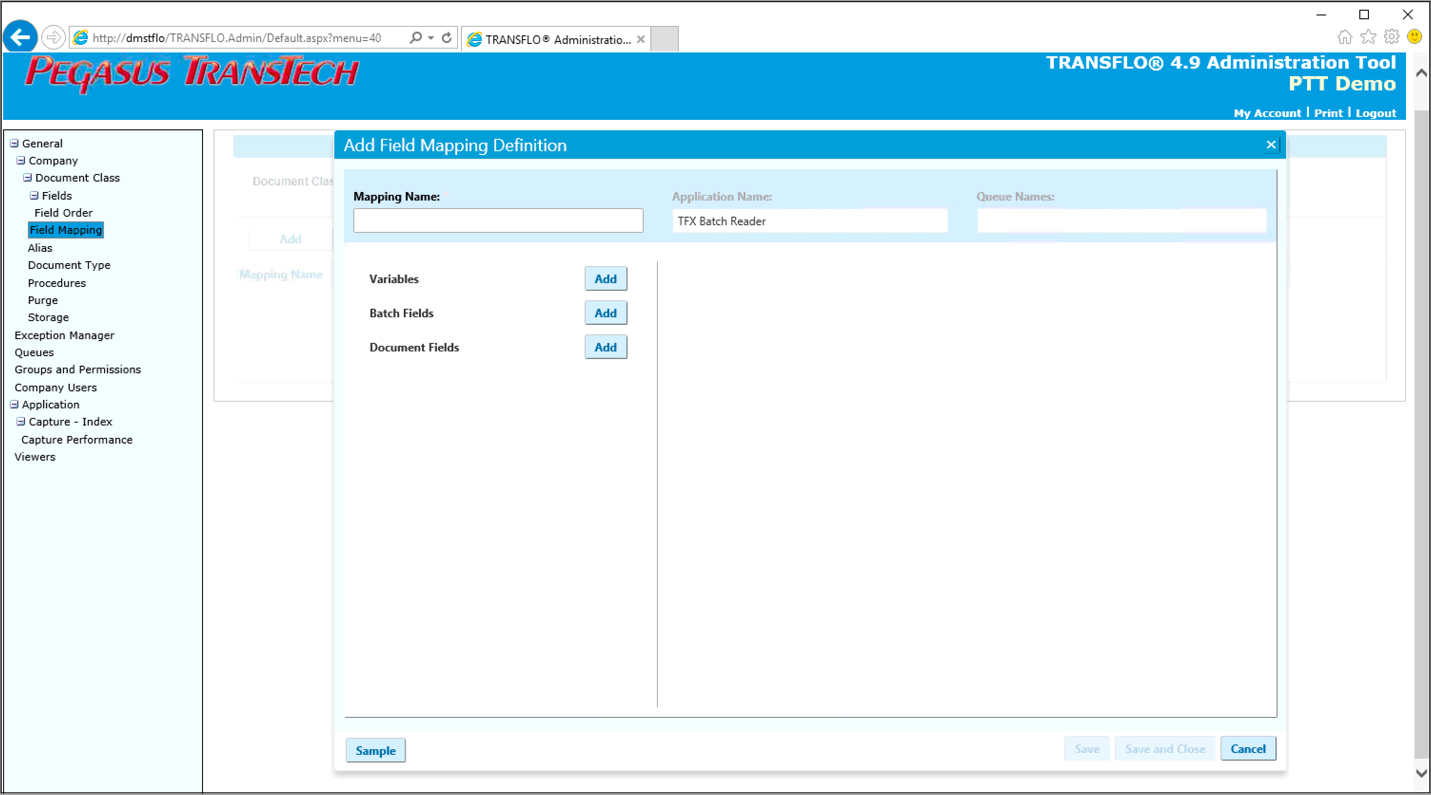
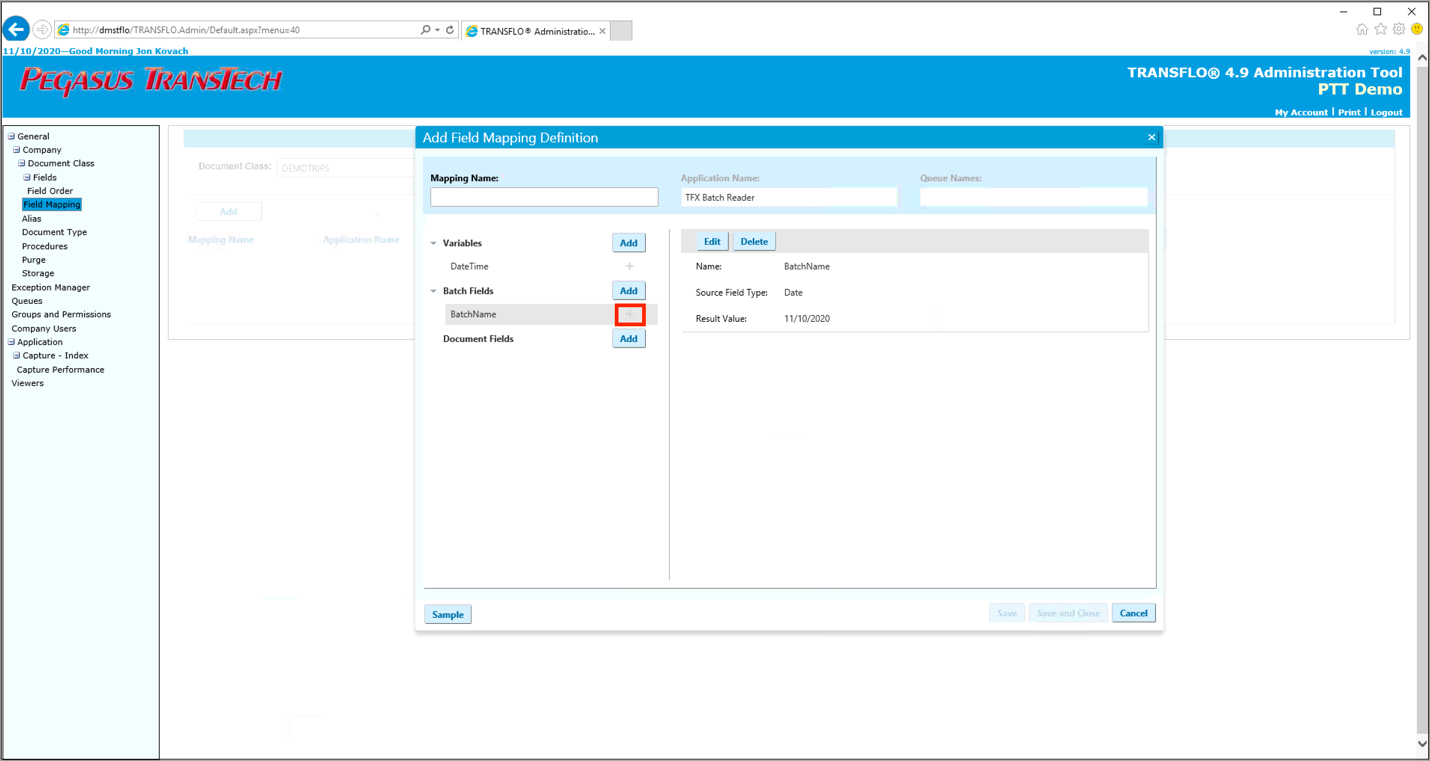
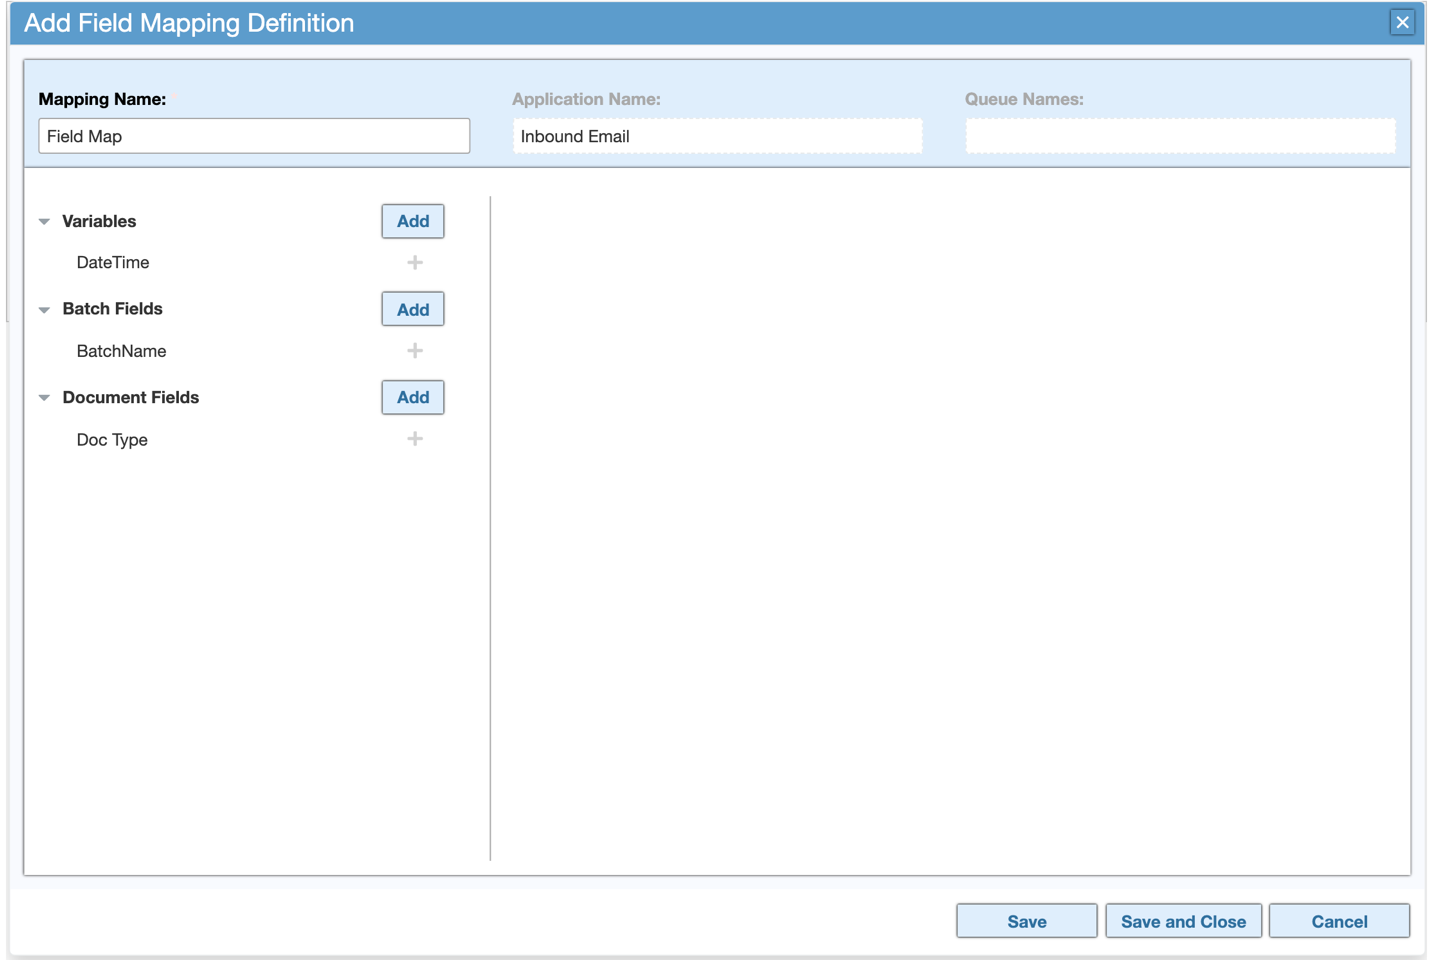
In the resulting Add Field Mapping Definition window, enter a title for the new field map in the Mapping Name field.

As a best practice, use the Doc Class or Alias as the prefix, followed by the Application type.
-
The Application Name will pre-populate, but you can change this if necessary.
-
You have the option to add Queue Names, but this is not required.


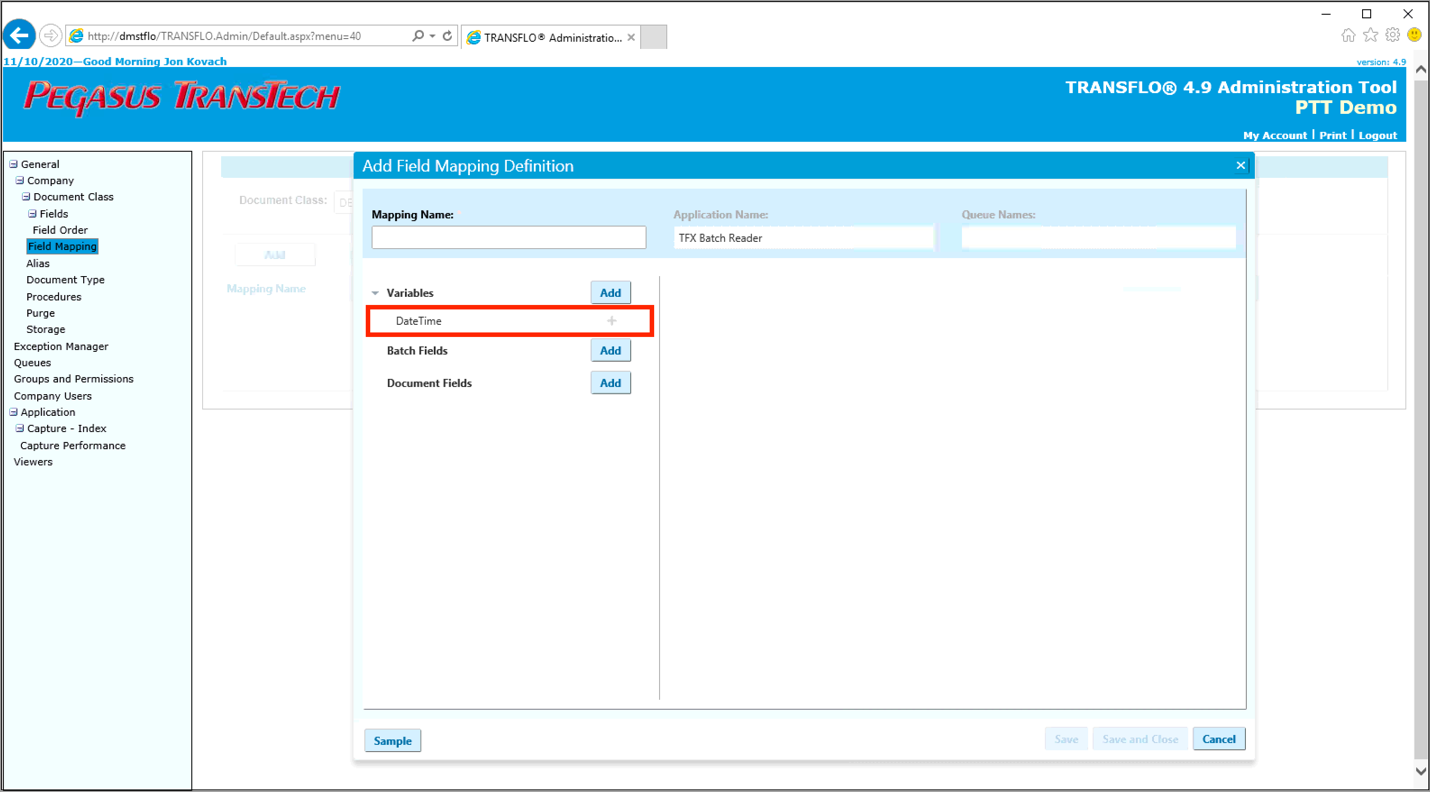
When creating a new Field Map, the User has the option to add Variables to the new Field Mapping.
-
From the Add Field Mapping Definition window, click the blue Add button next to Variables.
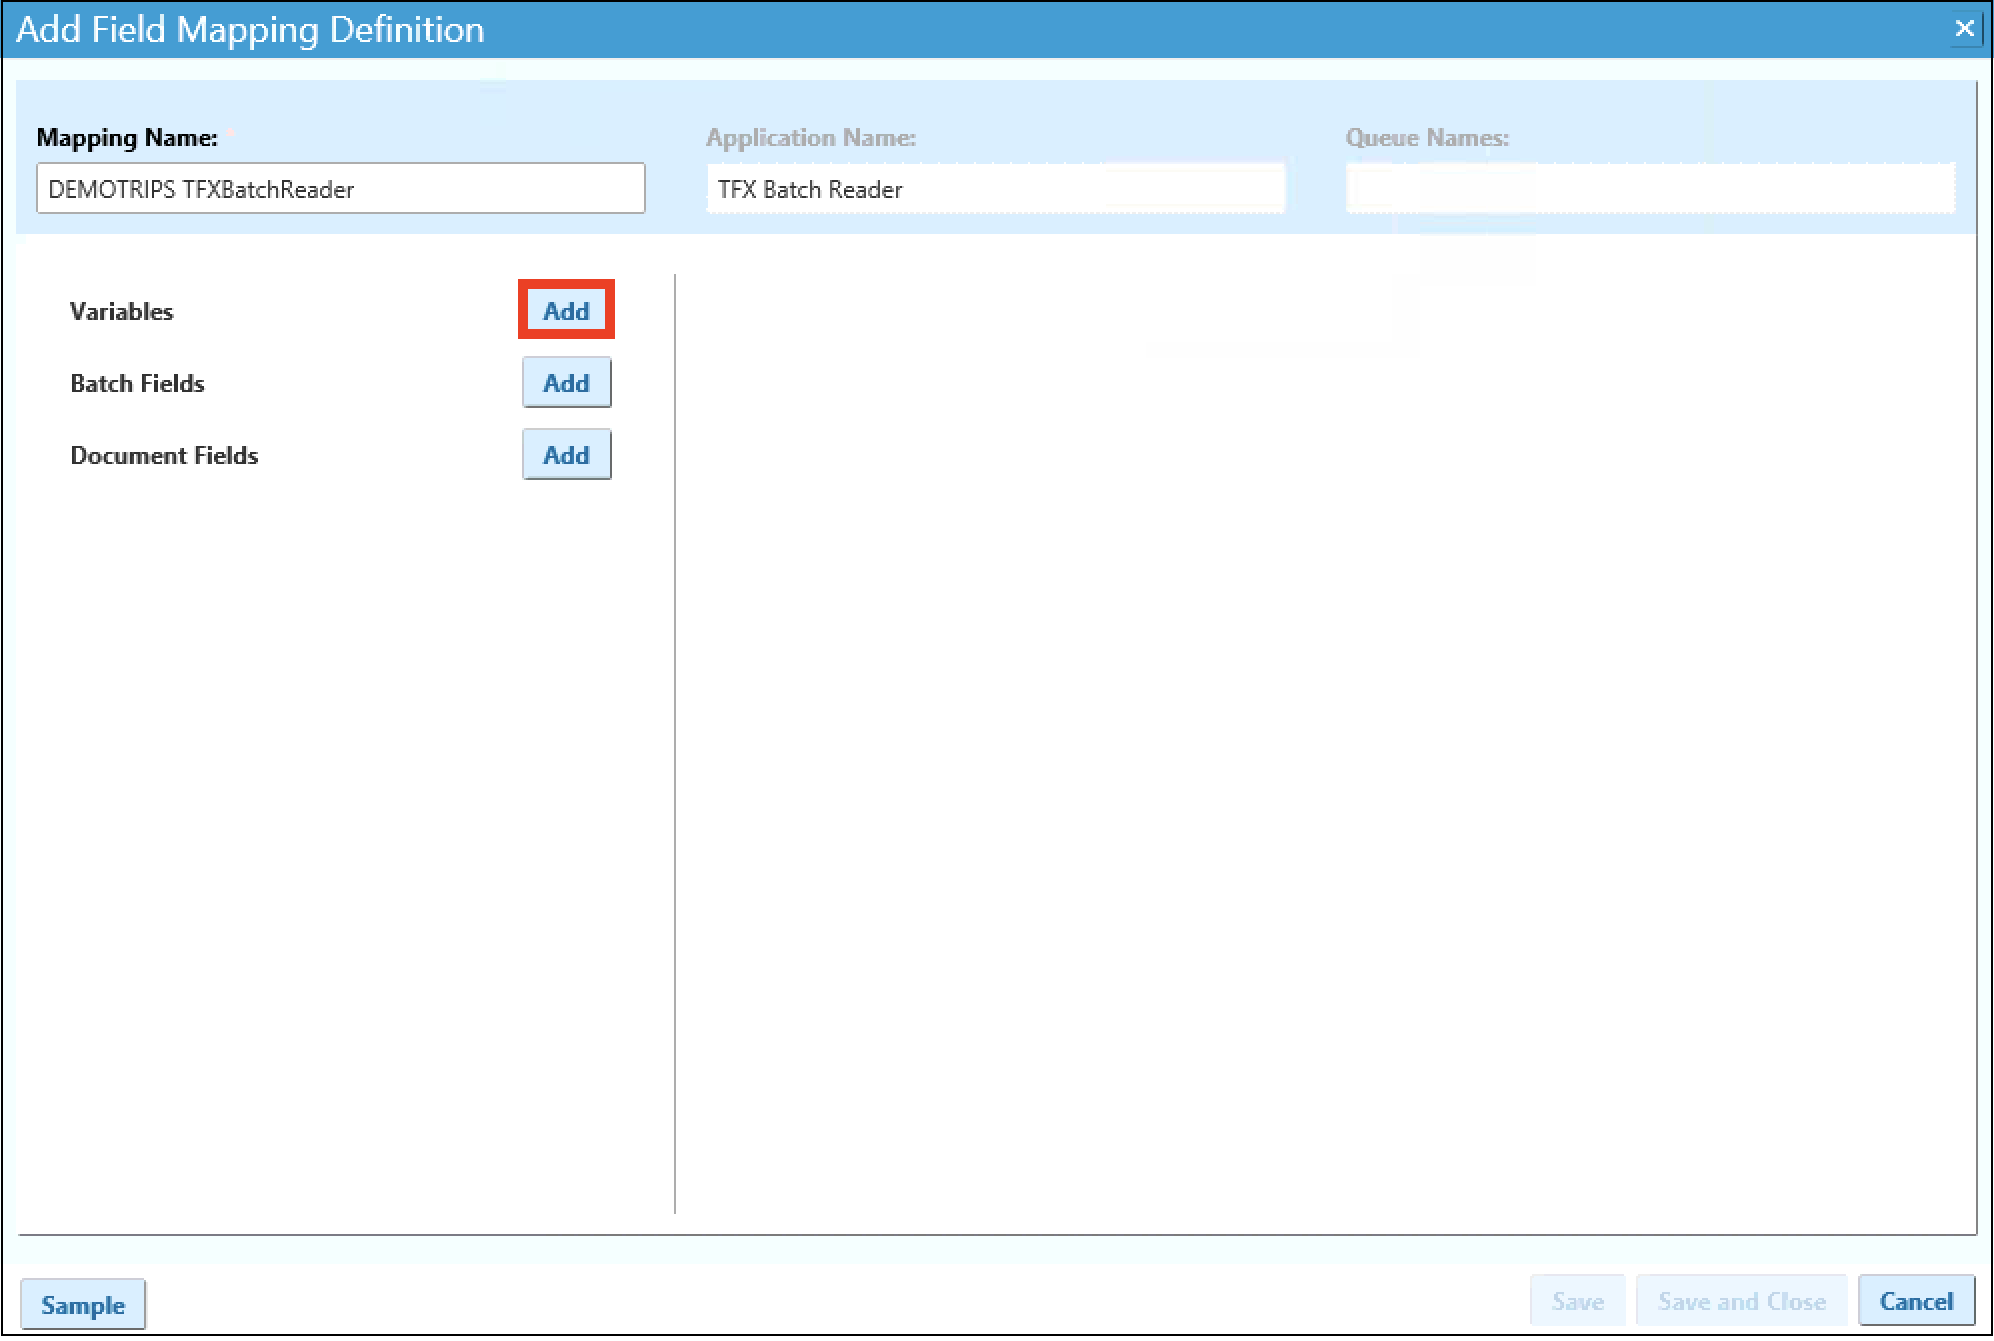
The Add Variable pop-up window will appear.
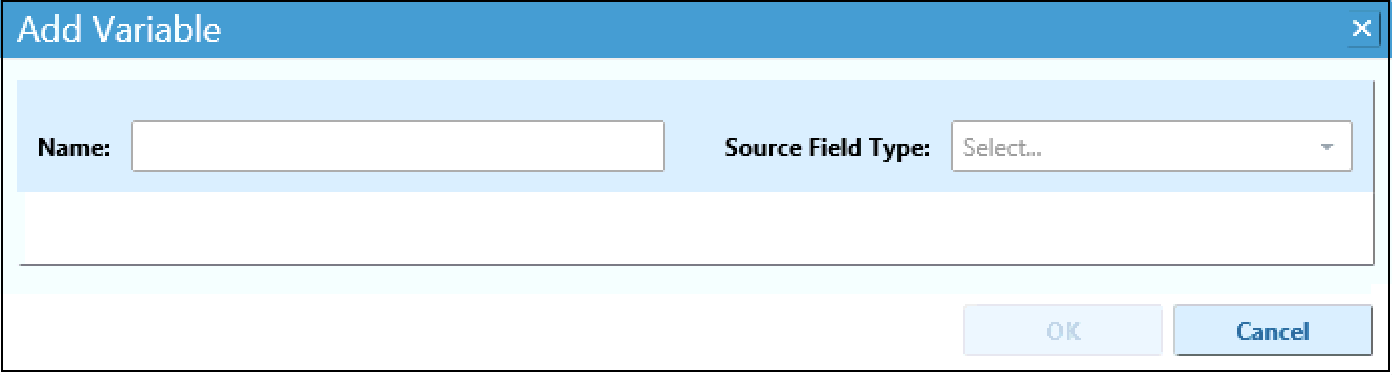
Note: You can close the Add Variable window at any time and return to the Add Field Mapping Definition window, by clicking the blue Cancel button or the blue and white X  icon in the top-right corner.
You can add any title in the Name field.
-
Click the drop-down
 arrow next to Source Field Type and select the option for the field.
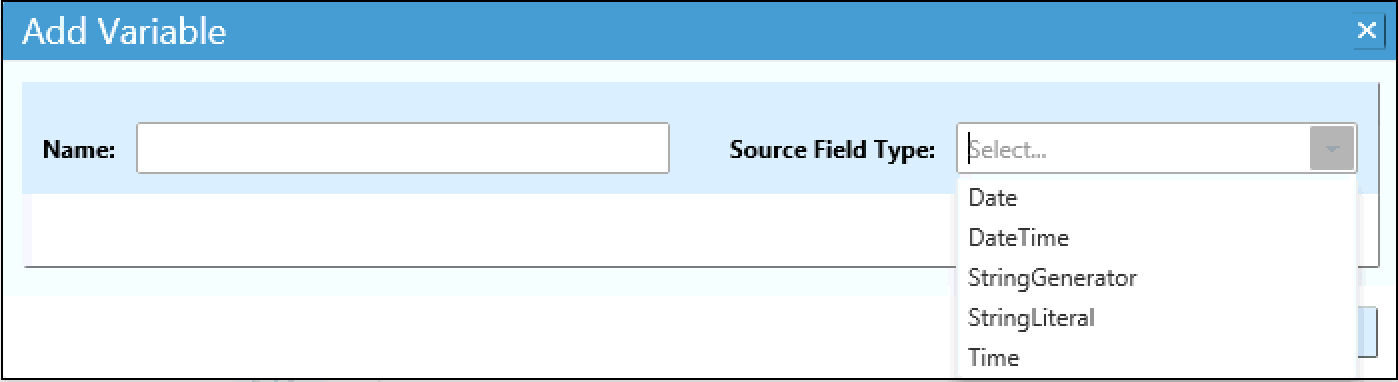
The Source Field Type indicates the type of data to reflect in the Variable.
This will be added to the Batches, in which Field Mapping is configured.
The Date will include today’s date, in MM/DD/YYYY format.

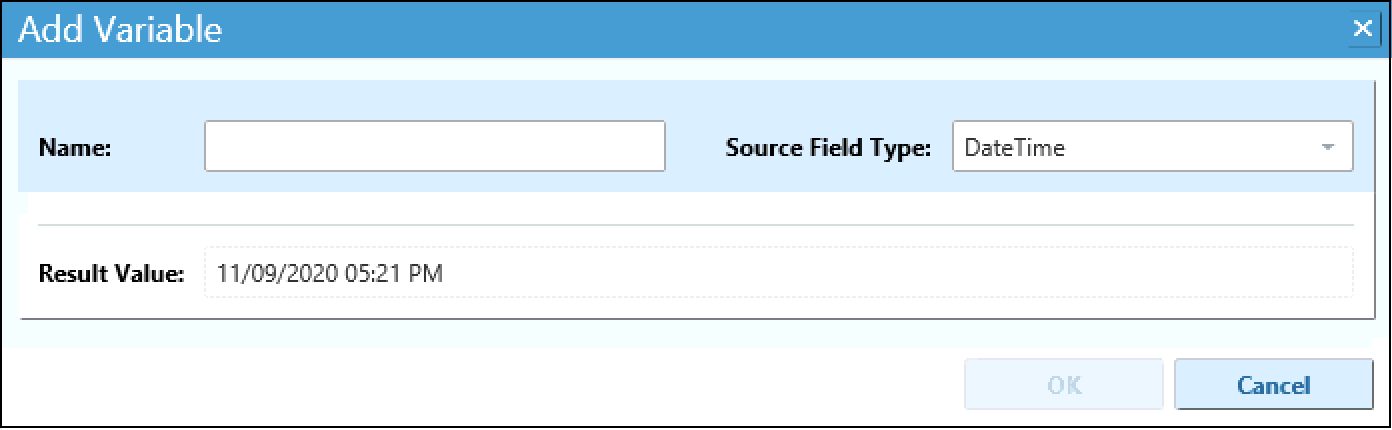
The DateTime value will include today’s date and current time, in MM/DD/YYYY for date and 00:00 AM/PM for time format.
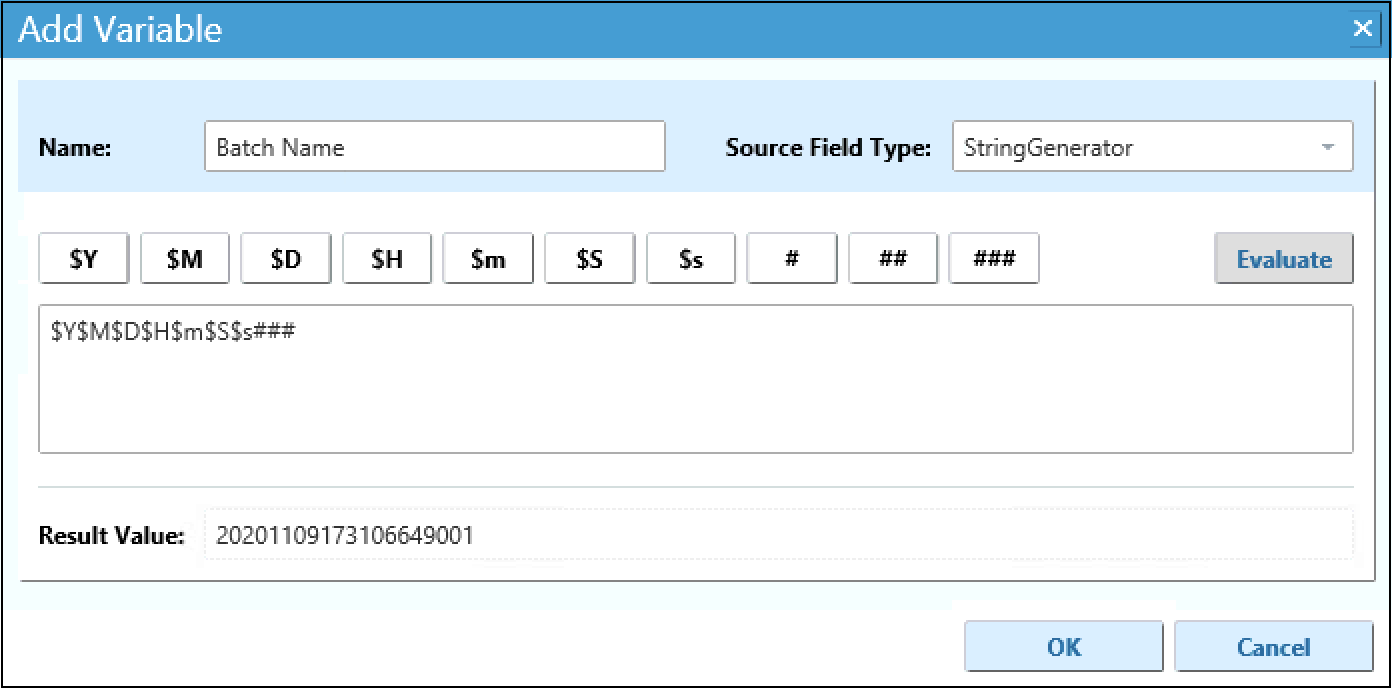
Selecting StringGenerator will allow the User to create a Source Field Type with specific naming buttons and values.
Click the buttons above the table, to name your batch.
Note: You can hover your mouse cursor over each button, to see the name and number of digits for each one.
The following table displays the naming convention buttons:
| Button | Name | Digits |
|---|---|---|
| $Y | Year | 4 |
| $M | Month | 2 |
| $D | Day | 2 |
| $H | Hour | 2 |
| $m | Minute | 2 |
| $S | Second | 2 |
| Ss | Millisecond | 3 |
| # | Sequence Number | 1 |
| ## | Sequence Number | 2 |
| ### | Sequence Number | 3 |
Enter the BatchName into the field, then click the blue Evaluate button.
The Result Value will generate after.
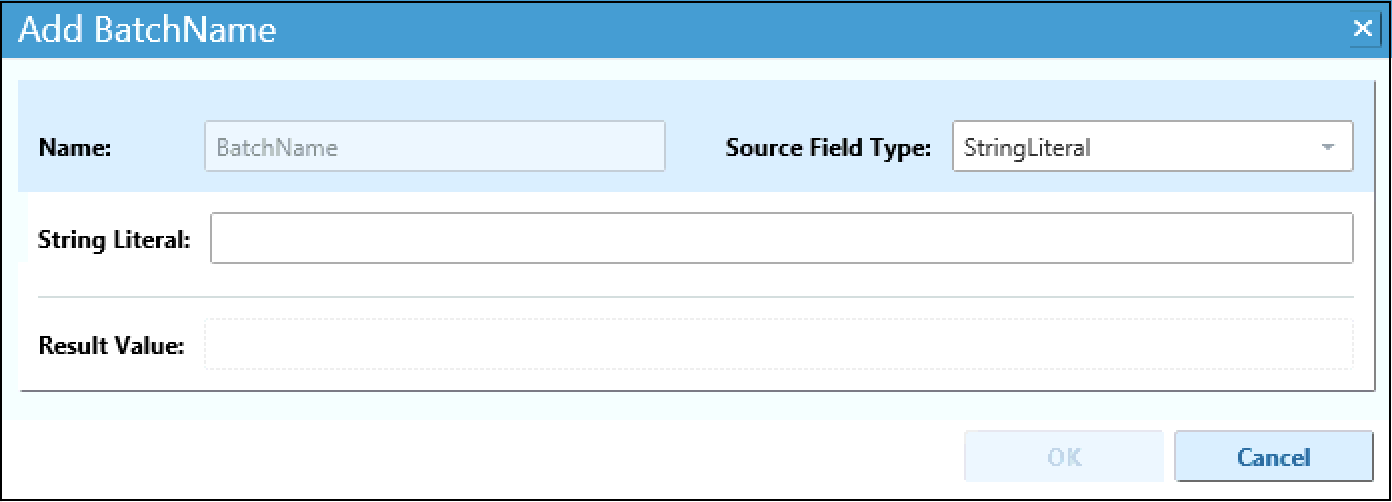
Selecting StringLiteral allows the User to input custom data, including the Result Value, into the Field Map.
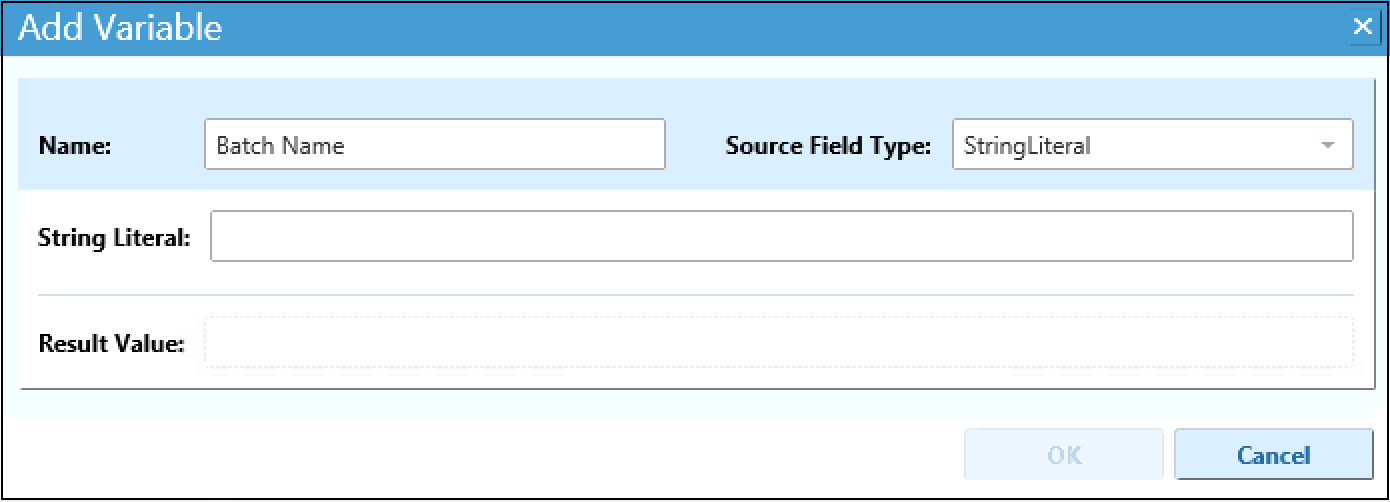
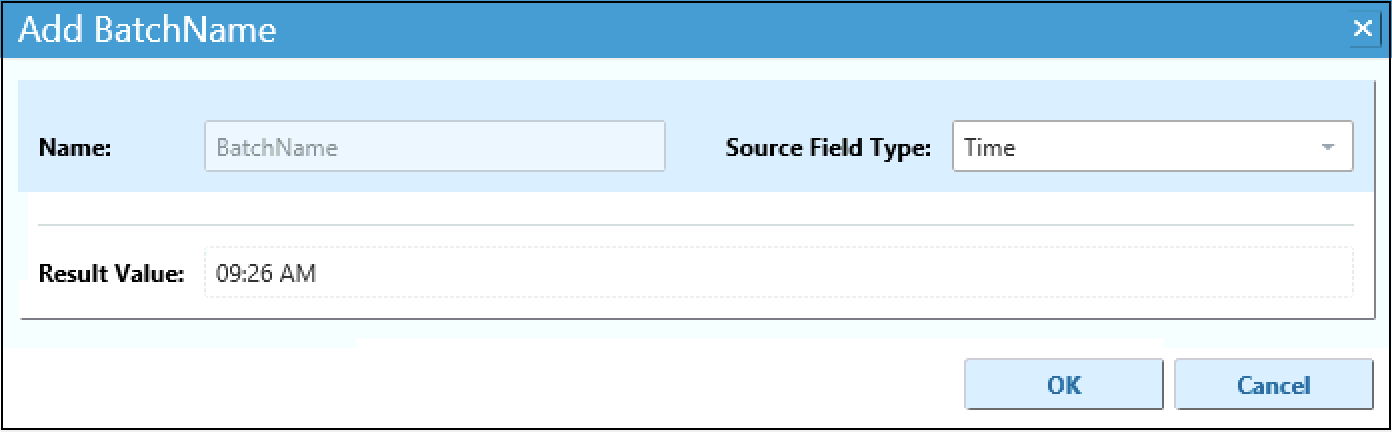
You can select Time, to include the current time in 00:00 AM/PM format, for the batch.

-
After you enter a Name for the Variable and select a Source Field Type, click the blue OK button.
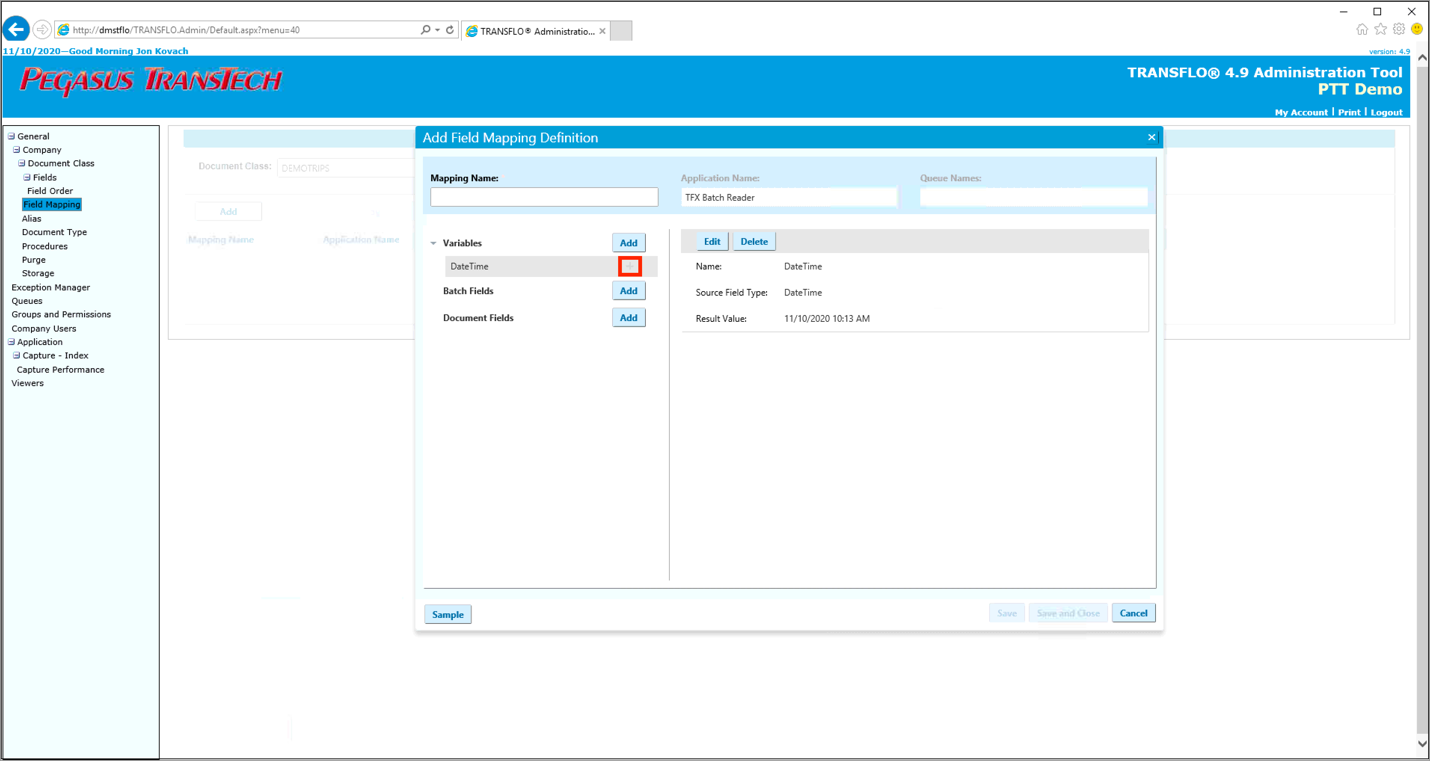
The new value will appear under Variables, in the Add Field Mapping Definition window.
-
If you need to edit or delete the Variables that were added, click the Edit
 icon to the right of the name.
Click the blue Edit button, to make changes to the values.
To delete the Variables, click the blue Delete button.
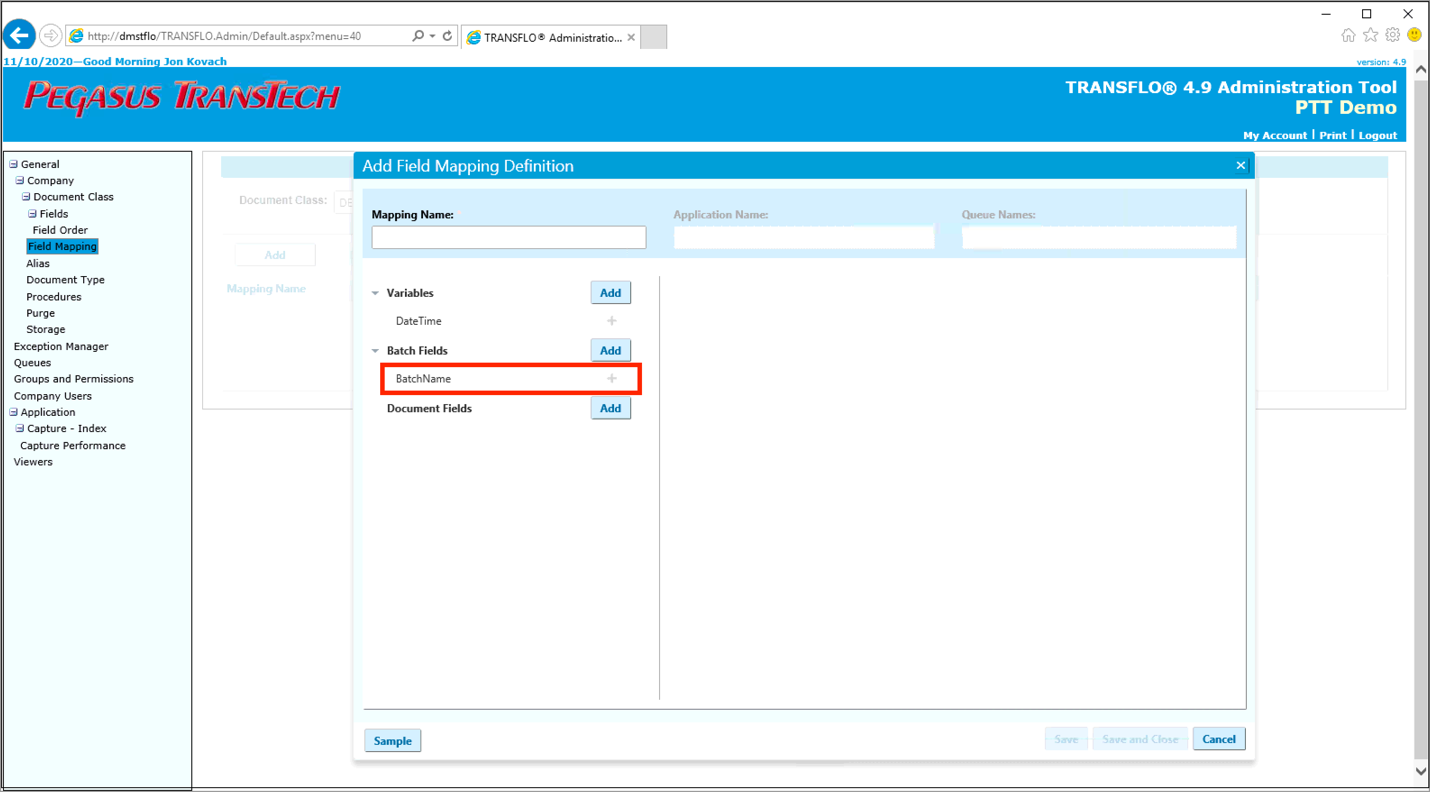
The User can add Batch Fields, to indicate specific data, to be included in the batch, such as the BatchName or OriginUserName.
-
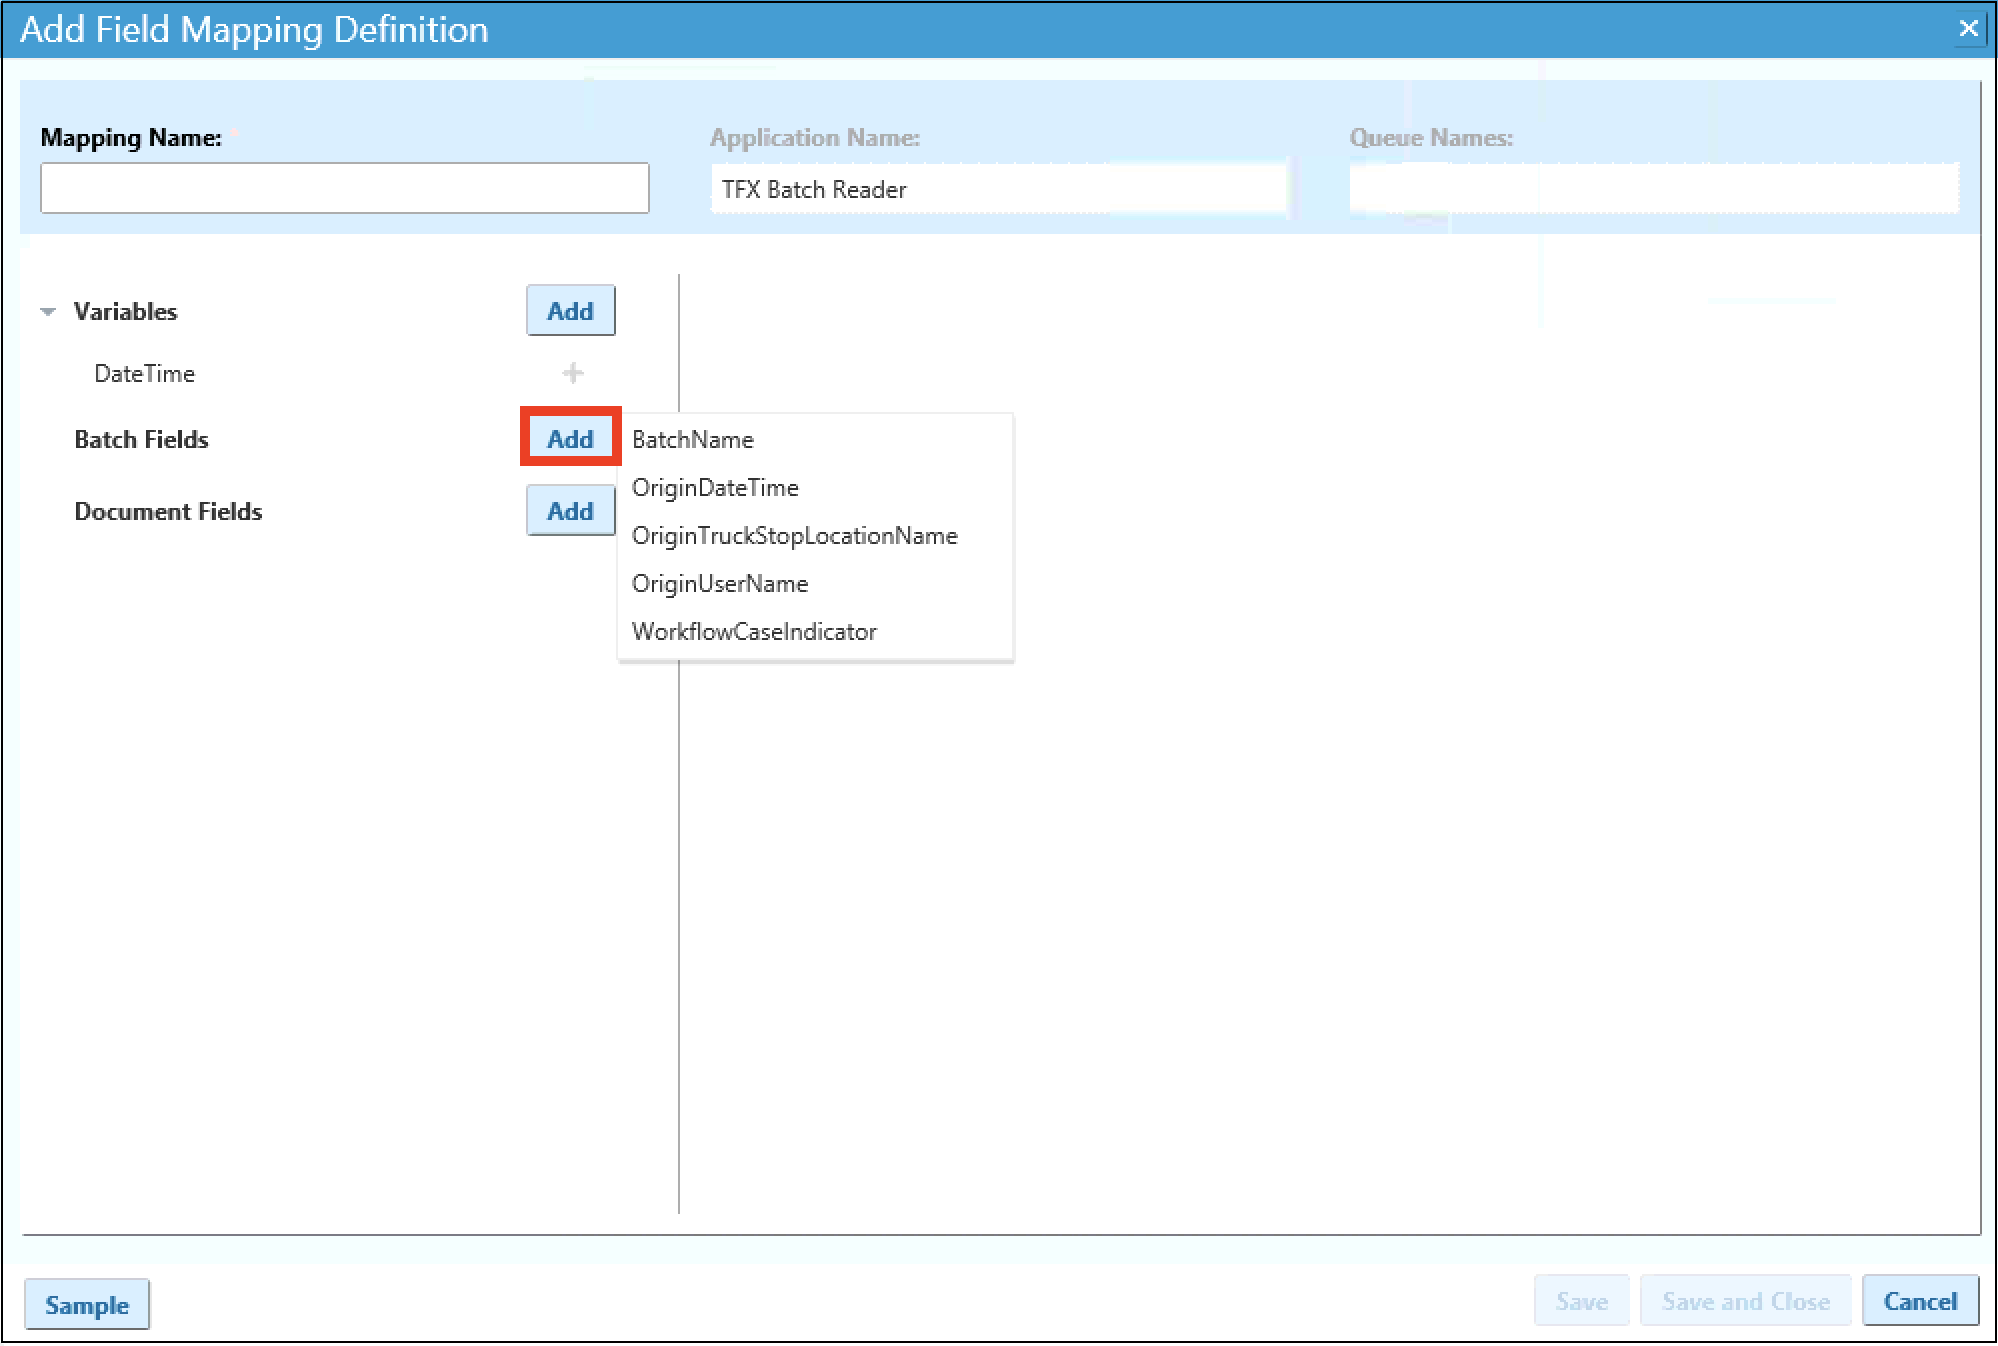
To add Batch Fields, click the blue Add button next to Batch Fields.
The drop-down menu containing the configured Batch Fields will appear.
Note: When any of the values are selected, from the BatchFields drop-down menu, the Name field will be pre-populated, and the User cannot change this value.

When you select any of the values, from the drop-down menu of Batch Fields, a new pop-up window will appear, to add more details.
The following options can be added as Batch Fields in TRANSFLO® 4.9 Administration Tool:
-
BatchName
-
OriginDateTime
-
OriginTruckStopLocationName
-
OriginUserName
-
WorkflowCaseIndicator
In this example, adding a BatchName value, for the Batch Fields will be demonstrated.
-
After clicking the blue Add button next to Batch Fields, the User will click the drop-down arrow next to Source Field Type, from the Add BatchName window.
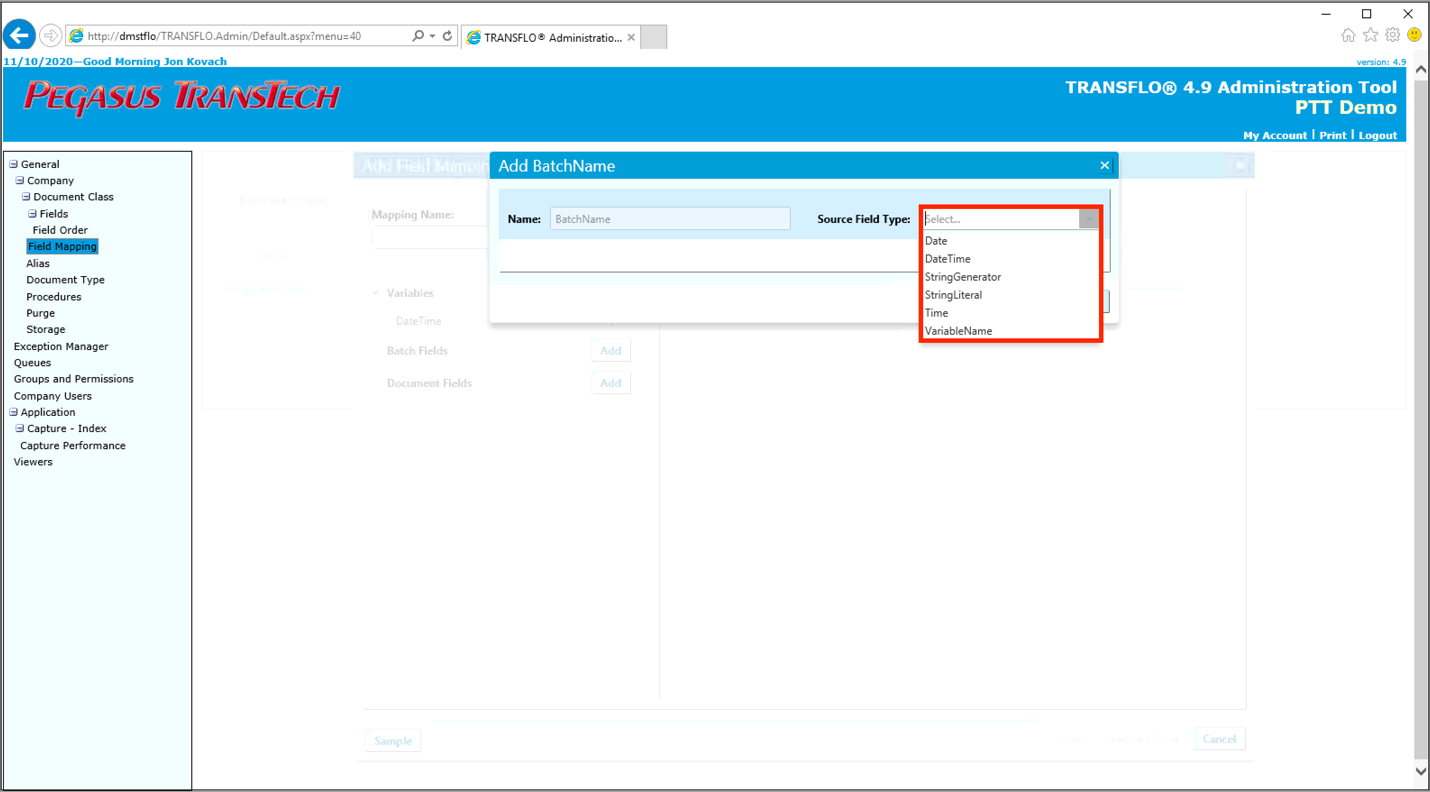
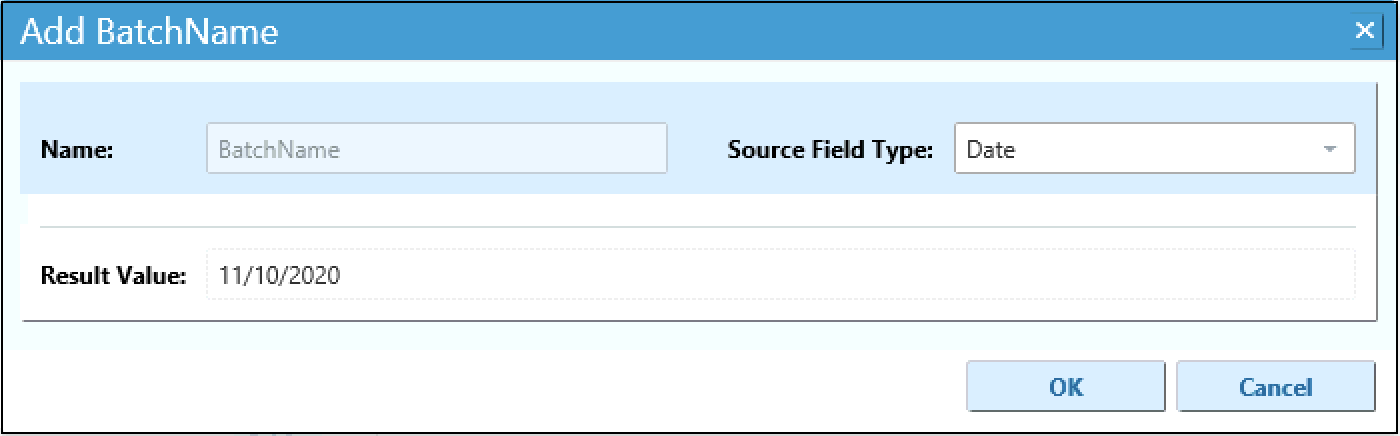
Selecting Date will include today’s date, in MM/DD/YYYY format.
Note: You can close the Batch Fields windows at any time and return to the Add Field Mapping Definition window, by clicking the blue Cancel button or the blue and white X icon in the top-right corner.
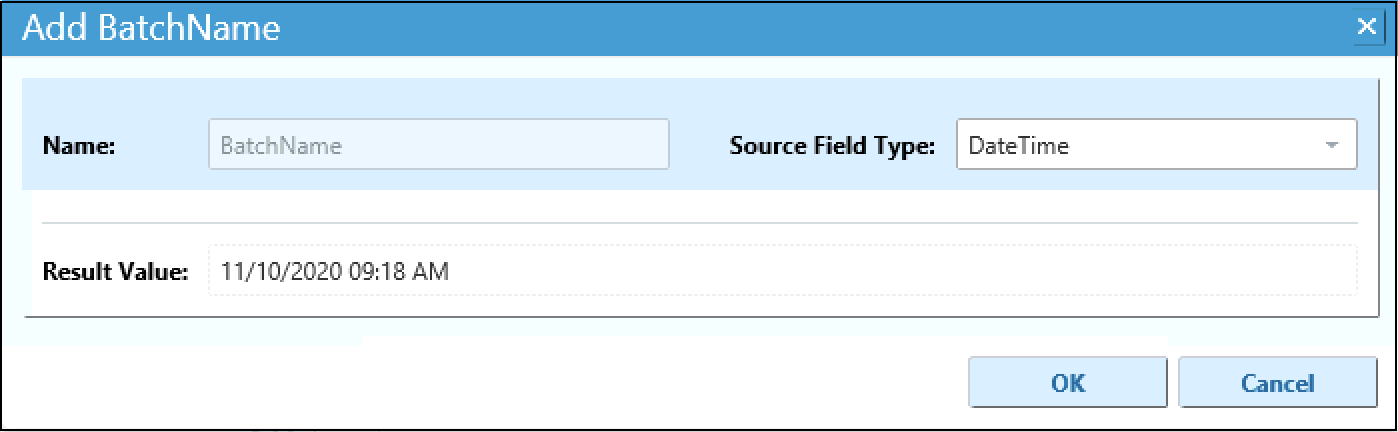
Choosing the DateTime value will include today’s date and current time, in MM/DD/YYYY for Date and 00:00 AM/PM for Time format.
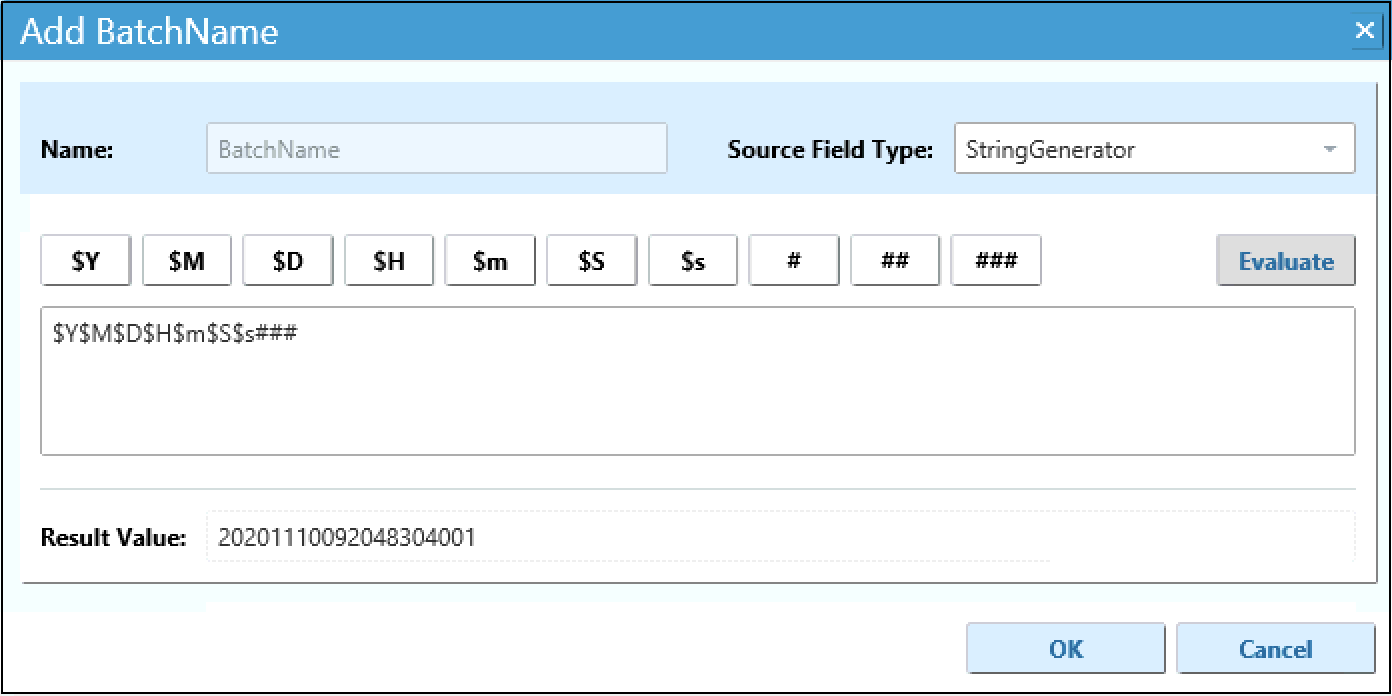
Selecting StringGenerator will allow the User to add a Source Field Type, with specific naming buttons and values.
You can type any letters, numbers, or prefixes in the AddBatchName box or click the configured buttons.
Enter a name, and click the buttons above the table, to name your batch.
Note: You can hover your mouse cursor over each button, to see the name and number of digits for each one.
The following table displays the naming convention buttons:
| Button | Name | Digits |
|---|---|---|
| $Y | Year | 4 |
| $M | Month | 2 |
| $D | Day | 2 |
| $H | Hour | 2 |
| $m | Minute | 2 |
| $S | Second | 2 |
| Ss | Millisecond | 3 |
| # | Sequence Number | 1 |
| ## | Sequence Number | 2 |
| ### | Sequence Number | 3 |
Click the blue Evaluate button, and the Result Value will generate after.
Selecting StingLiteral will allow you to type in specific values, in the String Literal and Result Value fields.
You can select Time, to include the current time in 00:00 AM/PM format, for the batch.
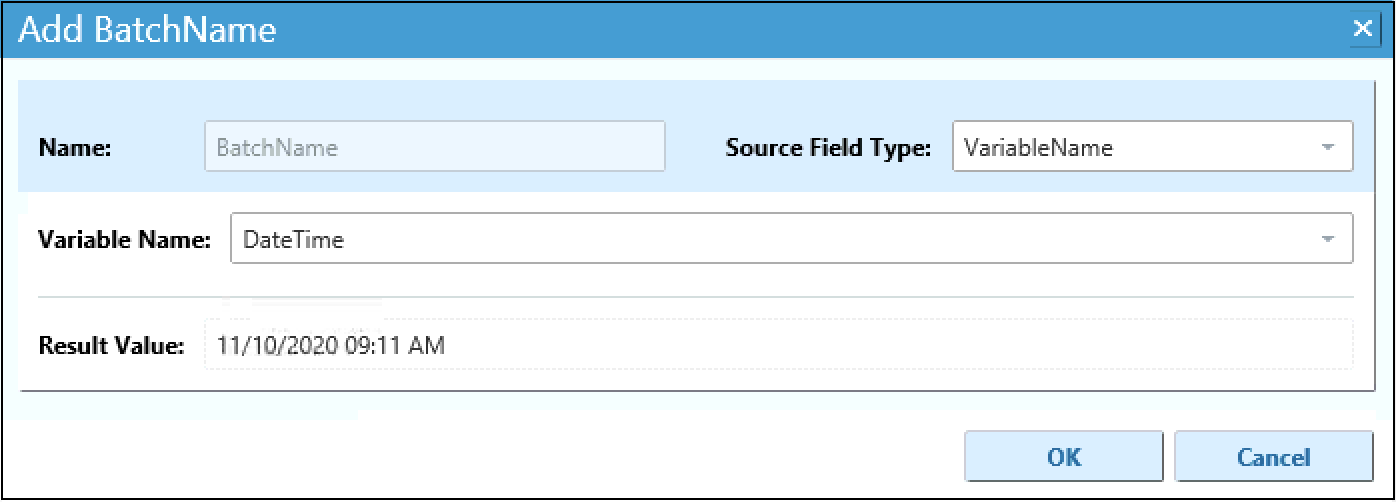
Selecting VariableName will allow the User to select the previously added Variable and generate a Result Value.
The User will click the drop-down arrow, next to Variable Name and select a Variable to add to the batch.
-
After you have chosen the Batch Fields values, click the blue OK button.
The new value will appear under Batch Fields, in the Add Field Mapping Definition window.
-
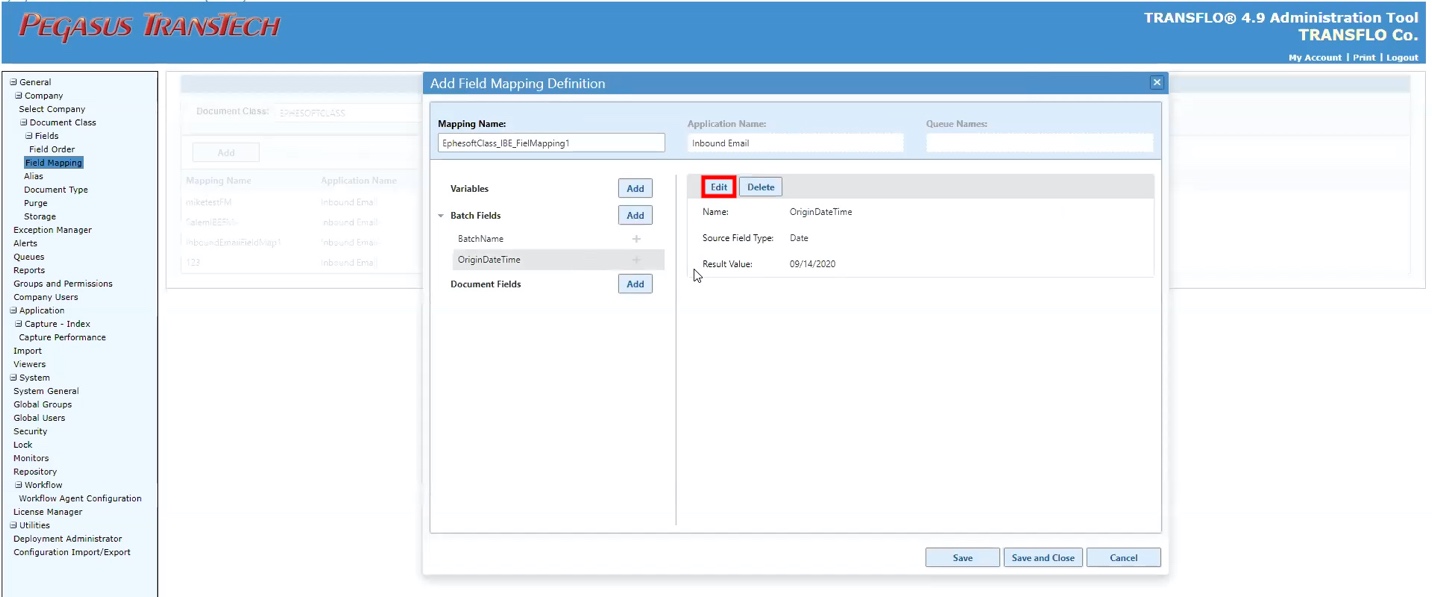
If you need to edit or delete the Batch Fields that were added, click the Edit icon to the right of the name.
Click the blue Edit button, to make changes to the values.
To delete the Batch Fields, click the blue Delete button.
Repeat the above steps, to configure the details for: OriginDateTime, OriginTruckStopLocationName, OriginUserName, and WorkflowCaseIndicator.
After you have completed adding the Batch Fields, the next step is to add the Document Fields, if needed.
Document Fields are extra set of values, to be included in the new Field Mapping. You can create a custom Document Field in addition to the pre-configured fields in the TRANSFLO® 4.9 Administration Tool. After you create your fields, you can add a data mapping into those defined fields in the Field Mapping section. Adding these values is optional, in order to create a new Field Map for Batches and Queues.
-
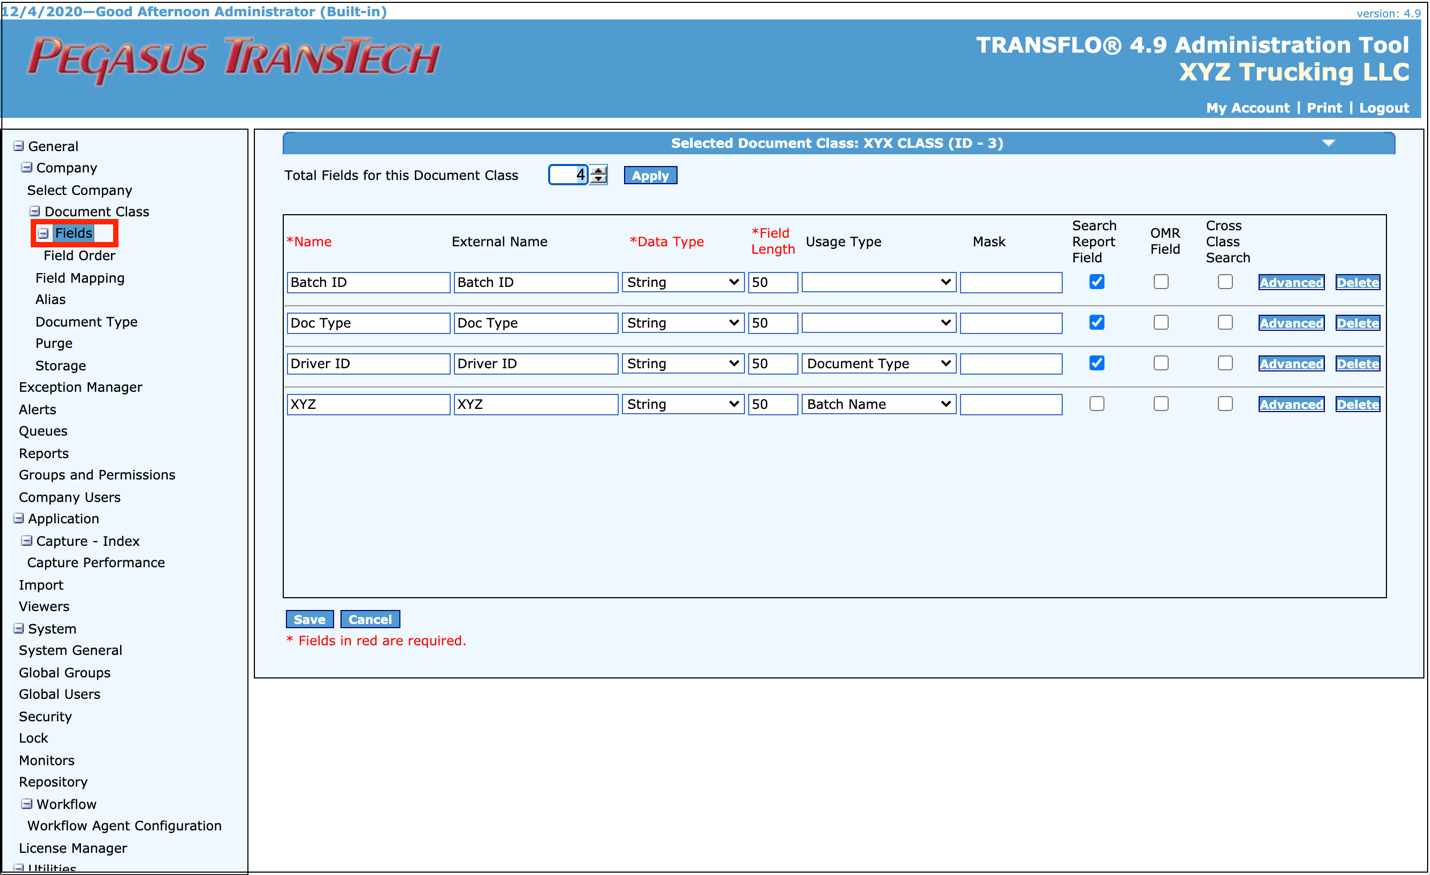
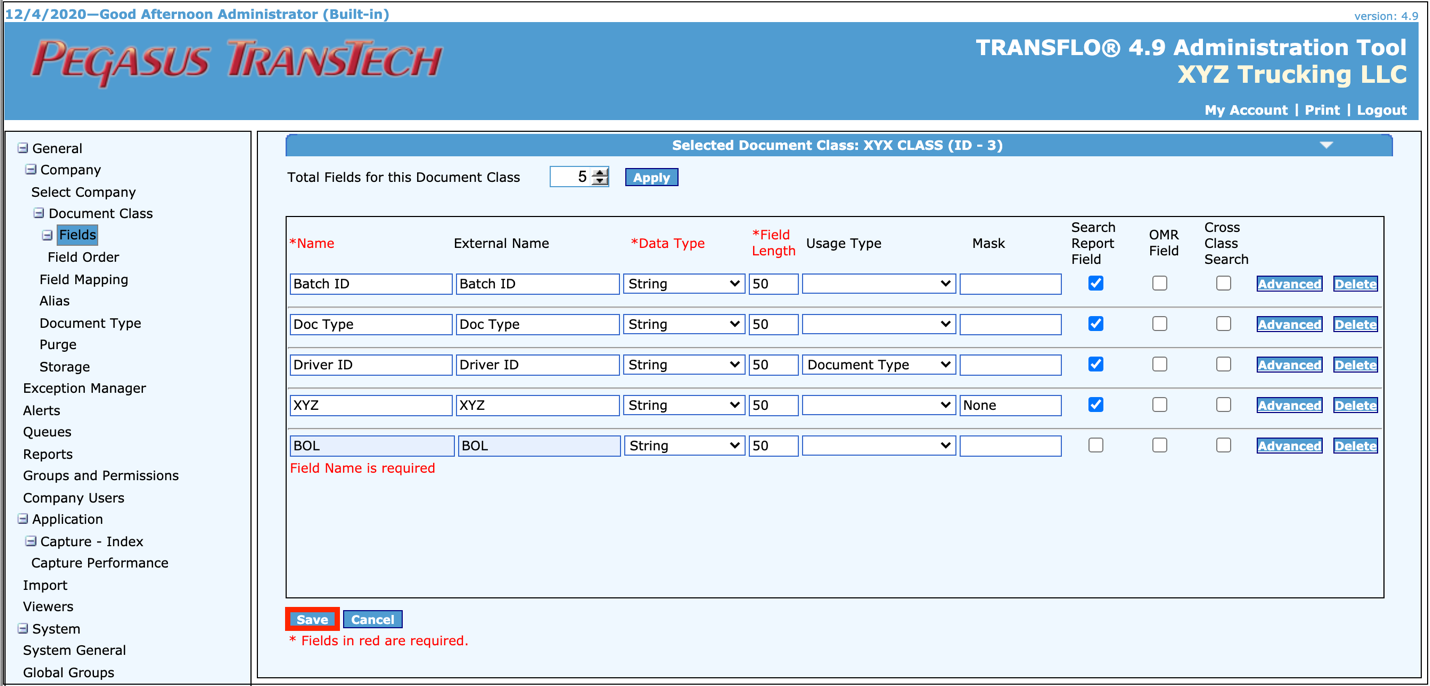
In the navigation pane, click Fields.

-
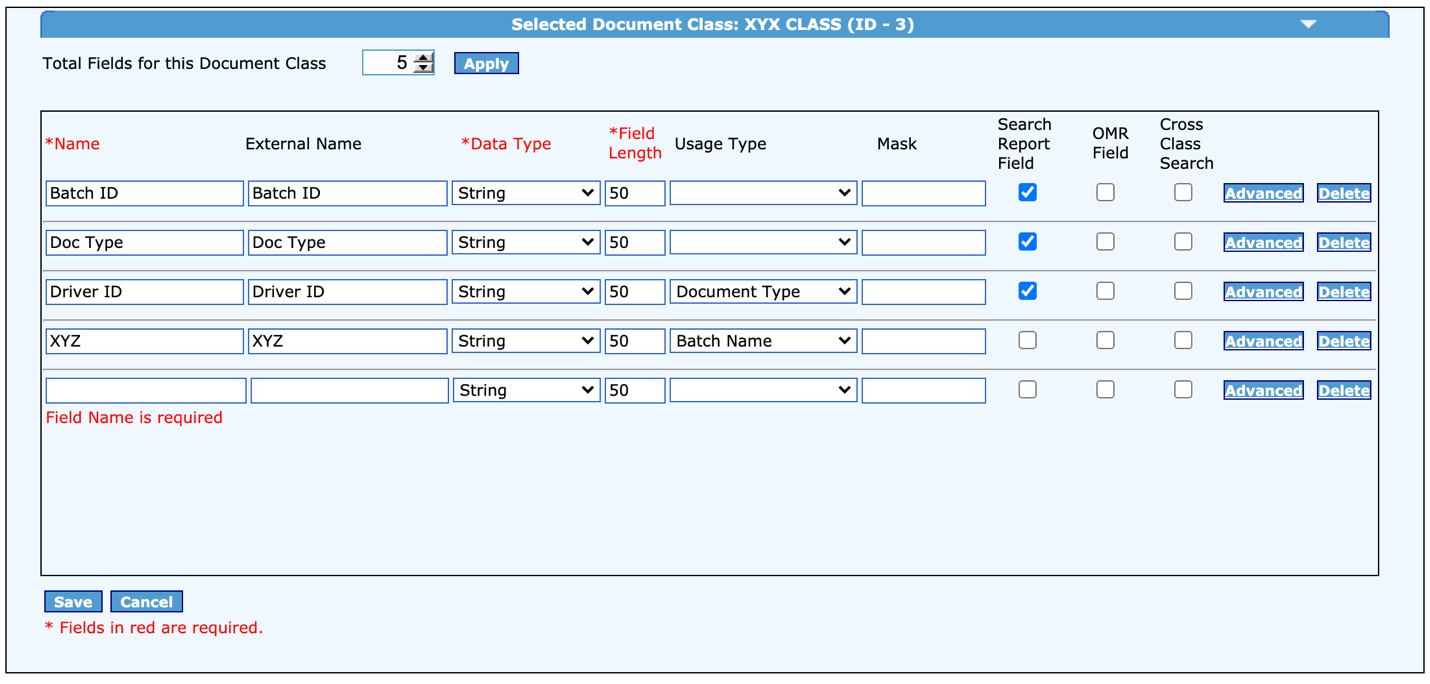
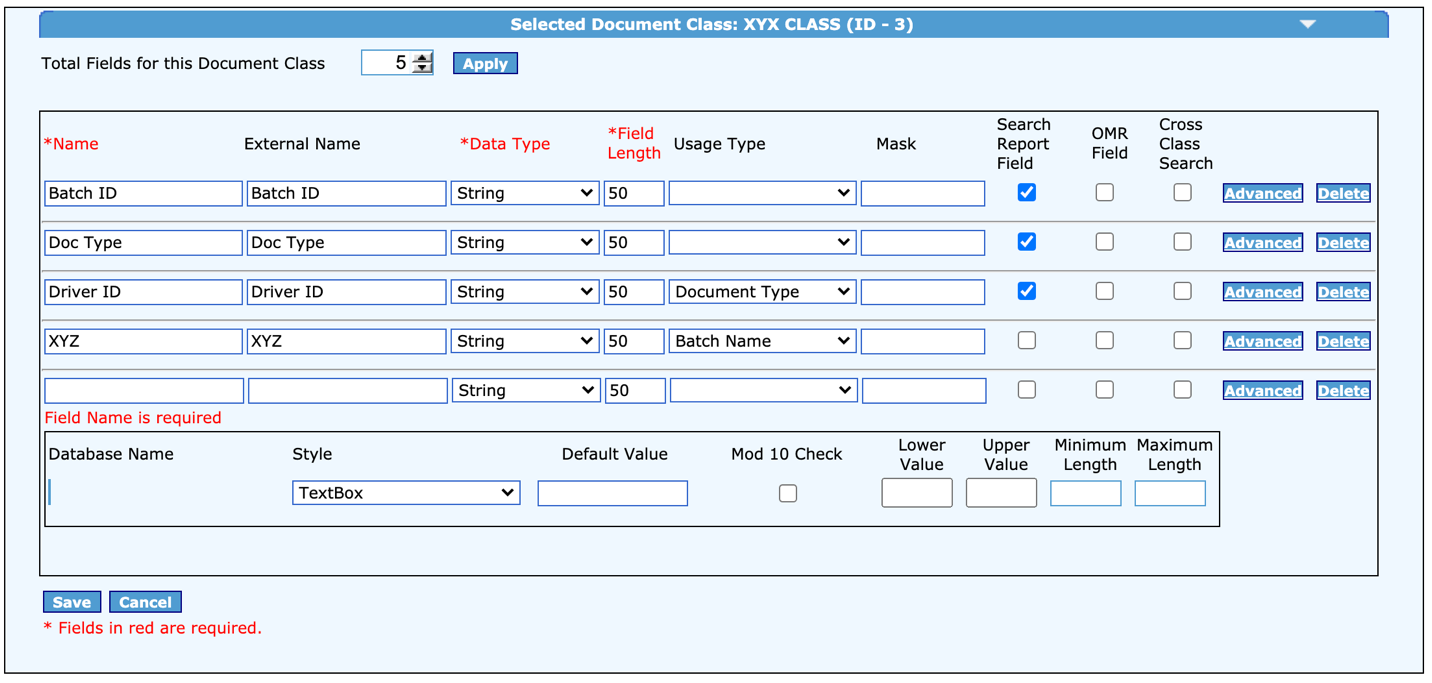
Click the arrows next to Total Fields for this Document Class or enter a number and click the blue Apply button.

A new Field appears under the pre-configured Fields.
-
Complete the required Name, Data Type, and Field Length fields.
-
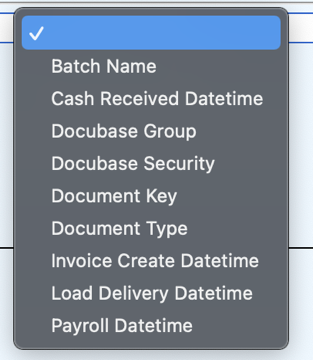
(Optional) To add Usage Type data, click the drop-down arrow under the column. Enter names in the External Name and Mask fields.

-
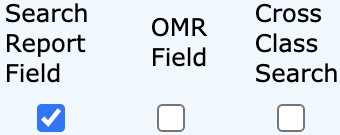
If necessary, click the check boxes in the Search Report Field, OMR Field, and Cross Class Search columns.

-
If you need to add more details to the custom Field, such as Maximum and Minimum Length, click the Advanced button, to the right. Enter the custom fields.

-
Click Save to save the details, or Close to close the Advanced section.
Note: Clicking the Close button will delete the new custom Field. Clarify the Advanced section needs, before adding a custom Field.

-
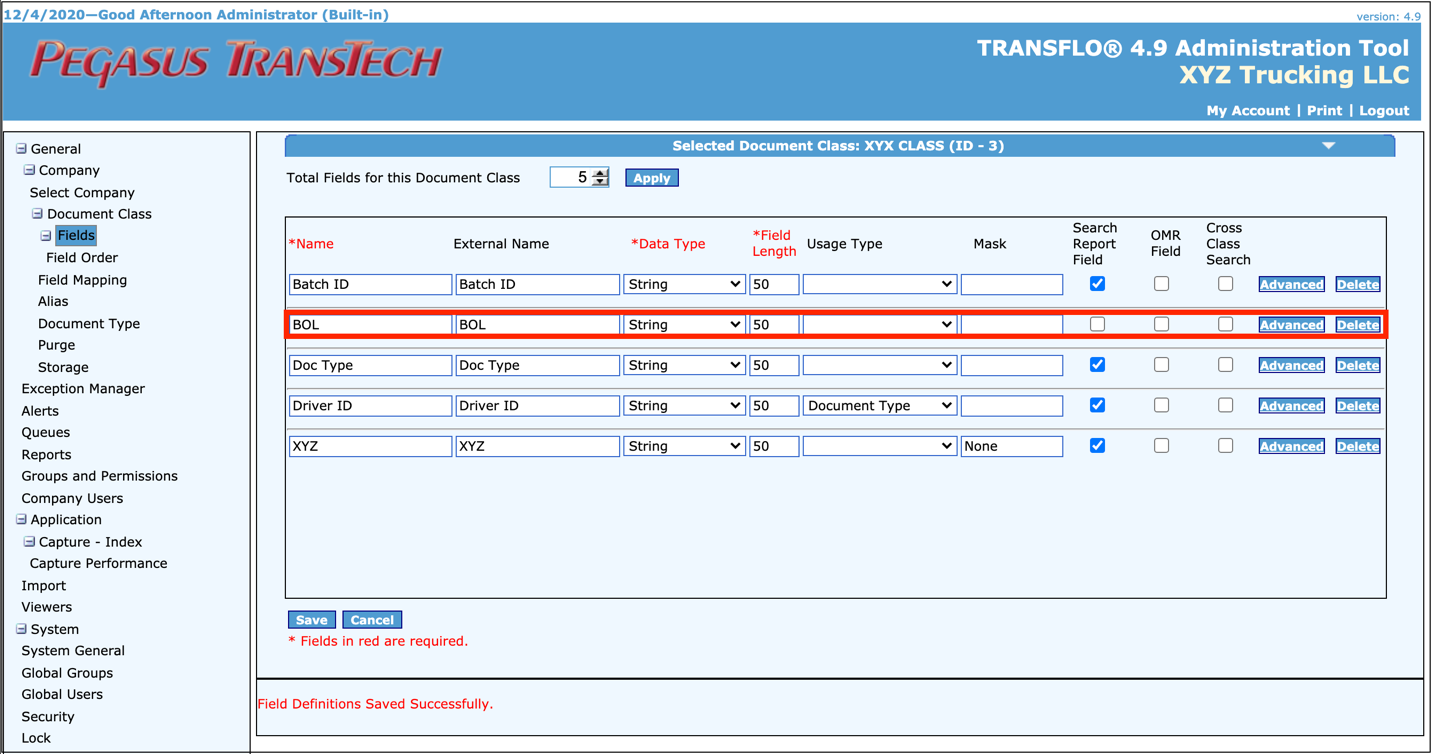
The new custom field appears in the Fields section.

-
The custom Field will also appear, when adding Document Fields in the Field Mapping section.

-
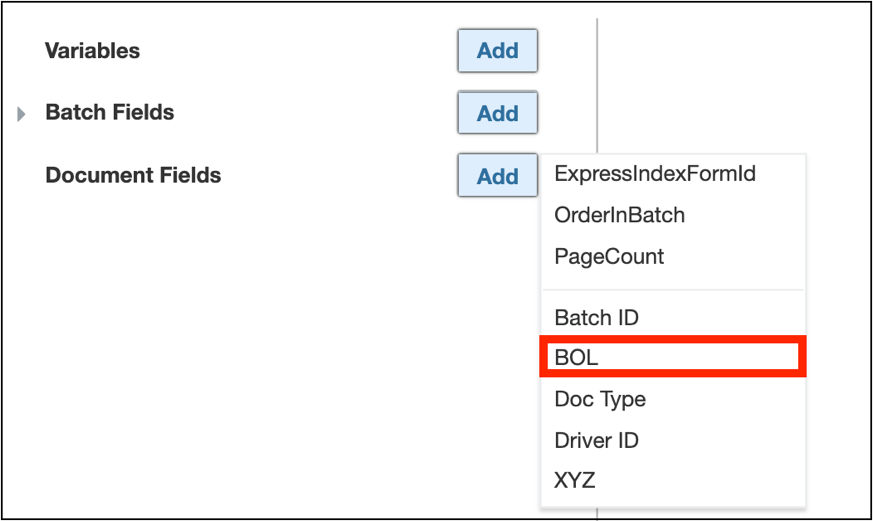
In addition to custom Document Fields, the following options can be added as Document Fields in the TRANSFLO® 4.9 Administration Tool:
-
DocumentFileName
-
ExpressIndexFormId
-
OrderInBatch
-
PageCount
-
BatchID
-
BillTo
-
DeliveryDate
-
DeliveryLocation
-
DocNumber
-
DocType
-
DriverID
-
DriverType
-
FleetID
-
InvoiceNumber
-
OrderNumber
-
PickupDate
-
PickupLocation
-
ScanDate
-
TractorID
-
TrailerID
-
-
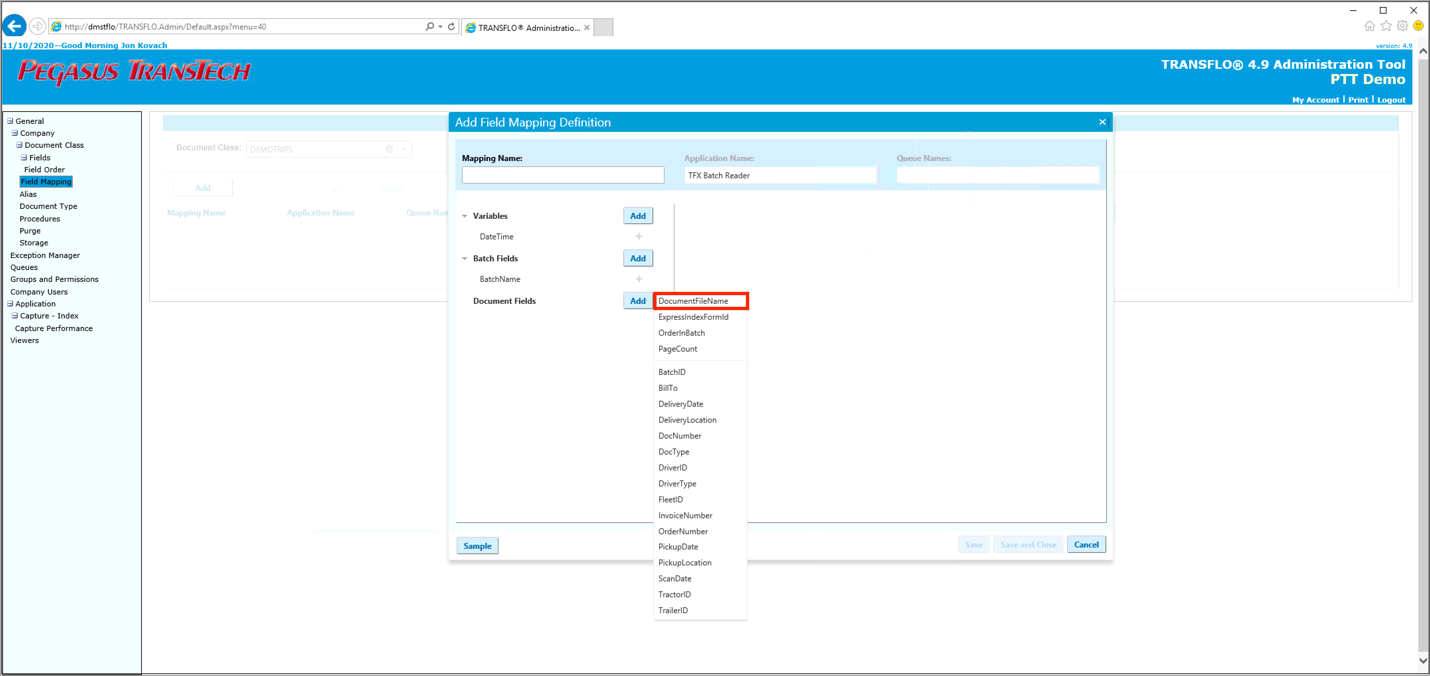
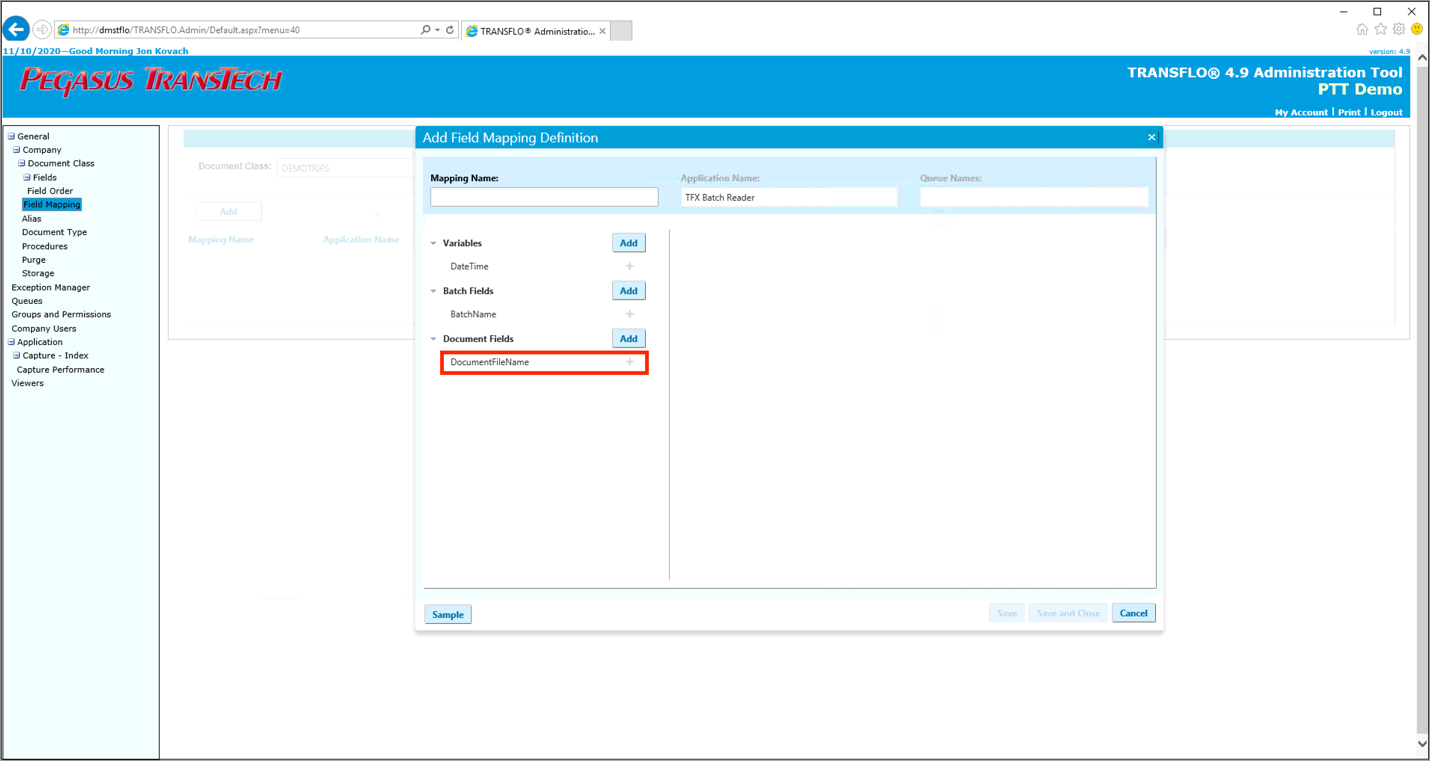
For example, to add the DocumentFileName field, follow these sub-steps:
-
Click the Add button next to Document Fields, then select DocumentFileName.

-
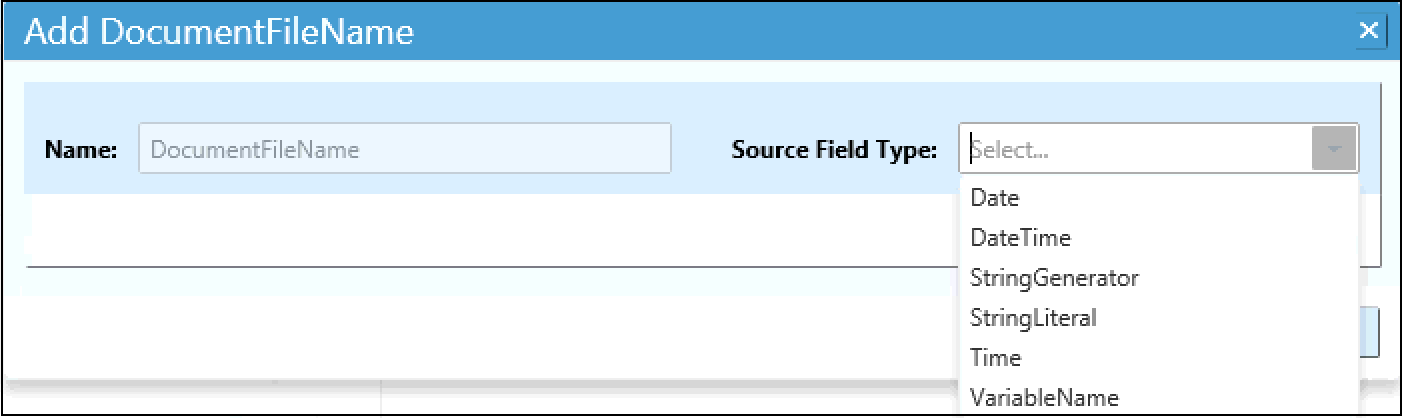
Click the drop-down
arrow next to Source Field Type and select the option for the field
-
The Source Field Type indicates the type of data to reflect in the Document Fields. This will be added to the Batches, in which Field Mapping is configured. The Date will include today’s date, in MM/DD/YYYY format.

-
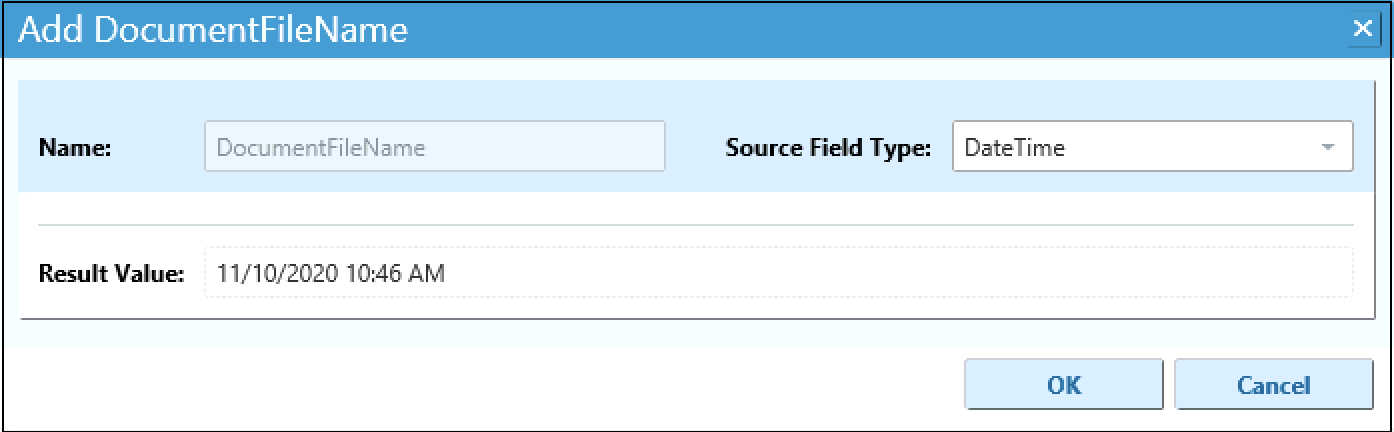
The DateTime value will include today’s date and current time, in MM/DD/YYYY for date and 00:00 AM/PM for time format.

-
Selecting StringGenerator will allow the User to create a Source Field Type with specific naming buttons and values.
-
Click the buttons above the table, to name your batch.

-
Hover your mouse cursor over each button, to see the name and number of digits for each one. The following table displays the naming convention buttons:
Button Name Digits $Y Year 4 $M Month 2 $D Day 2 $H Hour 2 $m Minute 2 $S Second 2 Ss Millisecond 3 # Sequence Number 1 ## Sequence Number 2 ### Sequence Number 3 -
Click the blue Evaluate button, and the Result Value will generate after.
-
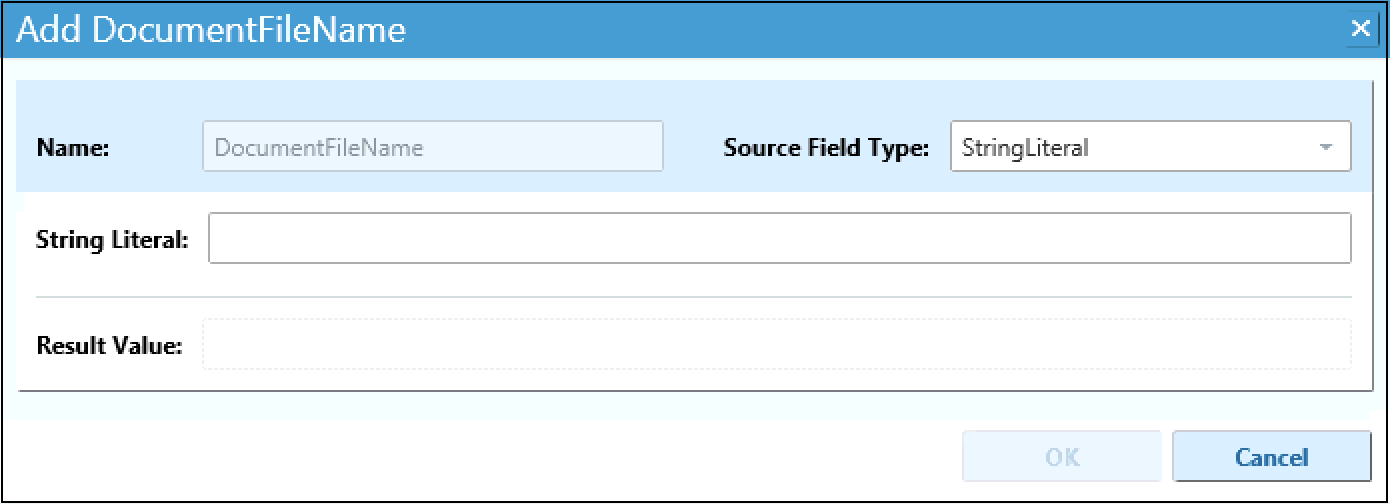
Selecting StringLiteral allows the User to input custom data, including the Result Value, into the Field Map.

-
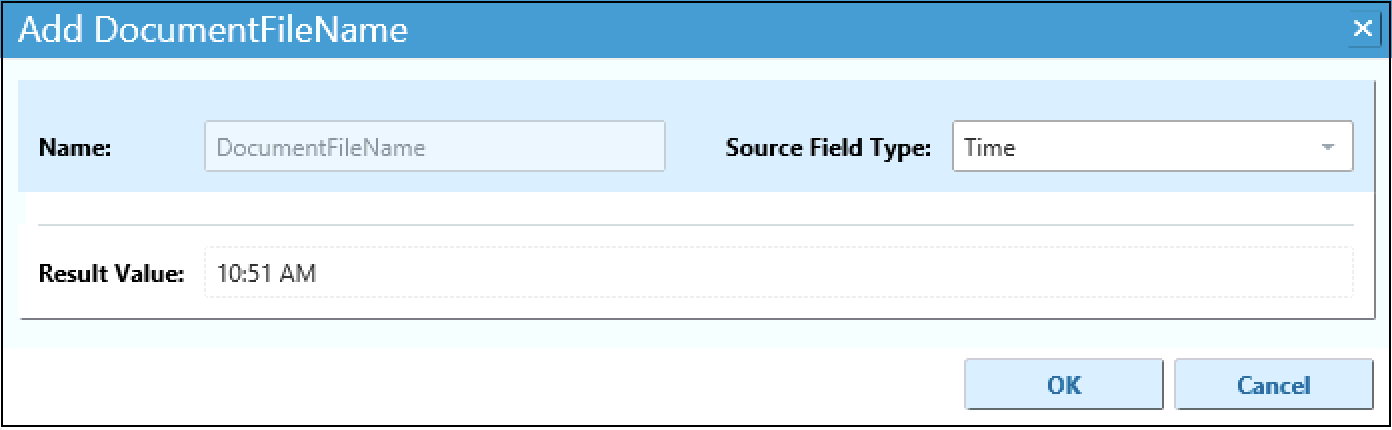
You can select Time, to include the current time in 00:00 AM/PM format, for the batch.

-
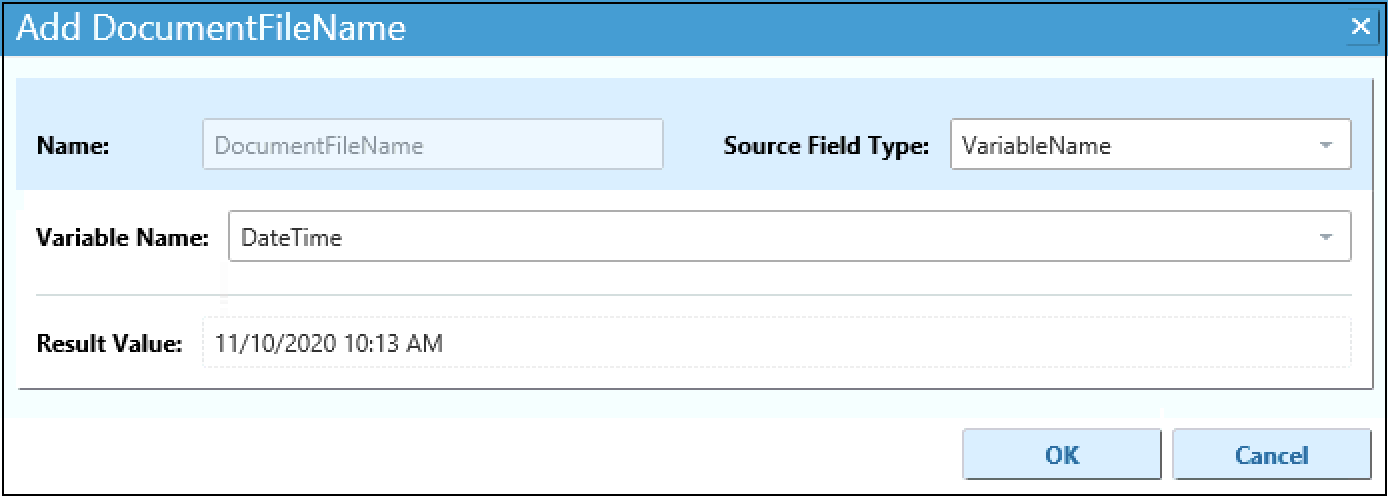
Selecting VariableName will allow the User to select the previously added Variable and generate a Result Value.
-
The User will click the drop-down
arrow, next to Variable Name and select a Variable to add to the batch.
-
- After you have configured the Document Fields values, click the blue OK button. The new value will appear under Document Fields, in the Add Field Mapping Definition window.


- If you need to edit or delete the Document Fields that were added, click the Edit icon to the right of the name.
- Click the blue Edit button, to make changes to the values.
- To delete the Document Fields, click the blue Delete button.


Once you have created your Variables, Batch Fields, and Document Fields, you can save the new Field Mapping.
-
Enter a Mapping Name. You must include a Mapping Name or you will not be able to save the added fields to the Field Mapping.
-
Click the blue Save button. The Add Field Mapping Definition window will remain open. To save and exit to the main Field Mapping screen, click the blue Save and Close button.
IMPORTANT: If you do not save any of the changes to the Field Map, clicking the blue Cancel button will delete anything that you have configured.
-
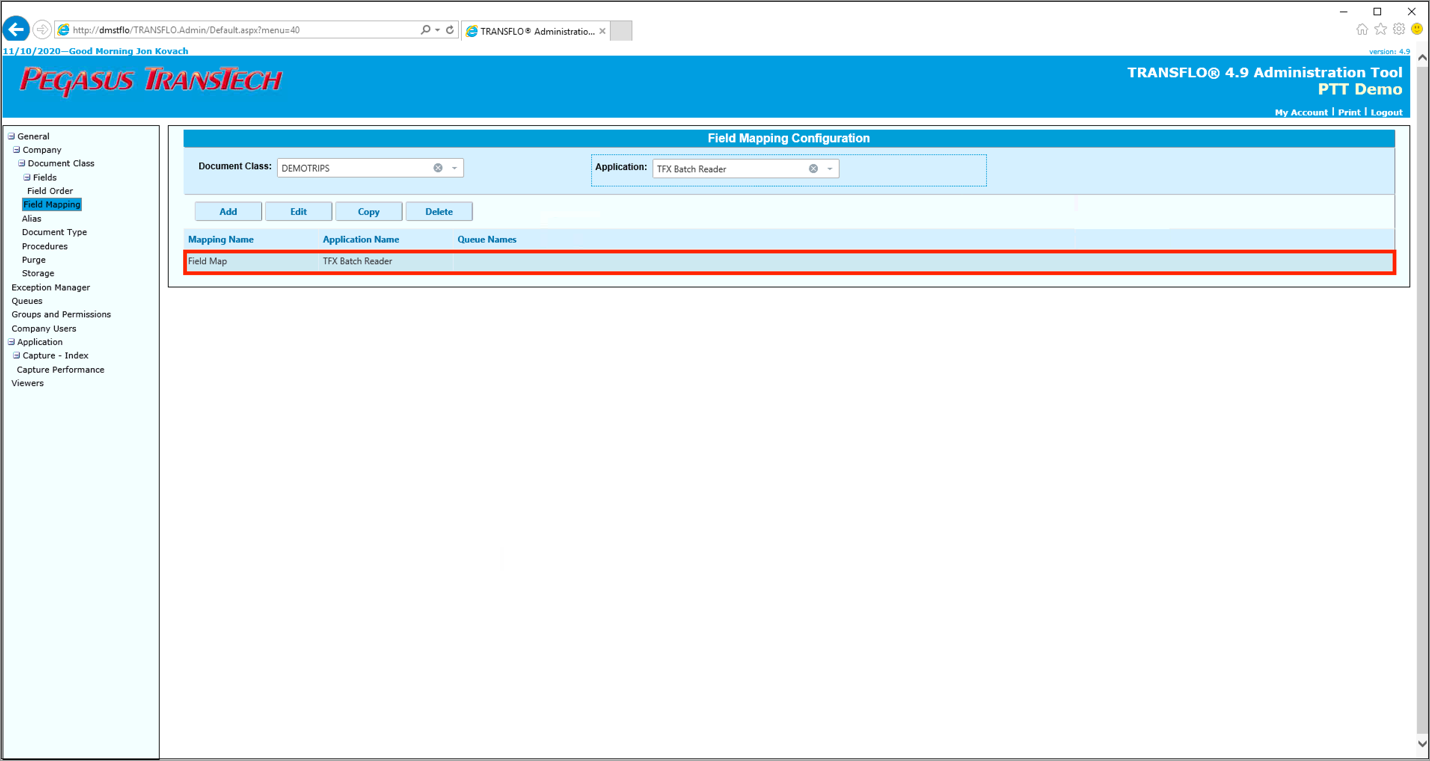
After you have saved the changes and closed the Add Field Mapping Definition window, the new Field Map will appear on the main Field Mapping screen.

-
To see the action buttons for a Field Map, you must select the Field Map in the list.
-
If you need to add an additional Field Map, click the blue Add button.
-
To edit the details for the added Field Map, click the blue Edit button.
-
To copy the selected Field Map to another Queue, click the blue Copy button. If you copy a Field Mapping to another Queue, it must be within the same current Document Class. If you need to create a new Field Mapping for another Document Class, you will have to select a new Document Class from the drop-down
arrow and configure the new Field Mapping. -
To remove a Field Map, click the blue Delete button.
Users have the option to edit and change any of the Field values that have been added to the Field Mapping Definition.
In this example, Batch Fields will be edited.
If you have added a Field value and need to edit and change the type:
-
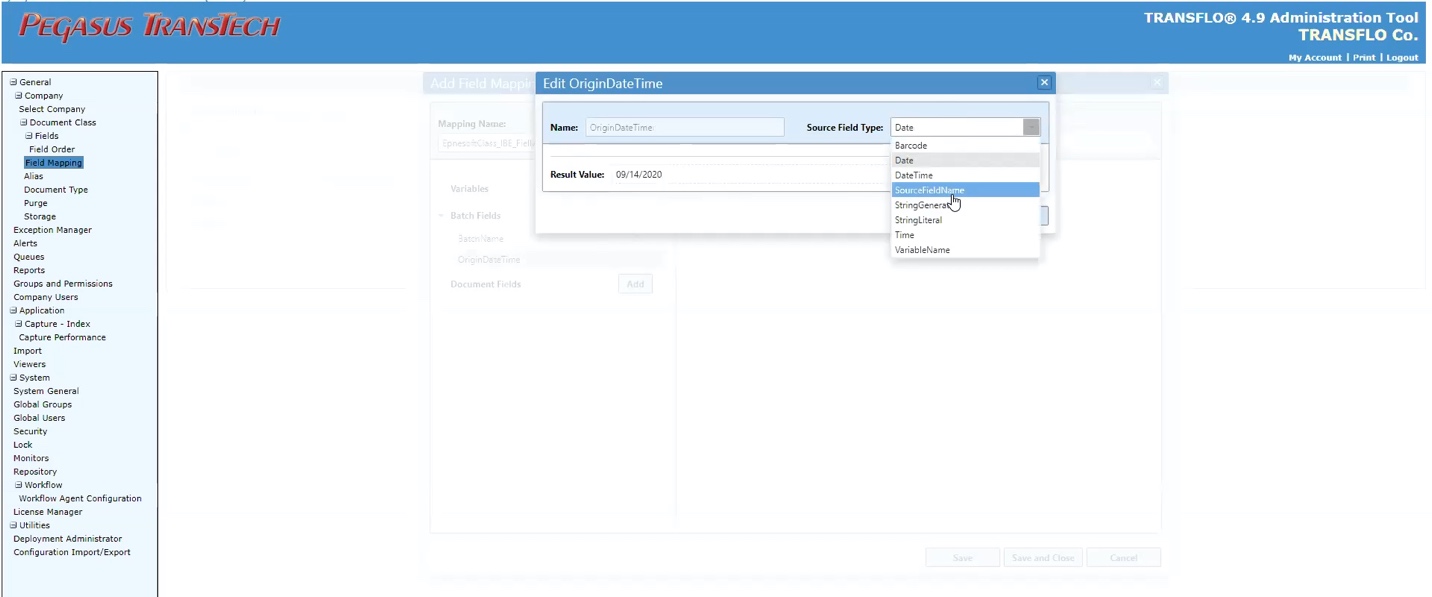
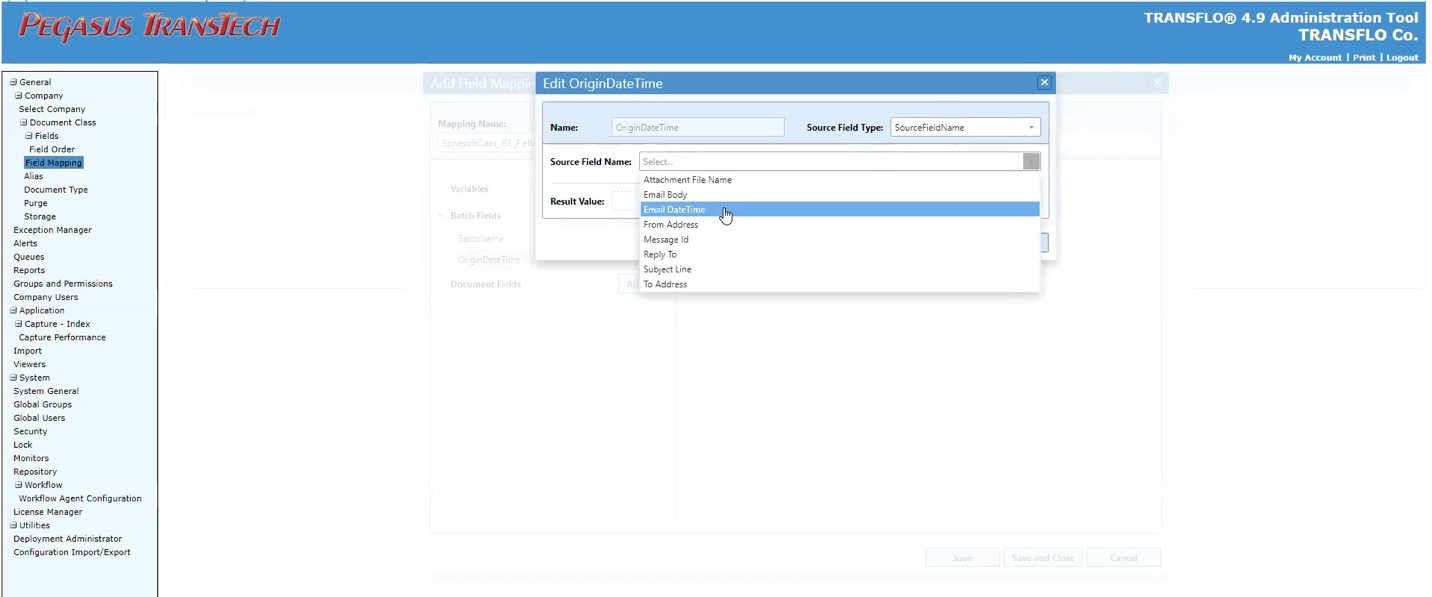
Click the name under Batch Fields, then click the Edit button. In this example, the OriginDateTime field will be changed to a SourceFieldName.

-
Select SourceFieldName, from the drop-down menu next to Source Field Type.

-
Choose the name from drop-down next to Source Field Name, then click the OK button. In this example, the Email DateTime name is selected. The Result Value will pre-populate automatically, after a name is chosen.

![]() View a demonstration of these steps in one or more Transflo videos:
View a demonstration of these steps in one or more Transflo videos: