Configure the Inbound Email Server Queue
To configure the Inbound Email queue, you must have an alias associated with a document class. To save the inbound email queue parameters, create a field map. You can use the same field mapping for multiple queues.
As an administrator, configure the Inbound Email queue with a field mapping for batch fields and document fields.
-
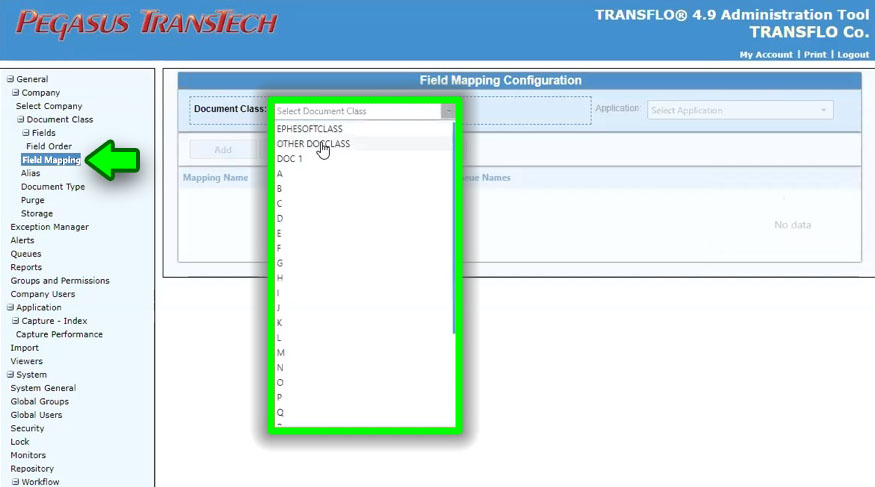
In the main menu, choose Field Mapping.
-
Select a Document Class from the drop-down menu.

-
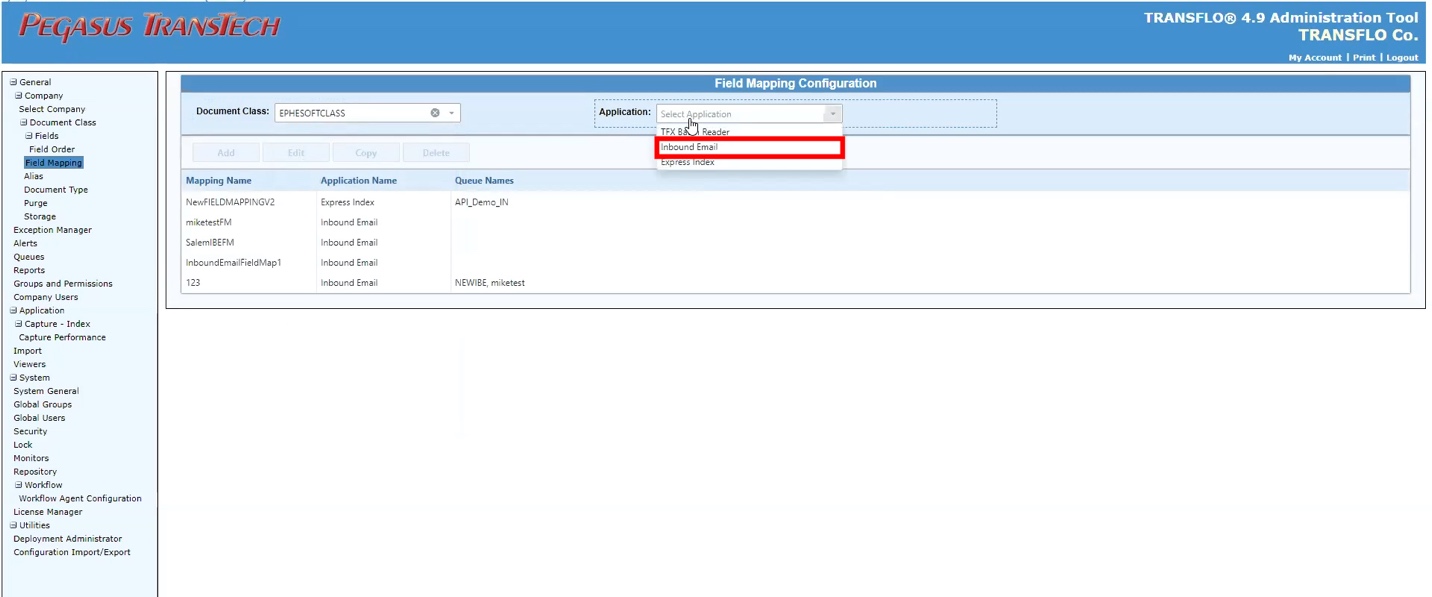
Select Inbound Email from the Application drop-down menu.

-
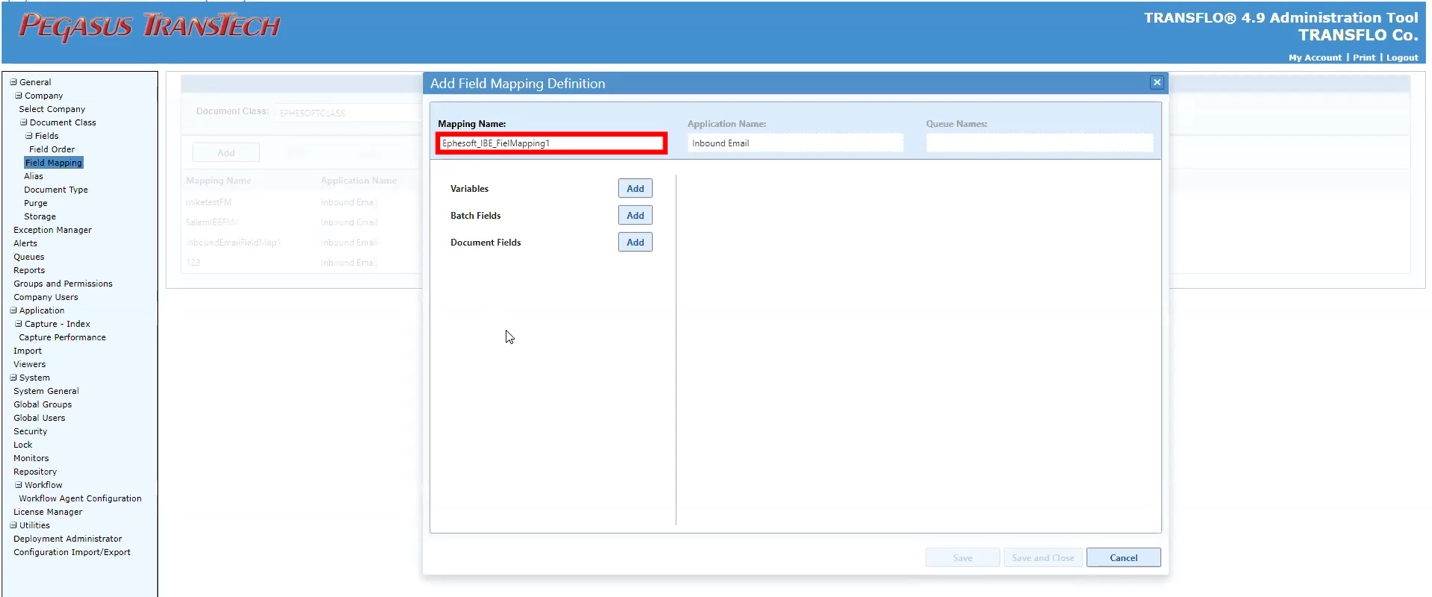
To add a new Field Mapping Name for the Inbound Email, click the blue Add button, and enter the name in the Mapping Name field.
Note: It is best practice to use the Doc Class and/or Alias as the prefix, followed by the Application type.

-
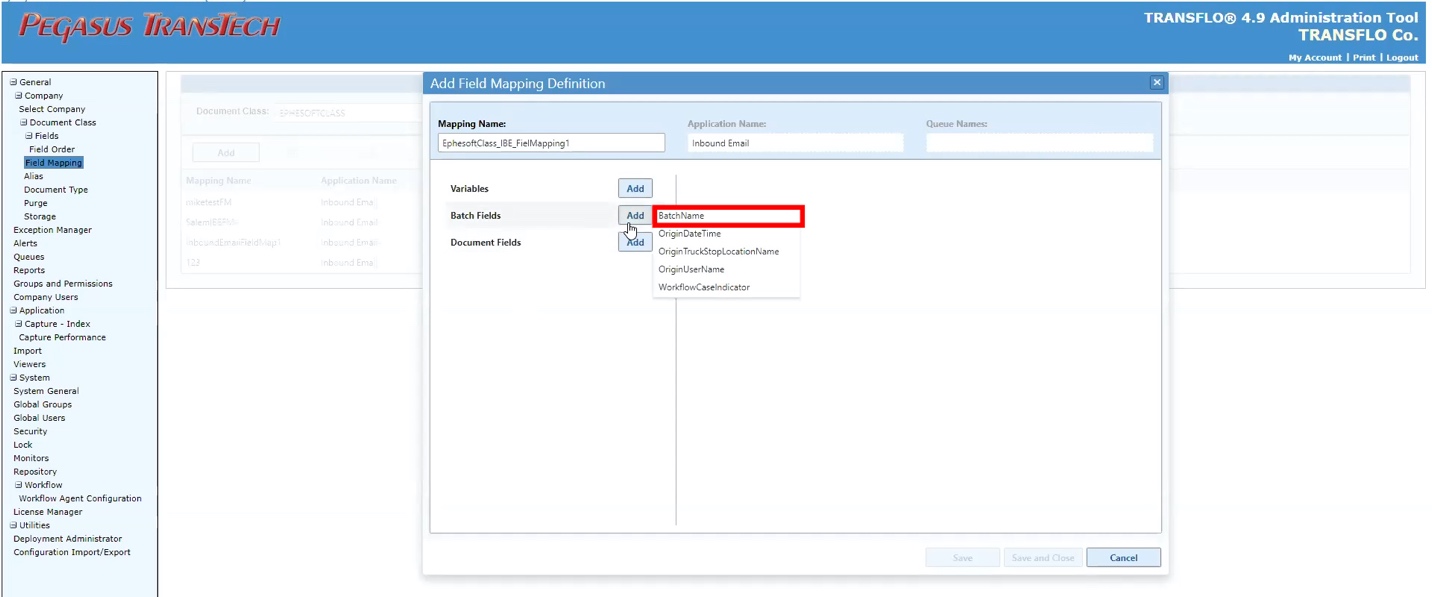
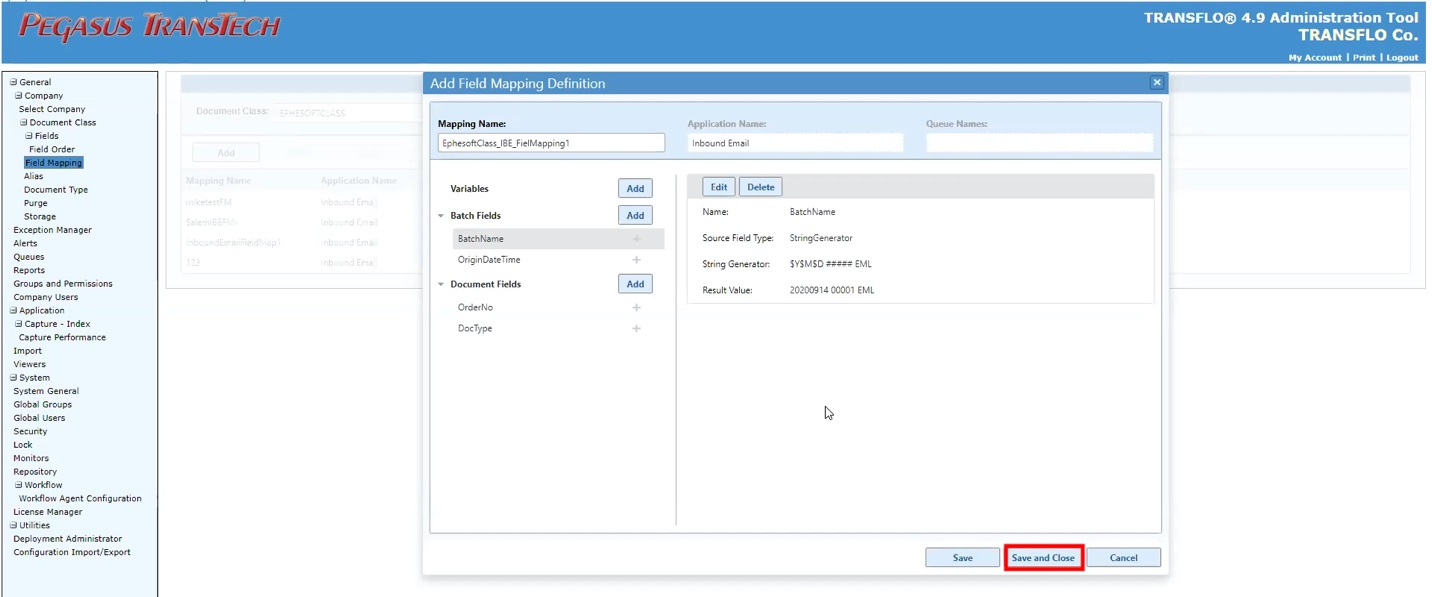
To add the batch fields:
-
Click the Add button next to Batch Fields and select BatchName.
-
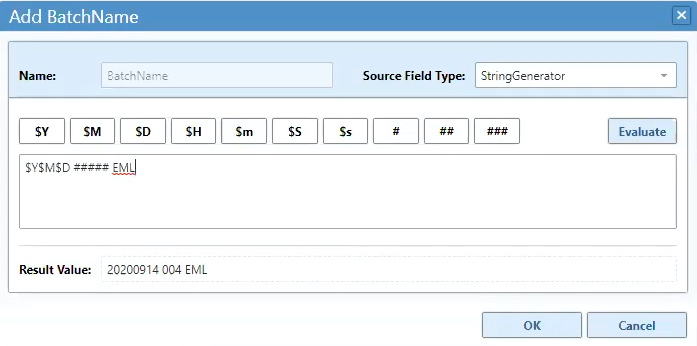
In the Name field, choose a batch name. If you do not choose a BatchName value, the system automatically generates a numerical sequence as the name.

-
In the Source Field Type drop-down field, select StringGenerator.
-
Enter the batch field definitions. You can edit directly or click the pre-defined variable buttons. Mouse over each button to see its name and number of digits.

The following table displays the naming convention buttons:
Button Name Digits $Y Year 4 $M Month 2 $D Day 2 $H Hour 2 $m Minute 2 $S Second 2 Ss Millisecond 3 # Sequence Number 1 ## Sequence Number 2 ### Sequence Number 3 -
To generate the Result Value, click the Evaluate button.
-
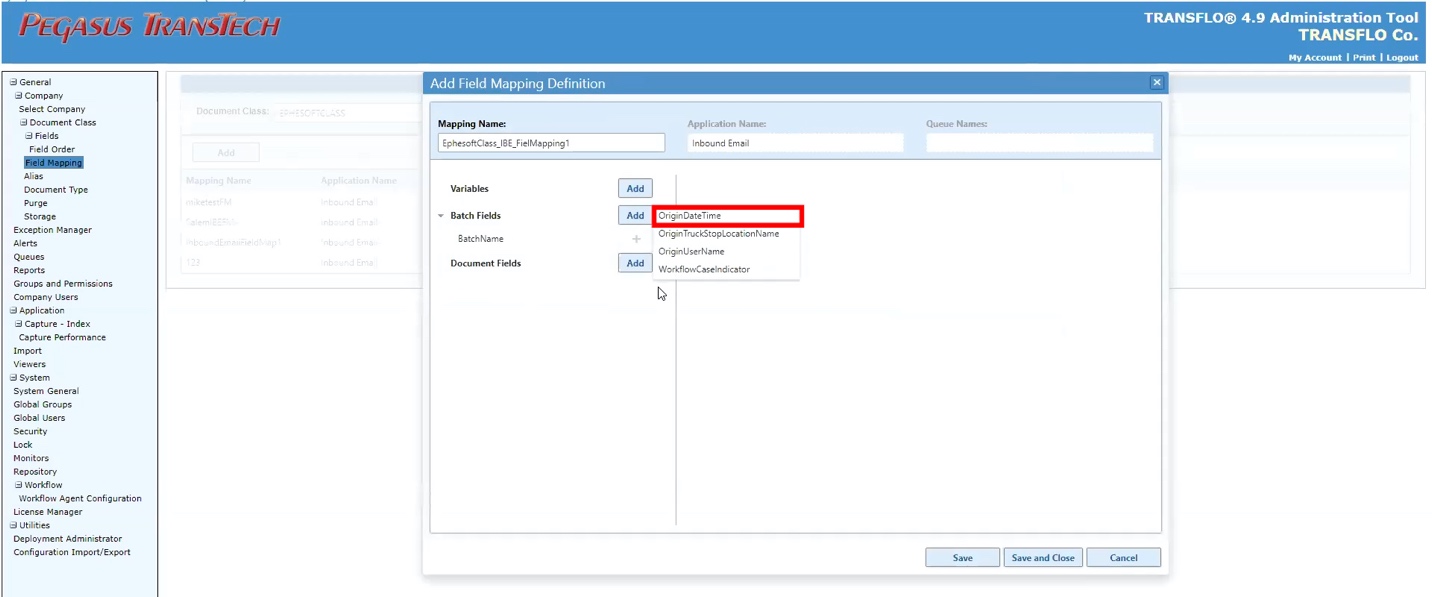
Click the Add button next to Batch Fields and select OriginDateTime.

-
In the Source Field Type field, select Date from the drop-down list. Click the OK button.

-
-
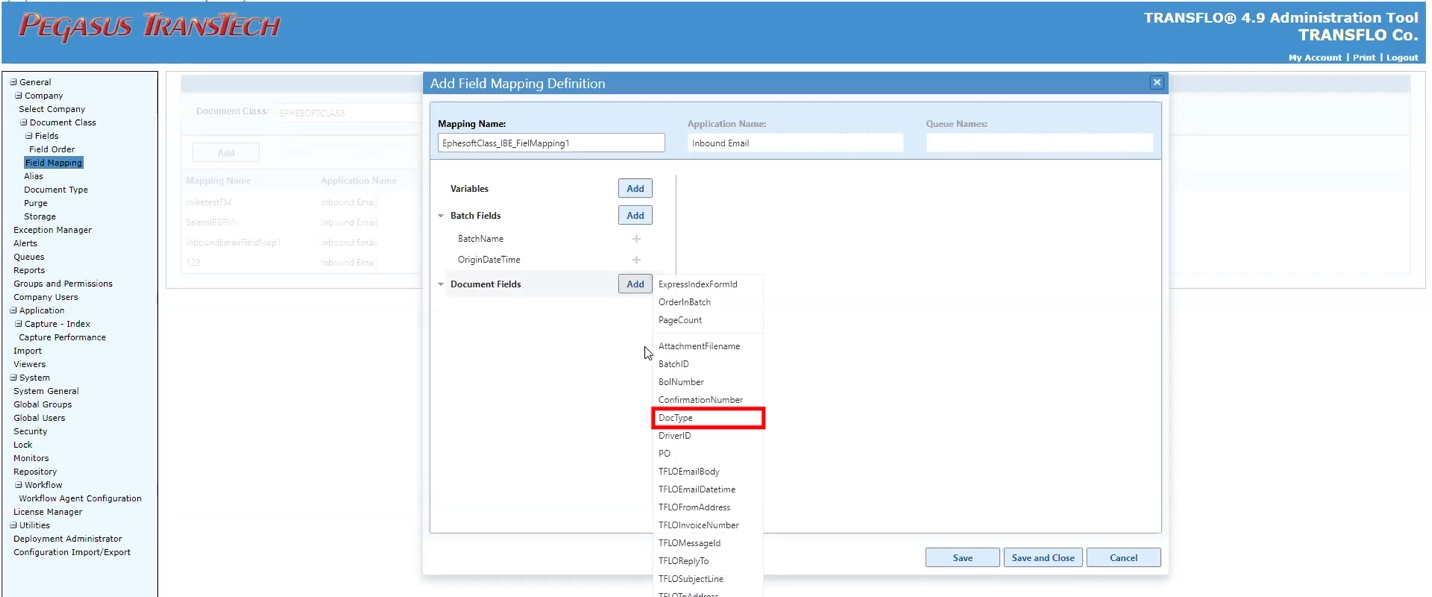
After you have completed adding the batch fields, follow the steps below to add one or more document fields if needed.
-
Click the blue Add button next to Document Fields, then select DocType.

-
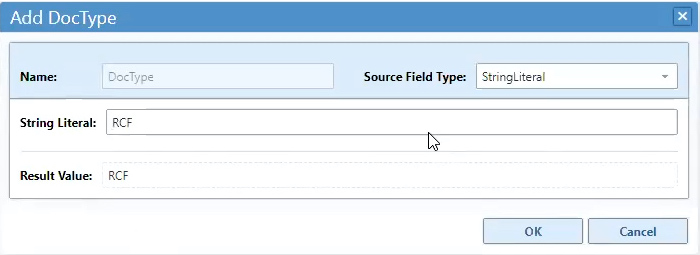
Select StringLiteral from the drop-down menu next to Source Field Type and enter a name in the field next to String Literal. The Result Value will automatically fill in a value, after you enter the name.
-
Click the blue OK button, after you have added the Document Fields.

-
After the Batch Fields and Document Fields have been created, click the Save and Close button.

-
-
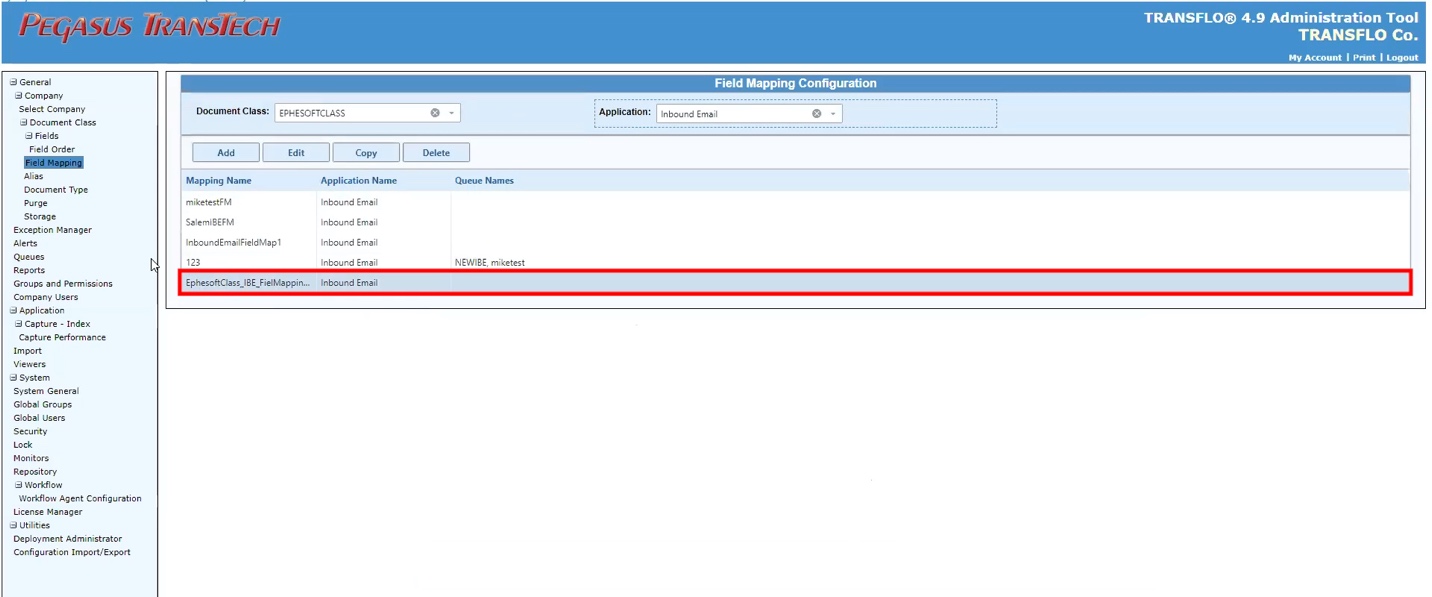
Your new Field Map appears under the Field Mapping section in the Main Menu. The following options are also available:
-
Click the Edit button to change the new Field Mapping,
-
Click Copy to copy an existing Field Map,
-
Click Delete to remove a Field Mapping from the list,
-
Click Add to create a new Field Mapping.
-
-
You can only copy a field mapping to another queue in the current document class. If you need to create new Field Mapping for another Document Class, you will have to select a new Document Class from the drop-down menu and configure the new Field Mapping.


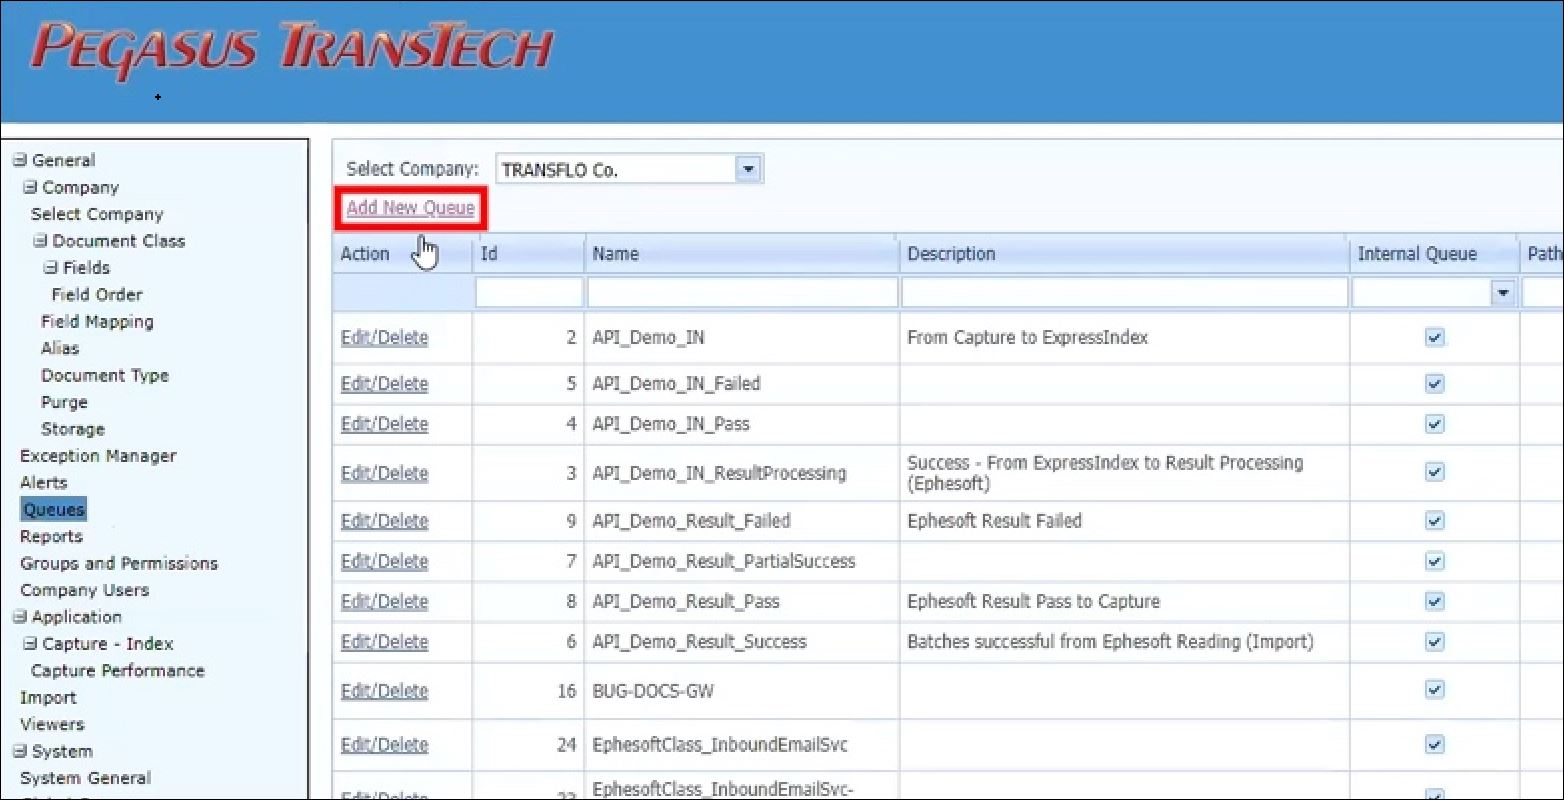
After you create a field map, create an inbound queue.
-
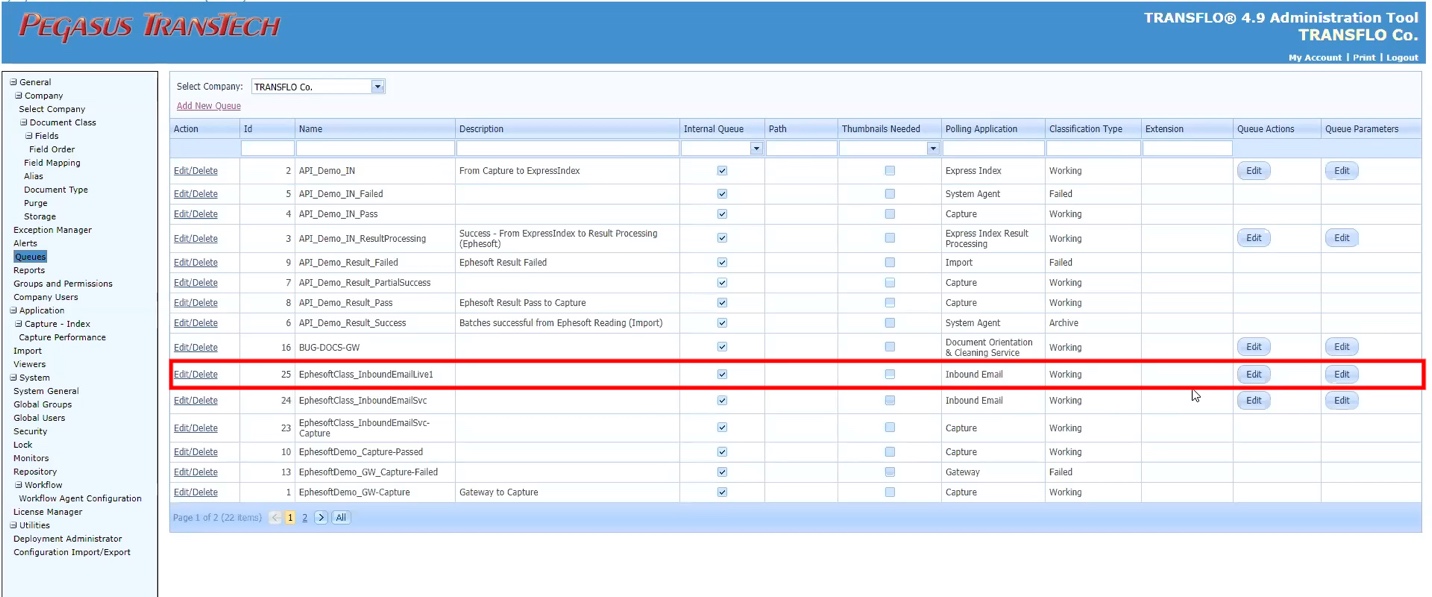
In the left navigation pane, select Queues and then click the Add New Queue link.

-
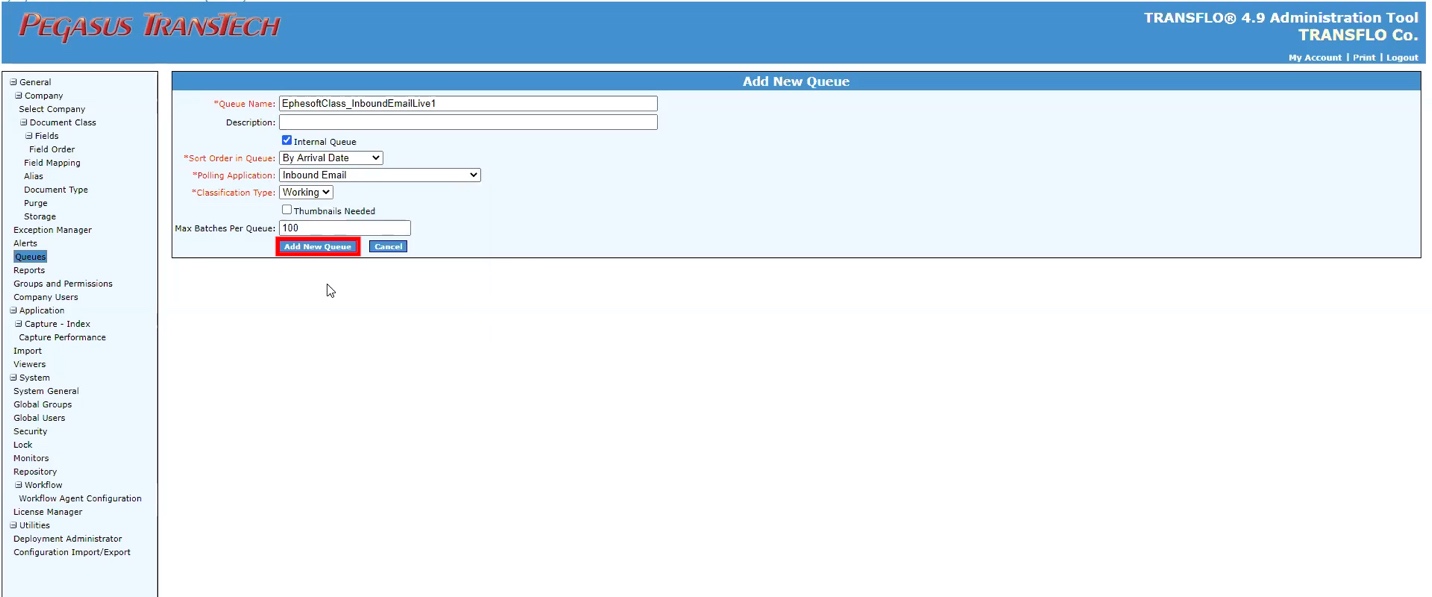
From the Add New Queue window, enter the Queue Name and add details:
-
Select By Arrival Date from the drop-down next to Sort Order in Queue.
-
Select Inbound Email from the drop-down next to Polling Application.
-
Select Working from the drop-down next to Classification Type.
Note: The default number for the Max Batches Per Queue is 100. This can be changed by the Administrator.

-
-
After adding the Queue details, click the blue Add New Queue button. After the new Queue has been added, the next steps are to configure the Queue Actions and Queue Parameters.
-
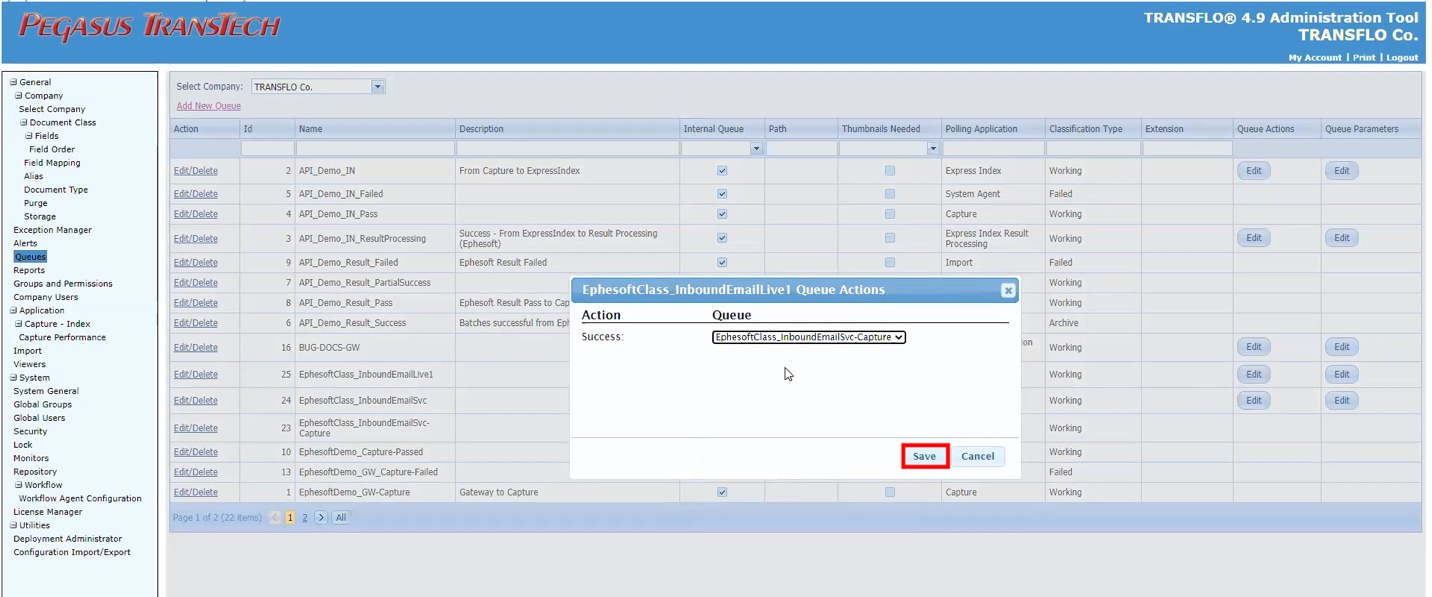
Queue Actions signify the events that will happen, when a document has been reached through a Queue and processed. In this example, Success will be the configured Queue Action.
-
Click the Edit button under the Queue Actions column.

-
Select a name from the drop-down menu under Queue, then click the blue Save button.

-
After you have configured the Queue Actions, click the Edit button under the Queue Parameters column. To configure the Queue Parameters, continue with the steps in the next section.

The steps below are continued from the previous section.
-
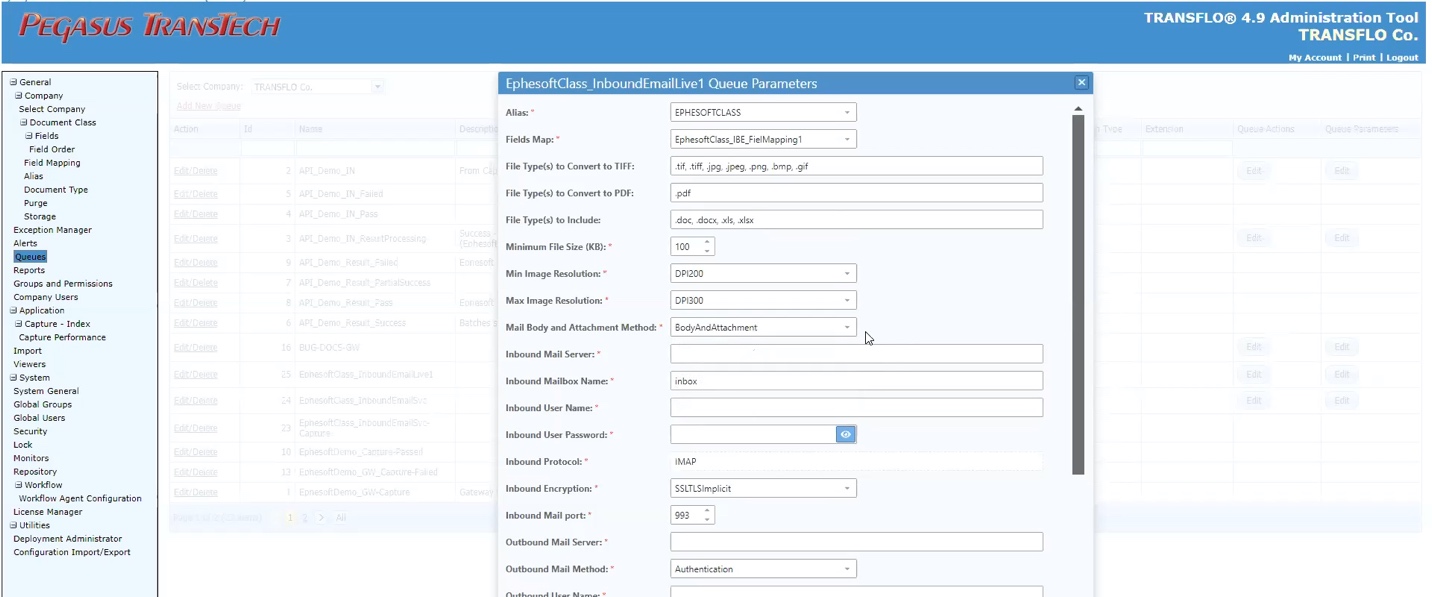
Select an appropriate name from the Alias drop-down menu (this is the same alias used for the Field Mapping process).
-
In the Field Maps drop-down, select the new field map that you previously created (a few procedures before this one).
-
Enter the types of files that you would like to be converted to a single-page TIFF file, in the File Type(s) to Convert to TIFF field (In Gateway, this is called ConvertValidImagesToTiff).
-
Enter the types of files that you would like to be converted to single-page PDF file, in the File Type(s) to Convert to PDF field (In Gateway, this is called PdfConversion).
-
Enter the list of file types that you would like to be included in the batch, in the File Type(s) to Include field (In Gateway, this is called AdditionalFileTypes).
-
Enter the desired file size in the Minimum File Size (KB) field.
The default number is 9 KB.
You can use the arrows to increase or decrease the value, or simply enter a number.
-
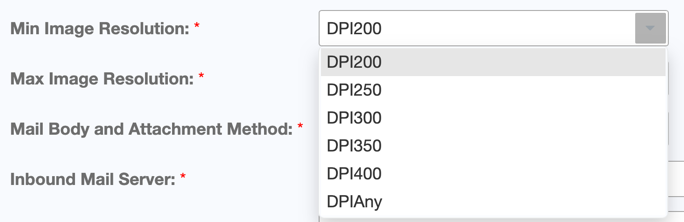
Enter the minimum image resolution in the Min Image Resolution field.
The default value is DPIAny.
Note: If you add images that are less than 200 DPI, the size will automatically be increased to the minimum value of DPI200.

-
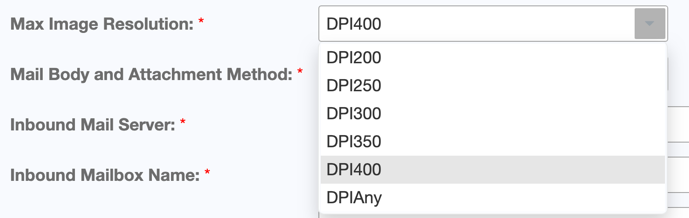
Enter the maximum image resolution in the Max Image Resolution field.
The default value is DPIAny.
Note: If you add images that are more than 400 DPI, the size will automatically be decreased to the maximum value of DPI400.
-
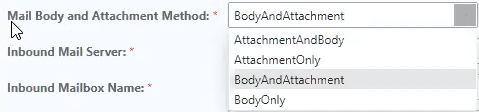
Click the drop-down menu next to Mail Body and Attachment Method and select a value.
The default value is BodyAndAttachment.
Note: The order of processing will be based on the title. Ex.BodyAndAttachment will process the Body first then the Attachment second.

-
Enter the inbound mail server in the Inbound Mail Server field. If you forget the name of your server, contact your Administrator.
-
Enter the name of the inbound mailbox in the Inbound Mailbox Name field (In Gateway, this is called Mailbox).
-
Enter the username used to authenticate the inbound mail server in the Inbound User Name field (In Gateway, this is called User).
-
Enter the password used to authenticate the inbound mail server in the Inbound User Password field (In Gateway, this is called Password).
To reveal the password (hidden for security), click
 Show Password.
 -
The Inbound Protocol will be automatically filled with the IMAP value, as this is currently the only supported function (In Gateway, this is called InboundAuthenticationMode).
-
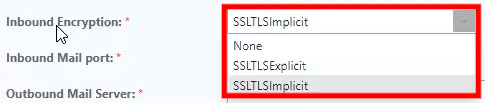
Click the drop-down menu next to Inbound Encryption and select a value based on your Inbound Mail Server configuration.

-
Enter the mail port in the Inbound Mail port field.
The default value is 993.
-
Enter the Host Name or IP of the outbound mail server in the Outbound Mail Server field.
-
Click the drop-down menu next to Outbound Mail Method and select a value.
The default value is Authentication (In Gateway, this is called ForwardingMailMethod).
-
Enter the username used to authenticate the outbound mail server in the Outbound User Name field (In Gateway, this is called ForwardingUser).
-
Enter the password used to authenticate the outbound mail server in the Outbound User Password field (In Gateway, this is called ForwardingPassword).
-
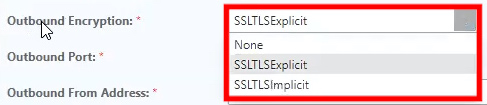
Click the drop-down menu next to Outbound Encryption and select a value (In Gateway, this is called OutboundAuthenticationMode).
This value will be based on your Inbound Mail Server configuration.

-
-
Enter the outbound port value in the Outbound Port field (In Gateway, this is called OutboundMailPort).
You can use the arrows to increase or decrease the value, or simply enter a number.
The default number is 587.
-
Input the email address that you would like displayed for Outbound mail services in the Outbound From Address field (In Gateway, this is called ForwardingMailFromAddress). The Forward Mail Address List field is optional as a backup.
-
If you would like to receive an email notification if a Queue fails, enter the Email address in the Exception Mail Address List field.
-
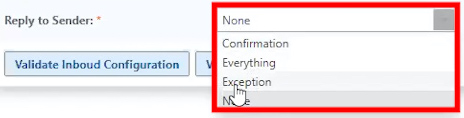
Click the drop-down menu next to Reply to Sender and select a value (In Gateway, this is called SendReplyOnException).
The default value is None.

-
(Optional) Before you click Save, as an option before you save the queue parameters, you can validate the connections for the outbound and inbound configurations.
-
To validate the Inbound Configuration:
-
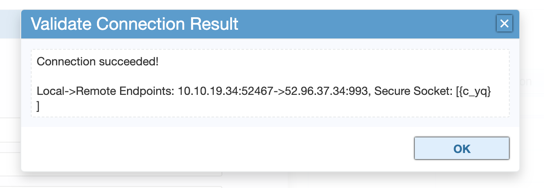
Click the blue Validate Inbound Configuration button, in the bottom right-hand corner of the Queue Parameters screen.
-
The Validation Connection Result window will appear, to show the success or failure of the connection
-
-
To validate the Outbound Configuration:
-
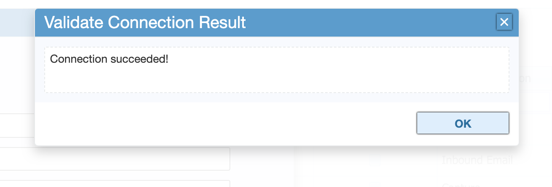
Click the blue Validate Outbound Configuration button, in the bottom right-hand corner of the Queue Parameters screen.
-
The Validation Connection Result window will appear, to show the success or failure of the connection
-
-
-
After you have completed configuring the Queue Parameters or validating the connections, click the blue Save button.
-
Your new Inbound Email Server Queue Configuration has been created, and now you can enable it for processing.

-
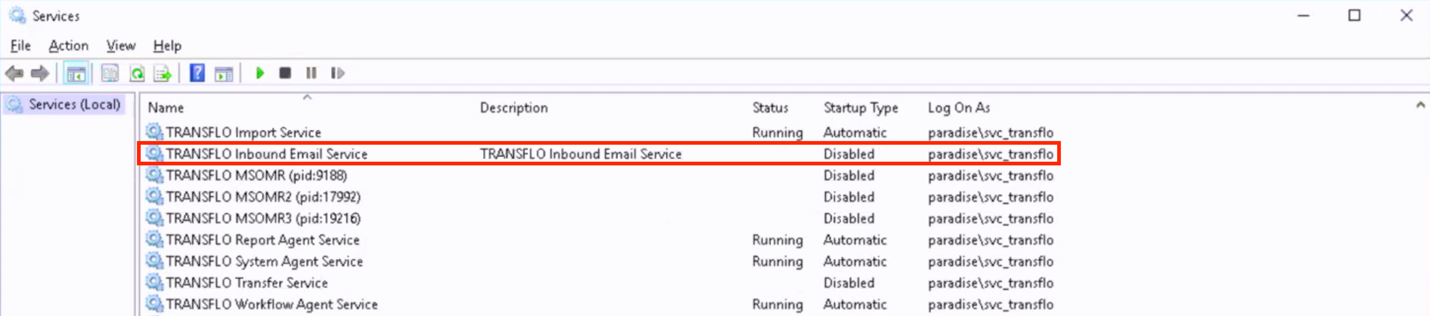
Restart the TRANSFLO® Inbound Email Service.
-
In the Windows Services section on your computer, the new Inbound Email Service must be installed, before configuring the queue.

-

![]() View a demonstration of these steps in one or more Transflo videos:
View a demonstration of these steps in one or more Transflo videos: