Configure Transflo DMS Gateway Settings
As an administrator, use this article to configure client settings, start DMS Gateway, view DMS queues on the Overview tab, create a customer, and define a document class. After completing these steps, create fields, services, and queues.
In order for TRANSFLO® client applications to communicate with TRANSFLO® Server, the TRANSFLO® Client Configuration application must be properly configured.
If you are experiencing connection problems with TRANSFLO® Server, you should verify the settings via this application.
To access the TRANSFLO® Client Configuration application and verify its settings:
1. Click the Windows Start button, point to Programs, point to TRANSFLO® , and click Client Configuration.
2. The TRANSFLO® Client Configuration window appears.
![]()
To configure or verify settings:
-
In the Web Service URL box, type the address of the TRANSFLO® Web service being used for communications with TRANSFLO® Server.
The default address is shown in the above screen capture.
Click Validate to ensure that the connection is active.
-
If your TRANSFLO® Server installation requires authentication, select the Authenticated Access check box and type the appropriate user name and password in the boxes provided.
-
If the local computer connects to the Internet via a proxy server, select the Use Proxy Server check box and type the proxy server address, connection port number, user name, and password in the boxes provided.
When you have finished entering or verifying connection information, click Apply, and then click the Logging tab.
3. On the Logging tab of the TRANSFLO® Client Configuration window, enter or verify the logging settings that should be used for TRANSFLO® applications.
![]()
To enter or verify logging settings:
-
Expand the Logging Level list and click the desired level of complexity for logged events.
-
In the Days to keep box, enter the number of days that events should remain in the log before being erased.
When you have finished configuring the logging settings for your TRANSFLO® client applications, click Apply to save your changes.
When you finish entering your logging settings, click Apply and then click the Authentication tab.
4. If you would like to use TRANSFLO® authentication, on the Authentication tab of the TRANSFLO® Client Configuration window check the Store TRANSFLO® Authentication Information check box and enter a User Name and Password in the corresponding boxes.
![]()
When you have finished configuring your TRANSFLO® Client Configuration, click OK.
For trouble shooting purposes you can temporarily override the Log Level from the file system.
To override the log level:
1. Navigate to the TRANSFLO® Client log folder.
This is typically is C:\Program Files\Common Files\Pegasus TransTech\Transflo Client\Logs\Transflo.ClientConfig
2. Create a text file in the log folder and rename it to Log.Config.
3. Open the file with a text editor and add the following line to the file:
<Config LogLevel="[Level]" />
where,
[Level] is an integer between 0 and 4 indicating the log level.
The available log levels are:
-
- No Logging
-
- Errors Only
-
- Errors and Warnings
-
- Detailed
-
- Trace
Example: For the log level to be set to Trace the entry in the Log.Config file will be:
<Config LogLevel="4" />
4. Save and close the Log.Config file.
The log level has changed.
5. To disable this feature and revert to the configured log level, rename the Log.Configfile to Log.Config.Old.
You should back up your critical Gateway files on a regular basis. These files include initialization files and data files. Back up all XML files in the installation folder; simply copy them to a safe location.
You should also back up the Windows registry settings for Gateway. To do this, export the following registry sub key to a REG file for safe keeping:
-
Windows 32 Bit Operating Systems
HKEY_LOCAL_MACHINE\SOFTWARE\Pegasus TransTech\TRANSFLO® Gateway
-
Windows 32 Bit Operating Systems
HKEY_LOCAL_MACHINE\SOFTWARE\Wow6432Node\Pegasus TransTech\TRANSFLO® Gateway
To open the Windows registry and export settings, see your Microsoft Windows documentation.
To start TRANSFLO® Gateway, follow these steps:
1. Click the Start button on the Windows task bar, point to Programs, point to TRANSFLO® , and click Gateway Configuration.
The TRANSFLO® Gateway Config splash screen opens while the Gateway Configuration Application initializes.
Note: At least one Document Class must be created in the TRANSFLO® Administration Tool in order to successfully log into Gateway after authentication validation.
If at least one Document Class does not exist the application may hang or crash.
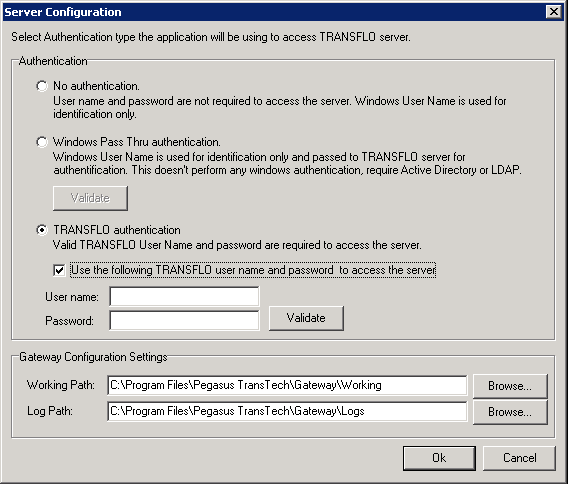
2. The Server Configuration window opens.
You can also open this window from the main window by selecting Connection from the File menu.
-
In the Authentication group box select the authentication you would like to use.
-
If you choose TRANSFLO® authentication, check the Use the following TRANSFLO® user name and password to access the server check box and enter a User name and Password in the corresponding text boxes.
Best Practice: If LDAP authentication is configured on your TRANSFLO® Server (via the TRANSFLO® Administration Tool), it is recommended that you use TRANSFLO® Authentication for your Gateway Services.
-
Click the Validate button to verify that the authentication succeeded.
-
In the Gateway Configuration Settings group box enter or browse to your Working Path and Log Path in the respective text boxes.
Click OK.
3. The TRANSFLO® Gateway Configuration window opens.
From here you can begin creating your Gateway structure, using the instructions found in this manual.
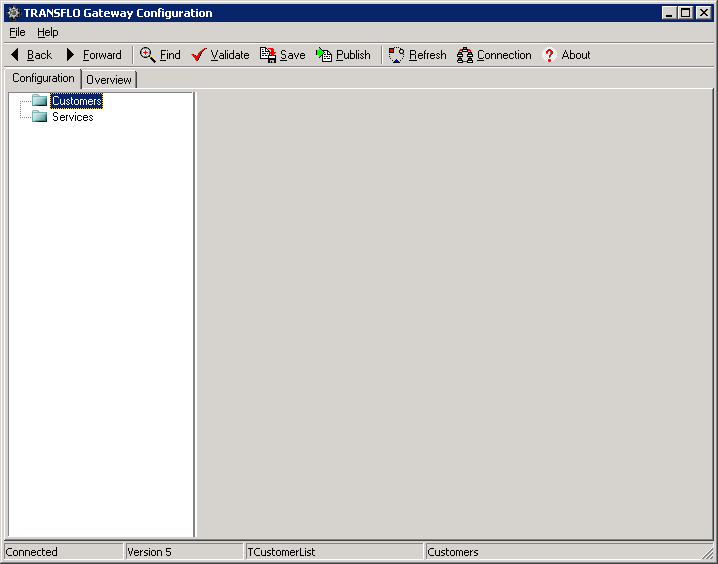
Most activities in the TRANSFLO® DMS Gateway interface are performed on the Configuration tab. In addition to the Configuration tab, the TRANSFLO® Gateway Configuration window contains the Overview tab. The Overview tab allows you to see a top-down view of all queues that have been configured for a particular customer along with arrows showing how the queues connect to other queues.
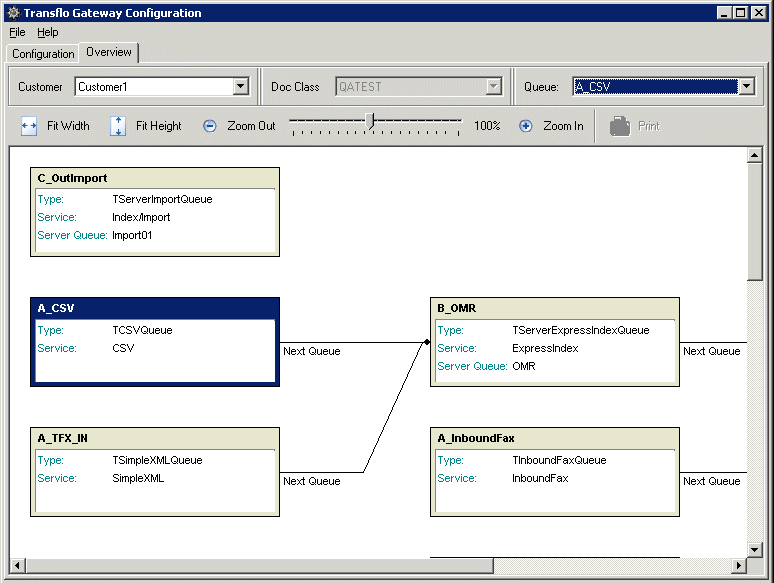
Configuring Overview Content
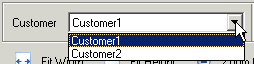
Via the Overview tab, you can see a top-down view of any Customer and associated Queue that you choose.
To select a Customer, click the arrow button next to the Customer list to expand the list, and click the desired Customer.
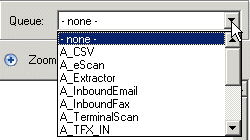
If you are looking for a specific Queue, you can quickly locate it by selecting its name in the Queue list.
To do this, click the arrow button next to the Queue list to expand the list, and click the desired Queue.
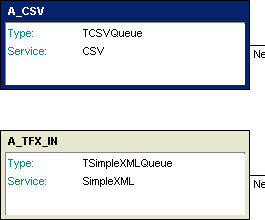
The rectangle representing the selected Queue will turn from light gray to dark blue in color, allowing you to find it easily in the overview display.
If you do not want any of the queues to stand out, select none in the Queue list (the default setting).
Display Overview Content
By default, the Queues displayed on the Overview tab usually will extend beyond the viewable area of the tab, so several display features are provided that will allow you to adjust your view of the tab.
These features include scroll bars and zoom options.
To see any part of the Overvew tab content not currently displayed in the viewing area, use the horizontal and vertical scroll bars to move the viewing area to the desired portion of the content.
To shrink the content in the display area, thus displaying more Queues, click the Zoom Out button.

To enlarge the Queues shown in the display area, click the Zoom In button.

As an alternative to the Zoom Out and Zoom In buttons, you can also click and drag the zoom slider to the desired focus level.
Drag the slider to the left to zoom out, and to the right to zoom in.
The current zoom percentage is displayed to the right of the slider.

You can also quickly adjust the content view so that it is displayed entirely within the display area either horizontally or vertically.
To fit the entire width of the content area in the display area, click the Fit Width button.

To fit the entire height of the content area in the display area, click the Fit Height button.

Create Customers and Document Classes
Creating a New Customer
To create a new Customer:
1. Locate the Customer node in the tree pane on the left side of your screen.
Right- click the Customer node, point to Insert on the shortcut menu, and then click Customer.
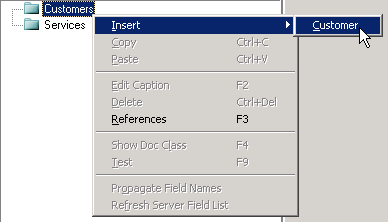
Gateway creates a new Customer with a default name, e.g., Customer2.
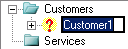
2. The default Customer name is already selected and ready for editing.
To rename the new Customer, simply type a new name.
When you are done, press [Enter].
A Document node now appears below your new Customer in the tree pane.
3. In the Server Customer list, select the name assigned to this customer on TRANSFLO® server.

Notice that once a Server Customer name has been assigned to the Customer, the icon next to the Customer node in the menu tree changes from  to
to  .
.
Note: The Billing Code box and Enable Billing list on the right side of the window are for Pegasus TransTech internal use.
Assigning a Document Class
To assign a Document Class to the customer:
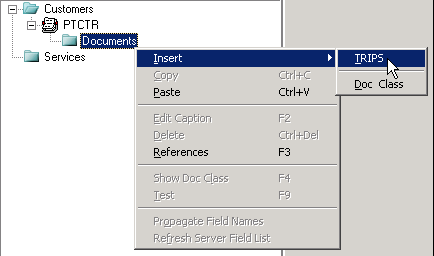
1. Locate the Documents node below the Customer name.
Right-click the Documents node, point to Insert on the shortcut menu, and then click the name of the Document Class which the Customer should use.
Document Classes are created using TRANSFLO® Administration Tool and are housed on the TRANSFLO® server.
If you do not see the name of the desired Document Class, it means that the Document Class has not been configured for the selected Customer in Administration Tool.
Note: Instead of selecting an existing Document Class, you can also select Doc Class in the menu, and then type a name for the new Document Class.
However, this new Document Class will be unusable until an identically-named Document class has been created for the current Customer via the Administration Tool.
2. Gateway adds the Document Class below the Documents folder.
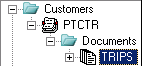
3. To the left of the new Document Class is a small toggle button.
This button shows a plus sign, which indicates that there are additional nodes located below your Document Class in the tree.
Clicking the plus sign expands the next section of the tree.
Three new nodes are displayed: Queues, Fields, and Aliases.
These three nodes are automatically created any time you add a Document Class to a Customer.

Using the Find Feature
Since Gateway configurations can be complex, finding an item can prove to be challenging.
The find feature simplifies locating Gateway objects and working with them.
To use the Gateway Find feature:
1. Click on the Find button.
2. The Find pop-up window opens with the items grouped by type.
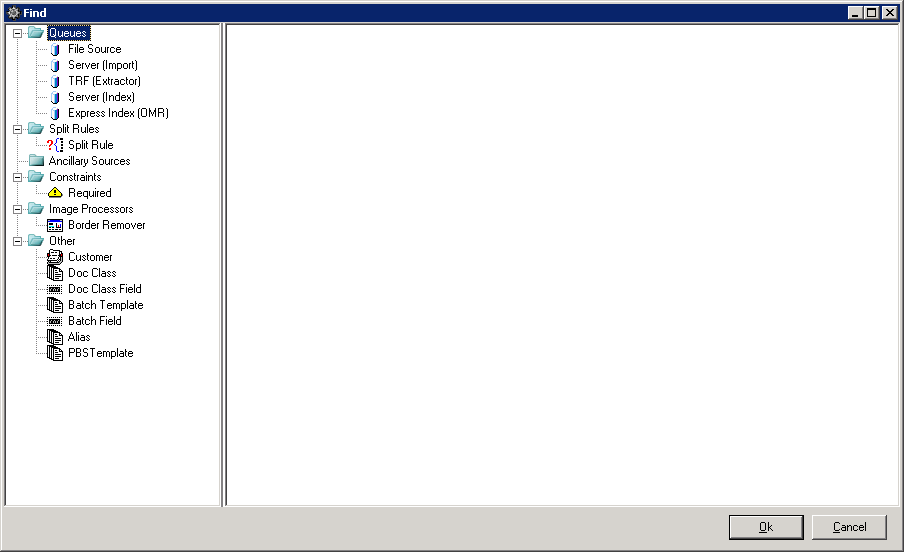
3. Click on a category on the left.
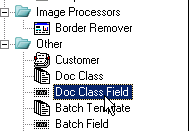
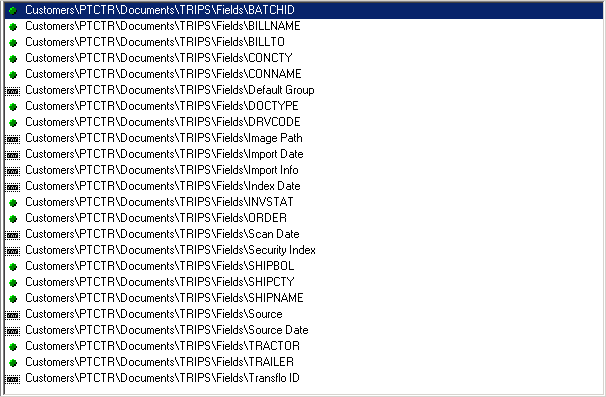
4. The list of items for the category is displayed on the right.
Double click on an item to open it.
The Gateway Toolbar
All of the Gateway File and Help menu choices are available on the Gateway Toolbar.

The following is a listing of the buttons on the Gateway Toolbar:
| Button | Description |
|---|---|
 Back Back |
Return to the previous screen. |
 Forward Forward |
Return to the screen you were on before you clicked the Back button. |
 Find Find |
|
 Validate Validate |
|
 Save Save |
|
 Publish Publish |
|
 Refresh Refresh |
|
 Connection Connection |
|
|
|
|
