Deploy DMS Workflow Processes and Forms
After you create your processes and forms, you typically deploy them to a staging environment for testing. When you are satisfied that they are ready for business users at your organization, you can deploy them to your production server.
Before you can deploy processes, you must define the process deployment servers where you would like your processes to reside. To define a process deployment server:
-
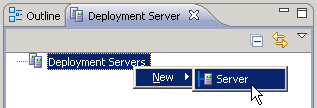
In Outline View, click the Deployment Server tab.
-
Right-click Deployment Servers and choose New, Server.
-
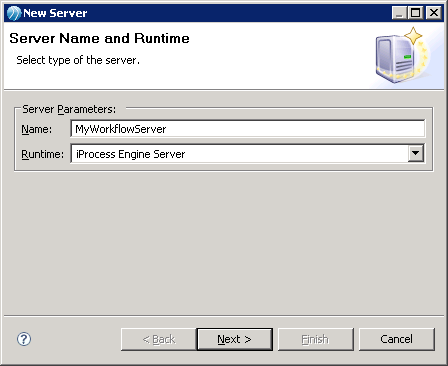
In the New Server wizard (series of screens), on the Server Name and Runtime window:
-
Enter the name of the server that you would like to appear in Project Explorer in the Name field. To avoid confusion, we recommend that you use the physical server name.
-
Select iProcess Engine Server in the Runtime drop-down field.
-
Click Next.

-
-
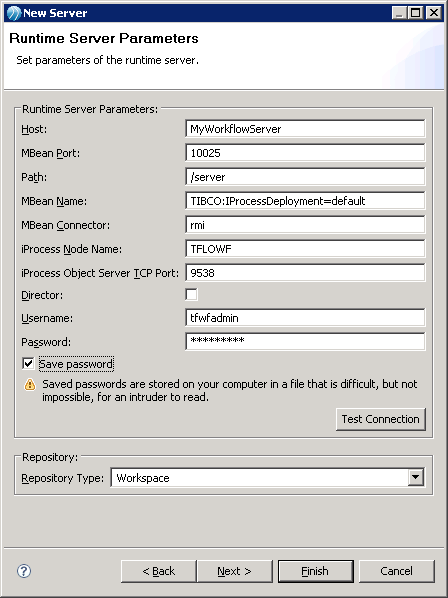
In the The Runtime Server Parameters window:
-
Enter the name of your Workflow server in the Host field.
-
Enter TFLOWF in the iProcess Node Name field.
-
Type tfwfadmin in the Username field.
-
Enter the password for the tfwfadmin user in the Password field.
-
Select the Save password check box.
-
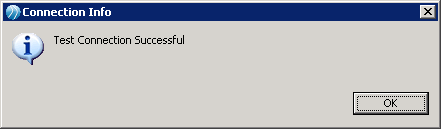
Click the Test Connection button.

The Connection Info message box shows that you have configured your deployment server connection. Click OK.
-
-
Click the Finish button.
-
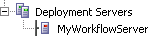
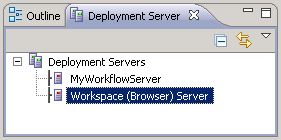
Expand the Deployment Servers node in the Project Explorer. Your new deployment server appears in the list.
Prior to deploying Workflow Studio Processes it important to stop the TRANSFLO® System Agentservice. Once you have defined your Deployment Servers you can deploy Workflow Studio modules such as Process and Forms to the defined Deployment server.
To deploy a module to your Deployment Server do the following:
-
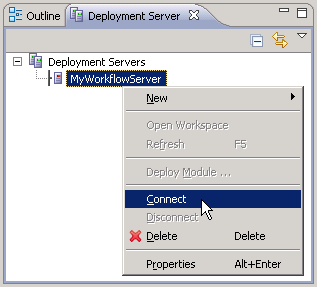
Right-click on your Deployment Server and choose Connect.

-
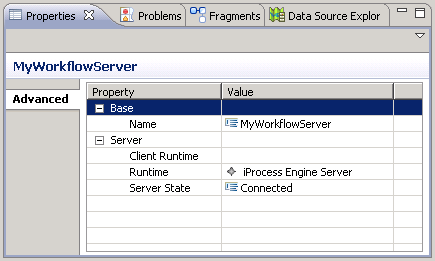
The Advanced sub-tab on the Properties tab shows that the Server State is Connected.

-
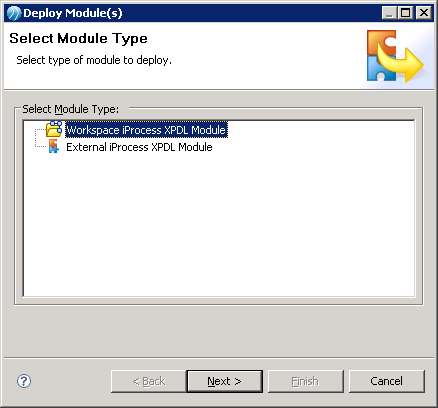
Right-click on your Deployment Server and click Deploy Module...

The Deploy Module(s) wizard opens.
-
On the Select Module Type page, select Workspace iProcess XPDL Module. Click Next.

-
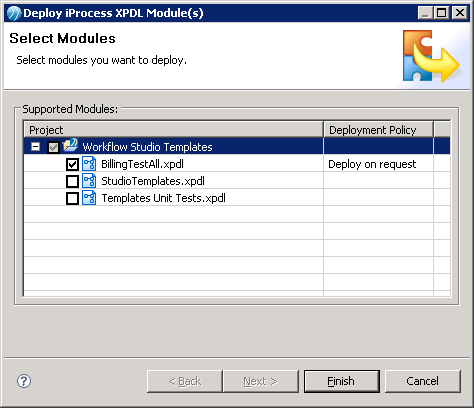
On the Select Modules page, select the check box for one or more XPDL modules you would like to deploy. Click Finish.

-
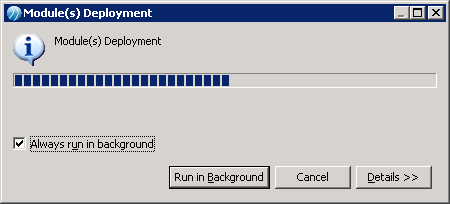
The progress bar shows the status of the XPDL module deployment.

-
To release (deploy) one or more workflow procedures:
-
Make sure the TRANSFLO® System Agent is still stopped.
-
From the Start menu select TIBCO iProcess Workspace (Windows) from the TIBCO iProcess Workspace (Windows) group.
-
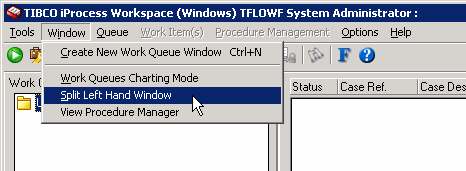
Select Split Left Hand Window from the Window menu, if it is not already split.

-
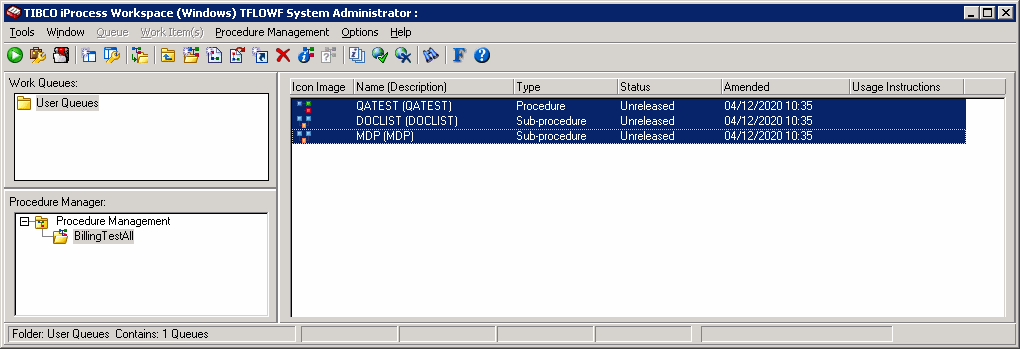
Select the process package you have modified in the Procedure Manager pane.
-
Select all released and unreleased procedures in the right pane.

-
Select Release Procedure from the Procedure Management menu.
-
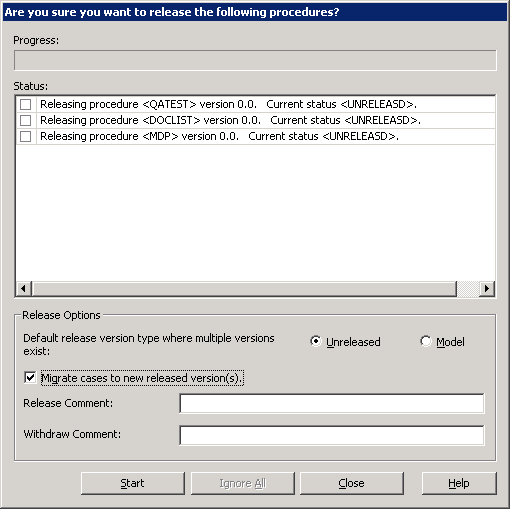
The Are you sure you want to release the following procedures windowopens. If you have existing cases in the system check the Migrate cases to new released version(s) check box.

-
Click the Start button.
Your procedures will be released when the progress bar fills up at the top of the window.
-
Restart the TRANSFLO® System Agent service.
-
-
Releasing processes on 64-bit platforms may not succeed from Business Studio. If this happens to you, follow these steps to release the process on Windows server from the command line:
-
In the Start menu, right-click on Command Prompt or enter cmd.
-
Select Run as administrator from the menu.
-
Enter the following command:
runas /user:<machinename>\tfwfadmincmd
<machinename> is the name of your Workflow server.
-
Enter the password for the tfwfadmin User.
-
A new command prompt window opens. Enter the following command:
“swutil PROC RELEASE <procedure> <version> <comment> –m ALL”
<procedure> is the name of the procedure.
<version> is the version of the procedure.
<comment> is an optional one-word comment.
-

You can manually copy the files to your Workflow server or you can create an iProcess Workspace (Browser) deployment server and deploy the forms using the Workflow Studio. Manual Form deployment is the preferred Forms deployment method.
Deploy Forms Manually
To deploy your forms manually:
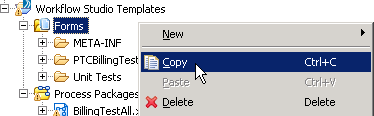
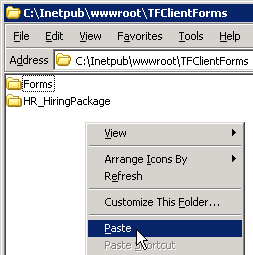
1. In the Project Explorer right-click your project’s Forms folder, and click Copy.
2. In Windows® Explorer navigate to your C:\inetpub\wwwroot\TFClientForms directory, and paste the Forms folder in this directory.
Deploy Forms Using Workflow Studio
Deploying Workflow Forms within Workflow Studio is a four step process:
-
Set Forms Virtual Directory and Folder Permissions,
-
Install WebDAV Publishing,
-
Create an iProcess Workspace (Browser) deployment server, and
-
Deploy the forms to the iProcess Workspace (Browser) Server.
Warning: Deploying forms through Business Studio as described here poses a security risk if you are going to make your forms available to the Internet. If this is the case it is better to move your forms manually from your Workflow Studio project folder to your Workflow Web site’s TFClientForms\Forms folder. If the forms are being deployed for use solely in your intranet, the procedure outlined here is relatively safe.
To create Workflow Web site permissions in Internet Information Services (IIS) 6 perform the following. (For IIS 7 instructions see the Setting Forms Virtual Directoryand Folder Permissions on 64 Bit Operating Systems (IIS 7) above.
-
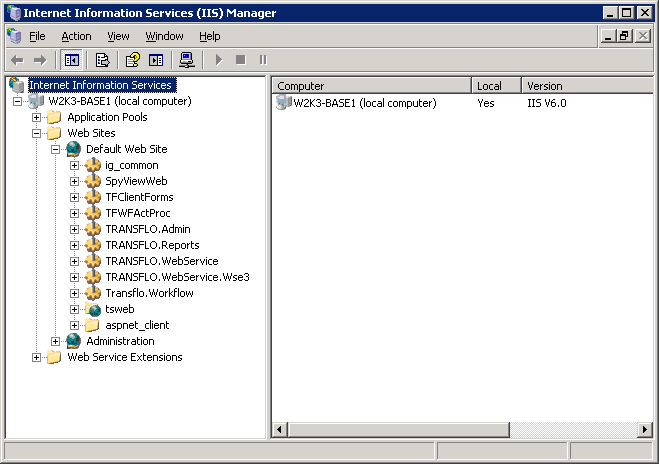
From Administrative Tools on your Workflow Server’s Windows® Start menu select Internet Information Services (IIS) Manager.
-
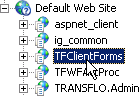
Expand the Local Computer node, the Web Sites node and then the Default Web Sites node in the tree view.
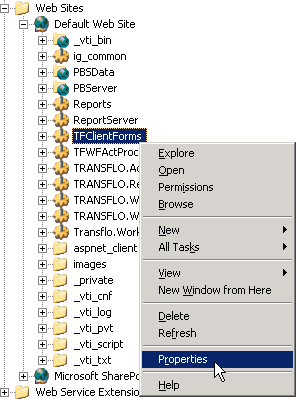
3. Right click the TFClientForms Virtual directory and select Properties.
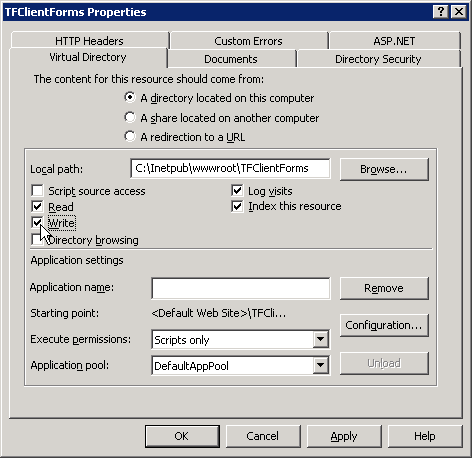
4. The TFClientForms Properties window for the Virtual Directory opens.
Select the Write permissions check box.
Click OK.
5. Open Windows® Explorer and navigate to the C:\Inetpub\wwwroot\TFClientForms folder.
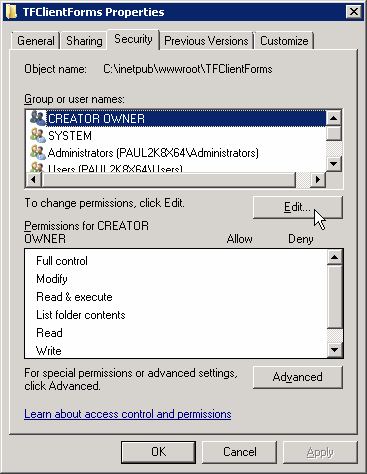
Right click on the TFClientForms folder and select Properties.
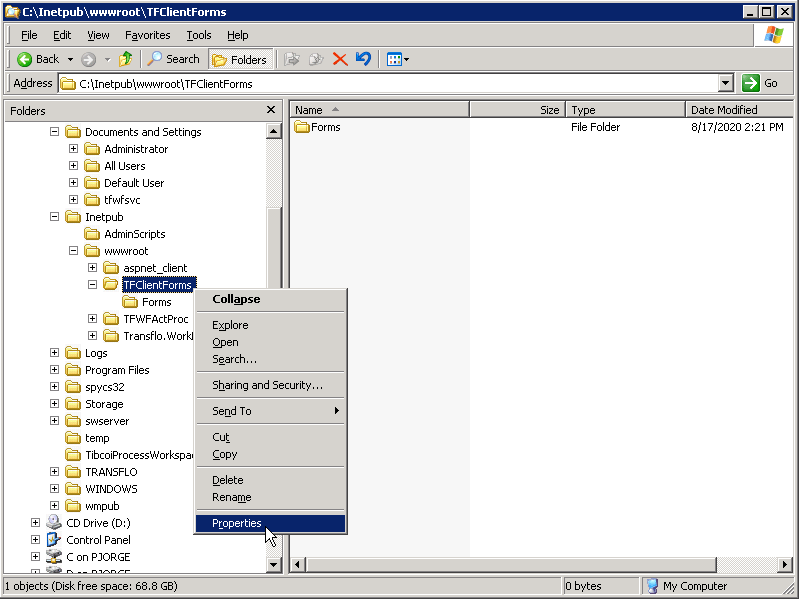
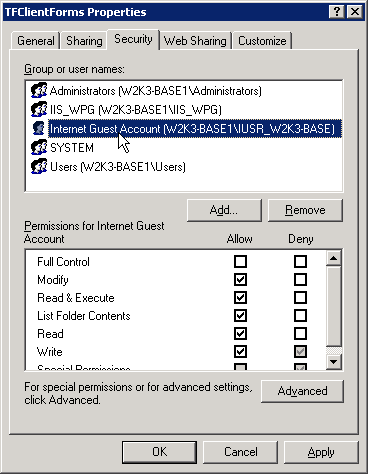
6. The TFClientForms Properties window for the folder opens.
Click on the Security tab, and click on the Internet Guest Account in the Group or user names list.
Select the Allow check boxes for all permissions except Full Control.
Click OK
To create Workflow Web site permissions in Internet Information Services (IIS) 7 perform the following. (For IIS 6 instructions see the Setting Forms Virtual Directoryand Folder Permissions on 32 Bit Operating Systems (IIS 6) below.)
-
From Administrative Tools on your Workflow Server’s Windows® Start menu select Internet Information Services (IIS) Manager.
-
In the left pane, expand the server name node, the Sites node and then the Default Web Site node in the tree view.
Click TFClientForms.
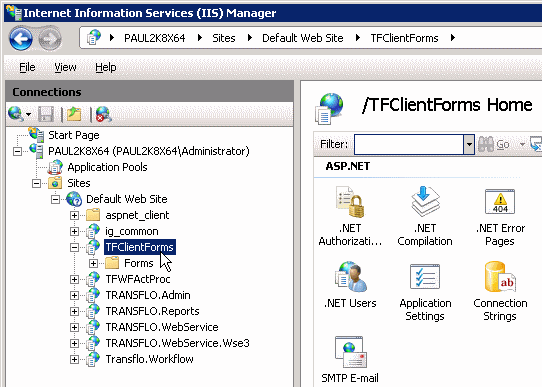
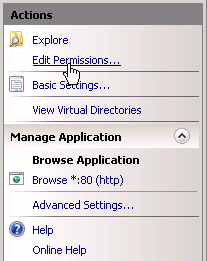
3. On the right, in the Actions pane, click Edit Permissions...
4. The TFClientFormsProperties window opens.
Click the Security tab, and then click the Edit button.
5. The Permissions for TFClientForms window opens.
In the Group or user names field select the IIS_IUSRS group.
Check the check box in the Allow column for the Write permissions.
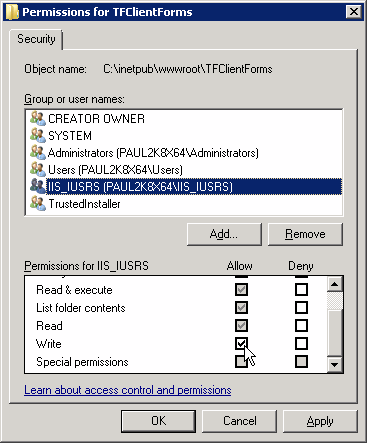
6. Repeat step 5 for the Users group.
7. Click OK to close the Permissions for TFClientForms window.
8. Close the TFClientForms Properties window.
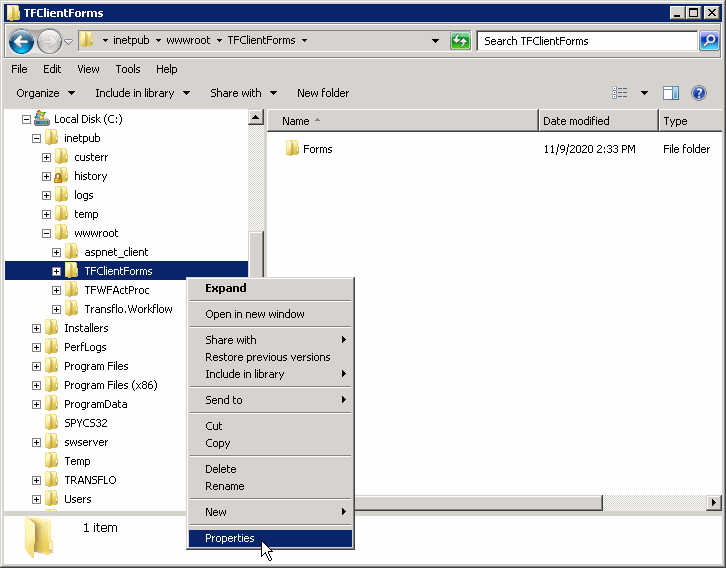
9. Open Windows® Explorer and navigate to the C:\Inetpub\wwwroot\ TFClientForms folder.
Right click on the TFClientForms folder and select Properties.
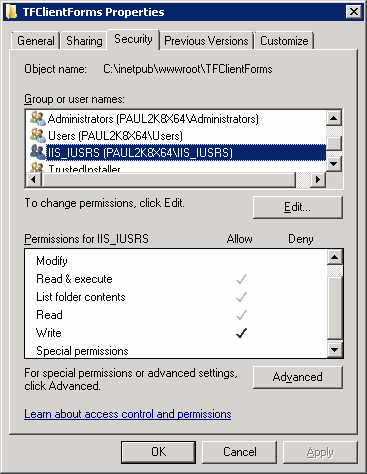
10. The TFClientForms Properties window opens.
Click on the Security tab.
Verify that the IIS_IUSRS group and the Users group have write permissions to the folder.
Follow the steps below to install WebDAV publishing on 32-bit or 64-bit operating systems:
To install WebDAV on a 32 bit Workflow server:
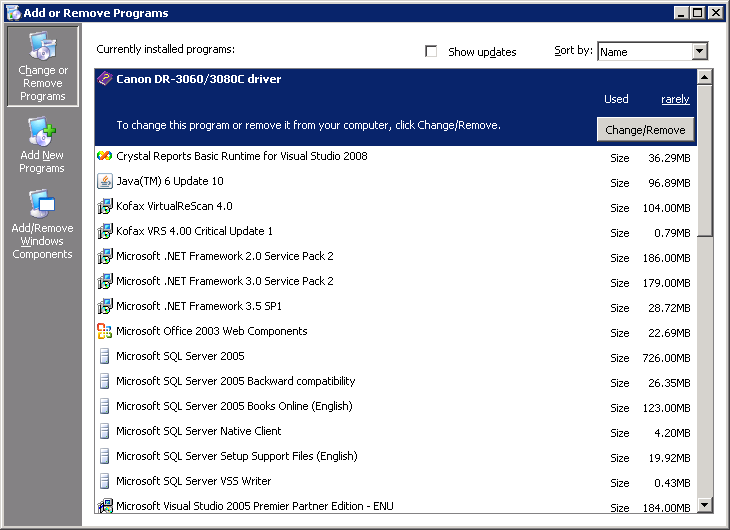
1. Open the Add or Remove Programs window from the Windows® Control Panel, and click the Add/Remove Windows Components button on the left.
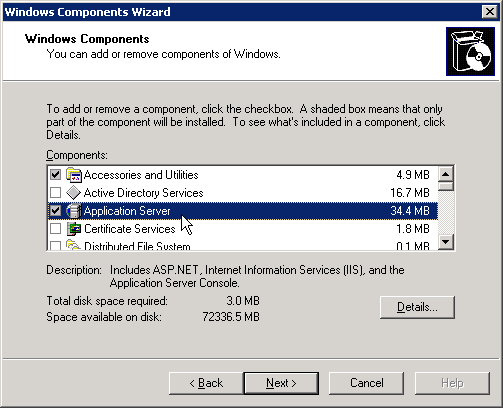
2. The Windows Components Wizard opens.
Double click on Application Server in the Components list.
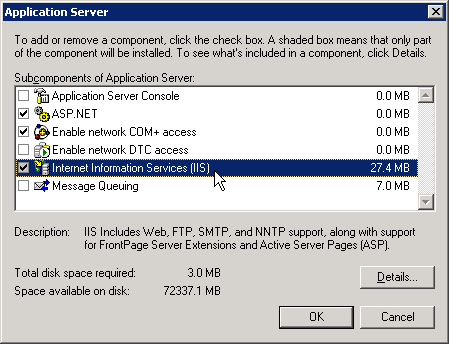
3. The Application Server window opens.
Double click on Internet Information Services (ISS) in the Subcomponents of Internet Information Services (ISS) list.
4. The Application Server window opens.
Double click on World Wide Web Service in the Subcomponents of Internet Information Services (ISS) list.
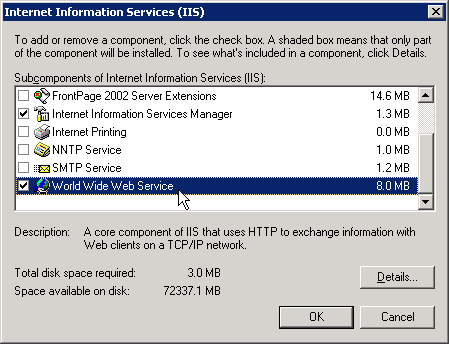
5. Select the WebDAV Publishing check box in the Subcomponents of World Wide Web Service list, and click OK.
Setup will install WebDAV Publishing.

6. Enable WebDAV on the Workflow Studio computer by opening the Services console under Administrative Tools.
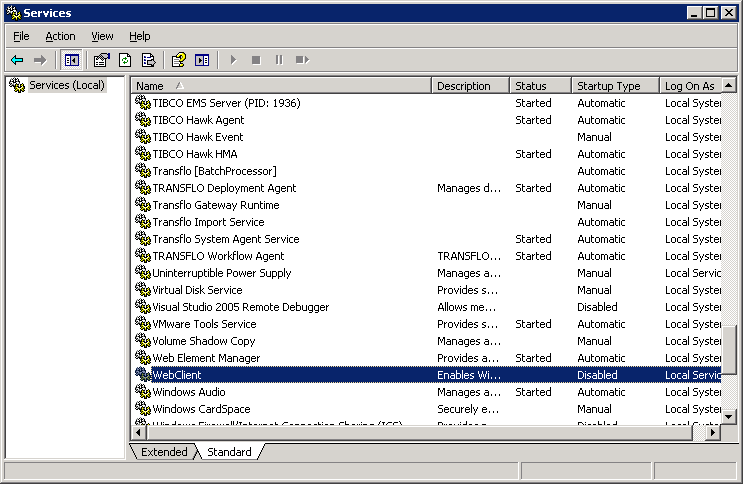
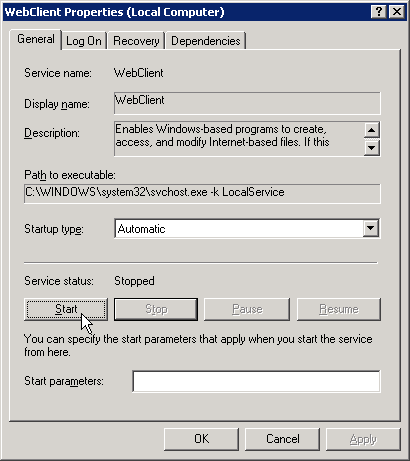
7. To start the WebClient service double click on the WebClient service to open the WebClient Properties window.
Set the startup type to Automatic, click Apply,and click Start.
Click OK.
Windows Server 2008 R2 x64 uses IIS 7 which is significantly different from IIS 6.0 that comes with Windows Server 2003 R2. Take care to follow the instructions below exactly as they are written.
To install and Configure WebDAV on a 64-bit Workflow server:
1. Open the Server Manager from Windows® Administrative Tools.
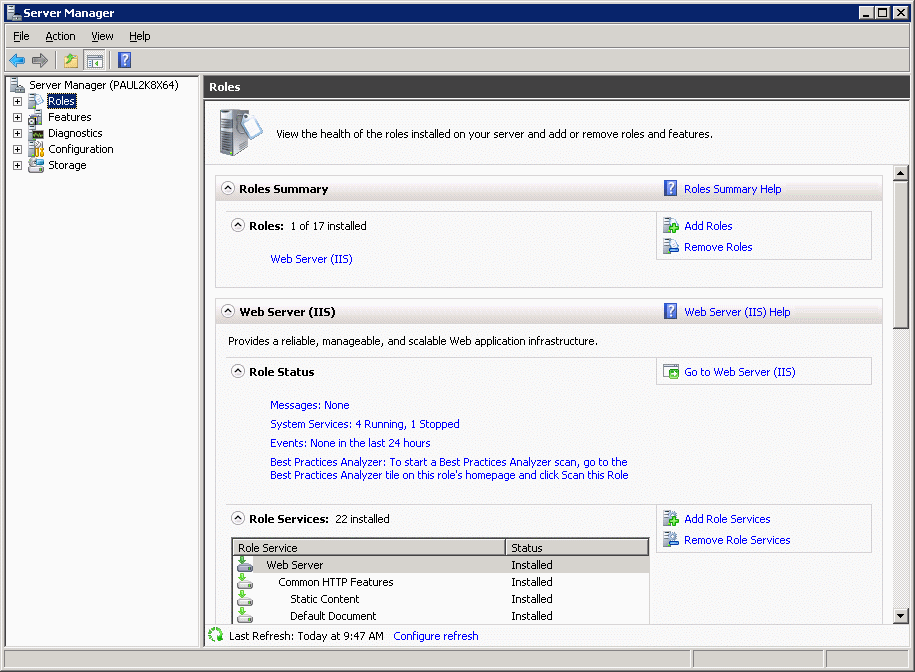
2. Click on Roles in the Server Manager tree.
3. Click the Add Role Services link in the right panel.
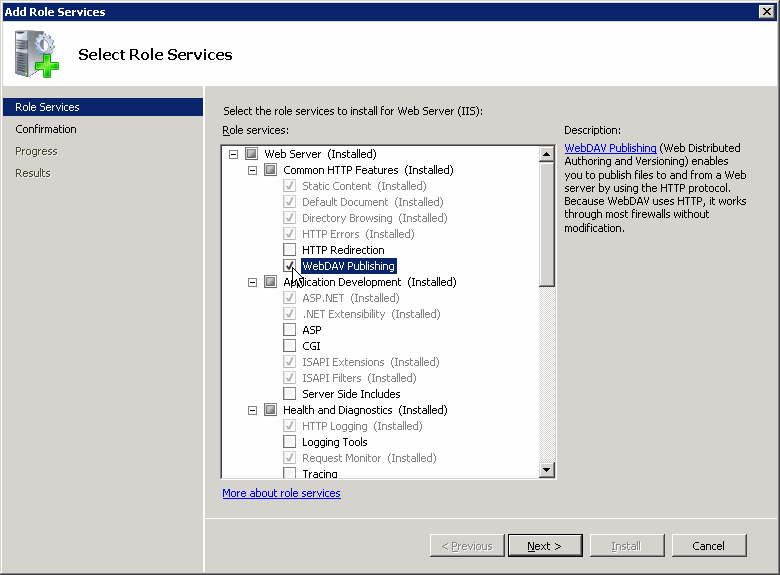
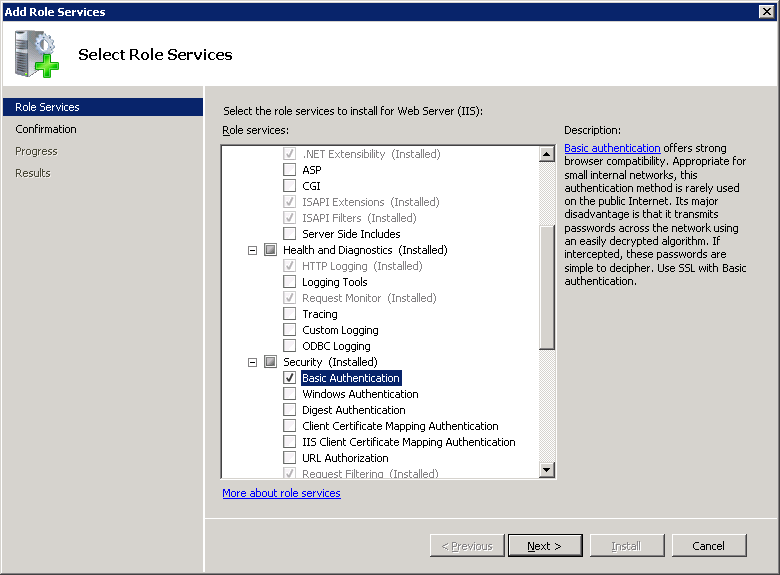
4. Select WebDAV Publishing from the list, and click Next.
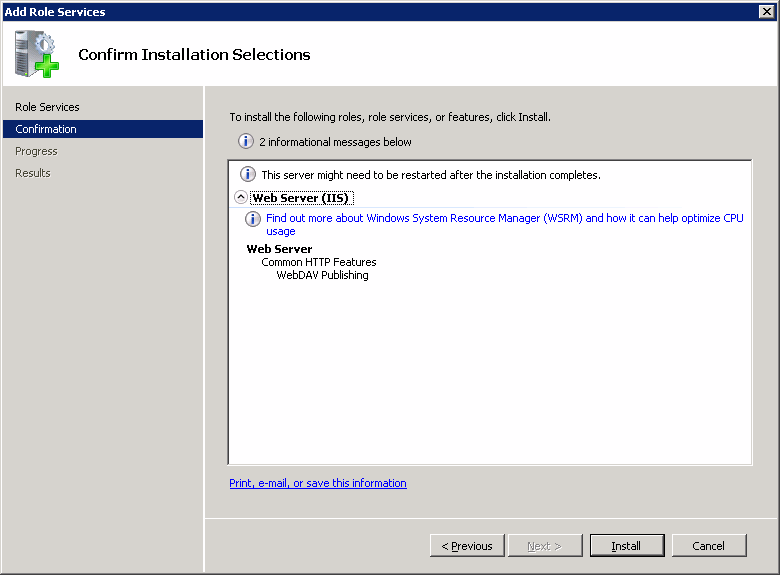
5. The Confirm Installation Selections window opens.
Click Install.
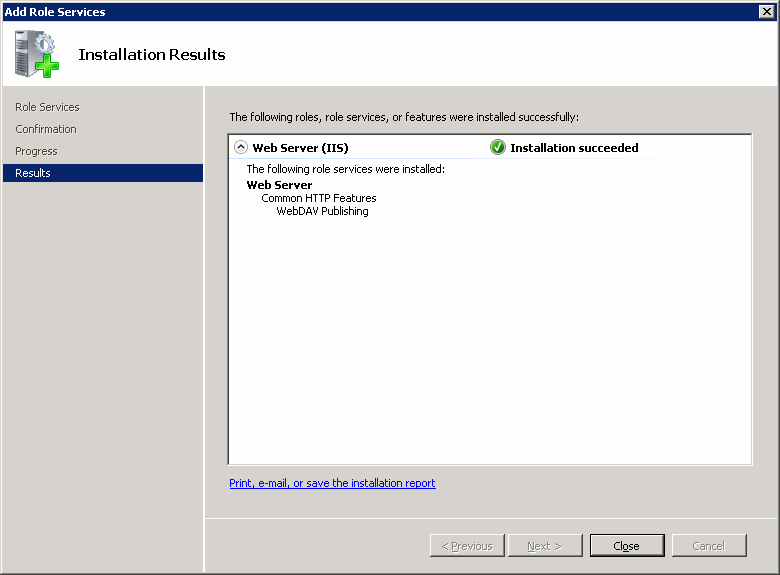
6. Once WebDAV is installed the Installation Results window opens.
Click Close.
7. Click the Add Role Services link in the right panel.
8. Under Security, select the Basic Authentication check box.
Click Next.
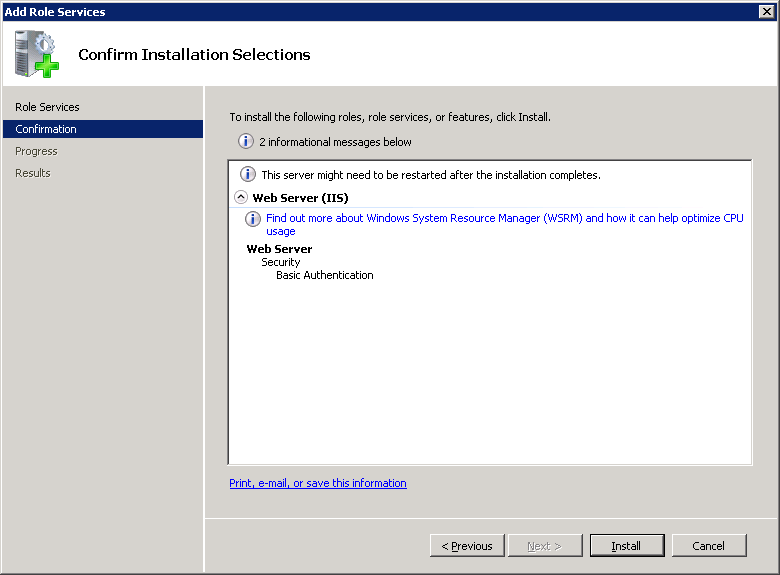
9. The Confirm Installation Selections window opens.
Click Install.
10. Once Basic Authentication is installed the Installation Results window opens.
Click Close.
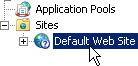
11. Open Internet Information Services (IIS) Manager from Windows® Administrative Tools, and expand the tree to the Default Web Site.
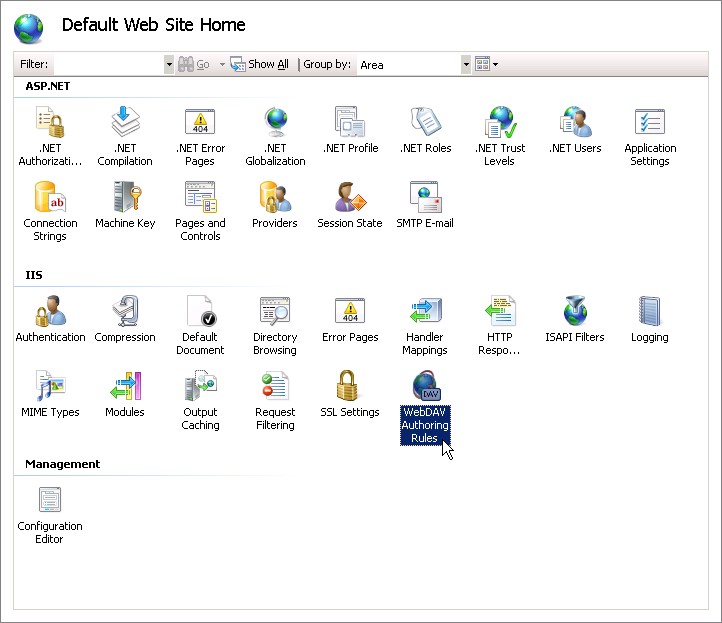
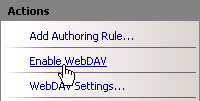
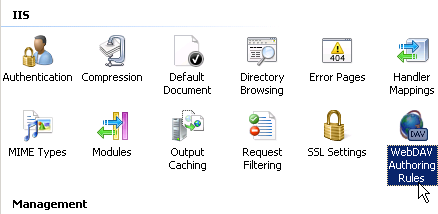
12. Double-click the WebDAV Authoring Rules icon.
13. In the right pane click the Enable WebDav link.
14. Select the TFClientForms virtual directory.
15. Double Click the Directory Browsing icon.
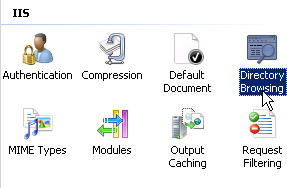
16. In the right pane of the Directory Browsing window click the Enable link.
17. Select the TFClientForms virtual directory.
18. Double-click the WebDAV Authoring Rules icon.
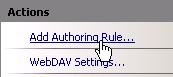
19. Click the Add Authoring Rule... link in the Actions pane.
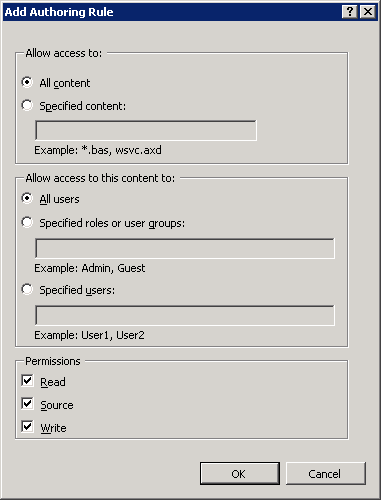
20. Select All content, All users.
Select Read, Source, and Write permissions.
You can also filter your users by selecting the Specified roles or user groups.
21. Select the TFClientForms virtual directory.
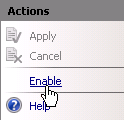
22. Double-click the Authentication Icon.
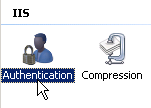
23. Right-click on Basic Authentication and click Enable.
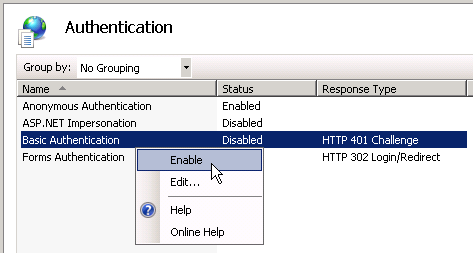
24. Enable Basic Authentication for TFClientForms.
For more information on installing WebDAV on IIS 7 see the following Microsoft Knowledge Base article:
http://learn.iis.net/page.aspx/350/installing-and-configuring-webdav-on-iis-7/
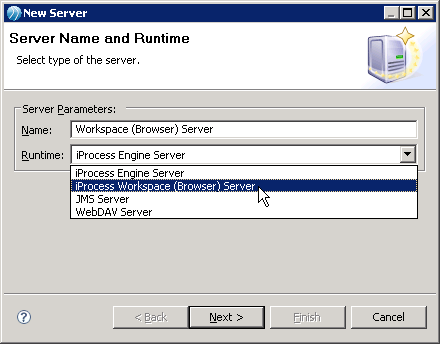
To create a new iProcess Workspace (Browser) Server do the following:
-
In the Deployment view, right-click Deployment Servers, point to New and click Server.

-
Type a name in the Name field, and select iProcess Workspace (Browser) Server in the Runtime drop- down. Click Next.

-
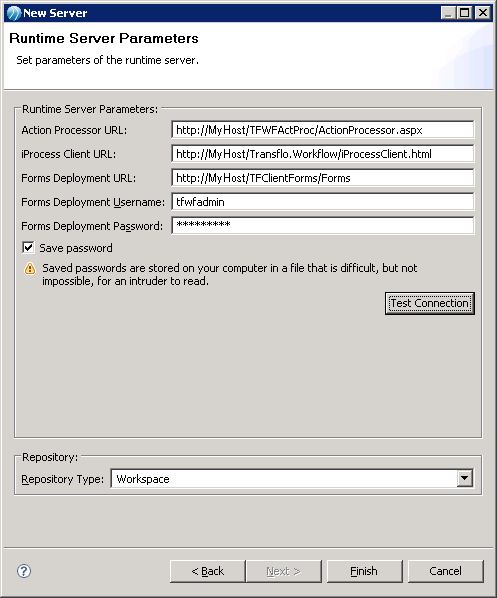
In the Runtime Server Parameters window, enter URLs in the fields as follows where <MyHost> is your Workflow server name.

Parameter URL Action Processor URL
http://<MyHost>/TFWFActProc/ActionProcessor.aspx
iProcess Client URL
http://<MyHost>/Transflo.Workflow/iProcessClient.html
Forms Deployment URL
http://<MyHost>/TFClientForms/Forms
- Type tfwfadmin in the Forms Deployment Username field.
-
Type the password for the tfwfadmin user in the Forms Deployment Username field.
-
Check the Save password check box.
-
Make sure “Workspace” is selected in the Repository type drop-down.
-
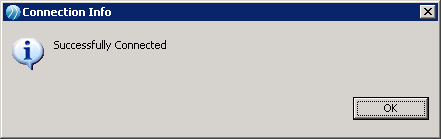
Click the Test Connection button. The Connection Info box notifies you that the connection test was successful. Click OK.

-
Click Finish to save your changes and close the Runtime Server Parameters window. Your new Workspace (Browser) Server is in the Deployment Servers list.

To deploy your Workflow forms to an iProcess Workspace (browser) deployment server:
-
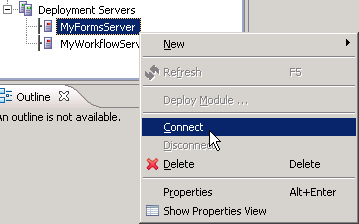
Under Deployment Servers, right-click on your forms deployment server in Project Explorer and choose Connect.

-
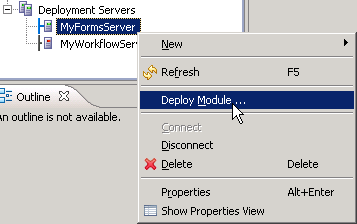
Right-click on your server again in the Project Explorer and choose Deploy Module.

-
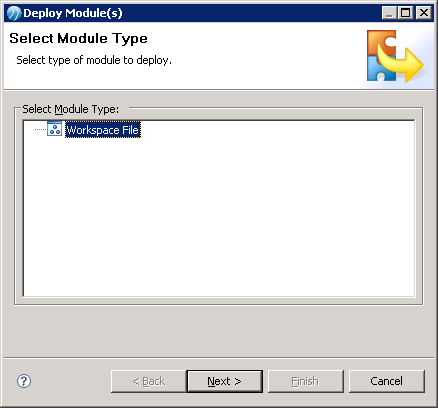
In the Select Module Type window, click Next.

-
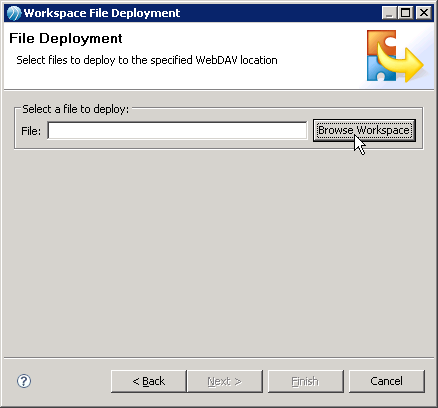
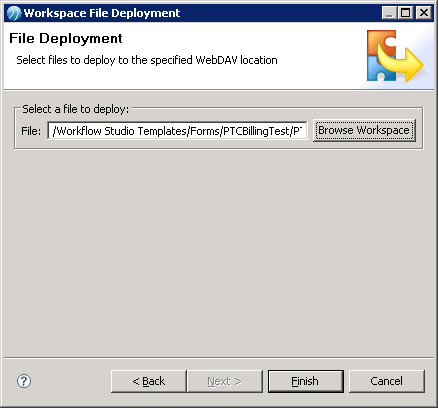
In the Workspace File Deployment window, click the Browse Workspace button.

-
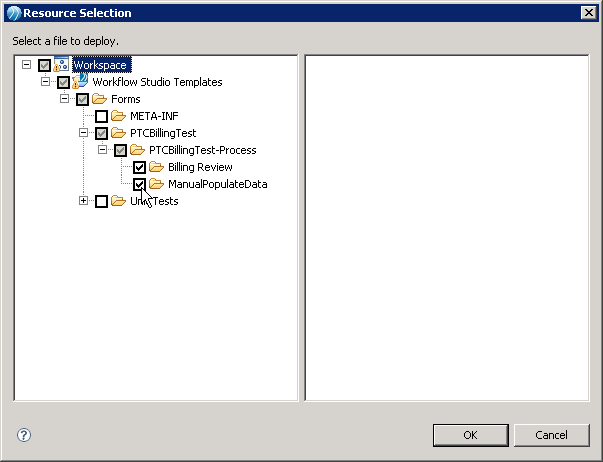
In the Resource Selection window:
-
Select the forms you want to deploy by expanding the nodes and selecting the appropriate check boxes.
-
Click OK.

-
-
The file to deploy is listed in the File field. Click Finish to deploy the selected forms.

-
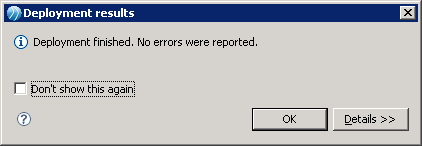
You are notified that your deployment finished successfully. Click OK.