Uninstall the Transflo DMS Workflow Engine and Components
If you ever need to reinstall the Transflo DMS Workflow Engine, use this article to learn how to uninstall all components properly for a successful fresh install. A reinstall of the Workflow engine components requires that the Workflow Engine and its components be uninstalled first.
When you uninstall the Workflow Engine and its components, it is essential that you perform the instructions in the sequence described in this topic. Do not attempt to delete Workflow Engine files directly. Removing these files directly may cause problems when you reinstall the Workflow Engine later.
Make sure of the following before uninstalling the Workflow Engine components:
-
TRANSFLO® Workflow Studio must not be on the server that houses the Workflow Engine during the removal of the Workflow Engine components.
-
If Workflow Studio is on this server, uninstall it first.
-
After the Workflow Engine components have been removed you can reinstall TRANSFLO® Workflow Studio.
To uninstall the TRANSFLO® Workflow Studio:
-
Open the Add or Remove Programs window from the Windows® Control Panel.
-
Select TIBCO Universal Installer (<path>). The path indicates where Workflow Studio was installed.
Depending on the version of TRANSFLO® Workflow Studio installed on your computer the TIBCO Universal Installer entry may or may not be listed in the Windows® Control Panel. If not, disregard this step.
-
Click Change/Remove and follow the uninstall instructions.
-
Select TRANSFLO® Workflow Studio 2012 in the list and click Remove. Follow the uninstall instructions.
-
Close the Add or Remove Programs and Windows® Control Panel windows.
-
Backup your Workflow database schema and any other data related files. Configuration changes that were made prior to installation are not automatically removed during uninstall of the Workflow Engine. Any such changes must be changed back to their original values manually.
-
If you are removing TRANSFLO® Workflow 2010 R1, uninstall TIBCO EMS and TIBCO Hawk from the Workflow Server using Windows® Add or Remove Programs.
Skip this step if you are removing TRANSFLO® Workflow 2010 R2 or TRANSFLO® Workflow 2012.
-
If TIBCO Rendezvous is installed or is showing in the Windows® Add or Remove Programs uninstall it.
-
If you are removing TRANSFLO® Workflow 2010 R1, uninstall the TIBCOiProcess Web Services Plug-in from Windows® Add or Remove Programs.
Skip this step if you are removing TRANSFLO® Workflow 2010 R2 or TRANSFLO® Workflow 2012.
To uninstall the TRANSFLO® Workflow Engine from your computer:
-
Log in to Windows® using the tfwfadmin (iPE Admin) administrator account.
-
Make sure that all users are logged out from TRANSFLO® Workflow.
-
Stop the iProcess TFLOWF Process Sentinels service. (In this context TFLOWF is the name of the iProcess Engine known as the nodename.)
-
Open the Windows® Control Panel.
-
Open the Add or Remove Programs window from the Windows® Control Panel.
-
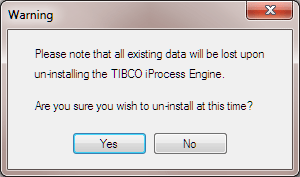
Select TIBCO iProcess Engine/TFLOWF and click the Change/Remove button. (TFLOWF is the nodename of the iProcess Engine.)
- A Warning similar to the one below opens. Click Yes.
-
The Remove Programs from Your Computer dialog opens.
This dialog shows the progress of the TRANSFLO® Workflow Engine uninstall process.
-
When the TRANSFLO® Workflow Engine uninstall finishes the Uninstall successfully completed window is displayed.
Click OK.
The iProcess Engine has been successfully removed from the system.
-
If any other messages are displayed, follow these instructions.
-
Close the Add or Remove Programs and Windows® Control Panel windows.
The next step in uninstalling the TRANSFLO® Workflow Engine is to remove the Staffware Events COM+ application. To remove the Staffware Events COM+ application, follow these steps:
1. From the Windows® Control Panel open the Administrative Tools window.
2. Open the Component Services window.
3. In the left panel of the Components Services window expand the Components Services node.
4. Expand the Computers node, expand the My Computer node, and expand the COM+ Applications node.
5. Right-click Staffware Events and click Delete.
6. Click Yes in the dialog box to confirm that you want to delete Staffware Events.
7. Close the Component Services and Administrative Tools windows.
8. In the “C:\WINDOWS\system32” folder delete the following files:
-
SWEventClass.dll
-
SWEventClassSubscriber.dll
9. Remove TIBCO iProcess Workspace (Windows) from Windows® Add or Remove Programs, if it exists.
10. Restart the computer.
Note: If you want to remove the TRANSFLO® Workflow Web Client see the Uninstalling the TRANSFLO® Workflow Web Client section in the Installing the Transflo DMS Workflow Web Client topic.
If you plan to reinstall the TRANSFLO® Workflow Engine the removal of the Workflow Engine Database is optional.
Removing the Workflow database involves removing the ODBC Data Source and then removing the Workflow Engine database.
To remove the TRANSFLO® Workflow Engine’s ODBC Data Source:
-
In the Windows Control Panel, open the Administrative Tools window.
-
Double-click Data Sources (ODBC).
-
On the System DSN tab, select TFLOWF (the name of the iProcess Engine database) and click Remove.
-
To confirm that you want to remove the ODBC data source, click Yes.
-
Close the Data Sources (ODBC) and Administrative Tools windows.
To remove the Workflow Engine database and the corresponding SQL logins, do the following:
-
Start the SQL Server Management Studio utility.
-
Expand Databases to the TFLOWF database. (TFLOWF is the TRANSFLO® Workflow database that was installed during the TRANSFLO® Workflow Engine installation.)
-
Right-click TFLOWF and select Delete from the menu.
-
Click OK in the dialog box to confirm that you want to delete this database.
-
Expand Security and click Logins.
-
Right-click the tfwowner login and select Delete. (The tfwfowner user is the login id for the iPE DB Owner created during the TRANSFLO® Workflow Engine installation.)
-
Click OK in the dialog box to confirm that you want to delete this login.
-
Right-click the tfwuser login and select Delete. (The tfwfuser user is the login id for the iPE DB User created during the TRANSFLO® Workflow Engine installation.)
-
Click OK in the dialog box to confirm that you want to delete this login.