DMS Capture Queue Status
As a companion to Capture, TRANSFLO® Capture Queue Status is a separate program with its own required login credentials to access the TRANSFLO® Capture Queue Status Dashboard.
To start the TRANSFLO® Capture Queue Status Dashboard, follow these steps on each workstation:
-
Make a copy of your Capture desktop shortcut.
-
Rename this shortcut to Capture Queue Status.
-
Right-click this new short cut and select Properties from the pop-up menu.
-
On the Shortcut tab, edit the Target field by adding the following to the end:
[space] /queuedashboard
-
Click the Apply button.
-
Click OK.
-
Double-click the Capture Queue Status desktop shortcut.
-
Log in to Capture Queue Status (see the next section below).
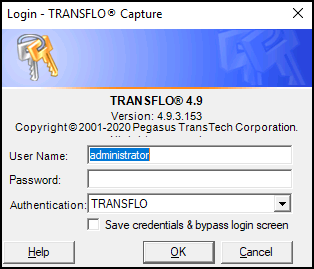
When Capture Queue Status starts, the Login dialog box appears.
To log into Capture Queue Status:
1. Select an Authentication Type from the Authentication list.
There are three types of Authentication from which you can choose:
-
None - This option allows anyone who has access to the computer to access Capture.
-
NTPassThru - This option uses your Windows® User Account to access Capture.
-
TRANSFLO® - When you use TRANSFLO® Authentication you must use a User Name and Password configured in the TRANSFLO® Administration Tool.
2. If you selected TRANSFLO® as the authentication type, type your user name and password in the User Name and Password boxes, respectively.
3. To use this authentication type each time you log in, select the Always use this authentication type check box.
4. To complete your login and start the Capture Queue Status application, click the OK button.
If you do not wish to log in, click the Cancel button.
If you need help logging in, click the Help button to open the Capture Online Help System.
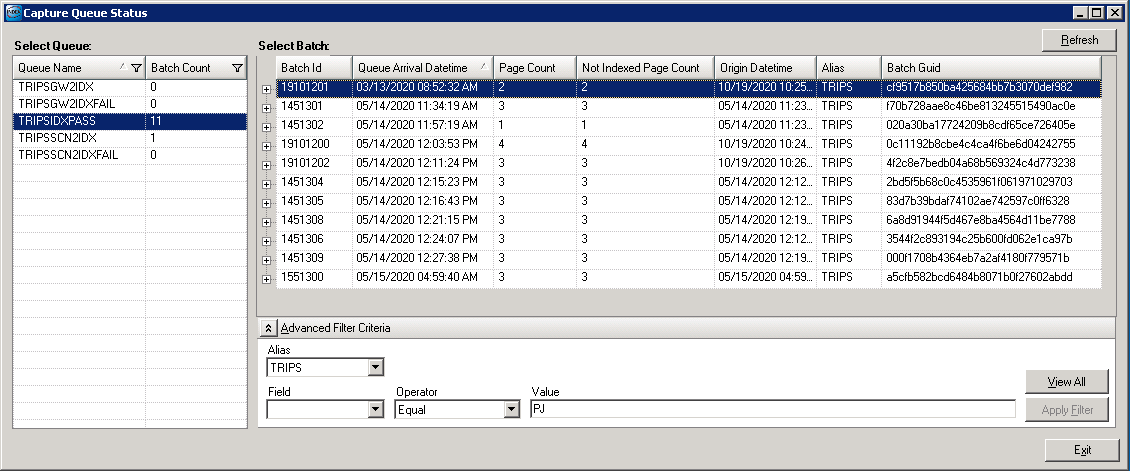
Once you log in the Capture Queue Status window opens.
To monitor your queues, follow the steps below:
-
The Queue that is set by default in the Capture application on your workstation will be selected in the Capture Queue Status window, but you can select a different Queue if necessary. To do this, click the name of the desired Queue in the Select Queue table on the left side of the Capture Queue Status window.
-
You can monitor the number of Batches in each Queue in the Select Queue table.
-
You can change the order of the Queues in the Select Queue table, by clicking on the header of the column you want to sort by. This will sort the list by that columns values in ascending order. To sort in descending order click the header a second time.
-
You can change the size of Select Queue table, by positioning your mouse in the area between the Select Queue table and the Select Batch table and dragging the edge to the desired position.
-
You can change the size of a column, by positioning your mouse on the left edge of the column’s header and dragging to the desired width.
-
The majority of the space in the Capture Queue Status window is occupied by the Select Batch table. This table consists of a list of the Batches in the selected Queue and Base Alias. The list of Batches can be sorted by clicking any of the column headers, which also can be repositioned.
-
-
You can refresh the Capture Queue Status window at any time. To do this, click the Refresh button in the top-right corner of the window. Refreshing the window will show you if any new Batches have come in or if any existing Batches have been locked or indexed by your Users.
-
To change the sort order of the batches in the Select Batch table, click a column header. Your first click sorts the list by column values in ascending order. To sort in descending order click the header a second time.
-
You can change the size of the Select Batch table by positioning your mouse in the area between the Select Queue table and the Select Batch table and dragging the edge to any position.
-
To see configured Batch Field Values and Last Activity Comment for a batch, click the + icon on the left edge of the batch.
-
You can change the size of a column, by positioning your mouse on the left edge of the column’s header and dragging to the desired width.
-
-
To filter the Select Batch table use the Advanced Filter Criteria panel below the Select Batch table. You can filter by Alias and by Field values.
-
Click the Apply Filter button to activate your filter.
-
To see the list unfiltered click the View All button.
-
-
You can re-size, minimize, and maximize the Capture Queue Status window.
-
To save your sort, window size, panel size and column size preferences, click the Exit button at the bottom right corner of the Capture Queue Status window.
Note: If you close the Capture Queue Status window using the X button in the top right corner of the Capture Queue Status window, your preferences are NOT saved.