Maintain Your Transflo Express Kiosk
As an attendant, cashier, or manager at a participating Transflo Express truck stop partner location, follow these steps to offer your customers the best service experience. With periodic maintenance, truck drivers can confidently place their load delivery documents into the scanner tray at a reliable Transflo Express kiosk to submit load documents to their carriers, brokers, or other processing and settlement providers.
We recommend cleaning each scanning kiosk once or twice per day. It can also be cleaned more often if documents do not feed easily, if several documents feed at the same time, or if streaks appear on your images. Use the following daily start or shift start maintenance checklist:
-
Clean scanner daily
-
Pick up any scraps or trash items left at kiosk daily
-
Check the receipt paper roll in the receipt printer
-
Periodically check the keyboard to make sure the labels on each key are visible and not worn away (clear plastic keyboard covers are available)
We also recommend that you refresh the following supplies for customer use:
-
stapler with adequate supply of staples
-
clear tape
-
extra sheets of paper
-
pen with blue or black ink
To perform your daily cleanings, you will also need the following supplies:
-
Soft clean cloth
-
Cleaning wipes for electronics
-
Glass cleaner or alcohol cleaner that is safe for electronics
-
Can of compressed air to remove dust safely from inside the scanner and kiosk workstation
The following instructions apply to the Canon DR‐5010C, DR6010C, DR6030C and similar supported Canon personal scanners:
-
Turn the power OFF. The power button is typically located on the front side near the bottom on the right side.
-
Unplug the black power cord from the back of the scanner.
-
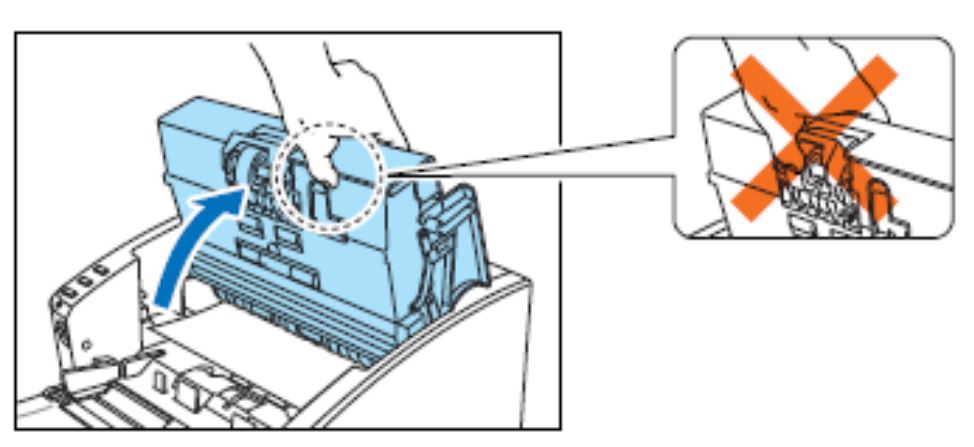
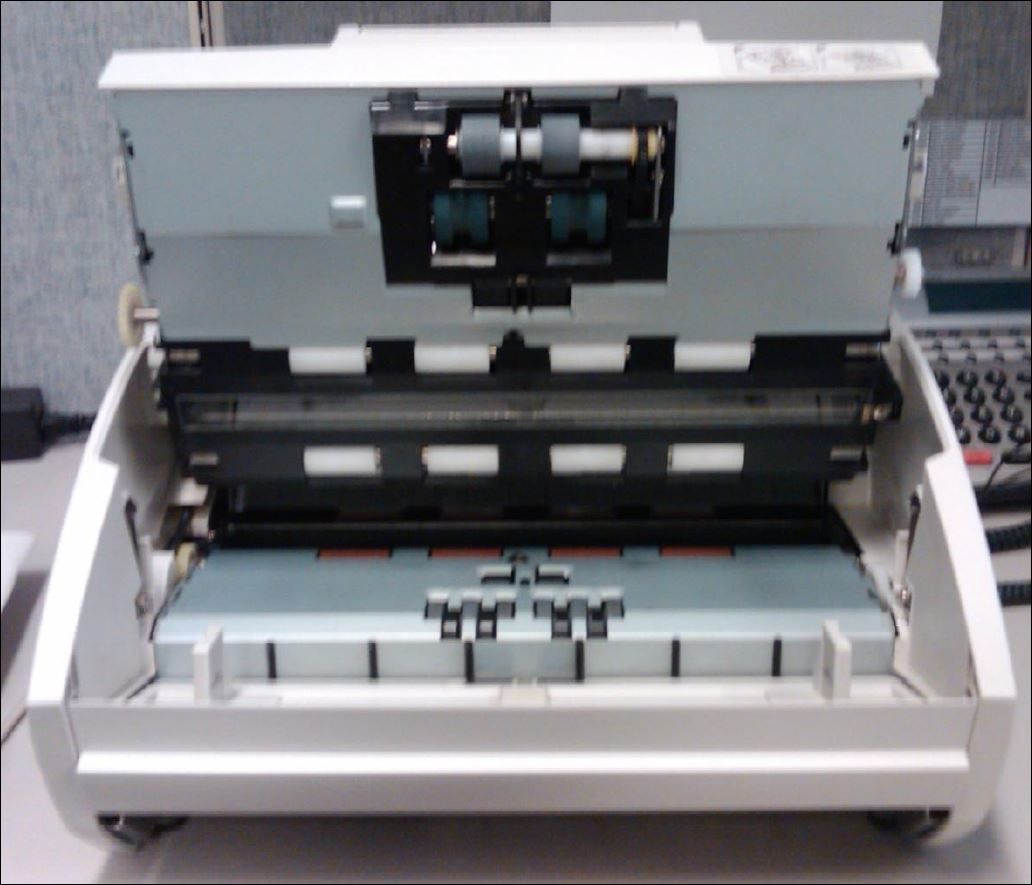
Carefully open the scanner cover by gently grasping the upper lid and swinging it up until it stops. Do not grab the lid in the middle where the rollers are located. This can damage the rollers and cause feed problems.
-
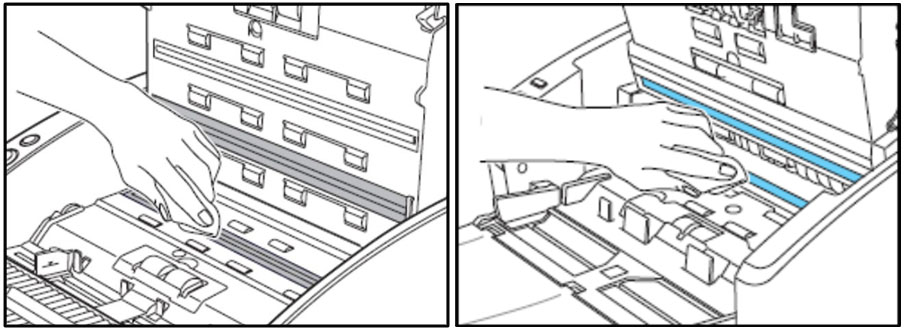
Wipe the scanning glass on the upper unit and the base unit of the scanner with a pre‐moistened cleaning wipe or a small amount of liquid cleaner sprayed on a soft cloth. Scratches on the glass can cause lines to appear on the images. If you have permanent scratches that are causing lines, contact your support department to have the glass or entire scanner replaced.
-
Use compressed air to blow the interior clean of dust and paper particles.
-
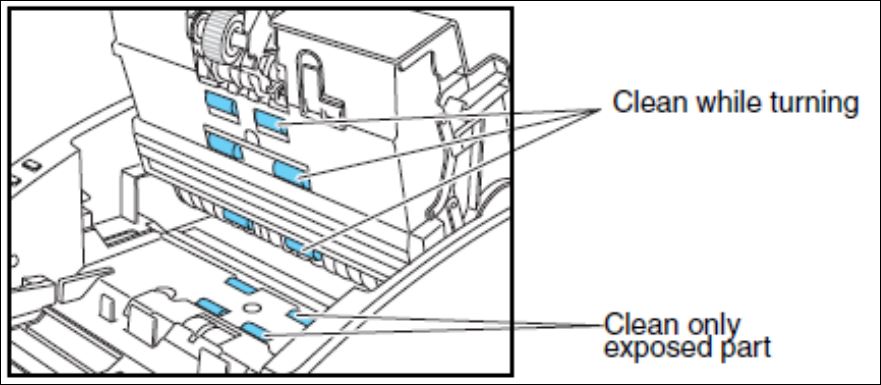
Dampen a soft cloth with water, wring it out thoroughly, and wipe the rollers of the upper unit while turning them.
-
Do not turn the rollers in the lower part of the scanner. Clean these rollers by simply wiping the exposed part.
-
Do not use detergent to clean the rollers. Any detergent residue on the rollers can cause feeding problems.
-
Do not try to turn the rollers in the bottom of the scanner. Doing so could cause damage that leads to feeding problems.
-
-
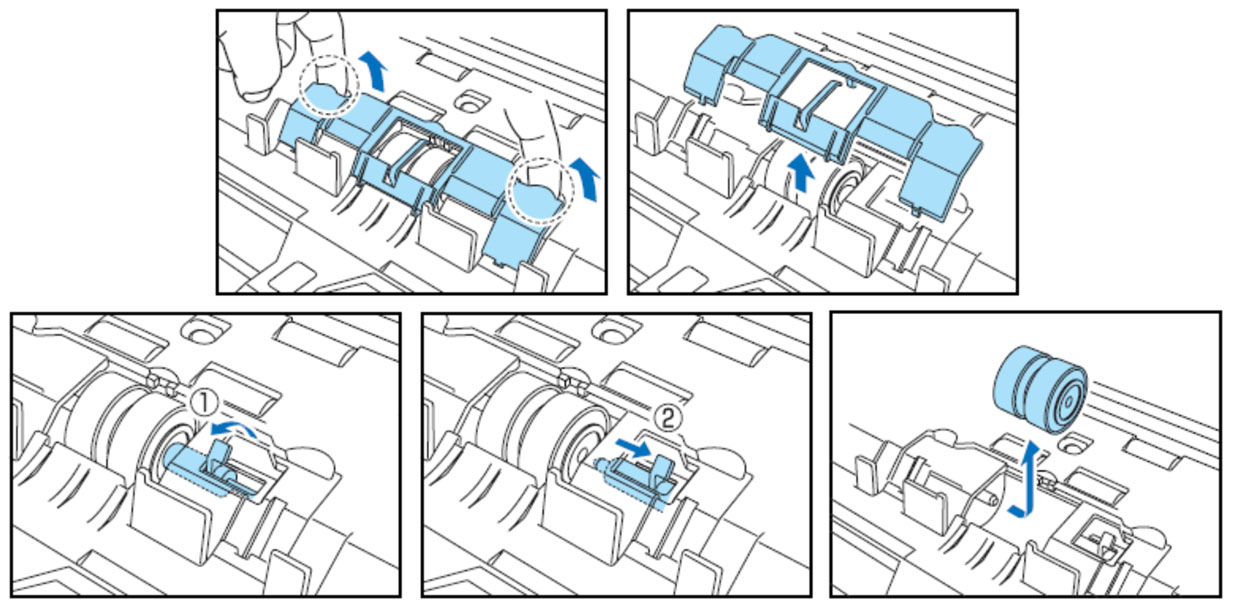
Remove the roller unit.
-
Remove the retard unit.
-
Wipe the removed rollers with a cloth moistened with water and thoroughly wrung out.
-
Reverse the removal steps to re-insert both roller assemblies back into the scanner.
The following instructions apply to Kodak personal scanners such as the Kodak i1210:
-
Power OFF the scanner and disconnect the electrical power.
-
Verify the input tray is in the open position.
-
Remove any optional output tray or dangler if attached.
-
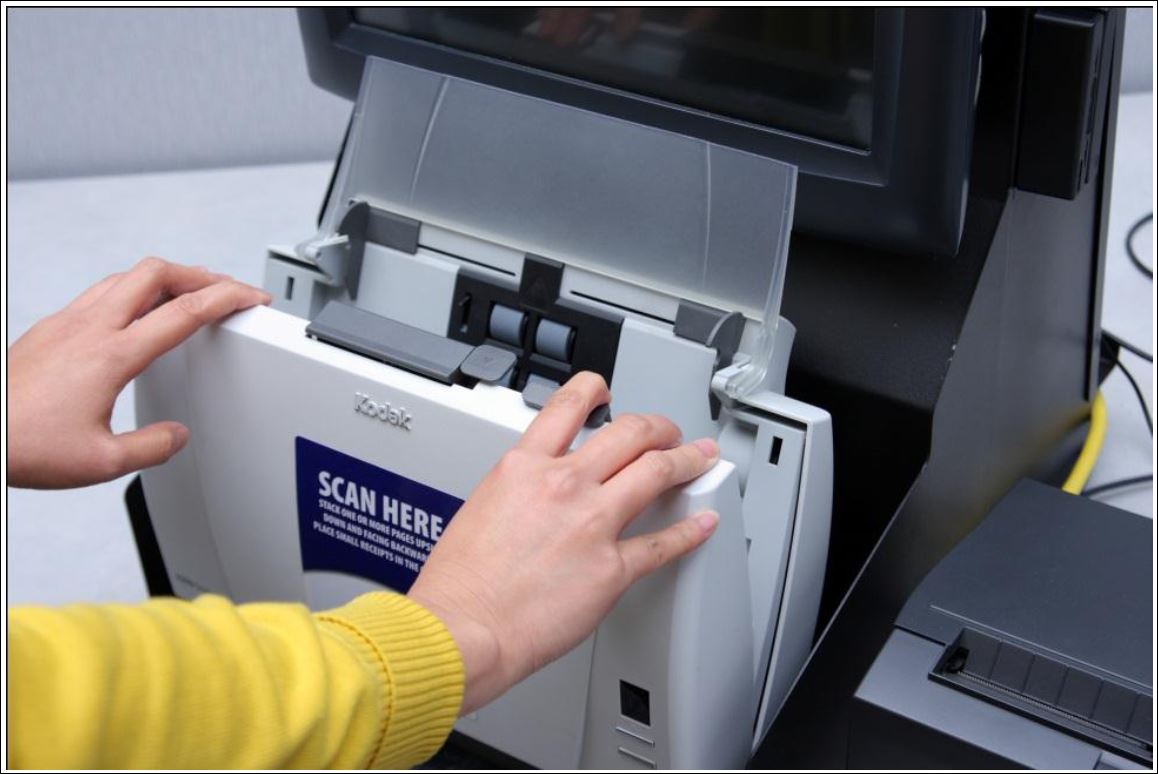
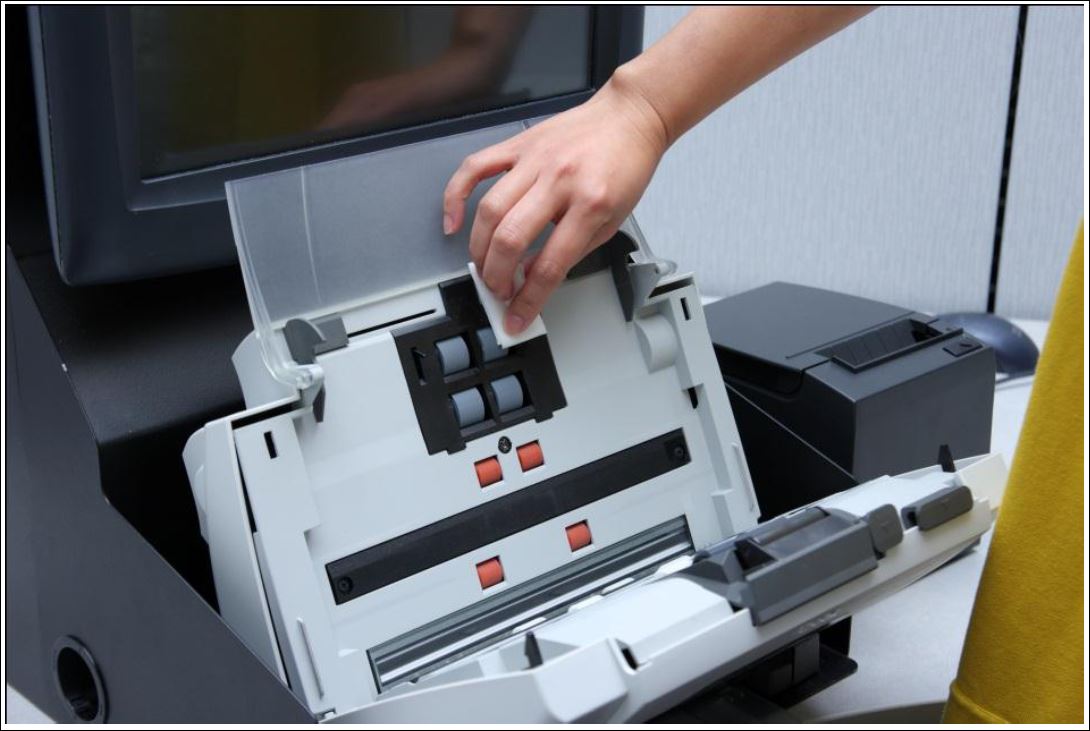
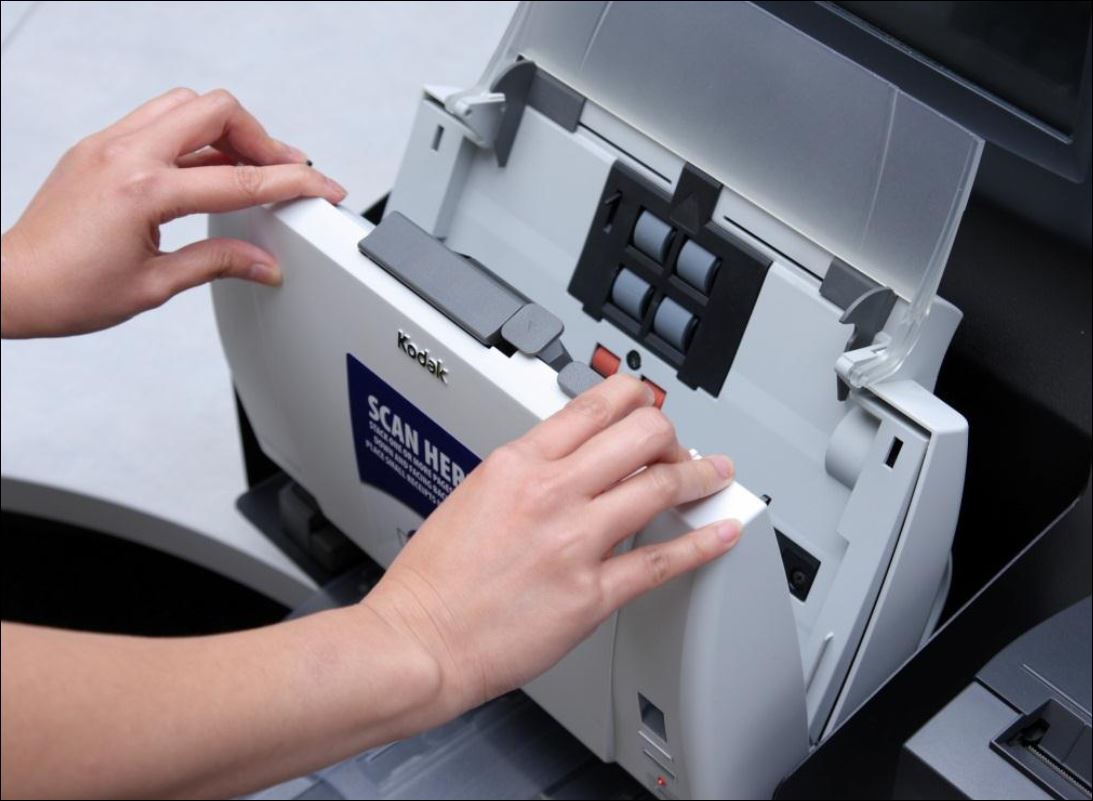
Press and hold the scanner cover release lever and pull the scanner cover down to open it.
-
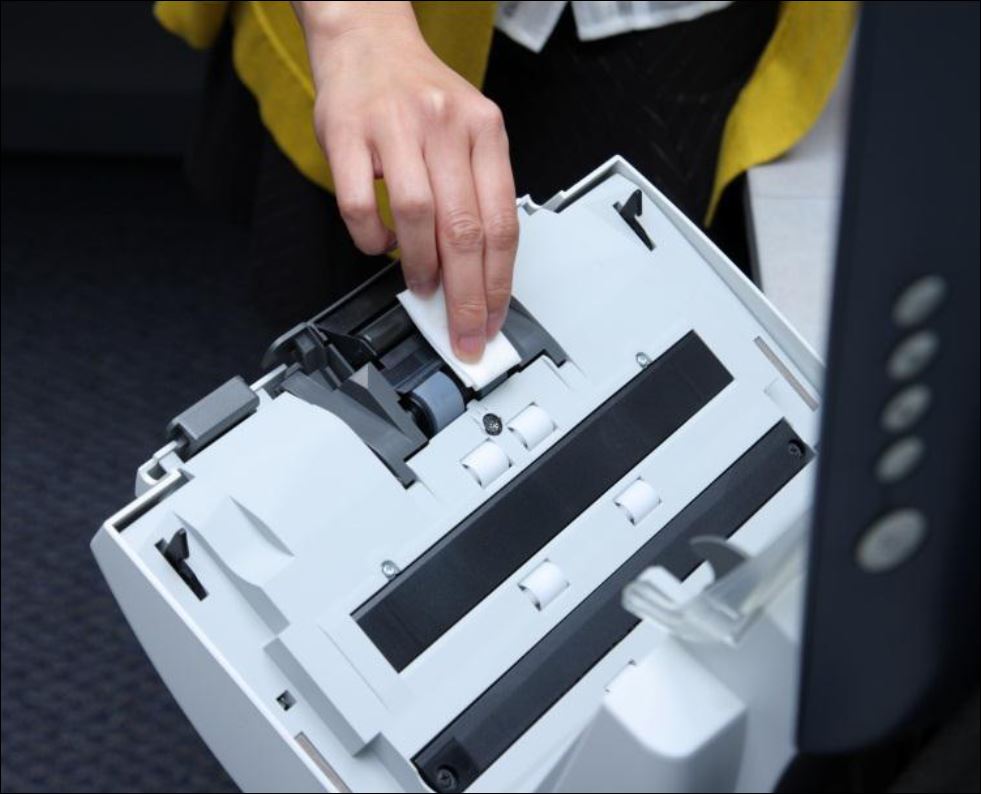
With Kodak roller cleaning pads #8535981, wipe the feed rollers from side to side. Rotate the feed rollers to clean the entire surface.
-
Dry the rollers with a lint-free cloth.
-
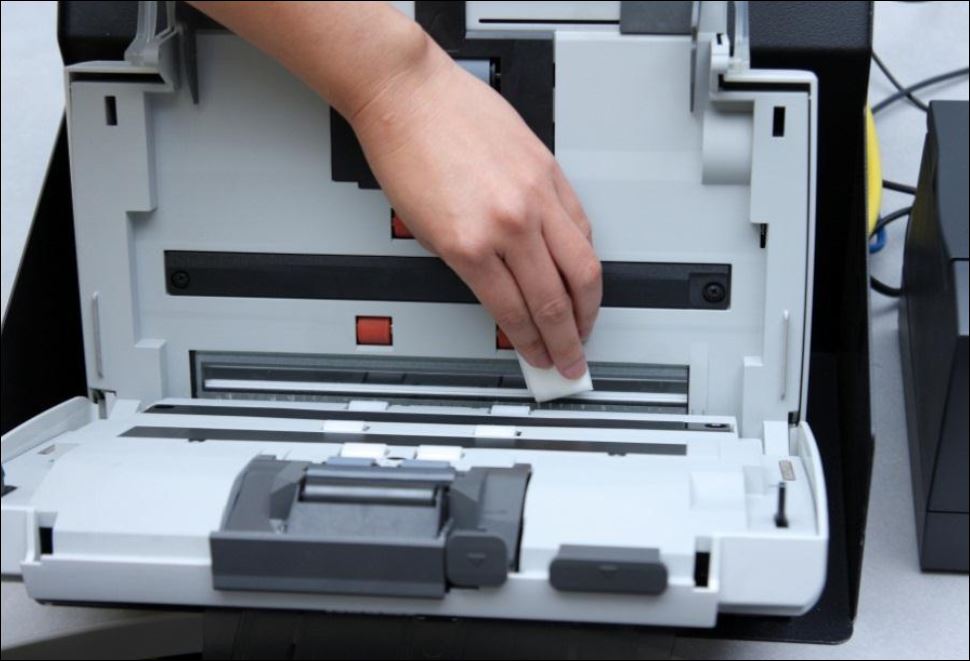
Clean the scanner camera glass. Wipe the upper and lower imaging area using a Kodak staticide wipe #8965519. Be careful not to scratch the imaging area when cleaning. Allow the glass to dry completely before using the scanner.
-
When you finish cleaning the scanner, close the scanner cover with both hands.
-
After cleaning your scanner you will need to scan the cleaning sheet seen on the last page of this document.
Follow these instructions to clean the scanner roller and scanner camera mechanism on a Xerox 262i and similar models from Xerox or Epson.
-
Turn OFF the scanner and disconnect the electrical power.
-
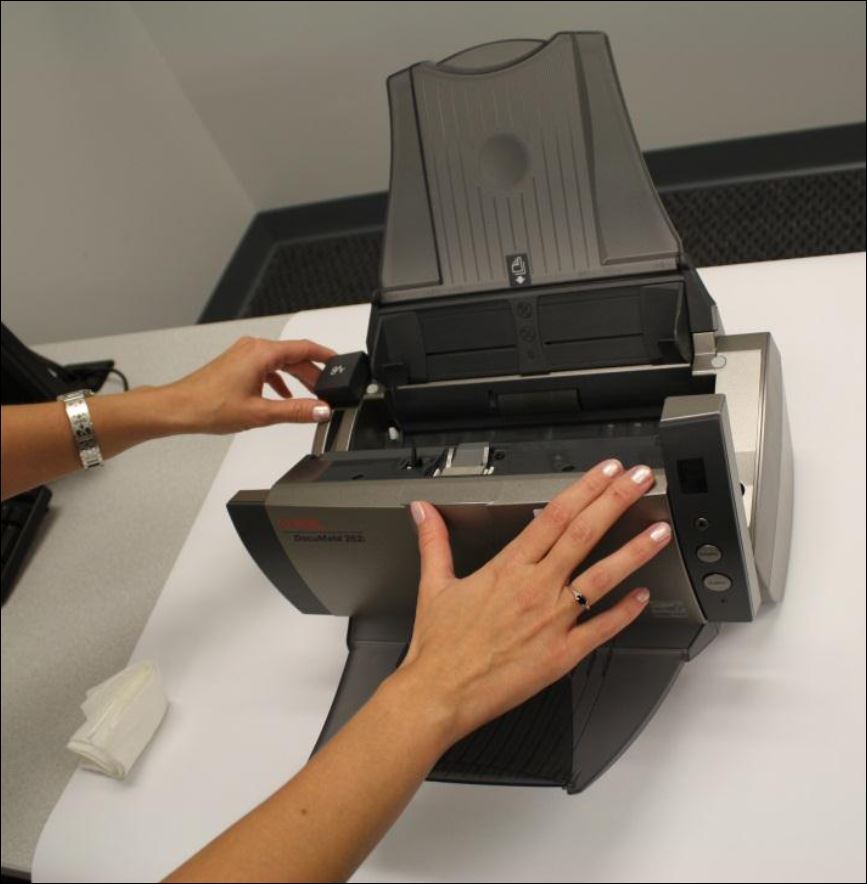
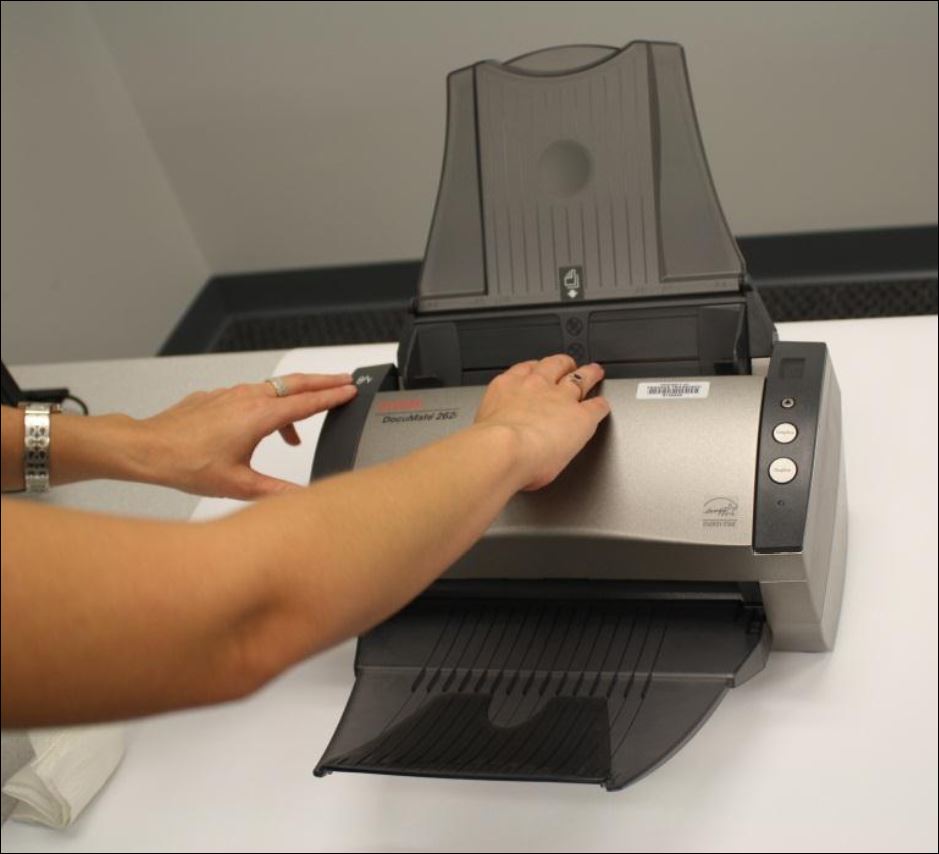
Press and hold the scanner cover release button and pull the scanner cover toward you.
-
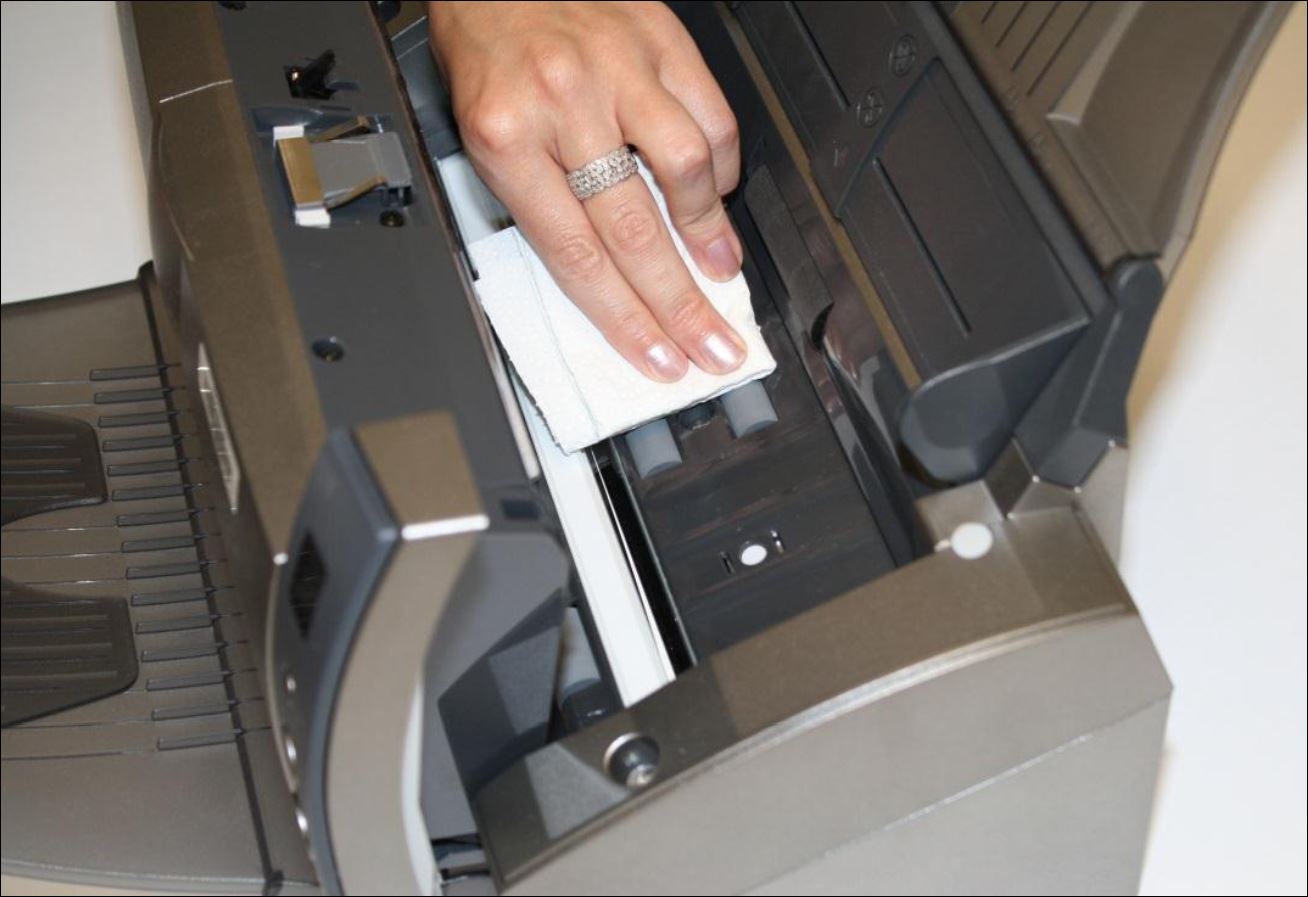
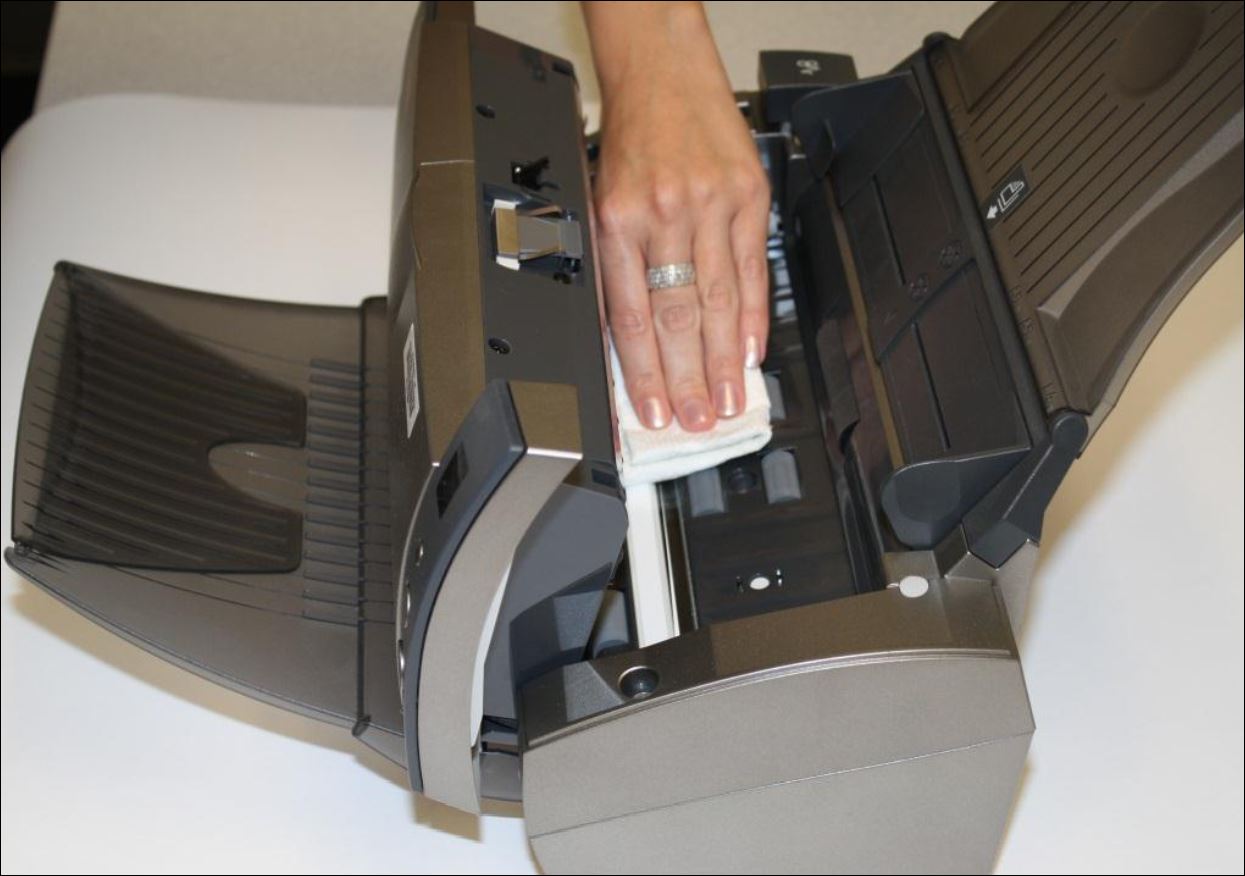
Dampen a soft cloth with some isopropyl rubbing alcohol (95%). Wipe the feed roller from side to side. Rotate the roller to clean its entire surface.
-
Be careful when cleaning the roller. The roller is designed to rotate in one direction only.
-
As you clean the roller, make sure it rotates easily, and continue rotating it in that direction while wiping it clean.
-
Do NOT force the roller to rotate in the opposite direction. Forcing the roller to rotate will damage it, and may cause the scanner to feed pages incorrectly.
-
-
To clean the scanner camera, wipe the lower glass imaging area using a damp soft cloth and isopropyl rubbing alcohol (95%). Be careful not to scratch the imaging area when cleaning.
-
When you have finished cleaning the scanner, close the scanner cover. Power the scanner ON.
If necessary, follow these steps to replace a missing, damaged, or worn feed tray:
Follow these general steps to replace a feed tray in basic scanners such as the Canon DR-5010C, DR-6010C, DR-6030C, and similar models from HP, Dell, and Epson.
-
Turn OFF the scanner power and unplug the power cord and USB cable.
-
Remove the broken feed tray.
-
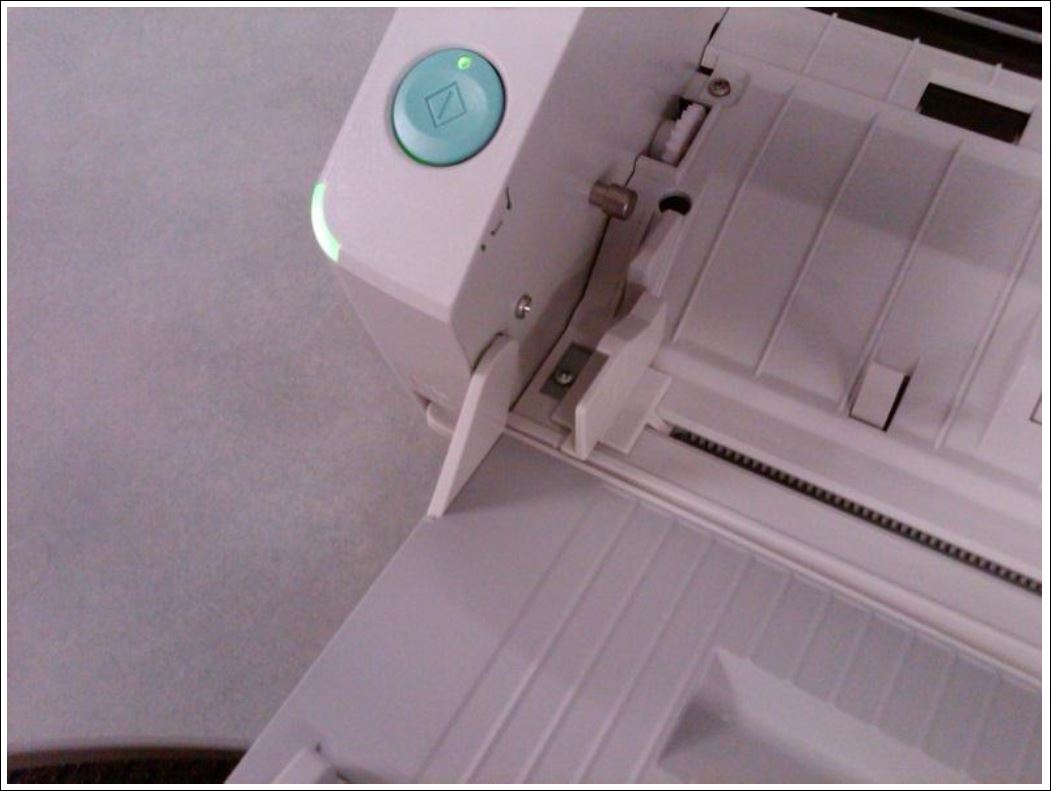
Install the replacement feed tray by inserting one of the hinge pins in the socket on the scanner.
-
Carefully pull the pin on the opposite end until it can slide into that socket. If you apply too much pressure the pin hinge could break so be careful.
-
Plug in the power cord and turn the scanner ON.
Follow these more advanced steps to replace a feed tray in more advanced scanners such as the Canon DR-3060, DR-3080, and similar models from HP, Dell, and Epson.
-
Turn OFF the scanner power and unplug the power cord, any SCSI cable, and any USB cable.
-
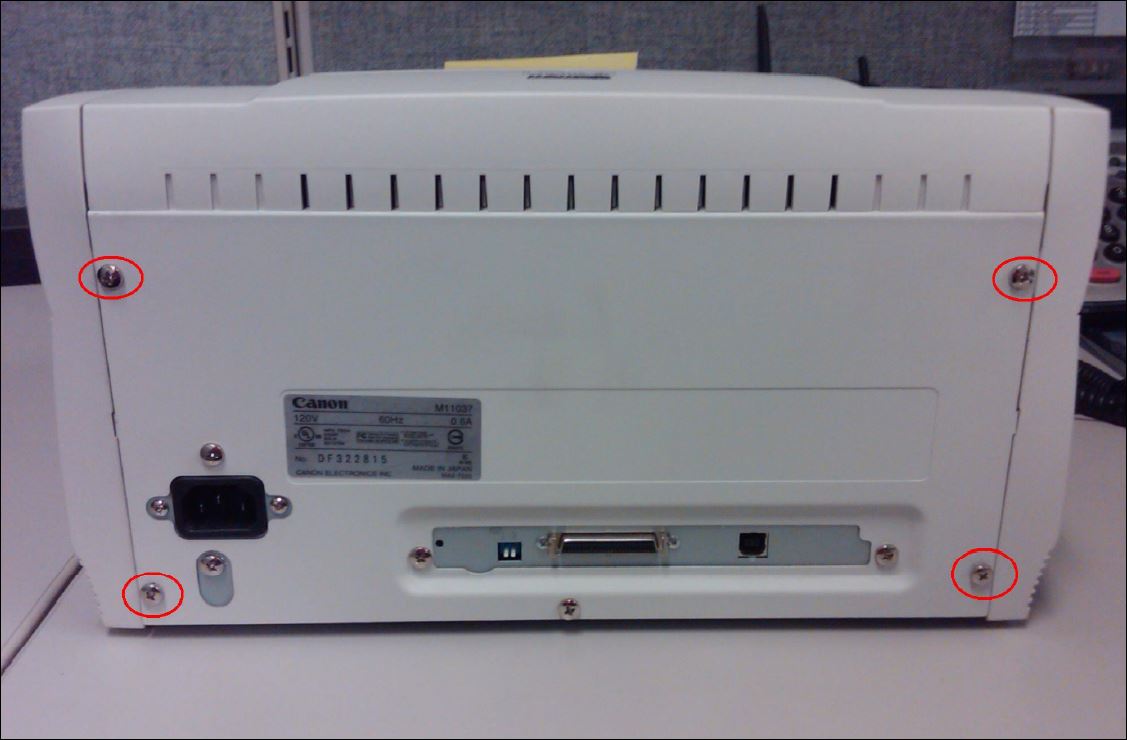
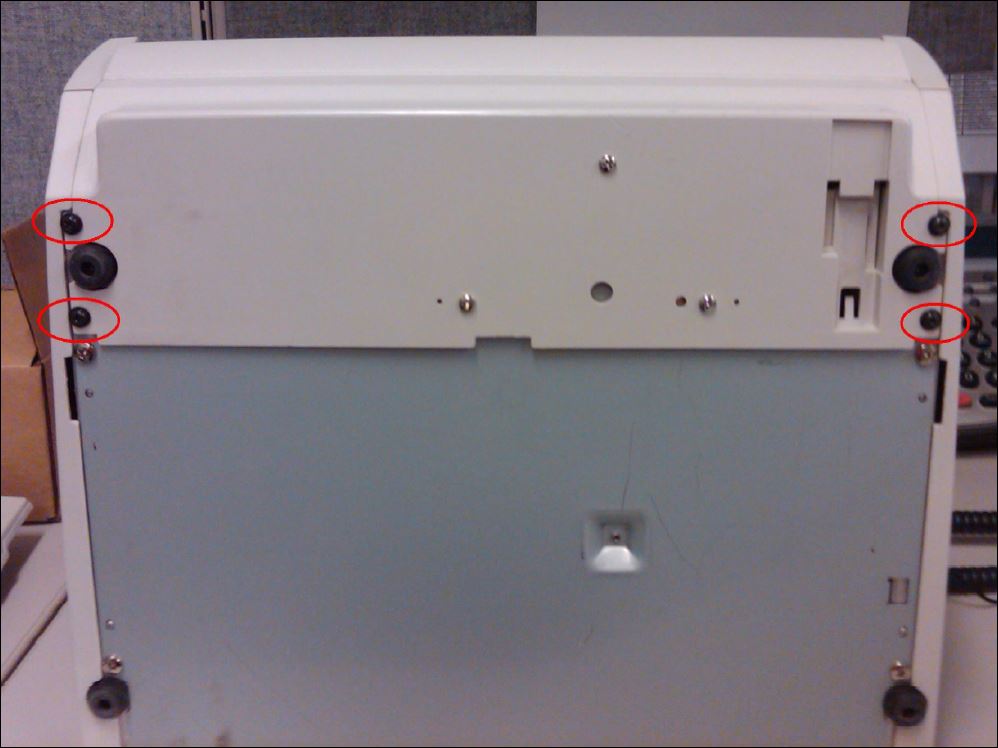
If necessary, you might have to remove screws on the back or bottom:
-
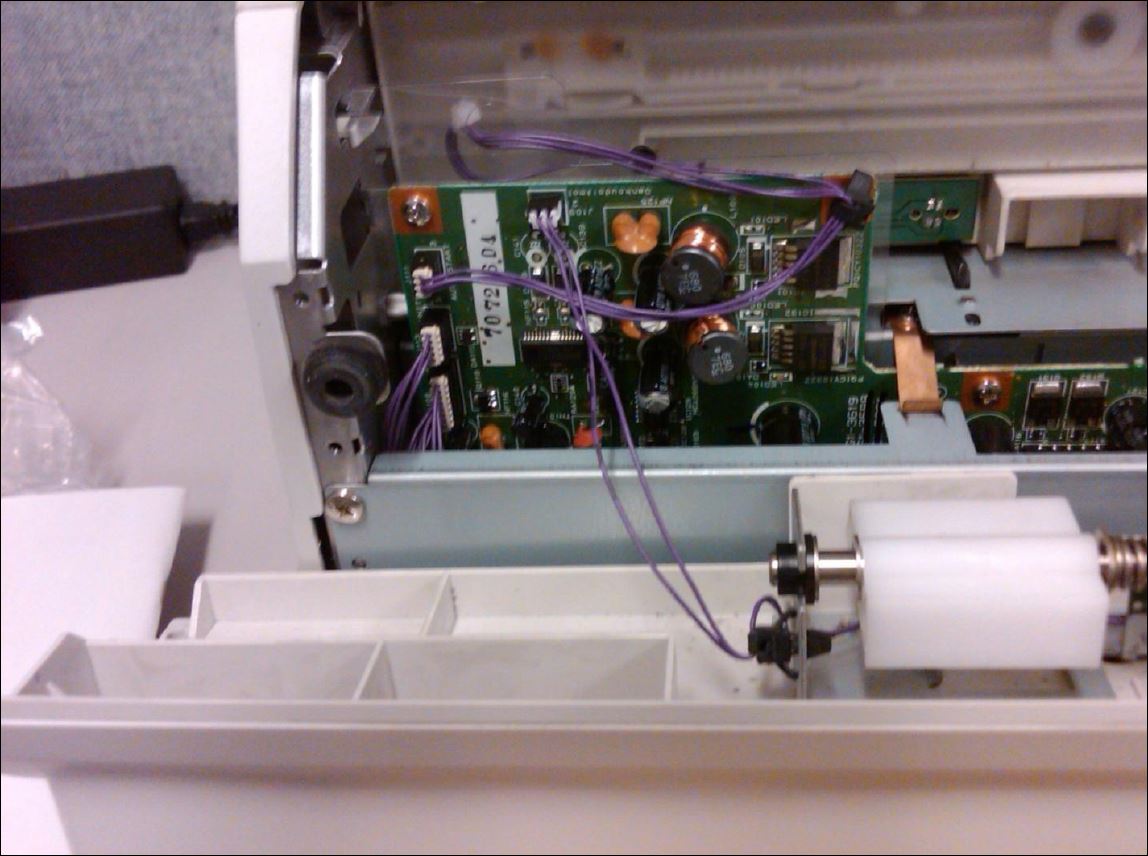
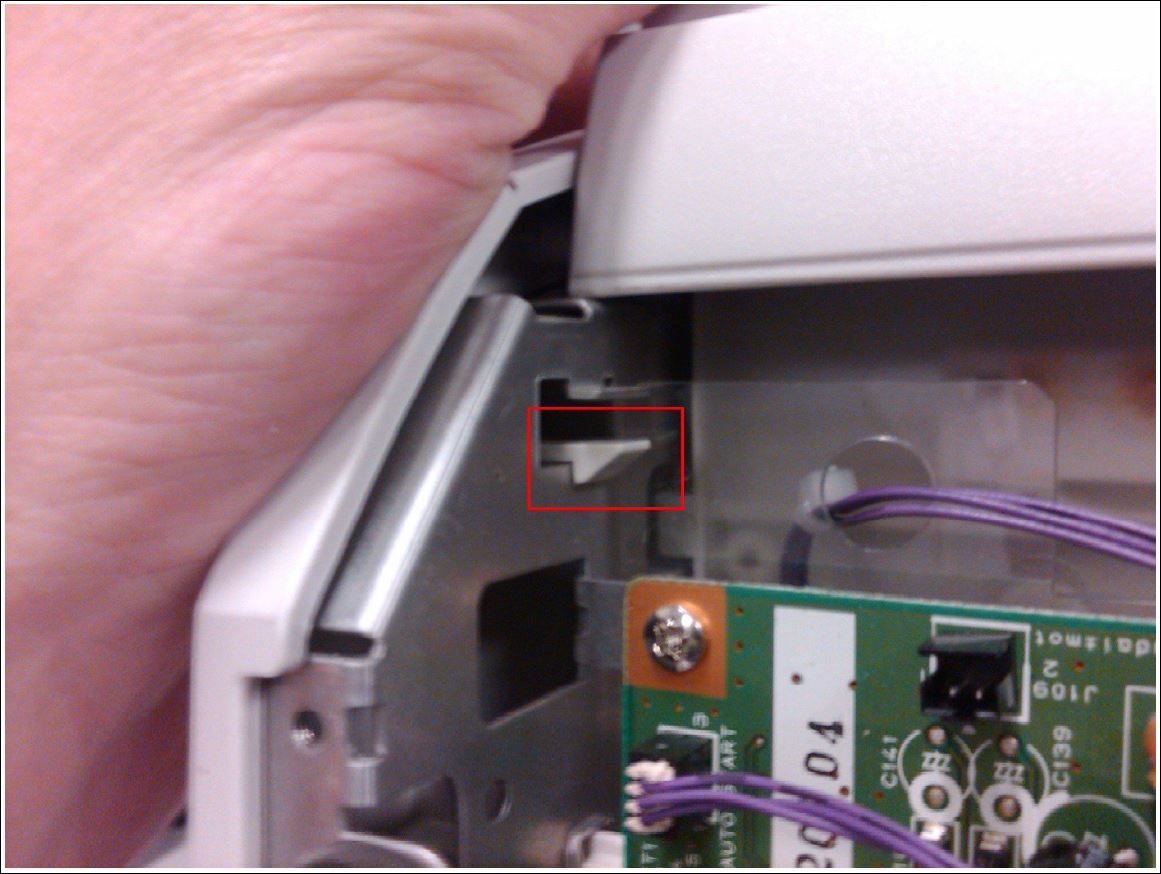
Carefully pull the lower cover off. An attached wire will need to be unplugged from the main board. The wire is very short so don’t pull the cover away too quickly.
-
Lay the scanner down in its normal position and open the top lid.
-
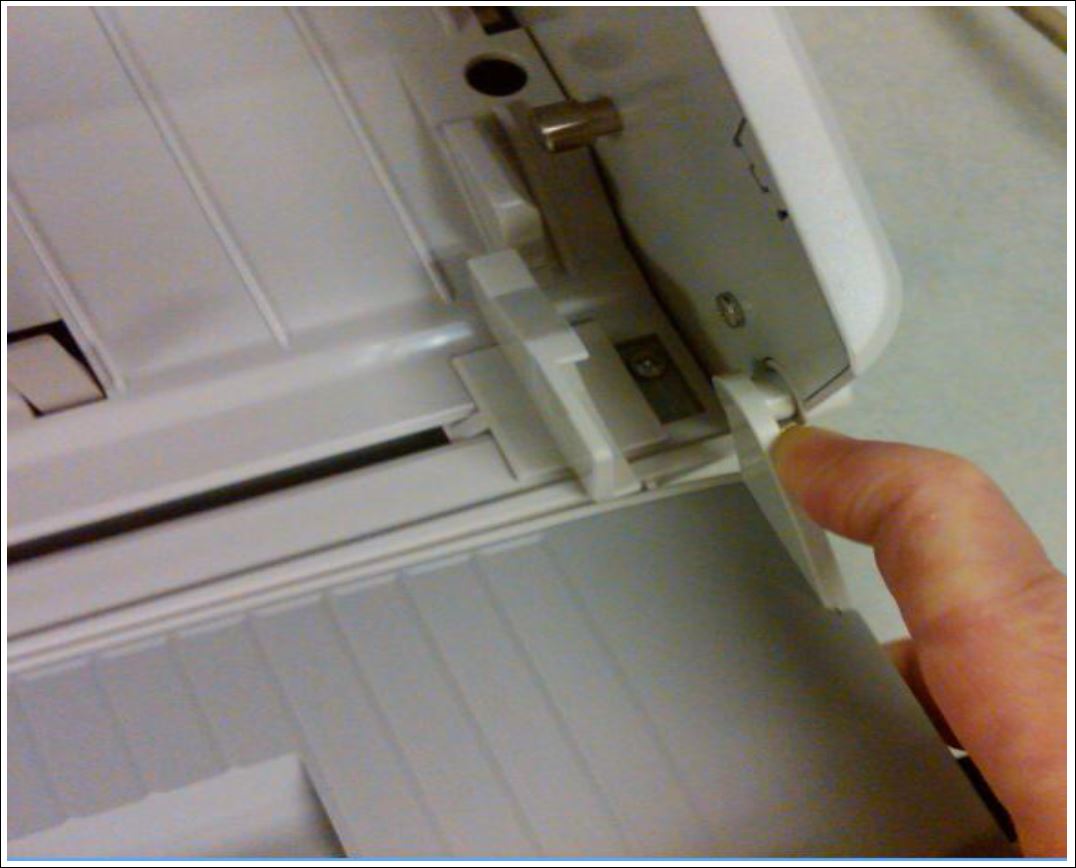
Insert the right side pin of the replacement feed tray into the socket on the right side cover. This will leave one pin in the scanner body and one pin out.
-
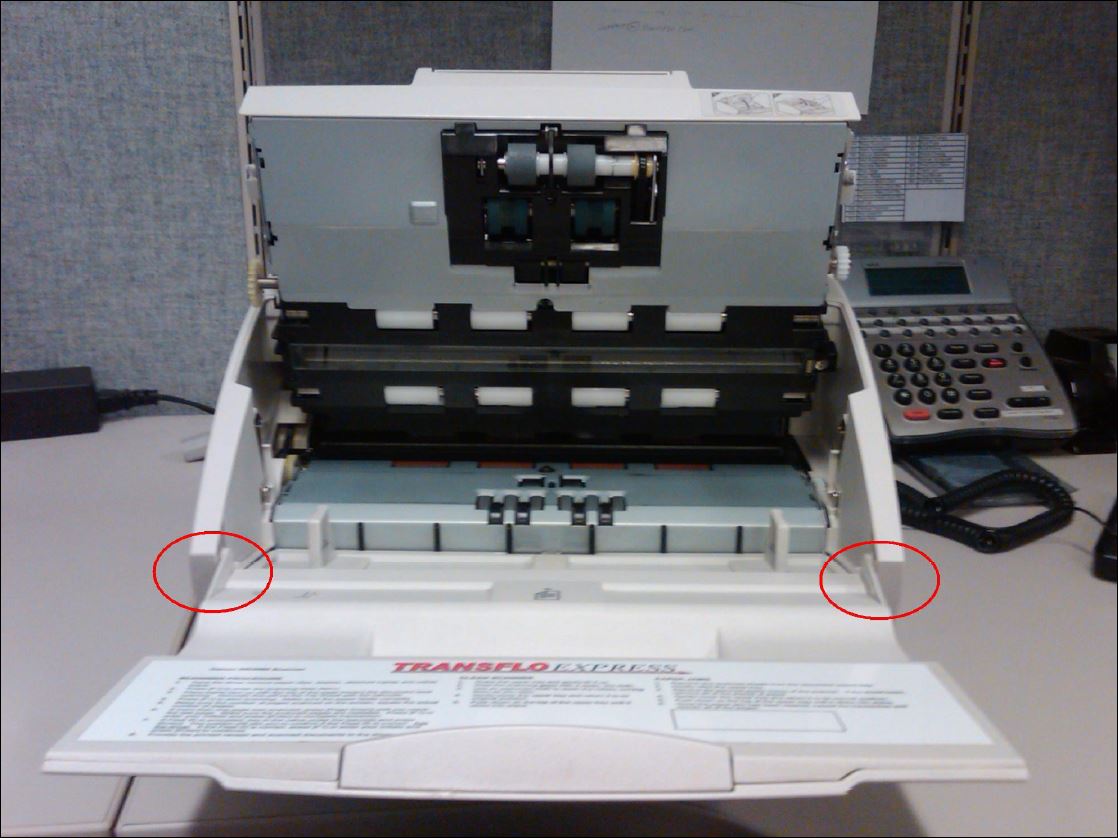
Keep the pin in the right socket as you reach under the scanner. When you removed the lower cover, you left an opening where you can now locate a clip that holds the side cover on.
-
Press the clip to release the side cover but do NOT pull the side cover away yet. There are two other pieces that are attached to the side cover in the same pin and socket configuration. These pieces will pull out of the sockets as you remove the side cover.
-
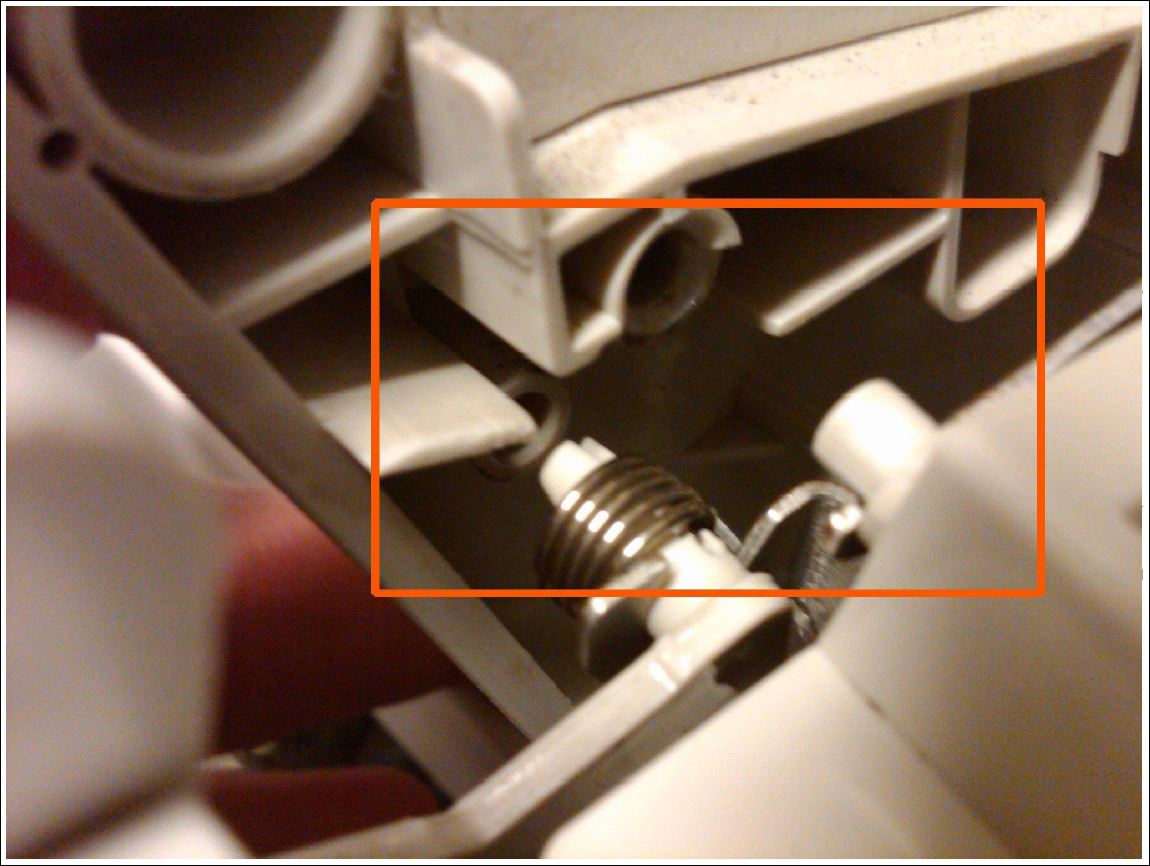
Gently pull the left side cover away while pushing the feed tray into place so the pin goes into the socket. If the other two pieces came out of their sockets you need to make sure they go back into place as your putting the side cover back on.
-
Be very careful as the lower pin with the spring is a split pin and if it does not go in the socket correctly it will break off. Slowly squeeze the side covers together. You should hear a click as the clip catches on the frame. If you feel any resistance when you squeeze the side cover on stop and check the pins again. Something is not aligned correctly.
-
-
After the side cover is locked in place, close the lid and put the bottom cover on making sure the wire is plugged into the main board.
-
Attach the cover with the 4 screws you removed.
-
Tighten the 4 screws that you loosened on the back of the scanner.
Important: All retail locations including Pilot, Flying J, and Loves stores must call their own internal support team first to report service issues so they are properly logged and resolved in a secure and timely manner. After you report an internal issue and your own teams troubleshoot the issue, your support agents can then contact Transflo Support:
-
Email: Support@transflo.com
-
Phone: 813.386.2327
