Install Add-On Queues
To bring even greater flexibility to your TRANSFLO® system, you can install, create, and configure one or more separate add-on queues:
-
CSV File Queue
-
eScan (EDO) Queue
-
eScan (Text) Queue
-
Express Index Queue
-
File Source Queue
-
Inbound Email Queue
-
Inbound Fax Queue
-
Outbound Email Queue
-
PBS File Export Queue
-
PBS File Import Queue
-
Simple XML in ZIP Queue
-
TRF (Extractor) Queue
-
Server Scripting Queue
-
Server Zip FileOutput Queue
These 14 optional queues (purchase one or more separately) allow Gateway to interact with applications and file types not supported by the standard queues included with your product.
The CSV File Queue is used to receive a batch file in a CSV (comma-separated value) format and image files in TIF format. The CSV File Queue can also correctly process comma-separated batch files and images that have been compressed in a single ZIP file. The CSV File Queue extracts the data and TIF files and reads the batch keys and values into memory so that the batch data and TIF files can then be passed to the next configured Queue.
-
The CSV File Queue replaces the TripPak Queue available in previous versions of TRANSFLO® Gateway.
-
The CSV Queue is not intended to process PDF files. To process Batches that contain PDF files, use the File Source Queue.
To create and configure a CSV File Queue:
-
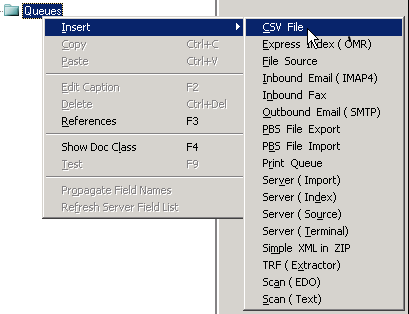
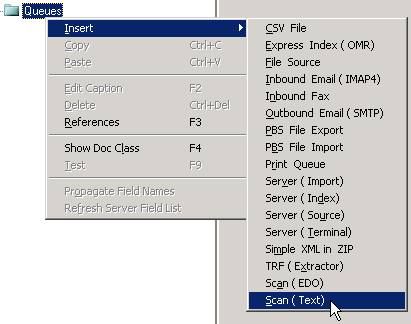
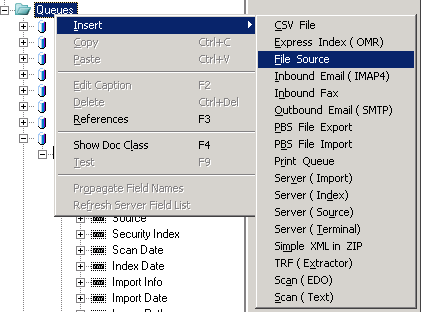
In the tree pane, right-click the Queues node. In the pop-up menu, choose Insert, CSV File.

-
The Gateway system creates a new CSV File Queue with a default name such as CSV File1.
-
The default CSV file queue name is already selected and ready for editing. To rename the new CSV File Queue, enter a new name and press Enter.
-
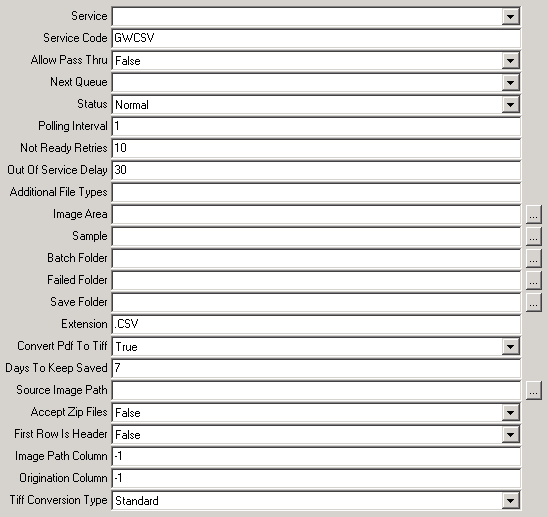
Now that you have created the CSV File Queue, you can configure its settings via the text boxes on the right side of the window.
-
Service Code
-
Allow Pass Thru
-
Next Queue
-
Status
-
Polling Interval
-
Not Ready Retries
-
Out of Service Delay
-
Additional File Types
-
Image Area
-
Sample
-
Batch Folder
-
Failed Folder
-
Save Folder
-
Extension
-
Convert Pdf to Tiff
-
Days To Keep Saved
-
Source Image Path
-
Accept Zip Files
-
First Row Is Header
-
Image Path Column
-
Origination Column
-
Tiff Conversion Type
-
To configure the CSV File Queue:
-
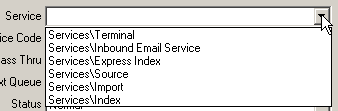
Click the Service arrow to expand the Service list, and then click the name of the service that should be used by this queue. The Service list shows the services that were created in the Services node in the tree pane.

If the Service you need is not listed, then you must first create it before you can configure the Queue.
See Creating and Configuring a Gateway Service
2. (Optional) Gateway automatically assigns a default Service Code when a Queue is created.
The default Service Code for the CSV File Queue is “GWCSV”.
To change this, type a new code in the Service Code box.
3. Click the Allow Pass Thru arrow, and then click the desired setting in the Allow Pass Thru list to specify how Gateway will handle Batches that pass all of the Queue’s requirements.
If these Batches should be passed on to the next Queue, click True.
If the Batches should instead be held at the Queue for further action, click False.

The default Allow Pass Thru setting is False.
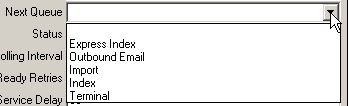
4. Click the Next Queue arrow to expand the Next Queue list, and then click the name of the Queue that should follow the current one in the Queue sequence.

The Next Queue list contains the names of the other Queues that have been created for your current Gateway Document, so if the needed Queue is not listed, then you must create that Queue before you can finish configuring this one.
Remember that to avoid such a situation, it is recommended that you create Queues in reverse order of their appearance in the Queue sequence.
Note: The Server Source, CSV File, eScan (EDO), eScan (Text), Inbound Email, Inbound Fax, Simple XML in ZIP, PBS File Import, TRF (Extractor), and File Source Queues can be used only as the initial Queue in a series, so none of these Queues will ever appear in the Next Queue list.
5. Click the Status arrow, and then click the desired status setting in the Status list.
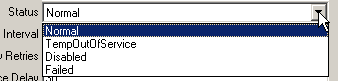
The default Status is Normal, and the Queue will function only if Normal is selected.
The three remaining settings - TempOutOfService, Disabled, and Failed - all serve the purpose of making the Queue non-functional.
The settings are differently named to denote the reason why the Queue is inactive.
-
“TempOutOfService” indicates that the Queue has been placed out of service by Gateway because an error occurred.
A warning will be displayed in the Windows Event Viewer if this happens.
-
“Disabled” can be used to disable the Queue for testing or troubleshooting purposes, or to show that the Queue is functioning properly but is not currently needed.
-
“Failed” signifies that the maximum number of restart retries has been exceeded.
6. (Optional) In the Polling Interval box, type the frequency in seconds with which the Queue should check for new Batches to process.
The default polling interval in seconds is 1.
7. (Optional) In the Not Ready Retries box, type the number of attempts that Gateway should make to execute the Queue before stopping the Queue’s Service or changing the Queue’s status to Failed.
The default number of Not Ready Retries is 10.
8. The determination of whether the Queue is failed or the Service is stopped depends upon how the Max Queue Errors Result setting was configured for the Queue’s Service.
For more information, see Step 8 of Creating and Configuring a Gateway Service
9. (Optional) In the Out Of Service Delay box, type the duration in seconds that Gateway should wait before reattempting to execute the Queue after an error.
The default duration in seconds is 30.
10. To process file types natively without conversion, list the file type extensions separated by commas in the Additional File Types box.
If you want to save PDF files without converting them to TIFF images you must include PDF in the list.
For example if you want to save Microsoft Office 2010 Word and Excel files as well as PDF in their native file formats, enter “DOCX,XLSX,PDF” in the Additional File Types box.
11. Specify the location of the folder to which the TIF images will be copied.
To do this, click the browse button  to the right of the Image Area box to open the Browse for Folder dialog box.
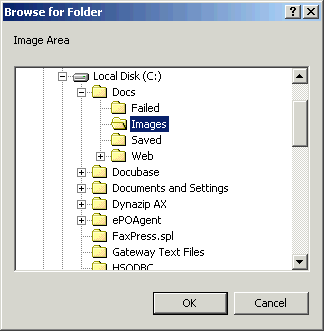
In the dialog box, browse to the desired folder, click the folder to select it, and then click OK.
The folder’s path now appears in the Image Area box.
Note: If you configure a Batch Folder first, the Image Area, Failed Folder, and Save Folder will be automatically populated.
These folders will be created when the Queue starts processing.
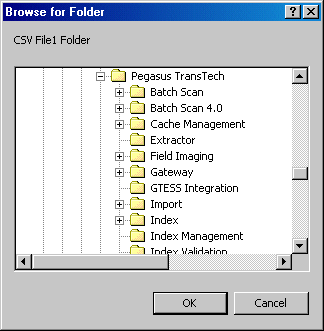
12. In the Sample box, enter the location of a comma-separated file that has the format that you will be using.
When you have finished configuring the CSV File Queue, the Queue will “sample” this file to determine its structure and name the Batch Fields appropriately.
How the Queue handles the header row of the comma-separated file (if a header row is present) is determined by the setting selected in the First Row Is Header list, explained further below.
13. Specify the location of the folder where your incoming CSV Batch files or ZIP files will reside.
If this folder does not yet exist, use Windows Explorer to create it at this time.
When your folder is ready, click the browse button to the right of the Batch Folder box to open the Browse for Folder dialog box.
In the dialog box, browse to the folder where your CSV or ZIP files will be located, click the folder to select it, and then click OK.
The folder’s path now appears in the Batch Folder box.
14. If you did not already create a “Failed” folder and a “Saved” folder in your batch folder, then Gateway will create them automatically at this time, and will also enter the paths to these folders in the Failed Folder and Save Folder boxes.
Batches will be written to these folders as ZIP files containing the CSV file and associated image files.
Important: If you change the location of the batch folder, you must also manually change the location of the Failed and Saved folders.
These will not be updated automatically.
15. (Optional) In the Extension box, type the file extension of the batch files that will be processed by the Queue.
The default extension is “.CSV”.
16. To convert PDF files to individual TIFF files, select true from the Convert Pdf to Tiff drop down.
To keep PDF files in their native format, select false from the Convert Pdf to Tiff drop down and make sure PDF is in the list in the Additional File Types box.
The default setting is true.

17. (Optional) In the Days To Keep Saved box, type the number of days for which files should be kept in the Saved folder before they are purged.
The default number of days is 7.
18. (Conditional) If CSV files will not be bundled together with image files inside of ZIP files, you must enter the location of the image files in the Source Image Path box.
To do this, click the browse button to the right of the box.
In the Browse for Folder dialog box that appears, navigate to the folder where image files will be located and then click OK.
The folder path now appears in the Source Image Path box.
19. In the Accept Zip Files list, select the appropriate setting indicating whether or not zip files containing CSV and TIF files should be accepted by the Queue.
Click the arrow button to the right of the list, and click either True or False.
If you click True, ZIP files will be accepted.
If you click False, ZIP files will not be accepted.
Note that if False is the selected value, an image folder must be configured in the Source Image Path box, described in the previous step.

The default value is False.
20. (Future Use) Currently the CSV File Queue does not support CSV files that contain header rows.
Leave the First Row Is Header list configured with its default value, False.
21. The comma-separated file must contain the name and path of the image file in one of the columns.
In the Image Path Column box, type the position number of the column that contains this information (the first column is 0, the second column is 1, etc.).
The default value is 1.
Note: In the comma-separated batch file, the location indicated for the image must be in either the same directory as the batch file or in a sub-directory below, and the image path must be expressed as a relative location.
Full file paths are not supported.
Note: The image path column setting must be entered correctly prior to sampling the comma-separated file.
22. The CSV File Queue can be configured so that the first column in a CSV file can be assigned the index of the column number of your choice.
Under most circumstances, the desired column number for the first column will be 0 since this Field is zero based.
In the Origination Column box, type the desired column number for the first column in your CSV files.
The default value is -1 which means origination is not set.
Note: The image path column setting must be entered correctly prior to sampling the comma-separated file.
23. If you notice Tiff image quality degradation when processed through this Queue, select Advanced from the Tiff Conversion Type drop down.
The default is Standard.
Notes on Using the CSV File Queue
-
If receiving ZIP files, each ZIP file can contain only one CSV file.
-
mData in CSV files can be processed with or without quotation marks.
Example of data without quotation marks in a file named 123.CSV: 123, MY DRIVER, MY TRUCK, BOL
Example of data with quotation marks in a file named 123.CSV: “123”, “MY DRIVER”, “MY TRUCK”, “BOL”
-
To improve processing performance, a CSV file should contain no more than 500 rows of data.
-
TIF files must use Group IV compression.
The eScan (EDO) Queue is used to receive a third-party eCapture PAK file, and pass the file contents, in the form of Batch keys and values and TIF image files to a Server Import Queue or Server Index Queue. Because the eCapture application uses a Microsoft Access database, the eScan (EDO) Queue is not load-balanced. Because of this, only one server should connect to the eCapture database. Simultaneous connections to the database from two or more servers will cause the eScan (EDO) Queue to be placed on Temporarily Out of Service status.
To create an eScan (EDO) Queue:
1. In the tree pane, right-click the Queues node.
Point to Insert on the shortcut menu, and then click eScan (EDO).
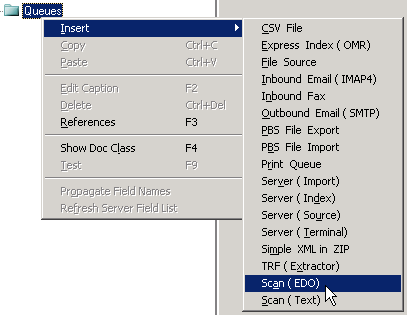
The Gateway system creates a new eScan (EDO) Queue with a default name,
e.g., eScan (EDO)1.

2. The default eScan (EDO) Queue name is already selected and ready for editing.
To rename the new eScan (EDO) Queue, simply type a new name.
When you are done, press [Enter].
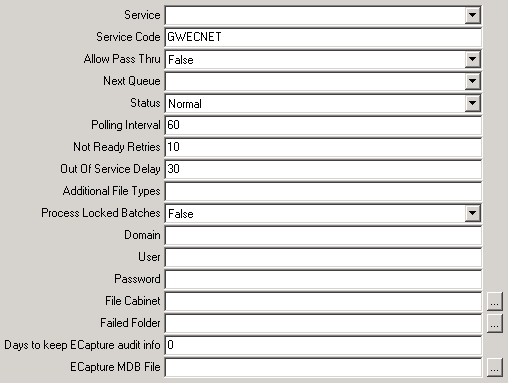
Now that you have created the eScan (EDO) Queue, you can configure its settings via the text boxes on the right side of the window.
These settings are:
-
Service
- Service Code
-
Allow Pass Thru
- Next Queue
-
Status
- Polling Interval
-
Not Ready Retries
- Out of Service Delay
-
Additional File Types
- Process Locked Batches
-
Domain
- User
-
Password
- File Cabinet
-
Failed Folder
- Days to keep ECapture audit info
-
ECapture MDB File
To configure the eScan (EDO) Queue:
1. Click the Service arrow to expand the Service list, and then click the name of the Service that should be used by this Queue.
The Service list contains the Services that have been created via the Services node in the tree pane.
If the Service you need is not listed, then you must first create it before you can configure the Queue.
See “Creating and Configuring a Gateway Service”
2. (Optional) Gateway automatically assigns a default Service Code when a Queue is created.
The default Service Code for the eScan (EDO) Queue is “GWECNET”.
To change this, type a new code in the Service Code box.
3. Click the Allow Pass Thru arrow, and then click the desired setting in the Allow Pass Thru list to specify how Gateway will handle Batches that pass all of the Queue’s requirements.
If these Batches should be passed on to the next Queue, click True.
If the Batches should instead be held at the Queue for further action, click False.
The default Allow Pass Thru setting is False.
4. Click the Next Queue arrow to expand the Next Queue list, and then click the name of the Queue that should follow the current one in the Queue sequence.
The Next Queue list contains the names of the other Queues that have been created for your current Gateway Document, so if the needed Queue is not listed, then you must create that Queue before you can finish configuring this one.
Remember that to avoid such a situation, it is recommended that you create Queues in reverse order of their appearance in the Queue sequence.
Note: The Server Source, CSV File, eScan (EDO), eScan (Text), Inbound Email, Inbound Fax, Simple XML in ZIP, PBS File Import, TRF (Extractor), and File Source Queues can be used only as the initial Queue in a series, so none of these Queues will ever appear in the Next Queue list.
5. Click the Status arrow, and then click the desired status setting in the Status list.
The default Status is Normal, and the Queue will function only if Normal is selected.
The three remaining settings -- TempOutOfService, Disabled, and Failed -- all serve the purpose of making the Queue nonfunctional.
The settings are differently named to denote the reason why the Queue is inactive.
-
“TempOutOfService” indicates that the Queue has been placed out of service by Gateway because an error occurred.
A warning will be displayed in the Windows Event Viewer if this happens.
-
“Disabled” can be used to disable the Queue for testing or troubleshooting purposes, or to show that the Queue is functioning properly but is not currently needed.
-
“Failed” signifies that the maximum number of restart retries has been exceeded.
6. (Optional) In the Polling Interval box, type the frequency in seconds with which the Queue should check for new Batches to process.
The default polling interval in seconds is 1.
7. (Optional) In the Not Ready Retries box, type the number of attempts that Gateway should make to execute the Queue before stopping the Queue’s Service or changing the Queue’s status to Failed.
The default number of Not Ready Retries is 10.
The determination of whether the Queue is failed or the Service is stopped depends upon how the Max Queue Errors Result setting was configured for the Queue’s Service.
For more information, see Step 8 of “Creating and Configuring a Gateway Service,”
8. (Optional) In the Out Of Service Delay box, type the duration in seconds that Gateway should wait before reattempting to execute the Queue after an error.
The default duration in seconds is 30.
9. To process file types natively without conversion, list the file type extensions separated by commas in the Additional File Types box.
If you want to save PDF files without converting them to TIFF images you must include PDF in the list.
For example if you want to save Microsoft Office 2010 Word and Excel files as well as PDF in their native file formats, enter “DOCX,XLSX,PDF” in the Additional File Types box.
10. eCapture has the ability to lock Batches for various reasons.
The Process Locked Batches function gives the Queue the ability to unlock a locked Batch.
If a locked Batch is not unlocked, it is skipped.
To configure this setting, click the Process Locked Batches arrow to expand the Process Locked Batches list, and then click the desired setting.
To enable the Queue to process locked Batches, click True.
To prevent the Queue from processing locked Batches, click False.
11. In the Domain box, type the eCapture server domain.
12. In the User box, type the login name for the eCapture Windows user account to be accessed by the Queue.
13. In the Password box, type the password for the eCapture Windows user account to be accessed.
14. Specify the location of the File Cabinet folder for your eCapture installation.
Click the browse button to the right of the File Cabinet box to open the Browse for Folder dialog box.
In the dialog box, browse to the File Cabinet folder, click the folder to select it, and then click OK.
The folder’s path now appears in the File Cabinet box.
15. Specify the location of the Failed folder for your files.
If you have not already created this folder, do so at this time.
When your folder is ready, click the browse button to the right of the Failed Folder box to open the Browse for Folder dialog box.

In the dialog box, browse to the folder where any failed files should be placed, click the folder to select it, and then click OK.
The folder’s path now appears in the Failed Folder box.
16. In the Days to keep ECapture audit info box, type the number of days that your eCapture audit information should be recorded in a MicrosoftAccess® database file before being purged.
If you enter 0, no audit information will be kept.
The default value is 0.
17 If you entered a non-zero value in the Days to keep ECapture audit info box, select the Microsoft Access database file (MDB file) that you wish to purge on a regular basis.
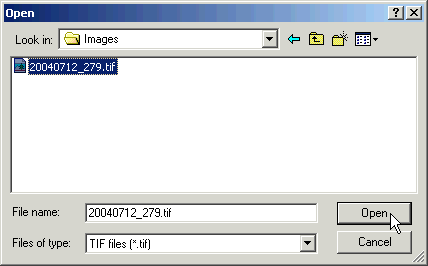
Click the browse button to the right of the ECapture MDB File box to open the Open dialog box.
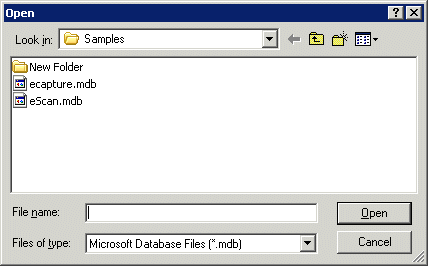
In the dialog box, browse to the folder where the MDB file is located, click the MDB file to select it, and click Open.
The database file’s path now appears in the ECapture MDB File box.
The eScan (Text) Queue is used to receive third-party eCapture text and TIF image output, convert the text data to Batch keys and values, and pass the Batch data and image files to a Server Import Queue or Server Index Queue.
Note: Because the eCapture application utilizes a Microsoft Access database, the eScan (Text) Queue is not load-balanced.
Because of this, only one server should connect to the eCapture database.
Simultaneous connections to the database from two or more servers will cause the eScan (Text) Queue to be placed on Temporarily Out of Service status.
Creating an eScan (Text) Queue
To create an eScan (Text) Queue:
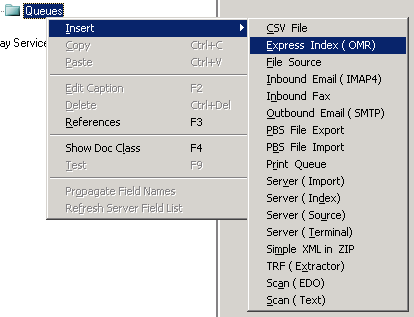
1. In the tree pane, right-click the Queues node.
Point to Insert on the shortcut menu, and then click eScan (Text).
The Gateway system creates a new eScan (Text) Queue with a default name,
e.g., eScan (Text)1.

2. The default eScan (Text) Queue name is already selected and ready for editing.
To rename the new eScan (Text) Queue, simply type a new name.
When you are done, press [Enter].
Configuring an eScan (Text) Queue
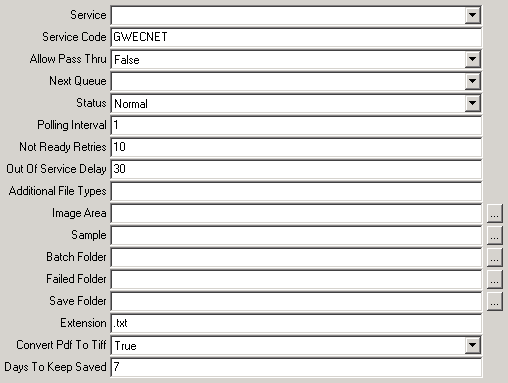
Now that you have created the eScan (Text) Queue, you can configure its settings via the text boxes on the right side of the window.
These settings are:
-
Service
- Service Code
-
Allow Pass Thru
- Next Queue
-
Status
- Polling Interval
-
Not Ready Retries
- Out of Service Delay
-
Additional File Types
- Image Area
-
Sample
- Batch Folder
-
Failed Folder
- Save Folder
-
Extension
- Days To Keep Saved
To configure the eScan (Text) Queue:
1. Click the Service arrow to expand the Service list, and then click the name of the Service that should be used by this Queue.
The Service list contains the Services that have been created via the Services node in the tree pane.
If the Service you need is not listed, then you must first create it before you can configure the Queue.
For more information, see “Creating and Configuring a Gateway Service”
2. (Optional) Gateway automatically assigns a default Service Code when a Queue is created.
The default Service Code for the eScan (Text) Queue is “GWECNET”.
To change this, type a new code in the Service Code box.
3. Click the Allow Pass Thru arrow, and then click the desired setting in the Allow Pass Thru list to specify how Gateway will handle Batches that pass all of the Queue’s requirements.
If these Batches should be passed on to the next Queue, click True.
If the Batches should instead be held at the Queue for further action, click False.
The default Allow Pass Thru setting is False.
4. Click the Next Queue arrow to expand the Next Queue list, and then click the name of the Queue that should follow the current one in the Queue sequence.
The Next Queue list contains the names of the other Queues that have been created for your current Gateway Document, so if the needed Queue is not listed, then you must create that Queue before you can finish configuring this one.
Remember that to avoid such a situation, it is recommended that you create Queues in reverse order of their appearance in the Queue sequence.
Note: The Server Source, CSV File, eScan (EDO), eScan (Text), Inbound Email, Inbound Fax, Simple XML in ZIP, PBS File Import, TRF (Extractor), and File Source Queues can be used only as the initial Queue in a series, so none of these Queues will ever appear in the Next Queue list.
5. Click the Status arrow, and then click the desired status setting in the Status list.
The default Status is Normal, and the Queue will function only if Normal is selected.
The three remaining settings -- TempOutOfService, Disabled, and Failed -- all serve the purpose of making the Queue nonfunctional.
The settings are differently named to denote the reason why the Queue is inactive.
-
“TempOutOfService” indicates that the Queue has been placed out of service by Gateway because an error occurred.
A warning will be displayed in the Windows Event Viewer if this happens.
-
“Disabled” can be used to disable the Queue for testing or troubleshooting purposes, or to show that the Queue is functioning properly but is not currently needed.
-
“Failed” signifies that the maximum number of restart retries has been exceeded.
6. (Optional) In the Polling Interval box, type the frequency in seconds with which the Queue should check for new Batches to process.
The default polling interval in seconds is 1.
7. (Optional) In the Not Ready Retries box, type the number of attempts that Gateway should make to execute the Queue before stopping the Queue’s Service or changing the Queue’s status to Failed.
The default number of Not Ready Retries is 10.
The determination of whether the Queue is failed or the Service is stopped depends upon how the Max Queue Errors Result setting was configured for the Queue’s Service.
For more information, see Step 8 of “Creating and Configuring a Gateway Service,”
8. (Optional) In the Out Of Service Delay box, type the duration in seconds that Gateway should wait before reattempting to execute the Queue after an error.
The default duration in seconds is 30.
9. To process file types natively without conversion, list the file type extensions separated by commas in the Additional File Types box.
If you want to save PDF files without converting them to TIFF images you must include PDF in the list.
For example if you want to save Microsoft Office 2010 Word and Excel files as well as PDF in their native file formats, enter “DOCX,XLSX,PDF” in the Additional File Types box.
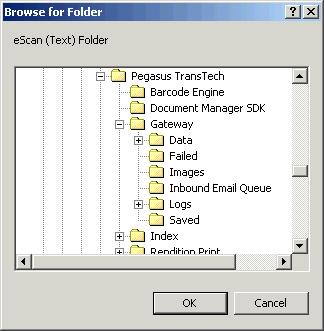
10. Specify the location of the folder where the TIF images of your Documents are located.
Click the Browse button to the right of the Image Area box to open the Browse for Folder dialog box.
In the dialog box, browse to the folder containing your image files, click the folder to select it, and then click OK.
The folder’s path now appears in the Image Area box.
11. Specify the location of the text file that the Queue should sample to generate Batch Fields for the Queue.
Click the Browse button to the right of the Sample box to display the Open dialog box.
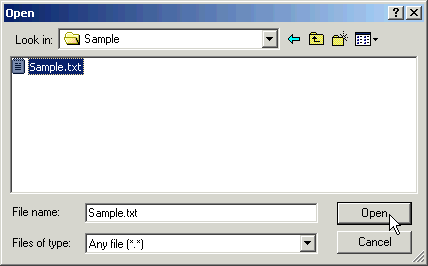
In the dialog box, browse to the folder containing the Batch file to sample, click the file to select it, and then click Open.
The file path now appears in the box.
12. Specify the location of the folder where your Batch files will reside.
If this folder does not yet exist, use Windows Explorer to create it at this time.
When your folder is ready, click the Browse button to the right of the Batch Folder box to open the Browse for Folder dialog box.
In the dialog box, browse to the folder where your Batch files will be located, click the folder to select it, and then click OK.
The folder’s path now appears in the Batch Folder box.
13. If you did not already create a “Failed” folder and a “Saved” folder in your Batch folder, then Gateway will create them automatically at this time, and will also enter the paths to these folders in the Failed Folder and Save Folder boxes.
Important: If you change the location of the Batch folder, you must also manually change the location of the Failed and Saved folders.
These will not be updated automatically.
14. (Optional) In the Extension box, type the file extension of the Batch files that will be processed by the Queue.
The default extension is “.txt”.
15. (Optional) In the Days To Keep Saved box, type the number of days for which files should be kept in the Saved folder before they are purged.
The default number of days is 7.
The Express Index Queue receives a Batch consisting of an XML file and a page (a TIF file).
The XML file contains the coordinates of data Fields on the page.
The Express Index Queue, interacting with third-party software from Cardiff, reads the XML data, converts it to a proprietary format in memory, and then passes the data keys and values to the next Queue, such as the Server Import Queue or the Server Index Queue.
Creating an Express Index Queue
To create an Express Index Queue:
1. In the tree pane, right-click the Queues node.
Point to Insert on the shortcut menu, and then click Express Index (OMR).
The Gateway system creates a new Express Index Queue with a default name,
e.g., Express Index (OMR)1.
2. The default Express Index Queue name is already selected and ready for editing.
To rename the new Express Index Queue, simply type a new name.
When you are done, press [Enter].
Configuring an Express Index Queue
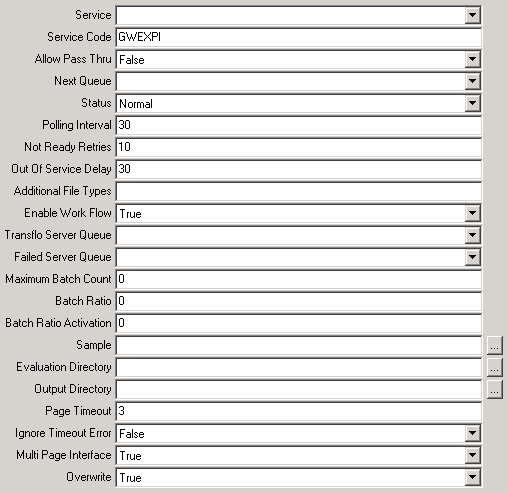
Now that you have created the Express Index Queue, you can configure its settings via the text boxes on the right side of the window.
These settings are:
-
Service
- Service Code
-
Allow Pass Thru
- Next Queue
-
Status
- Polling Interval
-
Not Ready Retries
- Out of Service Delay
-
Additional File Types
- Enable Work Flow
-
Transflo Server Queue
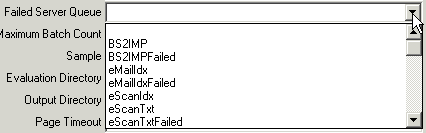
- Failed Server Queue
-
Maximum Batch Count
- Batch Ratio
-
Batch Ratio Activation
- Sample
-
Evaluation Directory
- Output Directory
-
Page Timeout
- Ignore Timeout Error
-
Multi Page Interface
- Overwrite
To configure the Express Index Queue:
1. Click the Service arrow to expand the Service list, and then click the name of the Service that should be used by this Queue.
The Service list contains the Services that have been created via the Services node in the tree pane.
If the Service you need is not listed, then you must first create it before you can configure the Queue.
For more information, see “Creating and Configuring a Gateway Service”
2. (Optional) Gateway automatically assigns a default Service Code when a Queue is created.
The default Service Code for the Express Index Queue is “GWEXPI”.
To change this, type a new code in the Service Code box.
3. Click the Allow Pass Thru arrow, and then click the desired setting in the Allow Pass Thru list to specify how Gateway will handle Batches that pass all of the Queue’s requirements.
If these Batches should be passed on to the next Queue, click True.
If the Batches should instead be held at the Queue for further action, click False.
The default Allow Pass Thru setting is False.
4. Click the Next Queue arrow to expand the Next Queue list, and then click the name of the Queue that should follow the current one in the Queue sequence.
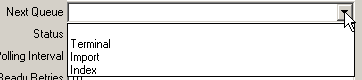
The Next Queue list contains the names of the other Queues that have been created for your current Gateway Document, so if the needed Queue is not listed, then you must create that Queue before you can finish configuring this one.
Remember that to avoid such a situation, it is recommended that you create Queues in reverse order of their appearance in the Queue sequence.
Note: The Server Source, CSV File, eScan (EDO), eScan (Text), Inbound Email, Inbound Fax, Simple XML in ZIP, PBS File Import, TRF (Extractor), and File Source Queues can be used only as the initial Queue in a series, so none of these Queues will ever appear in the Next Queue list.
5. (Optional) Click the Status arrow, and then click the desired status setting in the Status list.
The default Status is Normal, and the Queue will function only if Normal is selected.
The three remaining settings -- TempOutOfService, Disabled, and Failed -- all serve the purpose of making the Queue nonfunctional.
The settings are differently named to denote the reason why the Queue is inactive.
-
“TempOutOfService” indicates that the Queue has been placed out of service by Gateway because an error occurred. A warning will be displayed in the Windows Event Viewer if this happens.
-
“Disabled” can be used to disable the Queue for testing or troubleshooting purposes, or to show that the Queue is functioning properly but is not currently needed.
-
“Failed” signifies that the maximum number of restart retries has been exceeded.
6. (Optional) In the Polling Interval box, type the frequency in seconds with which the Queue should check for new Batches to process.
The default polling interval in seconds is 1.
7. (Optional) In the Not Ready Retries box, type the number of attempts that Gateway should make to execute the Queue before stopping the Queue’s Service or changing the Queue’s status to Failed.
The default number of Not Ready Retries is 10.
The determination of whether the Queue is failed or the Service is stopped depends upon how the Max Queue Errors Result setting was configured for the Queue’s Service.
For more information, see Step 8 of “Creating and Configuring a Gateway Service,”
8. (Optional) In the Out Of Service Delay box, type the duration in seconds that Gateway should wait before reattempting to execute the Queue after an error.
The default duration in seconds is 30.
9. To process file types natively without conversion, list the file type extensions separated by commas in the Additional File Types box.
If you want to save PDF files without converting them to TIFF images you must include PDF in the list.
For example if you want to save Microsoft Office 2010 Word and Excel files as well as PDF in their native file formats, enter “DOCX,XLSX,PDF” in the Additional File Types box.
Note: Only image file types, including PDF files that have been converted to TIF files, will be processed by the Express Index Queue.
All other file types will not be processed by the Express Index Queue.
10. (Optional) If your company uses the TRANSFLO® Workflow application to control billing and payroll processes, the TRANSFLO® Import application can create a new Workflow case for each page in a Batch.
To configure this option, click the Enable Work Flow arrow, and then click the desired setting in the Enable Work Flow list.
To enable the option, click True.
To disable it, click False.

The default setting is False.
11. Select the Queue to which Batch data should be passed when the Batch is successfully processed.
Click the arrow button next to the Transflo Server Queue list to expand the list, and then click the name of the desired Queue.
The list displays all Queues currently configured on your TRANSFLO® server.
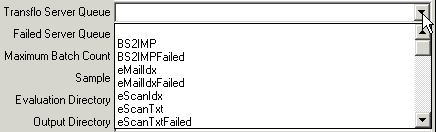
12. Select the Queue to which Batch data should be passed if the Batch cannot be processed.
Click the arrow button next to the Failed Server Queue list to expand the list, and then click the name of the desired Queue.
The list displays all Queues currently configured on your TRANSFLO® server.
13. (Optional) In the Maximum Batch Count box, type the maximum number of Batches that can be sent to each Queue.
For example, if the Maximum Batch Count is 50, and another Queue attempts to send this Queue 55 Batches, then the first 50 Batches will be sent and Gateway will display an error message alerting you that the Queue is full.
As soon as there is room again in the Queue, the remainder of the Batches will be sent.
If you do not wish to impose a maximum number of Batches, type 0.
The default setting is 0.
14. (Optional) In the Batch Ratio box, type the desired Batch Ratio for this Queue.
If you have configured multiple Express Index Queues, by default, none of them have any priority over the other Express Index Queues.
If you have only one OMR device, this unprioritized processing can be less than ideal.
Fortunately, the Batch Ratio feature allows you to set an Express Index Queue’s priority for processing Batches, versus any other Express Index Queues that you have configured.
The Batch Ratio number determines the number of consecutive Batches that will be processed by this Queue when the corresponding Batch Ratio Activation number is reached.
The Batch Ratio Activation number is the number of pending Batches that must be present before the Batch Ratio is triggered.
For example, suppose that you have two Express Index Queues, represented in the below table, and the individual Queues have the Batch Ratio and Batch Ratio Activation number stated in the table.
|
Batch Ratio |
Batch Ratio Activation |
|
|---|---|---|
|
Queue1 |
5 |
20 |
|
Queue2 |
3 |
12 |
If Queue1 has 17 pending Batches, and Queue2 has 9 pending Batches, then neither Queue’s Batch Ration Activation number has been met, and the Queues will alternate back and forth, each processing just one Batch per turn.
This is because neither Queue has met or exceeded its Batch Ratio Activation number (20 Batches for Queue1, 12 for Queue2).
However, if Queue1 has 22 pending Batches, and Queue2 has 14 pending Batches, then Queue1 will process 5 Batches before passing priority to Queue2. Queue2 will then process 3 Batches before passing priority back to Queue1.
If Queue1 did not receive any new pending Batches while Queue2 was processing, then on the next pass, Queue1 will process only 1 Batch, because its total number of pending Batches has dropped to 17 (22 - 5), which is below its Batch Ratio Activation number of 20.
If Queue2 received 1 new pending Batch while Queue1 was processing, then on the next pass, Queue2 will again process 3 Batches.
This is because Queue2 had 11 Batches remaining after the previous pass (14 - 3), and received 1 new pending Batch, meaning that Queue2 has 12 pending Batches (11 + 1).
This number of pending Batches meets Queue2’s Batch Ratio Activation number, so 3 Batches are processed.
The default Batch Ratio is 0, meaning that no priority is set.
15. (Conditional) If you entered a Batch Ratio in the previous step, then in the Batch Ratio Activation box, type the desired Batch Ratio Activation number for this Queue. (For more information about the Batch Ratio Activation number, see the previous step.)
The default Batch Ratio Activation number is 0, meaning that there is no Batch Ratio Activation threshold.
16. The Express Index Queue requires a special TIF template file created by your Cardiff software.
The Queue samples this template image to create Batch Fields.
To specify the location of this template file, click the Browse button to the right of the Sample box to display the Open dialog box.
In the dialog box, browse to the folder containing the TIF template file, click the file to select it, and then click OK.
The file path now appears in the Sample box.
17. Specify the location of the TIF file evaluation folder.
This folder is where the Queue will process the TIF files, reading the Field values based on the coordinates found in the XML file.
If you have not already created this folder, do so at this time.
When your folder is ready, click the Browse button to the right of the Evaluation Directory box to open the Browse for Folder dialog box.
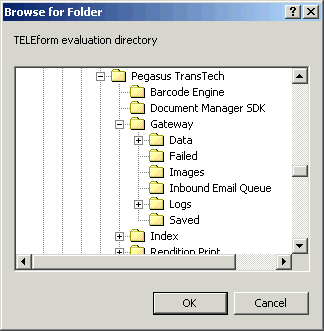
In the dialog box, browse to the folder where the TIF files should be processed, click the folder to select it, and then click OK.
The folder’s path now appears in the Evaluation Directory box.
18. Specify the location of the output folder for the PBS files generated from the page TIF files.
If you have not already created this folder, do so at this time.
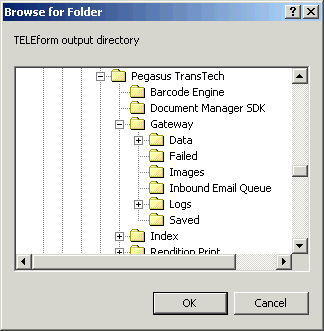
When your folder is ready, click the Browse button to the right of the Output Directory box to open the Browse for Folder dialog box.
In the dialog box, browse to the output folder, click the folder to select it, and then click OK.
The folder’s path now appears in the Output Directory box.
19. (Optional) In the Page Timeout box, type the length of time in seconds for which your Cardiff software should attempt to read and convert each TIF image before failing the image.
The default timeout length in seconds is 3.
20. (Optional) You can select how the Express Index Queue will react to any Page Timeout errors that occur.
Click the Ignore Timeout Error arrow to expand the Ignore Timeout Error list.
To force the Queue to continue processing despite any timeout errors, click True.
If the Queue should instead stop processing if a timeout error occurs, click False.

The default Ignore Timeout Error setting is False.
21. (Optional) You can specify whether or not the Express Index Queue should allow multi-page TIF files to be processed.
Click the Multi Page Interface arrow to expand the Multi Page Interface list.
To allow processing of multi-page TIF files, click True.
To disallow multi-page TIFs click False.

The default Multi Page Interface setting is True.
22. Click the Overwrite arrow to expand the Overwrite list.
To allow Fields to be overwritten by OMR values from Express Indexing click True.
If you click False, Gateway will only write OMR values to empty Fields.

The default Overwrite setting is True.
The File Source Queue allows Gateway to accept images from the file system without the use of a “control file” (CSV, PBS, XML, etc.). This Queue accepts image files so that they can then be passed to the next configured Queue. Any PDF file will automatically be converted to TIF format.
To create and configure a File Source Queue:
1. In the tree pane, right-click the Queues node.
Point to Insert on the shortcut menu, and then click File Source.
The Gateway system creates a new File Source Queue with a default name, e.g., File Source1.

2. The default File Source Queue name is already selected and ready for editing.
To rename the new File Source Queue, simply type a new name.
When you are done, press [Enter].
Configure a File Source Queue
Now that you have created the File Source Queue, you can configure its settings via the text boxes on the right side of the window.
These settings are:
-
Service
-
Service Code
-
Allow Pass Thru
-
Next Queue
-
Status
-
Polling Interval
-
Not Ready Retries
-
Out of Service Delay
-
Additional File Types
-
Image Area
-
Sample
-
Batch Folder
-
Failed Folder
-
Save Folder
-
Extension
-
Convert Pdf to Tiff
-
Days To Keep Saved
-
Ignore File Types
-
Desired Batch Size
-
Maximum Batch Size
-
Break Multipage Tiff
-
Tiff Conversion Type
To configure the File Source Queue:
1. Click the Service arrow to expand the Service list, and then click the name of the Service that should be used by this Queue.
The Service list contains the Services that have been created via the Services node in the tree pane.
If the Service you need is not listed, then you must first create it before you can configure the Queue.
See “Creating and Configuring a Gateway Service
2. (Optional) Gateway automatically assigns a default Service Code when a Queue is created.
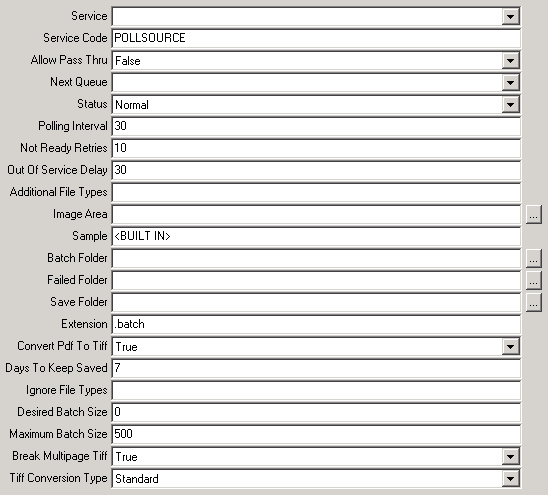
The default Service Code for the File Source Queue is “POLLSOURCE”.
To change this, type a new code in the Service Code box.
3. Click the Allow Pass Thru arrow, and then click the desired setting in the Allow Pass Thru list to specify how Gateway will handle Batches that pass all of the Queue’s requirements.
If these Batches should be passed on to the next Queue, click True.
If the Batches should instead be held at the Queue for further action, click False.
The default Allow Pass Thru setting is False.
4. Click the Next Queue arrow to expand the Next Queue list, and then click the name of the Queue that should follow the current one in the Queue sequence.
The Next Queue list contains the names of the other Queues that have been created for your current Gateway Document, so if the needed Queue is not listed, then you must create that Queue before you can finish configuring this one.
Remember that to avoid such a situation, it is recommended that you create Queues in reverse order of their appearance in the Queue sequence.
Note: The Server Source, CSV File, eScan (EDO), eScan (Text), Inbound Email, Inbound Fax, Simple XML in ZIP, PBS File Import, TRF (Extractor), and File Source Queues can be used only as the initial Queue in a series, so none of these Queues will ever appear in the Next Queue list.
5. Click the Status arrow, and then click the desired status setting in the Status list.
The default Status is Normal, and the Queue will function only if Normal is selected.
The three remaining settings -- TempOutOfService, Disabled, and Failed -- all serve the purpose of making the Queue nonfunctional. The settings are differently named to denote the reason why the Queue is inactive.
-
“TempOutOfService” indicates that the Queue has been placed out of service by Gateway because an error occurred.
A warning will be displayed in the Windows Event Viewer if this happens.
-
“Disabled” can be used to disable the Queue for testing or troubleshooting purposes, or to show that the Queue is functioning properly but is not currently needed.
-
“Failed” signifies that the maximum number of restart retries has been exceeded.
6. (Optional) In the Polling Interval box, type the frequency in seconds with which the Queue should check for new files to process.
The default polling interval in seconds is 30.
7. (Optional) In the Not Ready Retries box, type the number of attempts that Gateway should make to execute the Queue before stopping the Queue’s Service or changing the Queue’s status to Failed.
The default number of Not Ready Retries is 10.
The determination of whether the Queue is failed or the Service is stopped depends upon how the Max Queue Errors Result setting was configured for the Queue’s Service.
For more information, see Step 8 of “Creating and Configuring a Gateway Service,”
8. (Optional) In the Out Of Service Delay box, type the duration in seconds that Gateway should wait before reattempting to execute the Queue after an error.
The default duration in seconds is 30.
9. To process file types natively without conversion, list the file type extensions separated by commas in the Additional File Types box.
If you want to save PDF files without converting them to TIFF images you must include PDF in the list. (For example if you want to save Microsoft Office 2010 Word and Excel files as well as PDF in their native file formats, enter “DOCX,XLSX,PDF” in the Additional File Types box.)
10. Specify the location of the folder to which the TIF images will be copied.
To do this, click the Browse button to the right of the Image Area box to open the Browse for Folder dialog box.
In the dialog box, browse to the desired folder, click the folder to select it, and then click OK.
The folder’s path now appears in the Image Area box.
11. You do not need to enter a value in the Sample box, because the “sample” information needed by Gateway is built into the Queue.
12. Specify the location of the folder where your incoming image files will reside.
If this folder does not yet exist, use Windows Explorer to create it at this time.
When your folder is ready, click the Browse button to the right of the Batch Folder box to open the Browse for Folder dialog box.
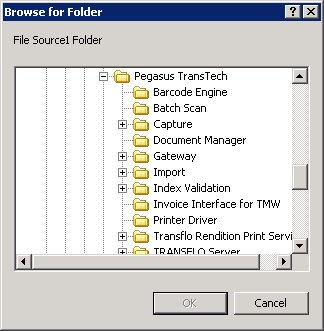
In the dialog box, browse to the folder where your image files will be located, click the folder to select it, and then click OK.
The folder’s path now appears in the Batch Folder box.
13. If you did not already create a “Failed” folder and a “Saved” folder in your Batch folder, then Gateway will create them automatically at this time, and will also enter the paths to these folders in the Failed Folder and Save Folder boxes.
Important: If you change the location of the Batch folder, you must also manually change the location of the Failed and Saved folders.
These will not be updated automatically.
14. (Optional) When the File Source Queue imports image files from the configured Batch folder, it creates a control file containing a record of the imported image files.
By default, the Queue creates these control files with a “.Batch” extension, which appears in the Extension box.
The “.batch” extension was chosen in order to avoid conflicting with any other common file types, and modifying this extension is not recommended.
If you do modify the extension, take care not to use a file extension associated with any other file type.
15. To convert PDF files to individual TIFF files, select true from the Convert Pdf to Tiff drop down.
To keep PDF files in their native format, select false from the Convert Pdf to Tiff drop down and make sure PDF is in the list in the Additional File Types box.
The default setting is true.
16. (Optional) In the Days To Keep Saved box, type the number of days for which files should be kept in the Saved folder before they are purged.
The default number of days is 7.
17. (Optional) If there are any file types that you do not wish to import from the Batch folder, type them in the Ignore File Types box, separated by commas.
For example, to ignore JPG and BMP image files, type: .jpg, .bmp
18. In the Desired Batch Size box, type the ideal number of images that should be included in any File Source Queue Batch.
If the File Source Queue only has single page image files after the polling interval has elapsed, Gateway will append images to the first Batch up to the Desire Batch Size limit.
Any remaining images will be appended to another Batch up to the Desired Batch Size.
This process will repeat until there are no more images in ther File Sourc Queue location.
If the File Source Queue has a combination of individual images and multi-page image files, and none of the multi-page image files contain more images than the value set in the Maximum Batch Size box, Gateway will append images so that the multi-page image files are not split to separate Batches until the number of images in the Batch has exceeded the Desired Batch Size amount.
Once this number has been exceded, the next multi-page or individual images will be put into another Batch until the Desired Batch Size has been reached or exceeded.
19. In the Maximum Batch Size box, type the highest number of images that should be included in any File Source Queue Batch.
If this value is left at 0, then the system will set the limit to the server’s maximum allowed size (presently set at 500).
If the number of images in a Batch is greater than the amount set here, the Batch will be split at the Maximum Images Per Batch amount and a new Batch will be created to hold the remainder of the images.
Note: The Desired Batch Size and the Maximum Batch Size rules will be repeated in tandem until the File Source Queue’s Image Area folder is depleted of image files.
20. If you want Multi-page TIFF files to be split into separate Single-page TIFF files select True from the Break Multipage Tiff drop down.
To keep Multi-page TIFF files as is, select False from the Break Multipage Tiff drop down.
The default is True.
Note: If you set Convert PDF to tiff to True and Break Multi Page Tiff to False any Multi-page PDF is converted to separate Single-page TIFF files although Break Multi Page Tiff option is set to False.
21. If you notice Tiff image quality degradation when processed through this Queue, select “Advanced” from the Tiff Conversion Type drop down.
The default is Standard.
The Inbound Email Queue is used as the initial Queue in a series. The Queue processes inbound e-mail messages that have Batch and image files attached. The valid formats for the attachments are XML, PBS, or ZIP for Batch files, and TIF, JPG, or BMP for image files.
As an option, the Queue can also process valid Batch and image files that it retrieves from a folder in the local file system, and these files are handled concurrently with those retrieved from the mail server.
The Inbound Email Queue can then pass its output to an Express Index Queue, Server Index Queue, Server Import Queue, or Simple XML in ZIP Queue.
In order to use the Inbound Email Queue your mail server must support IMAP.
Creating an Inbound Email Queue
To create an Inbound Email Queue:
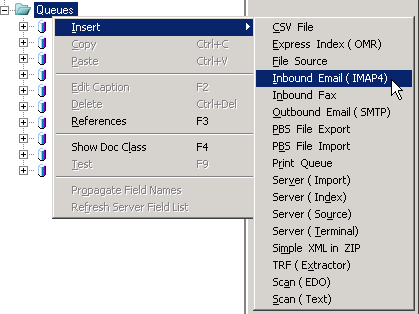
1. In the tree pane, right-click the Queues node.
Point to Insert on the shortcut menu, and then click Inbound Email (IMAP4).
The Gateway system creates a new Inbound Email Queue with a default name,
e.g., Inbound Email (IMAP4)1.
2. The default Inbound Email Queue name is already selected and ready for editing.
To rename the new Inbound Email Queue, simply type a new name.
When you are done, press [Enter].
Configuring an Inbound Email Queue
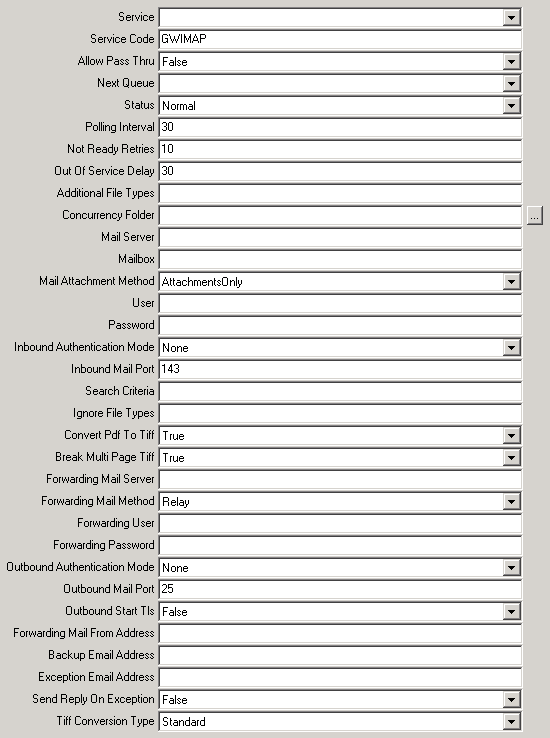
Now that you have created the Inbound Email Queue, you can configure its settings via the text boxes on the right side of the window.
These settings are:
-
Service
- Service Code
-
Allow Pass Thru
- Next Queue
-
Status
- Polling Interval
-
Not Ready Retries
- Out of Service Delay
-
Additional File Types
- Concurrency Folder
-
Mail Server
- Mailbox
-
Mail Attachment Method
- User
-
Password
- Inbound Authentication Mode
-
Inbound Mail Port
- Search Criteria
-
Ignore File Types
- Convert Pdf to Tiff
-
Break Multipage Tiff
- Forwarding Mail Server
-
Forwarding Mail Method
- Forwarding User
-
Forwarding Password
- Outbound Authentication Mode
-
Outbound Mail Port
- Outbound Start Tls
-
Forwarding Mail From Address
- Backup Email Address
-
Exception Email Address
- Send Reply on Exception
-
Tiff Conversion Type

To configure the Inbound Email Queue:
1 Click the Service arrow to expand the Service list, and then click the name of the Service that should be used by this Queue.
The Service list contains the Services that have been created via the Services node in the tree pane.
If the Service you need is not listed, then you must first create it before you can configure the Queue.
For more information, see “Creating and Configuring a Gateway Service”
2. (Optional) Gateway automatically assigns a default Service Code when a Queue is created.
The default Service Code for the Inbound Email Queue is “GWIMAP”.
To change this, type a new code in the Service Code box.
3. Click the Allow Pass Thru arrow, and then click the desired setting in the Allow Pass Thru list to specify how Gateway will handle Batches that pass all of the Queue’s requirements.
If these Batches should be passed on to the next Queue, click True.
If the Batches should instead be held at the Queue for further action, click False.
The default Allow Pass Thru setting is False.
4. Click the Next Queue arrow to expand the Next Queue list, and then click the name of the Queue that should follow the current one in the Queue sequence.
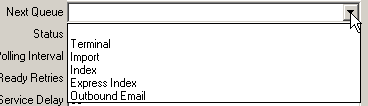
The Next Queue list contains the names of the other Queues that have been created for your current Gateway Document, so if the needed Queue is not listed, then you must create that Queue before you can finish configuring this one.
Remember that to avoid such a situation, it is recommended that you create Queues in reverse order of their appearance in the Queue sequence.
Note: The Server Source, CSV File, eScan (EDO), eScan (Text), Inbound Email, Inbound Fax, Simple XML in ZIP, PBS File Import, TRF (Extractor), and File Source Queues can be used only as the initial Queue in a series, so none of these Queues will ever appear in the Next Queue list.
5. (Optional) Click the Status arrow, and then click the desired status setting in the Status list.
The default Status is Normal, and the Queue will function only if Normal is selected.
The three remaining settings -- TempOutOfService, Disabled, and Failed -- all serve the purpose of making the Queue nonfunctional.
The settings are differently named to denote the reason why the Queue is inactive.
-
“TempOutOfService” indicates that the Queue has been placed out of service by Gateway because an error occurred.
A warning will be displayed in the Windows Event Viewer if this happens.
-
“Disabled” can be used to disable the Queue for testing or troubleshooting purposes, or to show that the Queue is functioning properly but is not currently needed.
-
“Failed” signifies that the maximum number of restart retries has been exceeded.
6. (Optional) In the Polling Interval box, type the frequency in seconds with which the Queue should check for new Batches to process.
The default polling interval in seconds is 30.
7. (Optional) In the Not Ready Retries box, type the number of attempts that Gateway should make to execute the Queue before stopping the Queue’s Service or changing the Queue’s status to Failed.
The default number of Not Ready Retries is 10.
The determination of whether the Queue is failed or the Service is stopped depends upon how the Max Queue Errors Result setting was configured for the Queue’s Service.
For more information, see Step 8 of “Creating and Configuring a Gateway Service,”
8. (Optional) In the Out Of Service Delay box, type the duration in seconds that Gateway should wait before reattempting to execute the Queue after an error.
The default duration in seconds is 30.
9. To process file types natively without conversion, list the file type extensions separated by commas in the Additional File Types box.
If you want to save PDF files without converting them to TIFF images you must include PDF in the list. (For example if you want to save Microsoft Office 2010 Word and Excel files as well as PDF in their native file formats, enter “DOCX,XLSX,PDF” in the Additional File Types box.)
10. (Optional) As an added feature, the Inbound Email Queue can also process valid image files that it retrieves from a folder in the local file system.
These files are processed concurrently with files retrieved from the mail server.
To enable this feature, specify the location of the folder where the files will reside (the Batch and image files must be in the same folder).
If this folder does not yet exist, use Windows Explorer to create it at this time.
When your folder is ready, click the Browse button to the right of the Concurrency Folder box to open the Browse for Folder dialog box.
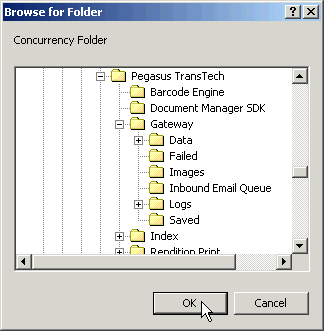
In the dialog box, browse to the folder where the files will be located, click the folder to select it, and then click OK.
The folder’s path now appears in the Concurrency Folder box.
Note: If you have multiple Gateway services running the Inbound Email Queue that are pointing to the same email Inbox, all your Inbound Email Queues must be configured to use the same Concurrency Folder.
This will prevent processing duplicate Batches.
11. In the Mail Server box, type the address of your mail server.
The mail server name you enter in this box does not have to be fully qualified.
12. In the Mailbox box, type the name of the mailbox into which incoming e-mail is deposited for the account to be accessed by the Queue.
The default Mailbox name is Inbox.
13. Expand the Mail Attachment Method list and click the desired option for handling e-mail messages and attachments.
The options are:
-
AttachmentsOnly - Gateway creates a Batch out of the supported file types that are attached to the e-mail. This is the default option.
-
EmailOnly - Gateway discards the files attached to the e-mail, and instead converts the body of the e-mail into a TIF file and processes that TIF file as a Batch.
-
EmailAndAttachments - Gateway coverts the body of the e-mail into a TIF file, and then processes that TIF file and the attached supporting files together as a Batch, with the e-mail body TIF file as the first page of the Batch.
Note: The supported file types are: TIF, TIFF, JPG, BMP, and PDF.
14. In the User box, type the login name for the e-mail account to be accessed by the Queue.
15. In the Password box, type the password for the e-mail account to be accessed.
16. Select the authentication mode your Inbound Email Queue will use from the Inbound Authentication Mode drop down.
If your email provider requires IMAP SSL authentication, select “IMAPSSL” from the Inbound Authentication Mode drop down.
Otherwise select None.
The default is None.
17. In the Inbound Mail Port box, type the port number that your mail system uses for inbound communications.
The default port number is 143.
18. In the Search Criteria box, type the search string that the Inbound Email Queue should use to search for messages on your mail server.
The table below lists some of the available search options, along with examples of how to use each of them.
| Command | Usage |
|---|---|
|
ALL |
To search for all messages in the mailbox, type “ALL” in the Search Criteria box. |
|
BCC |
To search by BCC, type: BCC "<name@domain>" where <name@domain>is an address like test@transflo.com. Note:Forlocaladdresses,itisnecessaryonlytosearchon"<name>",e.g., "test"instead of "test@transflo.com". |
|
BEFORE |
To search before a certain date -- for example, November 11, 2001 -- type: BEFORE 11-Nov-2001 |
|
BODY |
To search by an alphanumeric string contained in the message body, type: BODY "<string>" where<string>isthestringforwhichyouwishtosearch,suchas"this is a test". Any messages that contain the string in the message body are returned. The search is not casesensitive. |
|
CC |
To search by CC, type: CC "<name@domain>" where <name@domain>is an address like test@transflo.com. Note:Forlocaladdresses,itisnecessaryonlytosearchon"<name>",e.g., "test"instead of "test@transflo.com". |
|
DELETED |
To search for deleted e-mail, type: DELETED |
|
FROM |
To search by FROM,type: FROM"<name@domain>" where <name@domain>is an address like test@transflo.com. Note:Forlocaladdresses,itisnecessaryonlytosearchon"<name>",e.g., "test"instead of "test@transflo.com". |
|
NEW |
To search for all new messages, type: NEW |
|
NOT |
To search for messages that do not include the search criteria, type: NOT after the search criteria. Example: BEFORE 16-Nov-2001 NOT FROM "test" This will return all messages from before November 16th, 2001, that are not from the sender name “test”. |
|
ON |
To search on a certain date -- for example, November 11, 2001 -- type: ON 11-Nov-2001 |
|
OR |
To search for messages using an OR argument, type: <ARGUMENT> <value> OR <value> Example: SENTBEFORE 11-Nov-2001 OR 12-Nov-2001 |
|
SENTBEFORE |
Tosearchformessagessentbeforeacertaindate--forexample,November 11, 2001 --type: SENTBEFORE 11-Nov-2001 |
|
SENTON |
To search for messages sent on a certain date -- for example, November 11, 2001 -- type: SENTON 11-Nov-2001 |
|
SENTSINCE |
To search for messages sent since a certain date -- for example, November 11, 2001 -- type: SENTSINCE 11-Nov-2001 |
|
SUBJECT |
To search by an alphanumeric string contained in the subject line, type: SUBJECT "<string>" where<string>isthestringforwhichyouwishtosearch,suchas"this is a test". Any messages that contain the string in the subject line are returned. The search is not casesensitive. |
|
TO |
To search by TO, type: TO "<name@domain>" where <name@domain>is an address like test@transflo.com. Note:Forlocaladdresses,itisnecessaryonlytosearchon"<name>",e.g., "test"instead of "test@transflo.com". |
Note: If the search command was written properly, but there are not any messages that meet the criteria, you will receive a message prompt stating that the Inbox is empty.
The Inbox may or may not be empty; the message means that the Inbox does not contain messages with the specified search string.
Note: If the search command was not written properly, you will receive an error message similar to the following:
“Error searching mailbox Inbox on server (server name), Easy Mail error code =2 in TIMAP4BatchQueue.BeginSession.”
19. (Optional) The Ignore File Types box is used to filter out known file types that should not be processed by the Queue, and also to prevent the Queue from generating error messages if those file types are received.
If there are any file types that should not be processed, type them in the Ignore File Types box, separated by commas.
The file types can be entered in any of the formats shown in the example below:
Format 1: RTF, TXT, JPG
Format 2: .RTF, .TXT, .JPG
Format 3: *.RTF, *.TXT, *.JPG
20. To convert PDF files to individual TIFF files, select true from the Convert Pdf to Tiff drop down.
To keep PDF files in their native format, select false from the Convert Pdf to Tiff drop down and make sure PDF is in the list in the Additional File Types box.
The default setting istrue.
21 If you want Multi-page TIFF files to be split into separate Single-page TIFF files select True from the Break Multipage Tiff drop down.
To keep Multi-page TIFF files as is, select False from the Break Multipage Tiff drop down.
The default is True.
Note: If you set Convert PDF to tiff to True and Break Multi Page Tiff to False any Multi-page PDF is converted to separate Single-page TIFF files although Break Multi Page Tiff option is set to False.
22. In the Forwarding Mail Server box, type the name of your mail server that should be used for forwarding mail.
23 Expand the Forwarding Mail Method list and click the method that should be used for forwarding mail, either Relay or Authenticate With Specific User.

The default method is Relay.
24. In the Forwarding User box, type the user ID that should be used to log into the mail server when forwarding mail.
25. In the Forwarding Password box, type the password for the user ID that you entered in the Forwarding User box.
26. If you want to use SMTP Authentication to secure Outbound Email traffic, select “SmtpAuth” from the Outbound Authentication Mode drop down.
If you want to use SMTP Authentication with SSL to secure Outbound Email traffic, select “SecureSmtp” from the Outbound Authentication Mode drop down.
Select “False” if you are not using SMTP Authentication.
The default is False.
27. In the Outbound Mail Port box, type the port number that your mail system uses for outbound communications.
The default port number is 25.
28. Some remote email servers, like smtp.live.com, require start with TLS before switching to SSL.
For these remote servers select “True” from the Outbound Start Tls drop down.
The default is False.
29. In the Forwarding Mail From Address box, type the address that should appear as the “From” address on mail forwarded by the Queue.
Note: Forwarding User, Forwarding Password and Forwarding Mail From Address above are only required if the Forwarding Mail Method is set to “Authenticate with Specific User” – otherwise, they will be ignored.
30. (Optional) If copies of all messages received on this server should also be forwarded to an alternate address, type that address in the Backup Email Address box.
31. (Optional) If any unsupported file attachments that are received should be forwarded to an exception address, type that address in the Exception Email Address box.
32. If you want to send email delivery errors to the Exception Email Address box, select “True” from the Send Reply on Exception drop down.
The default is False.
33. If you notice Tiff image quality degradation when processed through this Queue, select “Advanced” from the Tiff Conversion Type drop down.
The default is Standard.
The Inbound Fax Queue receives a Batch from a compatible fax server, converts the Batch information to the data format used by the TRANSFLO® system, and then passes those keys and values to the next Queue, such as the Server Import Queue or the Server Index Queue.
Creating an Inbound Fax Queue
To create an Inbound Fax Queue:
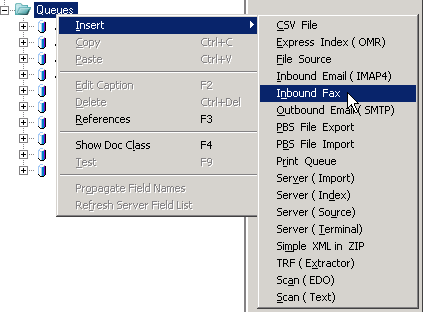
1. In the tree pane, right-click the Queues node.
Point to Insert on the shortcut menu, and then click Inbound Fax.
The Gateway system creates a new Inbound Fax Queue with a default name,
e.g., Inbound Fax1.
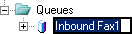
2. The default Inbound Fax Queue name is already selected and ready for editing.
To rename the new Inbound Fax Queue, simply type a new name.
When you are done, press [Enter].
Configure an Inbound Fax Queue
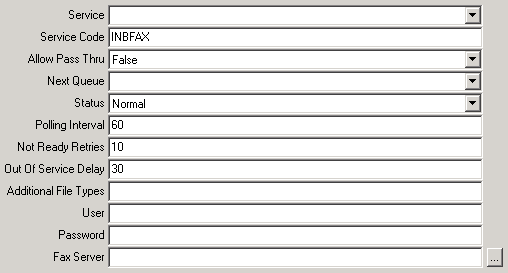
Now that you have created the Inbound Fax Queue, you can configure its settings via the text boxes on the right side of the window.
These settings are:
-
Service
- Service Code
-
Allow Pass Thru
- Next Queue
-
Status
- Polling Interval
-
Not Ready Retries
- Out of Service Delay
-
Additional File Types
- User
-
Password
- Fax Server
To configure the Inbound Fax Queue:
1. Click the Service arrow to expand the Service list, and then click the name of the Service that should be used by this Queue.
The Service list contains the Services that have been created via the Services node in the tree pane.
If the Service you need is not listed, then you must first create it before you can configure the Queue. See “Creating and Configuring a Gateway Service”
2. (Optional) Gateway automatically assigns a default Service Code when a Queue is created.
The default Service Code for the Inbound Fax Queue is “INBFAX”.
To change this, type a new code in the Service Code box.
3. Click the Allow Pass Thru arrow, and then click the desired setting in the Allow Pass Thru list to specify how Gateway will handle Batches that pass all of the Queue’s requirements.
If these Batches should be passed on to the next Queue, click True.
If the Batches should instead be held at the Queue for further action, click False.
The default Allow Pass Thru setting is False.
4. Click the Next Queue arrow to expand the Next Queue list, and then click the name of the Queue that should follow the current one in the Queue sequence.
The Next Queue list contains the names of the other Queues that have been created for your current Gateway Document, so if the needed Queue is not listed, then you must create that Queue before you can finish configuring this one.
Remember that to avoid such a situation, it is recommended that you create Queues in reverse order of their appearance in the Queue sequence.
Note: The Server Source, CSV File, eScan (EDO), eScan (Text), Inbound Email, Inbound Fax, Simple XML in ZIP, PBS File Import, TRF (Extractor), and File Source Queues can be used only as the initial Queue in a series, so none of these Queues will ever appear in the Next Queue list.
5. (Optional) Click the Status arrow, and then click the desired status setting in the Status list.
The default Status is Normal, and the Queue will function only if Normal is selected.
The three remaining settings -- TempOutOfService, Disabled, and Failed -- all serve the purpose of making the Queue nonfunctional. The settings are differently named to denote the reason why the Queue is inactive.
-
“TempOutOfService” indicates that the Queue has been placed out of service by Gateway because an error occurred.
A warning will be displayed in the Windows Event Viewer if this happens.
-
“Disabled” can be used to disable the Queue for testing or troubleshooting purposes, or to show that the Queue is functioning properly but is not currently needed.
-
“Failed” signifies that the maximum number of restart retries has been exceeded.
6. (Optional) In the Polling Interval box, type the frequency in seconds with which the Queue should check for new Batches to process.
The default polling interval in seconds is 60.
7. (Optional) In the Not Ready Retries box, type the number of attempts that Gateway should make to execute the Queue before stopping the Queue’s Service or changing the Queue’s status to Failed.
The default number of Not Ready Retries is 10.
The determination of whether the Queue is failed or the Service is stopped depends upon how the Max Queue Errors Result setting was configured for the Queue’s Service.
For more information, see Step 8 of “Creating and Configuring a Gateway Service,”
8. (Optional) In the Out Of Service Delay box, type the duration in seconds that Gateway should wait before reattempting to execute the Queue after an error.
The default duration in seconds is 30.
9. To process file types natively without conversion, list the file type extensions separated by commas in the Additional File Types box.
If you want to save PDF files without converting them to TIFF images you must include PDF in the list. (For example if you want to save Microsoft Office 2010 Word and Excel files as well as PDF in their native file formats, enter “DOCX,XLSX,PDF” in the Additional File Types box.)
In the User box, type the user ID that should be used to log into the fax server.
10. In the Password box, type the password that corresponds to the user ID that you entered.
If the fax server security settings for the user ID do not require a password, leave this box empty.
11. In the Fax Server box, enter the serial identification string for a fax server or click the Browse button to select a server in the Select Fax Server dialog box.
Click the down arrow to the right of the Fax Server Serial ID box, and click the serial ID of the desired fax server.
Click OK.

The serial ID is entered in the Fax Server box.
The Outbound Email Queue is designed to send Document image files as e-mail attachments.
Optionally, it can attach a single ZIP archive file containing these image files instead of attaching them individually.
Creating an Outbound Email Queue
To create an Outbound Email Queue:
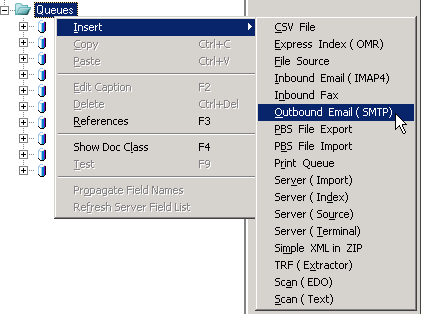
1. In the tree pane, right-click the Queues node.
Point to Insert on the shortcut menu, and then click Outbound Email (SMTP).
The Gateway system creates a new Outbound Email Queue with a default name,
e.g., Outbound Email (SMTP)1.
2. The default Outbound Email Queue name is already selected and ready for editing.
To rename the new Outbound Email Queue, simply type a new name.
When you are done, press [Enter].
Configuring an Outbound Email Queue
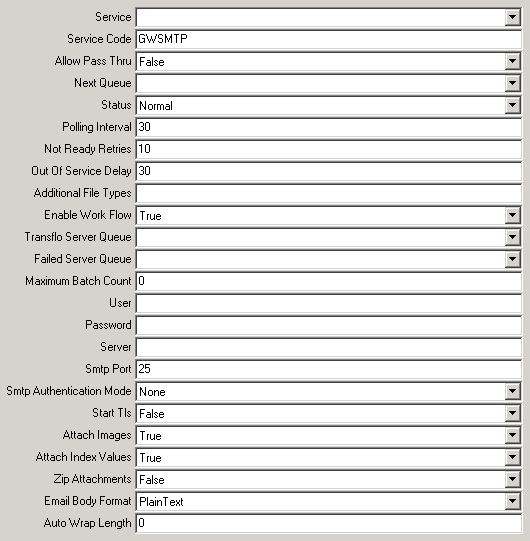
Now that you have created the Outbound Email Queue, you can configure its settings via the text boxes on the right side of the window.
These settings are:
-
Service
- Service Code
-
Allow Pass Thru
- Next Queue
-
Status
- Polling Interval
-
Not Ready Retries
- Out Of Service Delay
-
Additional File Types
- Enable Work Flow
-
Transflo Server Queue
- Failed Server Queue
-
Maximum Batch Count
- User
-
Password
- Server
-
SMTP Port
- Use SMTP Authentication
-
Start Tls
- Attach Images
-
Attach Index Values
- Zip Attachments
-
Email Body Format
- Auto Wrap Length
To configure the Outbound Email Queue:
1. Click the Service arrow to expand the Service list, and then click the name of the Service that should be used by this Queue.
The Service list contains the Services that have been created via the Services node in the tree pane.
If the Service you need is not listed, then you must first create it before you can configure the Queue.
See “Creating and Configuring a Gateway Service”
2. (Optional) Gateway automatically assigns a default Service Code when a Queue is created.
The default Service Code for the Outbound Email Queue is “GWSMTP”.
To change this, type a new code in the Service Code box.
3. Click the Allow Pass Thru arrow, and then click the desired setting in the Allow Pass Thru list to specify how Gateway will handle Batches that pass all of the Queue’s requirements.
If these Batches should be passed on to the next Queue, click True.
If the Batches should instead be held at the Queue for further action, click False.
The default Allow Pass Thru setting is False.
4. Click the Next Queue arrow to expand the Next Queue list, and then click the name of the Queue that should follow the current one in the Queue sequence.
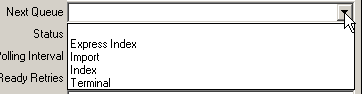
The Next Queue list contains the names of the other Queues that have been created for your current Gateway Document, so if the needed Queue is not listed, then you must create that Queue before you can finish configuring this one.
Remember that to avoid such a situation, it is recommended that you create Queues in reverse order of their appearance in the Queue sequence.
Note: The Server Source, CSV File, eScan (EDO), eScan (Text), Inbound Email, Inbound Fax, Simple XML in ZIP, PBS File Import, TRF (Extractor), and File Source Queues can be used only as the initial Queue in a series, so none of these Queues will ever appear in the Next Queue list.
5. Click the Status arrow, and then click the desired status setting in the Status list.
The default Status is Normal, and the Queue will function only if Normal is selected.
The three remaining settings -- TempOutOfService, Disabled, and Failed -- all serve the purpose of making the Queue nonfunctional. The settings are differently named to denote the reason why the Queue is inactive.
-
“TempOutOfService” indicates that the Queue has been placed out of service by Gateway because an error occurred.
A warning will be displayed in the Windows Event Viewer if this happens.
-
“Disabled” can be used to disable the Queue for testing or troubleshooting purposes, or to show that the Queue is functioning properly but is not currently needed.
-
“Failed” signifies that the maximum number of restart retries has been exceeded.
6. (Optional) In the Polling Interval box, type the frequency in seconds with which the Queue should check for new Batches to process.
The default polling interval in seconds is 30.
7. (Optional) In the Not Ready Retries box, type the number of attempts that Gateway should make to execute the Queue before stopping the Queue’s Service or changing the Queue’s status to Failed.
The default number of Not Ready Retries is 10.
The determination of whether the Queue is failed or the Service is stopped depends upon how the Max Queue Errors Result setting was configured for the Queue’s Service.
For more information, see Step 8 of Create and Configure a Gateway Service in DMS Enterprise Gateway Fields, Queues, and Services
8. (Optional) In the Out Of Service Delay box, type the duration in seconds that Gateway should wait before reattempting to execute the Queue after an error.
The default duration in seconds is 30.
9. To process file types natively without conversion, list the file type extensions separated by commas in the Additional File Types box.
If you want to save PDF files without converting them to TIFF images you must include PDF in the list. (For example if you want to save Microsoft Office 2010 Word and Excel files as well as PDF in their native file formats, enter “DOCX,XLSX,PDF” in the Additional File Types box.)
10. (Optional) If your company uses the TRANSFLO® Workflow application to control billing and payroll processes, the TRANSFLO® Import application can create a new Workflow case for each page in a Batch.
To configure this option, click the Enable Work Flow arrow, and then click the desired setting in the Enable Work Flow list.
To enable the option, click True.
To disable it, click False.
The default setting is False.
11. Select the Queue to which Batch data should be passed when the Batch is successfully processed.
Click the arrow button next to the Transflo Server Queue list to expand the list, and then click the name of the desired Queue.
The list displays all Queues currently configured on your TRANSFLO® server.
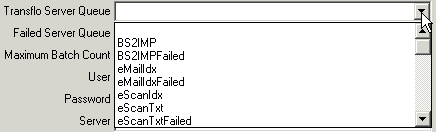
12. Select the Queue to which Batch data should be passed if the Batch cannot be processed.
Click the arrow button next to the Failed Server Queue list to expand the list, and then click the name of the desired Queue.
The list displays all Queues currently configured on your TRANSFLO® server.
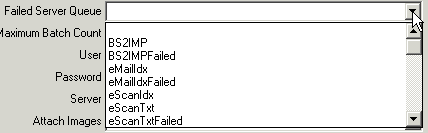
13. (Optional) In the Maximum Batch Count box, type the maximum number of Batches that can be sent to each Queue.
For example, if the Maximum Batch Count is 50, and another Queue attempts to send this Queue 55 Batches, then the first 50 Batches will be sent and Gateway will display an error message alerting you that the Batch is full.
As soon as there is room again in the Queue, the remainder of the Batches will be sent.
If you do not wish to impose a maximum number of Batches, type 0.
The default setting is 0.
14. In the User box, type the login name for the e-mail account to be accessed by the Queue.
Note: This login name is limited to 20 characters.
15. In the Password box, type the password for the e-mail account to be accessed.
16. In the Server box, type the address of your mail server.
17. In the Smtp Port box enter the SMTP port that the Outbound Email service will use.
The default is port 25.
18. If you want to use SMTP Authentication to secure Outbound Email traffic, select SmtpAuth from the Smtp Authentication Mode drop down.
If you want to use SMTP Authentication with SSL to secure Outbound Email traffic, select SecureSmtp from the Smtp Authentication Mode drop down.
Select False if you are not using SMTP Authentication.
The default is False.
19. Some remote email servers, like smtp.live.com, require start with TLS before switching to SSL.
For these remote servers select True from the Start Tls drop down.
The default is False.
20. Click the Attach Images arrow, and then click the desired setting in the Attach Images list to specify whether or not images should be attached to outbound email.

To have the Queue attach images to e-mail that it sends, click True.
If images should not be sent with e-mail, click False.
The default Attach Images setting is True.
21. (Optional) The Attach Index Values setting enables you to have the Queue attach an XML Batch file to the outgoing e-mail.
To configure this setting, click the Attach Index Values arrow, and then click the desired setting in the Attach Index Values list to specify whether or not a Batch file should be attached to outbound e-mail sent by the Queue.

To have the Queue attach XML Batch files to e-mail that it sends, click True.
If XML Batch files should not be attached to outgoing e-mail, click False.
The default Attach Index Values setting is True.
22. (Optional) Rather than sending attachments as individual, uncompressed files, the Outbound Email Queue can instead send a single compressed ZIP file containing the attachments.
To configure this setting, click the Zip Attachments arrow, and then click the desired setting in the Zip Attachments list to specify whether or not attachments should be sent as a ZIP file.

To have the Queue send attachments as a ZIP file, click True.
If attachments should be sent as individual files, click False.
The default Zip Attachments setting is False.
23. Select the format your outbound emails will have from the Email Body Format drop down.
The available formats are Plain Text, HTML, RTF and XML. The default is Plain Text.
24. To limit the number of characters in a line that can be auto wrapped enter the maximum number of characters for each line in the Auto Wrap Length box.
If you enter 0 in this box there will be no limit in the length of auto wrapped lines.
The Default is 0.
Note: Some Internet mail servers have trouble processing messages with lines longer than 76 characters.
Unless you are sure that your message will only be processed by mail servers which can handle messages with longer line lengths, do not set this property to a value greater than 76.
Note: If you are sending HTML formatted messages, this property should be set to 0, the application will set it to 0 automatically when HTML is selected.
Outbound Email Queue Required Fields
For the Outbound Email Queue to work a To and a From address must be configured.
These are configured using the Batch Fields To and FromAddr.
To configure the To required Batch Field:
1. In the Tree Pane on the left, expand your Outbound Email Queue’s node, expand the Template node, expand the Batch Fields node and click To.
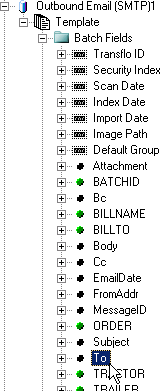
2. The To Batch Field properties open in the right pane.

3. If you wish the To email address to persist from the previous email, select True from the Sticky drop down.
The default is “False”.
4. To retrieve the To email address from a Batch Field, select it from the Mapped Field drop down.
5. To retrieve the To email address from a TRANSFLO® Server Field, select it from the Database Override Field drop down.
6. Expand the To node, right-click Ancillary Sources, point to Insert, and select String Generator from the menu tree.
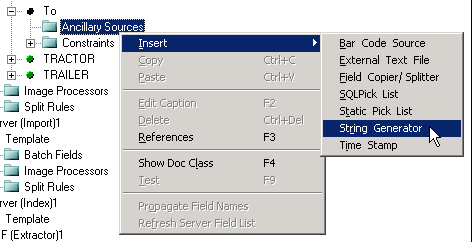
7. The String Generator properties open in the right pane.

8. Click the Browse button next to the Mask box.
9. The String Generator Mask window opens.
Right click in the Mask text box and select Literal Text from the context menu.
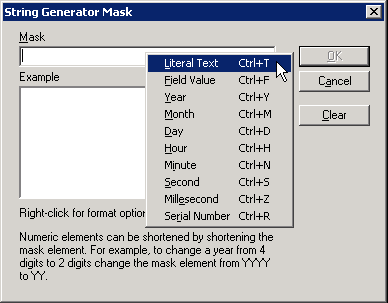
10 In the Enter literal element window type the destination email address for the Outbound Queue in the Value box.
11. Click OK to close the Enter literal element window.
12 Click OK to save the literal mask and close the String Generator Mask window.
To configure the FromAddr required Batch Field:
13 In the Tree Pane on the left, expand your Outbound Email Queue’s node, expand the Template node, expand the Batch Fields node and click FromAddr.
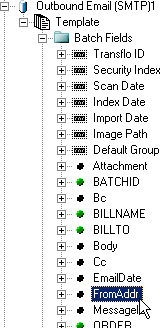
14. Repeat the steps for configuring the To Batch Field above, but this time the Ancialliary Source is configured to show the email address that will appear in the From box.
The PBS File Export Queue is designed to pass Batch data files and, optionally, Document images to an external location.
PBS files were used to pass data in pre-2010 TRANSFLO® applications, and this Queue is intended for use in TRANSFLO® systems
that have been upgraded from earlier versions, but still need compatibility with PBS files.
Creating a PBS File Export Queue
To create a PBS File Export Queue:
1. In the tree pane, right-click the Queues node.
Point to Insert on the shortcut menu, and then click PBS File Export.
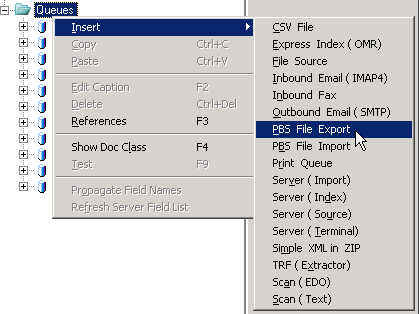
The Gateway system creates a new PBS File Export Queue with a default name,
e.g., PBS File Export1.
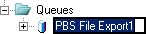
2. The default PBS File Export Queue name is already selected and ready for editing.
To rename the new PBS File Export Queue, simply type a new name.
When you are done, press [Enter].
Configuring a PBS File Export Queue
Now that you have created the PBS File Export Queue, you can configure its settings via the text boxes on the right side of the window.
These settings are:
-
Service
- Service Code
-
Allow Pass Thru
- Next Queue
-
Status
- Polling Interval
-
Not Ready Retries
- Out Of Service Delay
-
Additional File Types
- Enable Work Flow
-
Transflo Server Queue
- Failed Server Queue
-
Maximum Batch Count
- Extension
-
PBS Export Type
- BatchFolder
-
ImageArea
- Sample
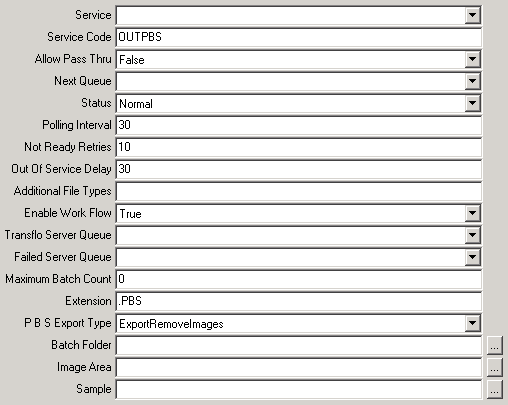
To configure the PBS File Export Queue:
1 Click the Service arrow to expand the Service list, and then click the name of the Service that should be used by this Queue.
The Service list contains the Services that have been created via the Services node in the tree pane.
If the service you need is not listed, you must first create it before you can configure the queue.
See Create and Configure a Gateway Service.
2 (Optional) Gateway automatically assigns a default Service Code when a Queue is created.
The default Service Code for the PBS File Export Queue is “OUTPBS”.
To change this, type a new code in the Service Code box.
3 Click the Allow Pass Thruarrow, and then click the desired setting in the Allow Pass Thru list to specify how Gateway will handle Batches that pass all of the Queue’s requirements.
If these Batches should be passed on to the next Queue, click True.
If the Batches should instead be held at the Queue for further action, click False.
The default Allow Pass Thru setting is False.
4 Click the Next Queue arrow to expand the Next Queue list, and then click the name of the Queue that should follow the current one in the Queue sequence.
The Next Queue list contains the names of the other Queues that have been created for your current Gateway Document, so if the needed Queue is not listed, then you must create that Queue before you can finish configuring this one.
Remember that to avoid such a situation, it is recommended that you create Queues in reverse order of their appearance in the Queue sequence.
Note: The Server Source, CSV File, eScan (EDO), eScan (Text), Inbound Email, Inbound Fax, Simple XML in ZIP, PBS File Import, and TRF (Extractor) Queues can be used only as the initial Queue in a series, so none of these Queues will ever appear in the Next Queue list.
5 Click the Status arrow, and then click the desired status setting in the Status list.
The default Status is Normal, and the Queue will function only if Normal is selected.
The three remaining settings -- TempOutOfService, Disabled, and Failed -- all serve the purpose of making the Queue nonfunctional.
The settings are differently named to denote the reason why the Queue is inactive.
-
“TempOutOfService” indicates that the Queue has been placed out of servicebyGatewaybecauseanerroroccurred.
Awarningwillbedisplayed in the Windows Event Viewer if thishappens.
-
“Disabled” can be used to disable the Queue for testing ortroubleshooting purposes, or to show that the Queue is functioning properly but is not currentlyneeded.
-
“Failed” signifies that the maximum number of restart retries hasbeen exceeded.
6. (Optional) In the Polling Interval box, type the frequency in seconds with which the Queue should check for new Batches to process.
The default polling interval in seconds is 1.
7. (Optional) In the Not Ready Retries box, type the number of attempts that Gateway should make to execute the Queue before stopping the Queue’s Service or changing the Queue’s status to Failed.
The default number of Not Ready Retries is 10.
The determination of whether the Queue is failed or the Service is stopped depends upon how the Max Queue Errors Result setting was configured for the Queue’s Service.
For more information, see Step 8 of “Creating and Configuring a Gateway Service,”
8. (Optional) In the Out Of Service Delay box, type the duration in seconds that Gateway should wait before reattempting to execute the Queue after an error.
The default duration in seconds is 30.
9. To process file types natively without conversion, list the file type extensions separated by commas in the Additional File Types box.
If you want to save PDF files without converting them to TIFF images you must include PDF in the list. (For example if you want to save Microsoft Office 2010 Word and Excel files as well as PDF in their native file formats, enter “DOCX,XLSX,PDF” in the Additional File Types box.)
10. (Optional) If your company uses the TRANSFLO® Workflow application to control billing and payroll processes, the TRANSFLO® Import application can create a new Workflow case for each page in a Batch.
To configure this option, click the Enable Work Flow arrow, and then click the desired setting in the Enable Work Flow list.
To enable the option, click True.
To disable it, click False.
The default setting is False.
11. Select the Queue to which Batch data should be passed when the Batch is successfully processed.
Click the arrow button next to the Transflo Server Queue list to expand the list, and then click the name of the desired Queue.
The list displays all Queues currently configured on your TRANSFLO® server.

12. Select the Queue to which Batch data should be passed if the Batch cannot be processed.
Click the arrow button next to the Failed Server Queue list to expand the list, and then click the name of the desired Queue.
The list displays all Queues currently configured on your TRANSFLO® server.
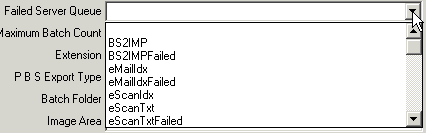
13. (Optional) In the Maximum Batch Count box, type the maximum number of Batches that can be sent to each Queue.
For example, if the Maximum Batch Count is 50, and another Queue attempts to send this Queue 55 Batches, then the first 50 Batches will be sent and Gateway will display an error message alerting you that the Batch is full.
As soon as there is room again in the Queue, the remainder of the Batches will be sent.
If you do not wish to impose a maximum number of Batches, type 0.
The default setting is 0.
14. In the Extension box, type the file extension of the Batch file to be exported.
The default file extension is “.PBS”.
15. Select whether or not the Document image files should be exported along with the Batch data file.
Click the arrow button next to the PBS Export Type list to expand the list, and then click the name of the desired option.
To export Document image files along with the Batch data, click ExportKeepImages.
To export just the Batch data file, click ExportRemoveImages.

The default value is ExportRemoveImages.
16. Specify the location of the folder to which the Batch files will be copied.
If this folder does not yet exist, use Windows Explorer to create it at this time.
When your folder is ready, click the Browse button to the right of the Batch Folder box to open the Browse for Folder dialog box.
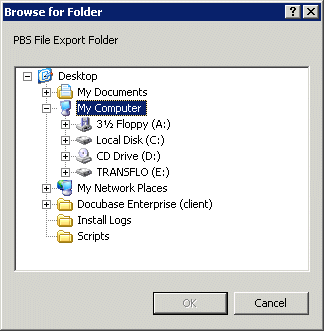
In the dialog box, browse to the folder where your Batch files will be located, click the folder to select it, and then click OK.
The folder path now appears in the Batch Folder box.
17. If you are exporting images, specify the location of the folder where the TIF images of your documents should be copied.
Click the Browse button to the right of the Image Area box to open the Browse for Folder dialog box.
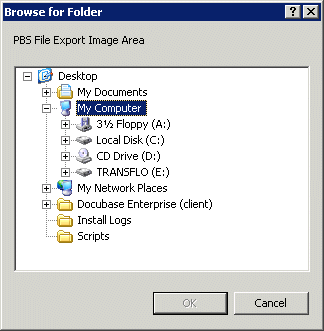
In the dialog box, browse to the folder containing your image files, click the folder to select it, and then click OK.
The folder’s path now appears in the Image Area box.
18. Before it can create a Batch file to export, Gateway must know the desired data structure for the file.
Click the Browse button to the right of the Sample box to open the Browse for Folder dialog box.
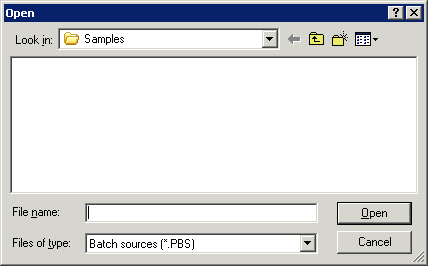
In the dialog box, browse to the folder containing the Batch data file that you wish to sample, click the file to select it, and then click OK.
The file’s path now appears in the Sample box.
The PBS File Import Queue is designed to import Batch data files and Document images to an external location.
PBS files were used to pass data in pre-4.0 TRANSFLO® applications, and this Queue is intended for use in TRANSFLO® systems that have been upgraded from earlier versions, but still need compatibility with PBS files.
CREATING A PBS FILE IMPORT QUEUE
To create a PBS File Import Queue:
1 In the tree pane, right-click the Queues node. Point to Insert on theshortcut menu, and then click PBS File Import.
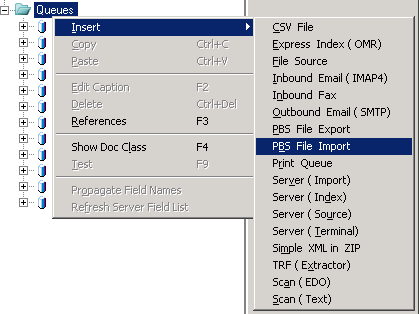
The Gateway system creates a new PBS File Import Queue with a default name,
e.g., PBS File Import1.

2 The default PBS File Export Queue name is already selected and ready for editing.
To rename the new PBS File Export Queue, simply type a new name.
When you are done, press [Enter].
CONFIGURING A PBS FILE IMPORT QUEUE
Now that you have created the PBS File Import Queue, you can configure its settings via the text boxes on the right side of the window.
These settings are:
-
Service
- ServiceCode
-
AllowPassThru
- NextQueue
-
Status
- PollingInterval
-
NotReadyRetries
- Out Of ServiceDelay
-
AdditionalFile Types
- ImageArea
-
Sample
- BatchFolder
-
FailedFolder
- SaveFolder
-
Extension
- Convert Pdf toTiff
-
Days To KeepSaved
- Enable WorkFlow
-
SynchronizeServerQueue
- Tiff ConversionType
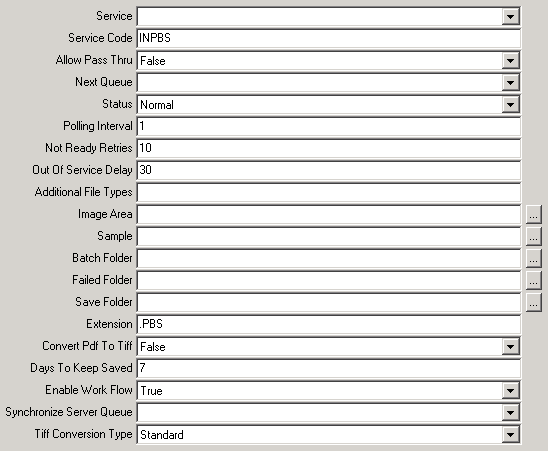
To configure the PBS File Import Queue:
1 Click the Service arrow to expand the Service list, and then click the name of the Service that should be used by this Queue.
The Service list contains the Services that have been created via the Services node in the tree pane.
If the service you need is not listed, you must first create it before you can configure the queue.
See Create and Configure a Gateway Service.
2 (Optional) Gateway automatically assigns a default Service Code when a Queue is created.
The default Service Code for the PBS File Import Queue is “INPBS”, the same Service Code used by the Server Import Queue.
To change this, type a new code in the Service Code box.
3 Click the Allow Pass Thruarrow, and then click the desired setting in the Allow Pass Thru list to specify how Gateway will handle Batches that pass all of the Queue’s requirements.
If these Batches should be passed on to the next Queue, click True.
If the Batches should instead be held at the Queue for further action, click False.
The default Allow Pass Thru setting is False.
4 Click the Next Queue arrow to expand the Next Queue list, and then click the name of the Queue that should follow the current one in the Queue sequence.
The Next Queue list contains the names of the other Queues that have been created for your current Gateway Document, so if the needed Queue is not listed, then you must create that Queue before you can finish configuring this one.
Remember that to avoid such a situation, it is recommended that you create Queues in reverse order of their appearance in the Queue sequence.
Note: The Server Source, CSV File, eScan (EDO), eScan (Text), Inbound Email, Inbound Fax, Simple XML in ZIP, PBS File Import, TRF (Extractor), and File Source Queues can be used only as the initial Queue in a series, so none of these Queues will ever appear in the Next Queue list.
5 Click the Status arrow, and then click the desired status setting in the Status list.
The default Status is Normal, and the Queue will function only if Normal is selected.
The three remaining settings -- TempOutOfService, Disabled, and Failed -- all serve the purpose of making the Queue nonfunctional.
The settings are differently named to denote the reason why the Queue is inactive.
-
“TempOutOfService” indicates that the Queue has been placed out of servicebyGatewaybecauseanerroroccurred.
Awarningwillbedisplayed in the Windows Event Viewer if thishappens.
-
“Disabled” can be used to disable the Queue for testing ortroubleshooting purposes, or to show that the Queue is functioning properly but is not currentlyneeded.
-
“Failed” signifies that the maximum number of restart retries hasbeen exceeded.
6 (Optional) In the Polling Interval box, type the frequency in seconds with which the Queue should check for new Batches to process.
The default polling interval in seconds is 1.
7 (Optional) In the Not Ready Retries box, type the number of attempts that Gateway should make to execute the Queue before stopping the Queue’s Service or changing the Queue’s status to Failed.
The default number of Not Ready Retries is 10.
The determination of whether the Queue is failed or the Service is stopped depends upon how the Max Queue Errors Result setting was configured for the Queue’s Service.
For more information, see Step 8 of “Creating and Configuring a Gateway Service,”
8 (Optional) In the Out Of Service Delay box, type the duration in seconds that Gateway should wait before reattempting to execute the Queue after an error.
The default duration in seconds is 30.
9 To process file types natively without conversion, list the file type extensions separated by commas in the Additional File Types box.
If you want to save PDF files without converting them to TIFF images you must include PDF in the list. (For example if you want to save Microsoft Office 2010 Word and Excel files as well as PDF in their native file formats, enter “DOCX,XLSX,PDF” in the Additional File Types box.)
10 Specify the location of the folder where the TIF images of your Documents are located. Click the Browse button to the right of the Image Area box to open the Browse for Folder dialog box.
In the dialog box, browse to the folder containing your image files, click the folder to select it, and then click OK.
The folder’s path now appears in the Image Area box.
11 Specify the location of the PBS file that the Queue should sample to generate Batch Fields for the Queue.
Click the Browse button to the right of the Sample box to display the Open dialog box.
In the dialog box, browse to the folder containing the Batch file to sample, click the file to select it, and then click OK.
The file path now appears in the Sample box.
12 Specify the location of the folder to which the Batch files will be copied. If this folder does not yet exist, use Windows Explorer to create it at this time. When your folder is ready, click the Browse button to the right of the Batch Folder box to open the Browse for Folder dialog box.

In the dialog box, browse to the folder where your Batch files will be located, click the folder to select it, and then click OK.
The folder’s path now appears in the Batch Folder box.
13 If you did not already create a “Failed” folder and a “Saved” folder in your Batch folder, then Gateway will create them automatically at this time, and will also enter the paths to these folders in the Failed Folder and Save Folder boxes.
Important: If you change the location of the Batch folder, you must also manually change the location of the Failed and Saved folders.
These will not be updated automatically.
14 In the Extension box, type the file extension of the Batch file to be imported.
The default file extension is “.pbs”.
15 To convert PDF files to individual TIFF files, select true from the Convert Pdf to Tiff drop down.
To keep PDF files in their native format, select false from the Convert Pdf to Tiff drop down and make sure PDF is in the list in the Additional File Types box.
The default setting istrue.
16 In the Days To Keep Saved box, type the number of days for which files should be kept in the Saved folder before they are purged.
The default number of days is 7.
17 (Optional) If your company uses the TRANSFLO® Workflow application to control billing and payroll processes, the TRANSFLO® Import application can create a new Workflow case for each page in a Batch.
To configure this option, click the Enable Work Flow arrow, and then click the desired setting in the Enable Work Flow list.
To enable the option, click True.
To disable it, click False.

The default setting is False.
18 Select the TRANSFLO® Server Queue to which the PBS Batch data and TIF Document images should be passed.
Click the arrow button next to the Synchronize Server Queue list to expand the list, and then click the name of the desired Queue.
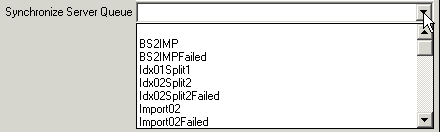
Note: PBS files must contain values for all system Fields. PBS files with blank spaces in the value will not be imported.
19 If you notice Tiff image quality degradation when processed through this Queue, select “Advanced” from the Tiff Conversion Type drop down.
The default is Standard.
The Simple XML in ZIP Queue is used to receive a ZIP file containing an XML file and one or more valid image files (TIF, JPG, or BMP format) and pass that data to either an Express Index Queue or an Outbound Email Queue.
The XML file can contain an unlimited number of Fields.
CREATING A SIMPLE XML IN ZIP QUEUE
To create a Simple XML in ZIP Queue:
1 In the tree pane, right-click the Queues node. Point to Insert on theshortcut menu, and then click Simple XML in ZIP.

The Gateway system creates a new Simple XML in ZIP Queue with a default name, e.g., Simple XML in ZIP1.
2 The default Simple XML in ZIP Queue name is already selected and ready for editing.
To rename the new Simple XML in ZIP Queue, simply type a new name.
When you are done, press [Enter].
CONFIGURING A SIMPLE XML IN ZIP QUEUE
Now that you have created the Simple XML in ZIP Queue, you can configure its settings via the text boxes on the right side of the window.
These settings are:
-
Service
- ServiceCode
-
AllowPassThru
- NextQueue
-
Status
- PollingInterval
-
NotReady Retries
- Out of ServiceDelay
-
AdditionalFile Types
- ImageArea
-
Sample
- BatchFolder
-
FailedFolder
- SaveFolder
-
Extension
- Convert Pdf toTiff
-
Days To KeepSaved
- XML FileName
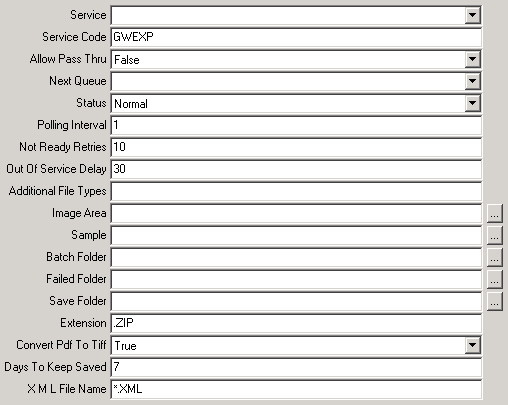
To configure the Simple XML in ZIP Queue:
1 Click the Service arrow to expand the Service list, and then click the name of the Service that should be used by this Queue.
The Service list contains the Services that have been created via the Services node in the tree pane.
If the Service you need is not listed, then you must first create it before you can configure the Queue. See “Creating and Configuring a Gateway Service” on
2 (Optional) Gateway automatically assigns a default Service Code when a Queue is created.
The default Service Code for the Simple XML in ZIP Queue is “GWEXP”.
To change this, type a new code in the Service Code box.
3 Click the Allow Pass Thruarrow, and then click the desired setting in the Allow Pass Thru list to specify how Gateway will handle Batches that pass all of the Queue’s requirements.
If these Batches should be passed on to the next Queue, click True.
If the Batches should instead be held at the Queue for further action, click False.
The default Allow Pass Thru setting is False.
4 Click the Next Queue arrow to expand the Next Queue list, and then click the name of the Queue that should follow the current one in the Queue sequence.

The Next Queue list contains the names of the other Queues that have been created for your current Gateway Document, so if the needed Queue is not listed, then you must create that Queue before you can finish configuring this one.
Remember that to avoid such a situation, it is recommended that you create Queues in reverse order of their appearance in the Queue sequence.
Note: The Server Source, CSV File, eScan (EDO), eScan (Text), Inbound Email, Inbound Fax, Simple XML in ZIP, PBS File Import, TRF (Extractor), and File Source Queues can be used only as the initial Queue in a series, so none of these Queues will ever appear in the Next Queue list.
5 Click the Status arrow, and then click the desired status setting in the Status list.
The default Status is Normal, and the Queue will function only if Normal is selected.
The three remaining settings -- TempOutOfService, Disabled, and Failed -- all serve the purpose of making the Queue nonfunctional.
The settings are differently named to denote the reason why the Queue is inactive.
-
“TempOutOfService” indicates that the Queue has been placed out of servicebyGatewaybecauseanerroroccurred.
Awarningwillbedisplayed in the Windows Event Viewer if thishappens.
-
“Disabled” can be used to disable the Queue for testing ortroubleshooting purposes, or to show that the Queue is functioning properly but is not currentlyneeded.
-
“Failed” signifies that the maximum number of restart retries hasbeen exceeded.
6 (Optional) In the Polling Interval box, type the frequency in seconds with which the Queue should check for new Batches to process.
The default polling interval in seconds is 1.
7 (Optional) In the Not Ready Retries box, type the number of attempts that Gateway should make to execute the Queue before stopping the Queue’s Service or changing the Queue’s status to Failed.
The default number of Not Ready Retries is 10.
The determination of whether the Queue is failed or the Service is stopped depends upon how the Max Queue Errors Result setting was configured for the Queue’s Service.
For more information, see Step 8 of “Creating and Configuring a Gateway Service,”
8 (Optional) In the Out Of Service Delay box, type the duration in seconds that Gateway should wait before reattempting to execute the Queue after an error.
The default duration in seconds is 30.
9 To process file types natively without conversion, list the file type extensions separated by commas in the Additional File Types box.
If you want to save PDF files without converting them to TIFF images you must include PDF in the list. (For example if you want to save Microsoft Office 2010 Word and Excel files as well as PDF in their native file formats, enter “DOCX,XLSX,PDF” in the Additional File Types box.)
10 Specify the location of the folder where the TIF images of your Documents are located.
Click the Browse button to the right of the Image Area box to open the Browse for Folder dialog box.
In the dialog box, browse to the folder containing your image files, click the folder to select it, and then click OK.
The folder’s path now appears in the Image Area box.
11 Specify the location of the ZIP file containing the XML file that Gateway should sample to create the Queue’s Batch Fields.
Click the Browse button to the right of the Sample box to display the Open dialog box.
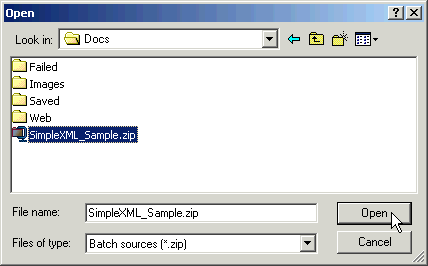
In the dialog box, browse to the folder containing the file to be sampled, click the file to select it, and then click OK.
The file path now appears in the Sample box.
12 Specify the location of the folder where your Batch files will reside. If this folder does not yet exist, use Windows Explorer to create it.
When your folder is ready, click the Browse button to the right of the Batch Folder box to open the Browse for Folder dialog box.

In the dialog box, browse to the folder where your Batch files will be located, click the folder to select it, and then click OK.
The folder’s path now appears in the Batch Folder box
13 If you did not already create a “Failed” folder and a “Saved” folder in your Batch folder, then Gateway will create them automatically at this time, and will also enter the paths to these folders in the Failed Folder and Save Folder boxes.
Important: If you change the location of the Batch folder, you must also manually change the location of the Failed and Saved folders.
These will not be updated automatically.
14 (Optional) In the Extension box, type the file extension of the Batch files that will be processed by the Queue.
The default extension is “.zip”.
15 To convert PDF files to individual TIFF files, select true from the Convert Pdf to Tiff drop down.
To keep PDF files in their native format, select false from the Convert Pdf to Tiff drop down and make sure PDF is in the list in the Additional File Types box.
The default setting istrue.
16 (Optional) In the Days To Keep Saved box, type the number of days for which files should be kept in the Saved folder before they are purged.
The default number of days is 7.
17 In the XML File Name box, type the name format that the Queue should use to recognize the XML file in the ZIP file. Type an asterisk (*) where the Queue should insert the filename of the original XML file.
If desired, you can include literal text in the filename as well.
The default XML filename format is “*.xml”.
The TRF (Extractor) Queue is used to receive Batches scanned and packaged using TRANSFLO® Field Imaging.
A TRF file contains both the data about a Batch and all of the TIF-format Document images in the Batch.
Each TRF file should be accompanied by an STA file, which contains information about the Batch’s origin, including the date when it was scanned, the Field Imaging station where the Batch was scanned, and the individual who scanned it.
CREATING A TRF EXTRACTOR QUEUE
To create a TRF (Extractor) Queue:
1 In the tree pane, right-click the Queues node.
Point to Insert on theshortcut menu, and then click TRF (Extractor).

The Gateway system creates a new TRF (Extractor) Queue with a default name,
e.g., TRF (Extractor)1.
2 The default TRF (Extractor) Queue name is already selected and ready for editing.
To rename the new TRF (Extractor) Queue, simply type a new name.
When you are done, press [Enter].
CONFIGURING A TRF EXTRACTOR QUEUE
Now that you have created the TRF (Extractor) Queue, you can configure its settings via the text boxes on the right side of the window.
These settings are:
-
Service
- ServiceCode
-
AllowPassThru
- NextQueue
-
Status
- PollingInterval
-
NotReadyRetries
- Out Of ServiceDelay
-
AdditionalFile Types
- ImageArea
-
Sample
- BatchFolder
-
FailedFolder
- SaveFolder
-
Extension
- Convert Pdf toTiff
-
Days To KeepSaved
- Enable WorkFlow
-
Days to keep orphan TRFfiles
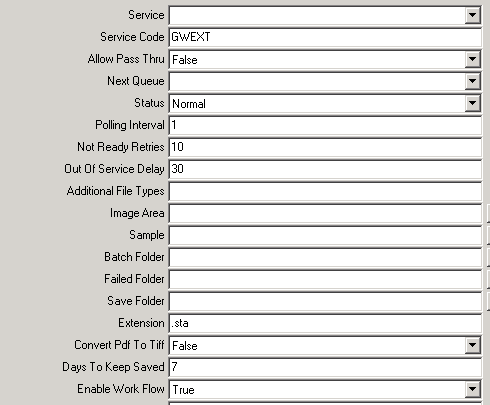
To configure the TRF (Extractor) Queue:
1 Click the Service arrow to expand the Service list, and then click the name of the Service that should be used by this Queue.
The Service list contains the Services that have been created via the Services node in the tree pane.
If the service you need is not listed, you must first create it before you can configure the queue.
See Create and Configure a Gateway Service.
2 (Optional) Gateway automatically assigns a default Service Code when a Queue is created.
The default Service Code for the TRF (Extractor) Queue is “GWEXT”.
To change this, type a new code in the Service Code box.
3 Click the Allow Pass Thruarrow, and then click the desired setting in the Allow Pass Thru list to specify how Gateway will handle Batches that pass all of the Queue’s requirements.
If these Batches should be passed on to the next Queue, click True.
If the Batches should instead be held at the Queue for further action, click False.
The default Allow Pass Thru setting is False.
4 Click the Next Queue arrow to expand the Next Queue list, and then click the name of the Queue that should follow the current one in the Queue sequence.
The Next Queue list contains the names of the other Queues that have been created for your current Gateway Document, so if the needed Queue is not listed, then you must create that Queue before you can finish configuring this one.
Remember that to avoid such a situation, it is recommended that you create Queues in reverse order of their appearance in the Queue sequence.
Note: The Server Source, CSV File, eScan (EDO), eScan (Text), Inbound Email, Inbound Fax, Simple XML in ZIP, PBS File Import, TRF (Extractor), and File Source Queues can be used only as the initial Queue in a series, so none of these Queues will ever appear in the Next Queue list.
5 Click the Status arrow, and then click the desired status setting in the Status list.
The default Status is Normal, and the Queue will function only if Normal is selected.
The three remaining settings -- TempOutOfService, Disabled, and Failed -- all serve the purpose of making the Queue nonfunctional.
The settings are differently named to denote the reason why the Queue is inactive.
-
“TempOutOfService” indicates that the Queue has been placed out of servicebyGatewaybecauseanerroroccurred.
Awarningwillbedisplayed in the Windows Event Viewer if thishappens.
-
“Disabled” can be used to disable the Queue for testing ortroubleshooting purposes, or to show that the Queue is functioning properly but is not currentlyneeded.
-
“Failed” signifies that the maximum number of restart retries hasbeen exceeded.
6 (Optional) In the Polling Interval box, type the frequency in seconds with which the Queue should check for new Batches to process.
The default polling interval in seconds is 1.
7 (Optional) In the Not Ready Retries box, type the number of attempts that Gateway should make to execute the Queue before stopping the Queue’s Service or changing the Queue’s status to Failed.
The default number of Not Ready Retries is 10.
The determination of whether the Queue is failed or the Service is stopped depends upon how the Max Queue Errors Result setting was configured for the Queue’s Service.
For more information, see Step 8 of “Creating and Configuring a Gateway Service,”
8 (Optional) In the Out Of Service Delay box, type the duration in seconds that Gateway should wait before reattempting to execute the Queue after an error.
The default duration in seconds is 30.
9 To process file types natively without conversion, list the file type extensions separated by commas in the Additional File Types box.
If you want to save PDF files without converting them to TIFF images you must include PDF in the list. (For example if you want to save Microsoft Office 2010 Word and Excel files as well as PDF in their native file formats, enter “DOCX,XLSX,PDF” in the Additional File Types box.)
10 Specify the location of the folder where the TIF images of your Documents are located.
Click the Browse button to the right of the Image Area box to open the Browse for Folder dialog box.
In the dialog box, browse to the folder containing your image files, click the folder to select it, and then click OK.
The folder’s path now appears in the Image Area box.
11 Specify the location of the PBS file that the Queue should sample to generate Batch Fields for the Queue.
Click the Browse button to the right of the Sample box to display the Open dialog box.
In the dialog box, browse to the folder containing the Batch file to sample, click the file to select it, and then click OK.
The file path now appears in the Sample box.
12 Specify the location of the folder to which the Batch files will be copied.
If this folder does not yet exist, use Windows Explorer to create it at this time.
When your folder is ready, click the Browse button to the right of the Batch Folder box to open the Browse for Folder dialog box.

In the dialog box, browse to the folder where your Batch files will be located, click the folder to select it, and then click OK.
The folder’s path now appears in the Batch Folder box.
13 If you did not already create a “Failed” folder and a “Saved” folder in your Batch folder, then Gateway will create them automatically at this time, and will also enter the paths to these folders in the Failed Folder and Save Folder boxes.
Important: If you change the location of the Batch folder, you must also manually change the location of the Failed and Saved folders.
These will not be updated automatically.
14 In the Extension box, type the file extension of the Batch file to be imported.
The default file extension is “.sta”.
15 To convert PDF files to individual TIFF files, select true from the Convert Pdf to Tiff drop down.
To keep PDF files in their native format, select false from the Convert Pdf to Tiff drop down and make sure PDF is in the list in the Additional File Types box.
The default setting istrue.
16 In the Days To Keep Saved box, type the number of days for which files should be kept in the Saved folder before they are purged.
The default number of days is 7.
17 (Optional) If your company uses the TRANSFLO® Workflow application to control billing and payroll processes, the TRANSFLO® Import application can create a new Workflow case for each page in a Batch.
To configure this option, click the Enable Work Flow arrow, and then click the desired setting in the Enable Work Flow list.
To enable the option, click True.
To disable it, click False.

The default setting is False.
18 In the Days to keep orphan TRF files box, type the number of days that a TRF file should be held while awaiting its accompanying STA file before the TRF file is moved to the Failed folder. The default number of days is 14.
The Server Scripting Queue is a Server Queue that allows you to write custom VB Scripts so you can integrate Gateway with other systems.
The Server Scripting Queue is a Batch Processor Queue that points to an external *.vb file.
CREATING A SERVER SCRIPTING QUEUE
To create a Server Scripting Queue:
1 In the tree pane, right-click the Queues node. Point to Insert on theshortcut menu, and then clickScripting.
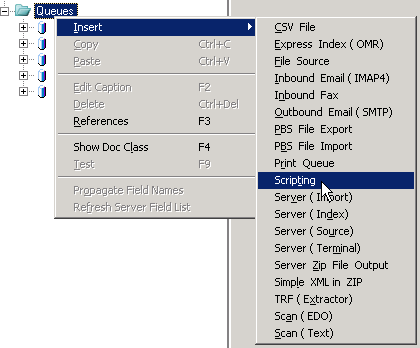
The Gateway system creates a new Server Scripting Queue with a default name,
e.g., Scripting1.
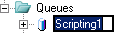
2 The default Server Scripting Queue name is already selected and ready for editing.
To rename the new Server Scripting Queue, simply type a new name.
When you are done, press [Enter].
CONFIGURING A SERVER SCRIPTING QUEUE
Now that you have created the Server Scripting Queue, you can configure its settings via the text boxes on the right side of the window.
These settings are:
-
Service
- ServiceCode
-
AllowPassThru
- NextQueue
-
Status
- PollingInterval
-
NotReadyRetries
- Out Of ServiceDelay
-
AdditionalFileTypes
- Enable WorkFlow
-
TransfloServerQueue
- Failed ServerQueue
-
MaximumBatchCount
- Script FileName
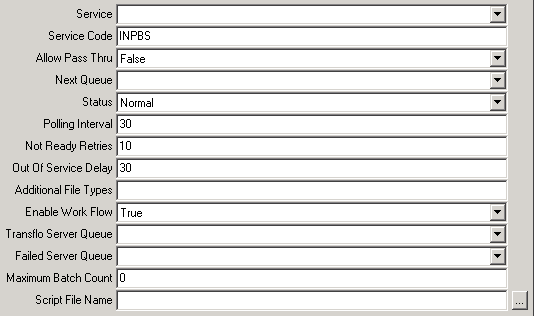
To configure the Server Scripting Queue:
1 Expand the Service drop down list, and then click the name of the Service that should be used by this Queue.
The Service list contains the Services that have been created via the Services node in the tree pane.
If the service you need is not listed, you must first create it before you can configure the queue.
See Create and Configure a Gateway Service.
2 (Optional) Gateway automatically assigns a default Service Code when a Queue is created.
The default Service Code for the Server Zip File Output Queue is “INPBS”.
To change this, type a new code in the Service Code box.
3 Click the Allow Pass Thru arrow, and then click the desired setting in the Allow Pass Thru list to specify how Gateway will handle Batches that pass all of the Queue’s requirements.
If these Batches should be passed on to the next Queue, click True.
If the Batches should instead be held at the Queue for further action, click False.
The default Allow Pass Thru setting is False.
4 Expand the Next Queue drop down, and select the name of the Queue that should follow the current one in the Queue sequence.
The Next Queue list contains the names of the other Queues that have been created for your current Gateway Document, so if the needed Queue is not listed, then you must create that Queue before you can finish configuring this one.
Remember that to avoid such a situation, it is recommended that you create Queues in reverse order of their appearance in the Queue sequence.
Note: The Server Source, CSV File, eScan (EDO), eScan (Text), Inbound Email, Inbound Fax, Simple XML in ZIP, PBS File Import, TRF (Extractor), and File Source Queues can be used only as the initial Queue in a series, so none of these Queues will ever appear in the Next Queue list.
5 Click the Status arrow, and then click the desired status setting in the Status list.
The default Status is Normal, and the Queue will function only if Normal is selected.
The three remaining settings -- TempOutOfService, Disabled, and Failed -- all serve the purpose of making the Queue nonfunctional.
The settings are differently named to denote the reason why the Queue is inactive.
-
“TempOutOfService” indicates that the Queue has been placed out of servicebyGatewaybecauseanerroroccurred.
Awarningwillbedisplayed in the Windows Event Viewer if thishappens.
-
“Disabled” can be used to disable the Queue for testing ortroubleshooting purposes, or to show that the Queue is functioning properly but is not currentlyneeded.
-
“Failed” signifies that the maximum number of restart retries hasbeen exceeded.
6 (Optional) In the Polling Interval box, type the frequency in seconds with which the Queue should check for new Batches to process.
The default polling interval in seconds is 1.
7 (Optional) In the Not Ready Retries box, type the number of attempts that Gateway should make to execute the Queue before stopping the Queue’s Service or changing the Queue’s status to Failed.
The default number of Not Ready Retries is 10.
The determination of whether the Queue is failed or the Service is stopped depends upon how the Max Queue Errors Result setting was configured for the Queue’s Service.
For more information, see Step 8 of Create and Configure a Gateway Service.
8 (Optional) In the Out Of Service Delay box, type the duration in seconds that Gateway should wait before reattempting to execute the Queue after an error.
The default duration in seconds is 30.
9 To process file types natively without conversion, list the file type extensions separated by commas in the Additional File Types box.
If you want to save PDF files without converting them to TIFF images you must include PDF in the list. (For example if you want to save Microsoft Office 2010 Word and Excel files as well as PDF in their native file formats, enter “DOCX,XLSX,PDF” in the Additional File Types box.)
10 (Optional) If your company uses the TRANSFLO® Workflow application to control billing and payroll processes, the TRANSFLO® Import application can create a new Workflow case for each page in a Batch.
To configure this option, click the Enable Work Flow arrow, and then click the desired setting in the Enable Work Flow list.
To enable the option, click True.
To disable it, click False.
The default setting is False.
11 Select the Queue to which Batch data should be passed when the Batch is successfully processed.
Click the arrow button next to the Transflo Server Queue list to expand the list, and then click the name of the desired Queue.
The list displays all Queues currently configured on your TRANSFLO® server.
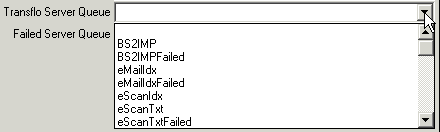
12 Select the Queue to which Batch data should be passed if the Batch cannot be processed.
Click the arrow button next to the Failed Server Queue list to expand the list, and then click the name of the desired Queue.
The list displays all Queues currently configured on your TRANSFLO® server.
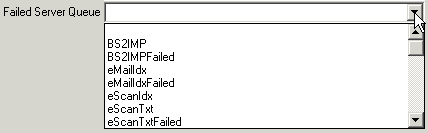
13 (Optional) In the Maximum Batch Count box, type the maximum number of Batches that can be sent to each Queue.
For example, if the Maximum Batch Count is 50, and another Queue attempts to send this Queue 55 Batches, then the first 50 Batches will be sent and Gateway will display an error message alerting you that the Batch is full.
As soon as there is room again in the Queue, the remainder of the Batches will be sent.
If you do not wish to impose a maximum number of Batches, type 0.
The default setting is 0.
14 Click the elipsis (...) button next to the Script File Name box.
The Windows Open window opens.
Navigate to the folder that contains the VB Script file that you wish to run when Batches enter this Queue.
Select the file and click the Open button.
The pathname displays in the Script File Name box.
Objects Exposed to the Server Scripting Queue
GetFieldValue
Parameteres: Batch asString
PageIndex as Integer FieldName as String
Returns: String
Description :
GetFieldValue returns the value of a Field for a specific Document in a particular Batch.
SetFieldValue
Parameters :Batch as String
PageIndex as Integer FieldName as String FieldValue as string
Returns: None
Description :
SetFieldValue writes a value for a Field in a specific Document in a particular Batch.
GetNumberOfPages
Parameters: Batch asString
Returns: Integer
Description :
GetNumberOfPages returns the number of pages in a specified Batch.
LogMessage
Parameters: Message asString
Returns: None
Description :
LogMessage writes a string to the Gateway Service log.
Server Scripting Queue Sample Code
SubMain
LogMessage>"Hello World!" PROValue = GetFieldValue(0,"PRO") 'Calculate UID value SetFieldValue 0, "UID",UIDValue
End Sub
A Server Zip File Output Queue is a Server Queue that Packages Batch images and data into a zip file that matches the TFX Batch Specfication.
The Batch data is packaged in the zip file as a simple XML file.
CREATING A SERVER ZIP FILE OUTPUT QUEUE
To create a Server Zip File Output Queue:
1 In the tree pane, right-click the Queues node. Point to Insert on theshortcut menu, and then click Server Zip File Output.
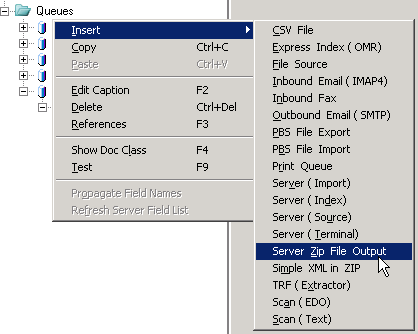
The Gateway system creates a new Server Zip File Output Queue with a default name, e.g., Server Zip File Output1.
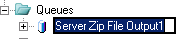
2 The default Server Zip File Output Queue name is already selected and ready for editing.
To rename the new Server Zip File Output Queue, simply type a new name.
When you are done, press [Enter].
CONFIGURING A SERVER ZIP FILE OUTPUT QUEUE
Now that you have created the Server Zip File Output Queue, you can configure its settings via the text boxes on the right side of the window.
These settings are:
-
Service
- ServiceCode
-
AllowPassThru
- NextQueue
-
Status
- PollingInterval
-
NotReadyRetries
- Out Of ServiceDelay
-
AdditionalFileTypes
- Enable WorkFlow
-
TransfloServerQueue
- Failed ServerQueue
-
BatchFolder
- ImageArea
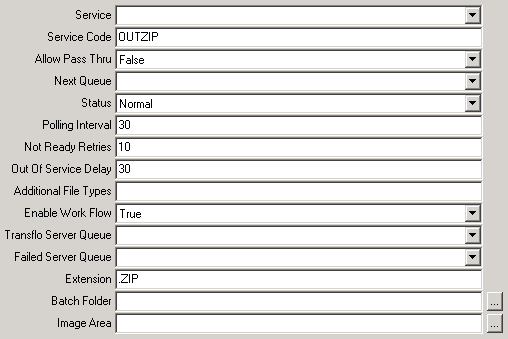
To configure the Server Zip File Output Queue:
1 Expand the Service drop down list, and then click the name of the Service that should be used by this Queue.
The Service list contains the Services that have been created via the Services node in the tree pane.
If the service you need is not listed, you must first create it before you can configure the queue.
See Create and Configure a Gateway Service.
2 (Optional) Gateway automatically assigns a default Service Code when a Queue is created.
The default Service Code for the Server Zip File Output Queue is “OUTZIP”.
To change this, type a new code in the Service Code box.
3 Click the Allow Pass Thruarrow, and then click the desired setting in the Allow Pass Thru list to specify how Gateway will handle Batches that pass all of the Queue’s requirements.
If these Batches should be passed on to the next Queue, click True.
If the Batches should instead be held at the Queue for further action, click False.
The default Allow Pass Thru setting is False.
4 Expand the Next Queue drop down, and select the name of the Queue that should follow the current one in the Queue sequence.
The Next Queue list contains the names of the other Queues that have been created for your current Gateway Document, so if the needed Queue is not listed, then you must create that Queue before you can finish configuring this one.
Remember that to avoid such a situation, it is recommended that you create Queues in reverse order of their appearance in the Queue sequence.
Note: The Server Source, CSV File, eScan (EDO), eScan (Text), Inbound Email, Inbound Fax, Simple XML in ZIP, PBS File Import, TRF (Extractor), and File Source Queues can be used only as the initial Queue in a series, so none of these Queues will ever appear in the Next Queue list.
5 Click the Status arrow, and then click the desired status setting in the Status list.
The default Status is Normal, and the Queue will function only if Normal is selected.
The three remaining settings -- TempOutOfService, Disabled, and Failed -- all serve the purpose of making the Queue nonfunctional.
The settings are differently named to denote the reason why the Queue is inactive.
-
“TempOutOfService” indicates that the Queue has been placed out of servicebyGatewaybecauseanerroroccurred.
Awarningwillbedisplayed in the Windows Event Viewer if thishappens.
-
“Disabled” can be used to disable the Queue for testing ortroubleshooting purposes, or to show that the Queue is functioning properly but is not currentlyneeded.
-
“Failed” signifies that the maximum number of restart retries hasbeen exceeded.
6 (Optional) In the Polling Interval box, type the frequency in seconds with which the Queue should check for new Batches to process.
The default polling interval in seconds is 1.
7 (Optional) In the Not Ready Retries box, type the number of attempts that Gateway should make to execute the Queue before stopping the Queue’s Service or changing the Queue’s status to Failed.
The default number of Not Ready Retries is 10.
The determination of whether the Queue is failed or the Service is stopped depends upon how the Max Queue Errors Result setting was configured for the Queue’s Service.
For more information, see Step 8 of “Creating and Configuring a Gateway Service,”
8 (Optional) In the Out Of Service Delay box, type the duration in seconds that Gateway should wait before reattempting to execute the Queue after an error.
The default duration in seconds is 30.
9 To process file types natively without conversion, list the file type extensions separated by commas in the Additional File Types box.
If you want to save PDF files without converting them to TIFF images you must include PDF in the list. (For example if you want to save Microsoft Office 2010 Word and Excel files as well as PDF in their native file formats, enter “DOCX,XLSX,PDF” in the Additional File Types box.)
10 (Optional) If your company uses the TRANSFLO® Workflow application to control billing and payroll processes, the TRANSFLO® Import application can create a new Workflow case for each page in a Batch.
To configure this option, click the Enable Work Flow arrow, and then click the desired setting in the Enable Work Flow list.
To enable the option, click True.
To disable it, click False.
The default setting is False.
11 Select the Queue to which Batch data should be passed when the Batch is successfully processed.
Click the arrow button next to the Transflo Server Queue list to expand the list, and then click the name of the desired Queue.
The list displays all Queues currently configured on your TRANSFLO® server.
12 Select the Queue to which Batch data should be passed if the Batch cannot be processed.
Click the arrow button next to the Failed Server Queue list to expand the list, and then click the name of the desired Queue.
The list displays all Queues currently configured on your TRANSFLO® server.
13 Specify the location of the folder to which the Batch files will be copied.
If this folder does not yet exist, use Windows Explorer to create it at this time.
When your folder is ready, Click the browse button to the right of the Batch Folder box to open the Browse for Folder dialog box.
In the dialog box, browse to the folder where your Batch files will be located, click the folder to select it, and then click OK.
The folder path now appears in the Batch Folder field.
Specify the location of the folder where the TIF images of your Documents are located.
Click the browse button to the right of the Image Area box to open the Browse for Folder dialog box.
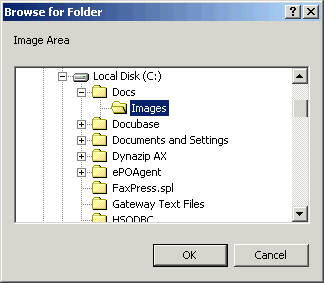
In the dialog box, browse to the folder containing your image files, click the folder to select it, and then click OK.
The folder path now appears in the Image Area box.