DMS Enterprise Gateway Fields, Queues, and Services
TRANSFLO® Gateway provides a central point of operation for managing the input and routing of documents from multiple sources. With Gateway, the administration of one application is easier than the administration of several similar applications running simultaneously. The Gateway infrastructure provides a robust, consistent run-time environment that minimizes downtime.
The list below provides a summary of the key features and benefits of your Transflo DMS Gateway implementation:
-
The Gateway application provides the following three (3) key infrastructure elements that shorten the overall development time for handling new document sources and formats:
-
fields (batch fields and DocClass fields)
-
queues
-
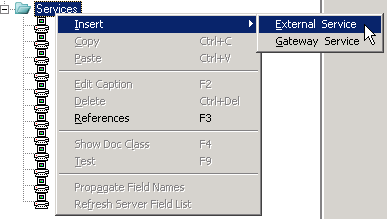
services (internal and external)
-
-
With the Transflo DMS Gateway, you can create processes that route documents through your established structure from a source to a destination. These processes, called queues, run on top of a service. Queues are able to properly accept and pass data from fields that are created and configured in Gateway.
-
Gateway can accept batch input in several different formats, such as PBS, XML, and zipped XML and CSV, and route the Batch Documents to the appropriate application, converting files along the way if necessary.
-
Bar codes on document images are recognized based on the bar code length, prefix, and position coordinates you specify.
-
A single bar code can contain multiple Field values.
-
Original Field values can be made to be overwritten by values derived either from other Fields or from the results of a SQL query.
-
Fields can be populated by a dynamic Field String Generator, which can compose a string containing elements such as a Field value, date/time stamp, sequence number, and literal string.
-
Constraints can be used to ensure that fields have data present and that it is of the right length.
Hardware requirements are based on a single system with approximately 10,000 or fewer images per day. Contact Pegasus TransTech Professional Services for requirements for systems processing higher volumes.
-
The product is not multi-threaded.
This means that only one Queue is processed at a time, but the Gateway Service can be configured with multi-process services.
-
Gateway configuration requires that a Document Class has been created in the Administration Tool or the Index Conversion Utility has been run.
-
If Queues need to use shared drive paths, the related Gateway Services will need to be configured to run under a user in the Windows Control Panel.
-
There can be only one bar code type per Field.
-
If any page of a Document does not meet the Constraint of a Queue, the entire batch will be rejected by the Queue.
-
Processor: 2 x 2.5Ghz with Dual Core
-
RAM: 3.0 GB
-
Disk Space: 500 GB
-
Screen Resolution: 1024 x 768
-
Processor: 2 x 3.0Ghz with Dual Core
-
RAM: 4GB
-
Disk Space: 750GB
-
Screen Resolution: 1024 x 768
-
Microsoft Windows® 2003 Server R2, SP2
-
Microsoft Windows® Server 2008 (x86 and x64)
The following is a list of required third-party software:
-
Microsoft SQL Server 2005 SP2
-
Microsoft SQL Server 2008
Two types of fields can be used in TRANSFLO® Gateway: DocClass fields and batch fields. DocClass fields are created at the document class level, and batch fields are created at the batch level. Batch fields are then mapped to docClass Fields. Both batch and docClass Fields have configurable settings that dictate how field values are read from batches of document image pages, and the docClass field settings can override the batch field settings.
This chapter begins by detailing the use of DocClass Fields, including how to configure a DocClass Field’s Scope; the proper use of Gateway’s included DocClass Fields; and how to create and use your own DocClass Fields. Following the DocClass Field explanation, Batch Fields are discussed and instructions are provided for creating and using these Fields. The chapter concludes with an explanation of the available types of ancillary sources, when and how to use them, and how to configure them (see Ancillary Sources for DocClass and Batch Fields).
Every batch field must be mapped to a docClass field. Multiple batch fields can be mapped to a single docClass field, and each docClass field acts as a master control over how its mapped batch fields will be applied. This is done by way of the DocClass Field’s Scope setting, which is explained in DocClass Field Scope . Several commonly used DocClass Fields are automatically created when Gateway is installed. You can also create as many custom DocClass Fields as you need.
Every DocClass Field has a configurable Scope setting, which affects how that DocClass Field is applied to individual pages in multi-page Batches.
Two Scope settings are available: Page and Batch.
-
Page scope: If a DocClass Field has a Page scope, then the value of the mapped Batch Field can be read from each page in the Batch. This means that the Field could have a different value for each page in the Batch.
-
Batch scope: If a DocClass Field has a Batch scope, then the value of the mapped Batch Field is read from the first page in the Batch and is applied as the value for all remaining pages in the Batch. This means that the Field will have the same value for every page in the Batch.
To set the scope for any DocClass Field, follow these steps:
-
Click the DocClass Field’s name in the tree pane to select it.
-
On the right side of the window, click the arrow next to the Scope list to expand the list.
-
Click the Scope, either Page or batch.

Override Batch Field Settings
Batch fields have a setting similar to scope called sticky. Like scope, it is used to determine whether a Field value will be read from only the first page of a Batch or from all pages of a Batch. A Batch Field’s Sticky setting will be applied only if the corresponding DocClass Field has a Scope setting of Page. If the DocClass Field’s Scope is set to Batch, then regardless of what the Sticky setting is, the Sticky setting will be overridden and the Field value of the first page of the Batch will be applied to the remaining pages of the Batch.
Ten (10) popular commonly-needed DocClass fields are automatically created with each new Gateway installation:
-
Default Group: If you are using Docubase as your image repository, this is the Default Security Group for the Document Class. The default Image Path Field Scope is Batch.
-
Image Path: The Image Path Field is designed to control the Scope of Batch-level Image Path Fields, which contain the paths of Document image files. The default Image Path Field Scope is Page.
-
Import Date: The Import Date Field is designed to control the Scope of Batch-level Import Date Fields, which contain the date when TRANSFLO® Import processed each Batch. The default Import Date Field Scope is Page.
-
Import Info: The Import Info Field is designed to control the Scope of Batch-level Import Info Fields, which contain the user name, machine name, and UDC date stamp recorded by TRANSFLO® Import. The default Import Info Field Scope is Page.
-
Index Date: The Index Date Field is designed to control the Scope of Batch-level Index Date Fields, which contain an index date that makes the Batch acceptable to TRANSFLO® Import. This date is added to the Batch by TRANSFLO® Index. The default Index Date Field Scope is Page.
-
Scan Date: The Scan Date Field is designed to control the Scope of Batch-level Scan Date Fields, which contain the time stamp indicating when the source Document was scanned. This time stamp is required by both TRANSFLO® Index and TRANSFLO® Import. The default Scan Date Field Scope is Page.
-
Security Index: If your image repository is Docubase, the Security Index is used to determine the security level of the Document. The default Source Field Scope is Batch.
-
Source: The Source Field is designed to control the Scope of Batch-level Source Fields, which contain the name of the application that passed each Batch into Gateway. The default Source Field Scope is Batch.
-
Source Date: The Source Date Field is designed to control the Scope of Batch-level Source Date Fields, which contain a time stamp indicating when the originating application first processed the Batch. The default Source Date Field Scope is Batch.
-
Transflo ID: The Transflo ID Field is designed to control the Scope of Batch-level Transflo ID Fields, which contain a unique identifier assigned by Gateway. The default Transflo ID Field Scope is Batch.
For each DocClass field, an identically named batch field is automatically created when the batch is sampled during configuration of most queues (see Create Batch Fields By Sampling). Each of these new batch fields is then automatically mapped to its DocClass field counterpart.
Important! These field names are reserved by Gateway. Do not use these names as TRANSFLO® server fields when you configure them in the Transflo Administration Tool. Although you can edit the names of the automatically created DocClass fields, we recommend that you do not change them.
-
Renaming the Transflo ID field prevents you from sampling any batches.
-
Renaming any other DocClass field prevents the automatic mapping of a corresponding batch field.
-
Renaming a DocClass field that already has batch fields mapped to it will invalidate those mappings.
Document class (DocClass) fields that have been added to TRANSFLO® Server in the Administration Tool can automatically be added for a document class in Gateway. This feature saves you from having to manually add these files individually.
To automatically add fields that have already been created, right-click the appropriate document class node, Fields folder, or any field in the Fields folder, and choose Refresh Server Field List in the pop-up menu.
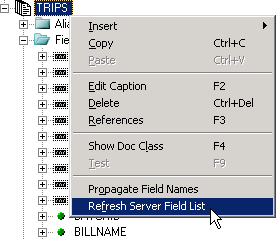
The server-created fields are now added for the document class. If these fields were added previously or other changes were made in the Administration Tool, the fields displayed in Gateway are updated.
In addition to the DocClass fields automatically created when Gateway is installed, and those that can be created automatically from server-generated fields, you can also create your own custom DocClass fields.
To create and configure a custom DocClass field, follow these steps:
-
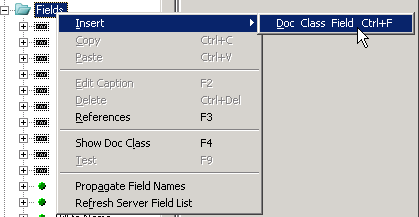
In the tree pane, right-click the Fields node and choose Insert, Doc Class Field or press Ctrl+F.
-
Gateway creates a new DocClass field with a default name such as Doc Class Field1.

-
To rename the new DocClass field, enter a new name and press Enter. If the name that you entered matches the name of a DocClass field that has been configured in the Administration Tool for the current document class, a green dot appears next to the DocClass field name. If the field name does not exist for the current document class in the Administration Tool, a black dot appears, indicating that the DocClass Field name is not valid.
-
The Scope setting for the DocClass Field is shown on the right side of the window. To set the DocClass Field scope, click the Scope arrow to expand the Scope list, and then click the desired setting, either Page or batch.

The default Scope is Page. For more information on these settings, see DocClass Field Scope .
-
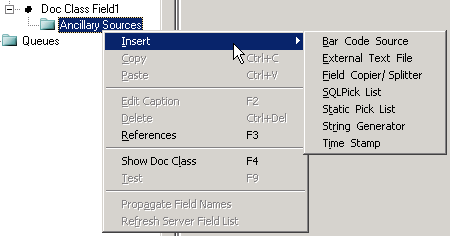
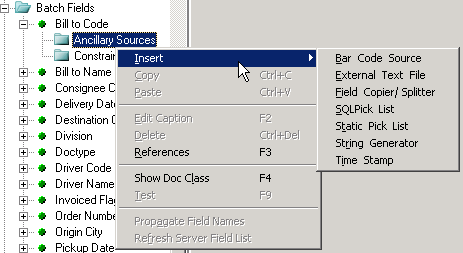
(Optional) Below the DocClass Field name in the tree pane is the Ancillary Sources node. An Ancillary Source is used to replace a Field’s current value with a new one. The new value’s type is determined by the type of Ancillary Source selected and how that Ancillary Source is configured.
-
To configure an Ancillary Source for the DocClass Field, right-click the Ancillary Sources node, point to Insert on the shortcut menu, and then click the name of the Ancillary Source that you wish to add to the DocClass Field.
-
Configure the settings for the ancillary source you selected. See Ancillary Sources for DocClass and Batch Fields.
-
-
You have now created and configured a DocClass field and can map batch fields to it.
An alias can be thought of as a document class embedded in another document class for the purpose of sharing DocClass fields. For example, you can use the same DocClass fields for two different document classes without having to create each of those DocClass fields twice.
To create a new alias, follow these steps:
-
Right-click the Aliases node in the tree pane on the left and choose Insert, Alias.
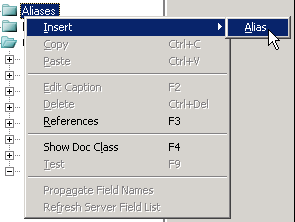
Gateway creates a new Alias with a default name, e.g., Alias1.
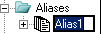
2. The default Alias name is already selected and ready for editing.
To rename the new Alias, simply type a new name.
When you are done, press [Enter].
The procedures for creating Queues and Batch Fields for an Alias are identical to those followed for a regular Document Class.
The Show Doc Class feature provides an overview of every Queue, DocClass Field, and Batch Field in the current Document Class.
-
To access the Show Doc Class feature, click any Doc Class node in the tree pane.
-
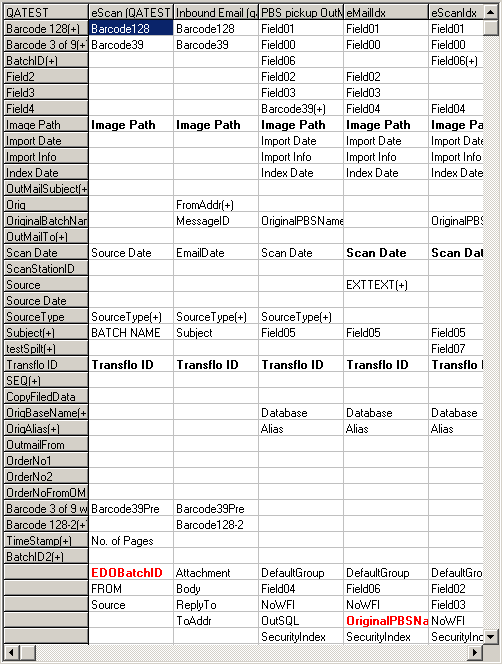
The Show Doc Class table appears in the right pane as shown below.

-
The Document Class name is shown in the top-left heading cell.
-
DocClass Fields are shown in the first column (the gray column).
-
Queues are shown in the heading row (the gray row).
-
Batch Fields are displayed in the column of the Queue for which they have been created. If a Batch Field has been mapped to a DocClass Field, it is displayed in the row of that DocClass Field. Any Batch Fields that have not been mapped are listed as the last entries in the column, below the line of the last DocClass Field.
-
If an Ancillary Source has been assigned to a Batch Field or a DocClass Field, the Field name is followed by a plus sign in parentheses “(+)”, e.g., SourceType(+).
-
If a Constraint has been assigned to a Batch Field, the Batch Field’s name has bold formatting. Additionally, if the Batch Field is not mapped to a DocClass Field, its name is displayed in red.
-
In addition to providing an overview of the Document Class, the Show Doc Class table can also be used to map and unmap Batch Fields, add Ancillary Sources, add Constraints, and view usage reports about the latter two.
-
To map a Batch Field to a DocClass Field, click the Batch Field name and drag it to the cell in the row of the desired DocClass Field. Alternatively, you can right-click the Batch Field name, point to Map Field on the shortcut menu, and then click the name of the DocClass Field.
-
To unmap a Batch Field, you can either click the Batch Field name and drag it down below the line of the final DocClass Field, or you can right-click the Batch Field name and click Unmap Field on the shortcut menu.
-
To add an Ancillary Source to a Batch Field or DocClass Field, right-click the Field name, point to Field Sources on the shortcut menu, point to Add, and then click the name of the desired Ancillary Source. In the window that appears, configure the Ancillary Source.
-
To view a report of all Ancillary Sources for a particular DocClass Field, right-click anywhere in the DocClass Field’s row, point to Field Sources on the shortcut menu, and click Report. A report window is displayed showing all Ancillary Sources for that DocClass Field, be they assigned directly to the DocClass Field, or to any of the mapped Batch Fields. The window shows the associated Template for each DocClass Field or Batch Field, the type of Ancillary Source assigned, and if the Ancillary Source has been configured to overwrite the DocClass Field or Batch Field value.
-
To add a constraint to a Batch Field, right-click the Batch Field name, point to Queue Constraints on the shortcut menu, point to Add, and then click the name of the desired Constraint. In the window that appears, configure the Constraint.
-
To view a report of all Constraints that have been added to Batch Fields in a Queue, right-click anywhere in that Queue’s column, point to Queue Constraints on the shortcut menu, and then click Report.
A report window is displayed showing which Batch Fields have a constraint, the type of Constraint, and the Action configured for that Constraint.
Batch Fields exist at the Queue level and are mapped to DocClass Fields, which exist at the DocClass level. Batch Fields serve the same main purpose as DocClass Fields: they both dictate whether Field values should be read from all pages in a Batch or from only the first page.
The difference between the two types of Fields lies in the level of control. A Batch Field’s settings apply only to a single Field in a single Queue, and those settings can be overridden by the DocClass Field to which the Batch Field is mapped.
Batch Fields are created in two ways.
-
The first way is an automated method called “sampling,” which can be done with certain types of Queues.
-
The second way is to manually create the Batch Field.
After you create a batch field, you must configure it. You can also create special parameters for the field known as constraints to determine its allowable values. To learn more, see Ancillary Sources for DocClass and Batch Fields.
For certain types of Queues, Batch Fields can be created via a method called “sampling,” in which Gateway automatically generates Batch Fields corresponding to keys found in a sample Batch file of your choosing. This sample Batch file is selected when you configure settings for the Queue, and the Batch must have been sampled before the Queue can successfully operate.
Note: Some Queues do not require you to sample the Batch when configuring them, because they come with a built-in sample file that is automatically loaded when the Queue is created. Certain other Queues do not make use of a sample file, so the topic of sampling does not apply to them.
The Queues requiring sample Batch files are:
-
CSV File
-
eScan (Text)
-
Express Index (OMR)
-
PBS File Export
-
PBS File Import
-
Simple XML in ZIP
-
TRF (Extractor)
The type of sample Batch file required varies by Queue, so you should refer to the appropriate section in Queues, for instructions on sampling the Batch for a specific Queue. Upon sampling the Batch file, a list of new Batch Fields is added beneath the Queue’s Batch Fields node in the tree pane. Each Batch Field is named after its corresponding key in the sample file. Each sampled Batch Field is denoted by a black dot icon next to the Batch Field name.
Every Batch Field created by sampling the Batch automatically has a “Required” Constraint assigned to it, making it a required Field. To learn more about constraints, see Ancillary Sources for DocClass and Batch Fields.
Sampling the Batch only creates Batch Fields; it does not configure them. For instructions on the latter, see Configuring Batch Fields .
In addition to creating Batch Files by sampling the Batch, there may be times when you need to create a User-Defined Batch Field.
For example, the source application that passed the Batch into Gateway might not include a Field that is required by the application that will receive the file from Gateway.
Before you can create a User-Defined Batch Field, you already must have created the Queue in which it will reside.
Refer to Chapter 5, “Queues,” for instructions on Queue creation.
To create and configure a new User-Defined Batch Field:
-
In the tree pane, click
 Expand next to the queue node under your DocClass node. This expands the next branch of the tree beyond the Queue node.
 -
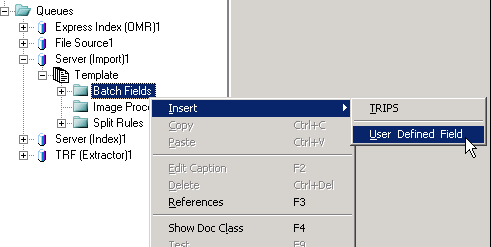
Use this same method to expand the node of the Queue you created, and then expand the Template node below your Queue. The Batch Fields node is now visible in the tree, below the Template node.
-
Right-click the Batch Fields node, point to Insert on the shortcut menu, and then click UserDefinedField.

Gateway creates a new Batch Field with a generic name, e.g., UserDefinedField1.

-
The default Batch Field name is already selected and ready for editing. To rename the new Batch Field, simply type a new name. When you are done, press [Enter].
-
If the name that you entered matches the name of a DocClass Field that has been configured in TRANSFLO® Administration Tool for the current Document Class, a green dot appears next to the Batch Field name.
-
If the Field name does not match the name of a DocClass Field, a red dot appears.
-
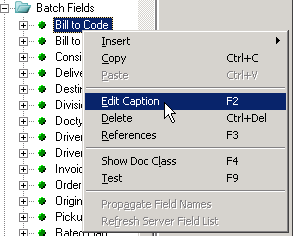
The Batch Field can be renamed in the future if necessary. To do this, right-click the Batch Field name, click Edit Caption on the shortcut menu, and then modify the Batch Field name as necessary.

-

Once you have created a User-Defined Batch Field, you must configure it.
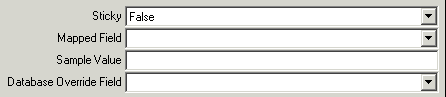
After you create the Batch Fields for a Queue, you must configure them before the Queue can be used. A Batch Field’s settings are configured via the text boxes on the right side of the window. These settings are Sticky, Mapped Field, Sample Value, and Database Override Field.
1. The Sticky function records the value of the Field on the first page of the Batch and applies that same value on all remaining pages of the Batch.
This function is toggled on or off by setting its value to True or False.
To set the value, click the arrow button next to the Sticky list to expand the list, and then click either True or False.
The default value is False.

The Sticky function can be overridden by the DocClass Field to which the Batch Field is mapped.
Each DocClass Field has a Scope setting, and if that Scope setting is Batch, then the Batch Field’s Sticky setting will not be considered.
This is because the DocClass Field’s setting of Batch dictates that the same value will be applied to the Field throughout the entire Batch, regardless of the Sticky setting in any mapped Batch Field.
Conversely, if a DocClass Field has a Scope setting of Page, then the determination of how to process the Field is made at the Queue level, by the Batch Field’s Sticky setting.
Scope and Sticky can both be thought of as restrictions.
If the Field is not restricted at the DocClass level (i.e., Scope is not set to Batch), then the decision is passed to the Queue level, where the Sticky setting makes the determination.
2. The Mapped Field is the DocClass Field to which this Batch Field should be mapped.
To set the Mapped Field, click the arrow button next to the Mapped Field list to expand the list, and then click the desired DocClass Field.
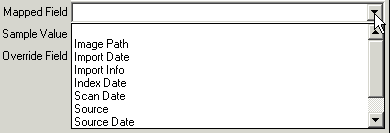
The Mapped Field list displays all DocClass Fields that have been created in Gateway.
Therefore, if the DocClass Field you need is not in the list, then you must create it before continuing.
For instructions on creating a DocClass Field, see “Adding Custom DocClass Fields”
3. (Optional) The Sample Value is an example of the type of data string that the Batch Field will contain.
In the Sample Value box, type a sample string as a reference of the type of data contained in this Field.
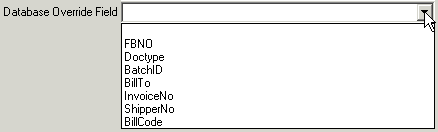
4. (Optional) The Database Override Field feature allows you to override the Field mapping specified in the Mapped Field list.
To set the Database Override Field, click the arrow button next to the Database Override Field list to expand the list, and then click the name of the desired Field.
5. (Optional) - Below the Batch Field name in the tree pane is its Ancillary Sources node.
An Ancillary Source is used to replace a Field’s current value with a new one.
The new value’s type is determined by the type of Ancillary Source selected and how that Ancillary Source is configured.
Ancillary Sources are configured only as needed, so this step is optional.
To configure an Ancillary Source for the Batch Field, right-click the Ancillary Sources node, point to Insert on the shortcut menu, and then click the name of the Ancillary Source that you wish to add to the Batch Field.
Configure the settings for the Ancillary Source you selected.
6. (Optional) - Below the Batch Field’s Ancillary Sources node is the Constraints node.
Constraints are requirements imposed upon data in the Queue.
To learn more about constraints, see Ancillary Sources for DocClass and Batch Fields.
It is not required that you configure Constraints for a Batch Field, so this step is optional.
Do note, though, that any Batch Field created by sampling the Batch is automatically assigned a Constraint called Required, which means that it is a required Field.
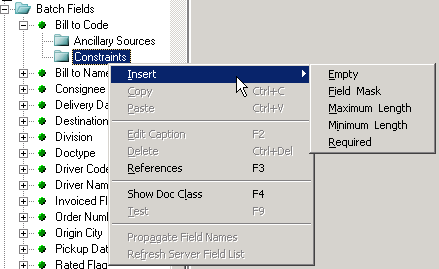
To add a Constraint to the Batch Field, right-click the Constraints node, point to Insert on the shortcut menu, and then click the name of the desired Constraint.
Configure the settings for the Constraint you added.
Each Batch Field can have multiple Constraints, so continue adding Constraints to the Batch Field as necessary.
Continue configuring Batch Fields until you have configured all Batch Fields in the Queue.
Constraints are optional rules imposed upon individual Batch Fields. These rules define a Batch Field’s basic data requirements, and they determine what action will be taken should a Batch Field contain data that does not meet these requirements.
There are five Constraints available:
-
Empty
-
Field Mask
-
Maximum Length
-
Minimum Length
-
Required
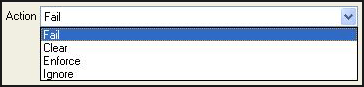
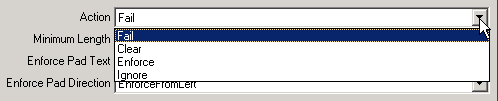
The most common of these is Required, because every Batch Field created by sampling the Batch is automatically assigned a Required Constraint. Each Constraint can be configured to perform one of four (4) possible actions if its requirements are not met. These actions are described below:
-
Fail: The Queue refuses the Batch.
-
Clear: If the Constraint is not met, the Batch Field is cleared.
-
Enforce: A value that meets the Constraint is generated for the Batch Field.
-
Ignore: The constraint is ignored. This action allows you to disable a Constraint without having to delete it.
One of each Constraint can be assigned to a Batch Field at the same time. However, depending on which action is selected for each Constraint, it is possible that conflicts could exist between two or more Constraints. Take this into consideration when assigning their actions.
The five Constraints, along with how to create and configure them, are explained in the following sections.
Empty
The Empty Constraint requires that a Batch Field be empty.
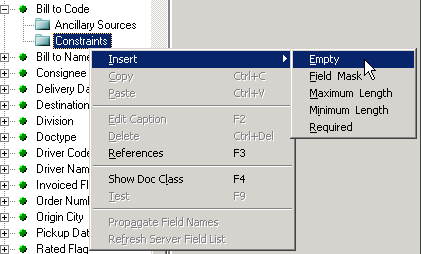
To add an Empty Constraint to a Batch Field, under the Batch Field’s name in the tree pane, right-click the Constraints node.
On the shortcut menu, point to Insert, and then click Empty.
On the right side of the window, click the Action arrow, and then click the desired action in the list.
Field Mask
The Field Mask Constraint requires that the value of a Batch Field match a specific mask format.
To add a Field Mask to a Batch Field, under the Batch Field’s name in the tree pane, right-click the Constraints node.
On the shortcut menu, point to Insert, and then click Field Mask.
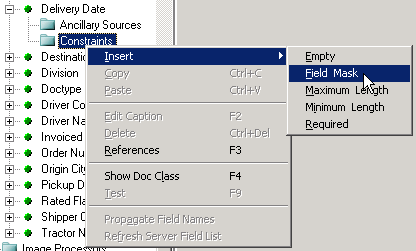
On the right side of the window, click the Action arrow, and then click the desired action in the list.

Next, click the Mask Type arrow, and then click the desired mask type in the list.
The available mask types are AlphaOnly (A-Z, upper- or lowercase, no symbols), NumericOnly (0-9), and AlphaNumeric (combined rules for AlphaOnly and NumericOnly).

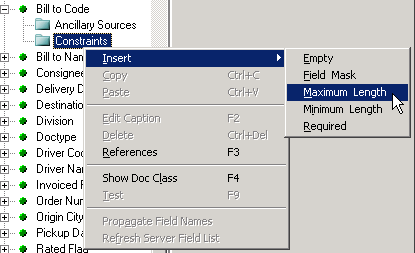
Maximum Length
The Maximum Length Constraint is used to prevent a Batch Field’s value from being too long.
The Batch Field is required to have a value shorter than or equal to the specified maximum length.
To add a Maximum Length Constraint to a Batch Field, under the Batch Field’s name in the tree pane, right-click the Constraints node.
On the shortcut menu, point to Insert, and then click Maximum Length.
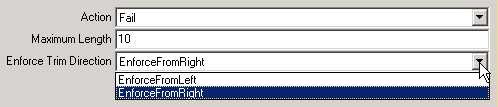
On the right side of the window, click the Action arrow, and then click the desired action in the list.

After setting the action for the Constraint, click in the Maximum Length box and type the required length for this Batch Field’s value.
The default maximum length is 1.
In the Enforce Trim Direction drop-down select an enforce trim direction rule.
The available rules are Enforce From Left and Enflorce From Right.
If the string that is to be written to the Batch Field is longer than the Maximum Length and the Enforce Action is selected, Gateway will trim the string based on the selected rule.
If Enforce From Left is selected, the characters on the left side of the string that exceed the Maximum Length will be removed.
If Enflorce From Right is selected, the characters on the right side of the string that exceed the Maximum Length will be removed.
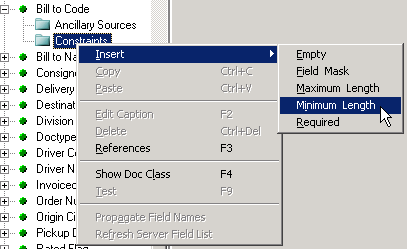
Minimum Length
The Minimum Length Constraint sets a bottom threshold for the number of characters in a Batch Field.
The Batch Field is required to have a value longer than or equal to the specified minimum length.
To add a Minimum Length Constraint to a Batch Field, under the Batch Field’s name in the tree pane, right-click the Constraints node.
On the shortcut menu, point to Insert, and then click Minimum Length.
On the right side of the window, click the Action arrow, and then click the desired action in the list.
After setting the action for the Constraint, click in the Minimum Length box and type the required length for this Batch Field’s value.
The default minimum length is 1.
In the Enforce Pad Text box enter the text that will be used to pad the Batch Field if the text that is to be written to the Batch Field is shorter than the Minimum Length.
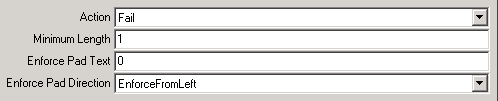
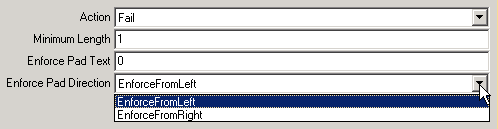
In the Enforce Pad Direction drop down select an enforce pad direction rule.
The available rules are Enforce From Left and Enflorce From Right.
If the text that is to be written to the Batch Field is shorter than the Minimum Length and the Enforce Action is selected, Gateway will pad the Batch Field based on the selected rule.
If Enforce From Left is selected, the characters on the left side of the Batch Field will be padded with text from the Enforce Pad Text value, so that the required Minimum Length is met.
If Enflorce From Rightis selected, the characters on the left side of the Batch Field will be padded with text from the Enforce Pad Text value, so that the required Minimum Length is met.
If Enforce Pad Text is empty, the Batch Field will be padded with spaces.
Required
The Required Constraint is used to prevent a Batch Field from being empty.
The Batch Field is required to have a value.
Since every Batch Field created by sampling the Batch already has a Required Constraint assigned to it, you will only ever need to assign a Required Constraint to a User-Defined Batch Field.
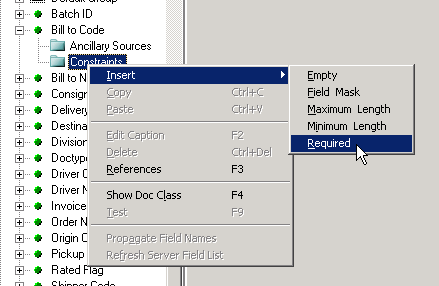
To add a Required Constraint, under the User- Defined Batch Field’s name in the tree pane, right-click the Constraints node.
On the shortcut menu, point to Insert, and then click Required.
Note: Even though you do not need to assign a Required Constraint to a Batch Field generated by sampling the Batch, you must still configure its Action.
On the right side of the window, click the Action arrow, and then click an action in the list. The most common action used with the Required Constraint is Fail.
Queues are individual processes in Gateway. When ordered in the proper sequence, queues route documents (in the form of pages) from one application to another. Most Queues perform necessary tasks such as importing pages into Gateway, re-shaping and adding data, reading bar code data, and converting files into the proper format for use by other applications.
Each Queue that executes a task runs atop a Gateway Service, which is actually a Windows service. Gateway, then, does not actually control Queues, but rather provides the means to configure them, and also provides the framework within which they operate.
Before you begin creating a sequence of Queues to perform a particular overall task, you should determine which Queues are required to execute specific assignments, and the proper order in which to arrange the Queues so that the larger task is completed successfully. When Queues are configured, some of their settings are dependent upon the next Queue in the process. For this reason, you should create and configure Queues in reverse of the order in which they will be executed. This will allow you to configure an individual Queue straight through from start to finish, instead of having to pause while configuring that Queue, create the next Queue, and then return to the first Queue to finish configuring it.
Gateway supports importing and processing files in their native file format without converting them to images. These file types are configured in the Queue’s Additional File Types property. When configuring these, make sure that all Queues that are configured in a sequence have the same file types configured. If this is not configured consistently, your Batches will potentially fail.
Queues are available in three (3) main categories: standard, server, and add-on.
-
Standard Queues:The following five (5) standard queues are included with every Gateway installation; collectively, these queues allow Gateway to interact with other TRANSFLO® applications:
-
Server (Source) Queue
-
Server (Import) Queue
-
Server (Index) Queue
-
Server (Terminal) Queue
-
Print Queue
-
-
Server Queues:TRANSFLO® Server Queues are custom queues used by the TRANSFLO® Server and Client applications and are generally edited in the TRANSFLO® Administration Tool. Gateway provides a means to view these Queues without having to open the TRANSFLO® Administration Tool. Gateway also allows you to create new TRANSFLO® Server Queues.
-
Add-On Queues: Additional queues can be purchased separately. See Install Add-On Queues.
The Server Source Queue is used to receive Batch files and pages into Gateway so that they can be processed by other Queues. This input comes from other applications such as Batch Scan, TRANSFLO® Express, Field Imaging, Terminal Scan, and Rendition Print. It is used as an initial Queue, the first Queue in a string of Queues.
To create and configure a Server Source Queue:
-
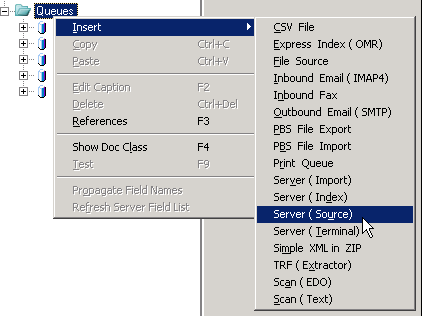
In the tree pane, right-click the Queues node and choose Insert, Server (Source).

-
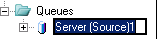
The Gateway system creates a new Server Source Queue with a default name, e.g., Server (Source)1.

-
The default Server Source Queue name is already selected and ready for editing. To rename the new Server Source Queue, simply type a new name and press Enter.
-
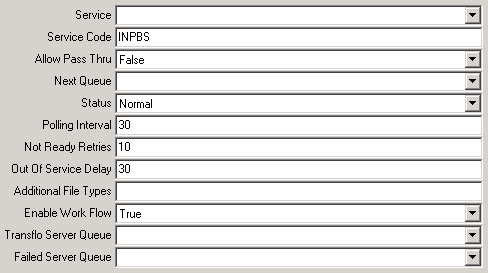
Configure the following settings:
-
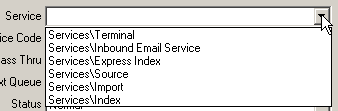
Service: The drop-down list contains the services that have been created in the Services node in the tree pane. Select the service that should be used by this queue.

If the Service you need is not listed, then you must first create it before you can configure the Queue. See Creating and Configuring a Gateway Service for more information.
-
Service Code: Gateway automatically assigns a default Service Code when a Queue is created. The default Service Code for the Server Source Queue is “INPBS”, the same Service Code used by the Server Terminal Queue and the PBS Import Queue. To change this setting, type a new code in the Service Code box.
-
Allow Pass Thru: Click the Allow Pass Thru arrow, and then click the desired setting in the Allow Pass Thru list to specify how Gateway will handle Batches that pass all of the Queue’s requirements. If these Batches should be passed on to the next Queue, click True. If the Batches should instead be held at the Queue for further action, click False. The default Allow Pass Thru setting is False.

-
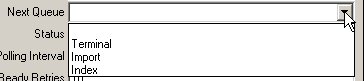
Next Queue: Click the Next Queue arrow to expand the Next Queue list, and then click the name of the Queue that should follow the current one in the Queue sequence.

The Next Queue list contains the names of the other Queues that have been created for the current Gateway Customer, so if the needed Queue is not listed, then you must create that Queue before you can finish configuring this one. Remember that to avoid such a situation, it is recommended that you create Queues in reverse order of their appearance in the Queue sequence.
The Server Source, CSV File, eScan (EDO), eScan (Text), Inbound Email, Inbound Fax, Simple XML in ZIP, PBS File Import, TRF (Extractor), and File Source Queues can be used only as the initial Queue in a series, so none of these Queues will ever appear in the Next Queue list.
-
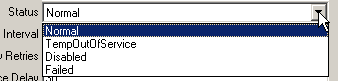
Status: Select a status setting in the Status list. The default Status is Normal, and the Queue will function only if Normal is selected.

The three remaining settings all serve the purpose of making the Queue nonfunctional. The settings denote the reason why the Queue is inactive.
-
TempOutOfService: indicates that the Queue has been placed out of service by Gateway because an error occurred. A warning will be displayed in the Windows Event Viewer if this happens.
-
Disabled: can be used to disable the Queue for testing or troubleshooting purposes, or to show that the Queue is functioning properly but is not currently needed.
-
Failed: signifies that the maximum number of restart retries has been exceeded.
-
-
Polling Interval: Enter the frequency in seconds with which the Queue should check for new Batches to process. The default polling interval in seconds is 30.
-
Not Ready Retries: Enter the number of attempts that Gateway should make to execute the Queue before stopping the Queue’s Service or changing the Queue’s status to Failed. The default number of Not Ready Retries is 10. The determination of whether the Queue is failed or the Service is stopped depends upon how the Max Queue Errors Result setting was configured for the Queue’s Service.
-
Out of Service Delay: Enter the delay in seconds (30 is the default) for a short pause before determining whether a service is down.
-
Additional File Types: To process file types natively without conversion, list the file type extensions separated by commas in the Additional File Types box. If you want to save PDF files without converting them to TIFF images you must include PDF in the list. (For example if you want to save Microsoft Office 2010 Word and Excel files as well as PDF in their native file formats, enter “DOCX,XLSX,PDF” in the Additional File Types box.)
-
Enable Work Flow: If your company uses the TRANSFLO® Workflow application to control billing and payroll processes, the TRANSFLO® Import application can create a new Workflow case for each page in a Batch. To configure this option, click the arrow next to the Enable Work Flow list to expand the list, and then click the desired setting. To enable the option, click True. To disable it, click False. The default setting is False.
-
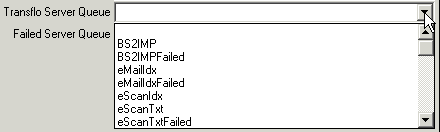
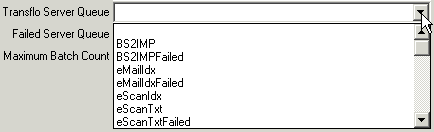
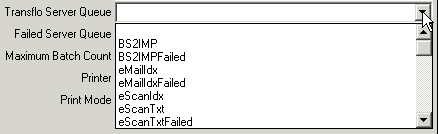
Transflo Server Queue: Select the Queue to which Batch data should be passed when the Batch is successfully processed. Click the arrow button next to the Transflo Server Queue list to expand the list, and then click the name of the desired Queue. The list displays all Queues currently configured on your TRANSFLO® server.
-
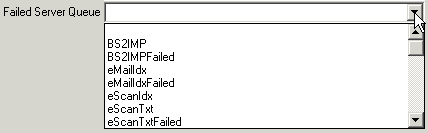
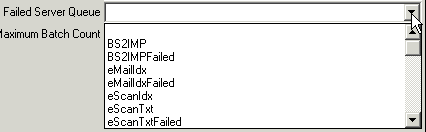
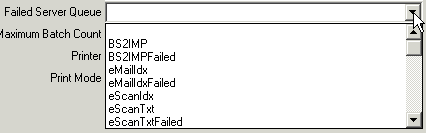
Failed Server Queue: Select the Queue to which Batch data should be passed if the Batch cannot be processed. Click the arrow button next to the Failed Server Queue list to expand the list, and then click the name of the desired Queue. The list displays all Queues currently configured on your TRANSFLO® server.

-
-
Click Save.
The Server Import Queue is used after the Server Source Queue to prepare data for TRANSFLO® Import.
To create and configure a Server Import Queue:
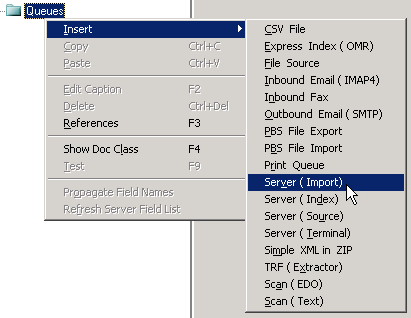
1. In the tree pane, right-click the Queues node.
Point to Insert on the shortcut menu, and then click Server (Import).
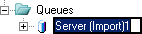
The Gateway system creates a new Server Import Queue with a default name,
e.g., Server (Import)1.
2. The default Server Import Queue name is already selected and ready for editing.
To rename the new Server Import Queue, simply type a new name.
When you are done, press [Enter].
Configure a Server Import Queue
Now that you have created the Server Import Queue, you can configure its settings. via the text boxes on the right side of the window.
These settings are:
-
Service
- Service Code
-
Allow Pass Thru
- Next Queue
-
Status
- Polling Interval
-
Not Ready Retries
- Out of Service Delay
-
Additional File Types
- Enable Work Flow
-
Transflo Server Queue
- Failed Server Queue
-
Maximum Batch Count

To configure the Server Import Queue:
1. Click the Service arrow to expand the Service list, and then click the name of the Service that should be used by this Queue.
The Service list contains the Services that have been created via the Services node in the tree pane.
If the Service you need is not listed, then you must first create it before you can configure the Queue.
See Creating and Configuring a Gateway Service for more information.
2. (Optional) Gateway automatically assigns a default Service Code when a Queue is created.
The default Service Code for the Server Import Queue is IMPORT.
To change this, type a new code in the Service Code box.
3. Click the Allow Pass Thru arrow, and then click the desired setting in the Allow Pass Thru list to specify how Gateway will handle Batches that pass all of the Queue’s requirements.
If these Batches should be passed on to the next Queue, click True.
If the Batches should instead be held at the Queue for further action, click False.

The default Allow Pass Thru setting is False.
4. Click the Next Queue arrow to expand the Next Queue list, and then click the name of the Queue that should follow the current one in the Queue sequence.

The Next Queue list contains the names of the other Queues that have been created for the current Gateway Customer, so if the needed Queue is not listed, then you must create that Queue before you can finish configuring this one.
Remember that to avoid such a situation, it is recommended that you create Queues in reverse order of their appearance in the Queue sequence.
Note: The Server Source, CSV File, eScan (EDO), eScan (Text), Inbound Email, Inbound Fax, Simple XML in ZIP, PBS File Import, TRF (Extractor), and File Source Queues can be used only as the initial Queue in a series, so none of these Queues will ever appear in the Next Queue list.
5. (Optional) Click the Status arrow, and then click the desired status setting in the Status list.
The default Status is Normal, and the Queue will function only if Normal is selected.
The three remaining settings -- TempOutOfService, Disabled, and Failed -- all serve the purpose of making the Queue nonfunctional.
The settings are differently named to denote the reason why the Queue is inactive.
-
“TempOutOfService” indicates that the Queue has been placed out of service by Gateway because an error occurred.
A warning will be displayed in the Windows Event Viewer if this happens.
-
“Disabled” can be used to disable the Queue for testing or troubleshooting purposes, or to show that the Queue is functioning properly but is not currently needed.
-
“Failed” signifies that the maximum number of restart retries has been exceeded.
6. (Optional) In the Polling Interval box, type the frequency in seconds with which the Queue should check for new Batches to process.
The default polling interval in seconds is 30.
7. (Optional) In the Not Ready Retries box, type the number of attempts that Gateway should make to execute the Queue before stopping the Queue’s Service or changing the Queue’s status to Failed.
The default number of Not Ready Retries is 10.
The determination of whether the Queue is failed or the Service is stopped depends upon how the Max Queue Errors Result setting was configured for the Queue’s Service.
For more information, see step 8 of Creating and Configuring a Gateway Service
8. (Optional) In the box, type the duration in seconds that Gateway should wait before reattempting to execute the Queue after an error.
The default duration in seconds is 30.
9. To process file types natively without conversion, list the file type extensions separated by commas in the Additional File Types box.
If you want to save PDF files without converting them to TIFF images you must include PDF in the list. (For example if you want to save Microsoft Office 2010 Word and Excel files as well as PDF in their native file formats, enter “DOCX,XLSX,PDF” in the Additional File Types box.)
10. (Optional) If your company uses the TRANSFLO® Workflow application to control billing and payroll processes, the TRANSFLO® Import application can create a new Workflow case for each page in a Batch.
To configure this option, click the Enable Work Flow arrow, and then click the desired setting in the Enable Work Flow list.
To enable the option, click True.
To disable it, click False.

The default setting is False.
11. Select the Queue to which Batch data should be passed when the Batch is successfully processed.
Click the arrow button next to the Transflo Server Queue list to expand the list, and then click the name of the desired Queue.
The list displays all Queues currently configured on your TRANSFLO® server.
12. Select the Queue to which Batch data should be passed if the Batch cannot be processed.
Click the arrow button next to the Failed Server Queue list to expand the list, and then click the name of the desired Queue.
The list displays all Queues currently configured on your TRANSFLO® server.
13. (Optional) In the Maximum Batch Count box, type the maximum number of Batches that can be sent to each Queue.
For example, if the Maximum Batch Count is 50, and another Queue attempts to send this Queue 55 Batches, then the first 50 Batches will be sent and Gateway will display an error message alerting you that the Batch is full.
As soon as there is room again in the Queue, the remainder of the Batches will be sent.
If you do not wish to impose a maximum number of Batches, type 0.
The default setting is 0.
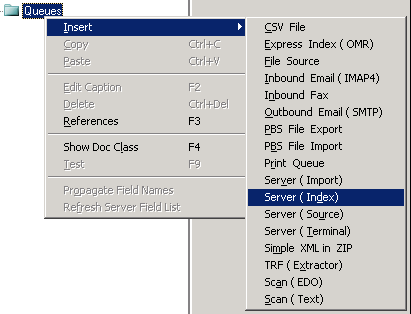
The Server Index Queue is used after the Server Source Queue to prepare data for TRANSFLO® Index.
To create and configure a Server Index Queue:
1. In the tree pane, right-click the Queues node.
Point to Insert on the shortcut menu, and then click Server (Index).
The Gateway system creates a new Server Index Queue with a default name,
e.g., Server (Index)1.
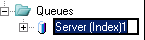
2. The default Server Index Queue name is already selected and ready for editing.
To rename the new Server Index Queue, simply type a new name.
When you are done, press [Enter].
Configuring a Server Index Queue
Now that you have created the Server Index Queue, you can configure its settings via the text boxes on the right side of the window.
These settings are:
-
Service
- Service Code
-
Allow Pass Thru
- Next Queue
-
Status
- Polling Interval
-
Not Ready Retries
- Out of Service Delay
-
Additional File Types
- Enable Work Flow
-
Transflo Server Queue
- Failed Server Queue
-
Maximum Batch Count
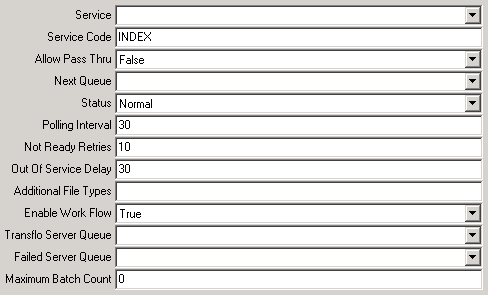
To configure the Server Index Queue:
1. Click the Service arrow to expand the Service list, and then click the name of the Service that should be used by this Queue.
The Service list contains the Services that have been created via the Services node in the tree pane.
If the Service you need is not listed, then you must first create it before you can configure the Queue.
See “Creating and Configuring a Gateway Service” for more information.
2. (Optional) Gateway automatically assigns a default Service Code when a Queue is created.
The default Service Code for the Server Index Queue is “INDEX”.
To change this, type a new code in the Service Code box.
3. Click the Allow Pass Thru arrow, and then click the desired setting in the Allow Pass Thru list to specify how Gateway will handle Batches that pass all of the Queue’s requirements.
If these Batches should be passed on to the next Queue, click True.
If the Batches should instead be held at the Queue for further action, click False.
The default Allow Pass Thru setting is False.
4. Click the Next Queue arrow to expand the Next Queue list, and then click the name of the Queue that should follow the current one in the Queue sequence.

The Next Queue list contains the names of the other Queues that have been created for your current Gateway Document, so if the needed Queue is not listed, then you must create that Queue before you can finish configuring this one.
Remember that to avoid such a situation, it is recommended that you create Queues in reverse order of their appearance in the Queue sequence.
Note: The Server Source, CSV File, eScan (EDO), eScan (Text), Inbound Email, Inbound Fax, Simple XML in ZIP, PBS File Import, TRF (Extractor), and File Source Queues can be used only as the initial Queue in a series, so none of these Queues will ever appear in the Next Queue list.
5. (Optional) Click the Status arrow, and then click the desired status setting in the Status list.
The default Status is Normal, and the Queue will function only if Normal is selected.
The three remaining settings -- TempOutOfService, Disabled, and Failed -- all serve the purpose of making the Queue nonfunctional.
The settings are differently named to denote the reason why the Queue is inactive.
-
“TempOutOfService” indicates that the Queue has been placed out of service by Gateway because an error occurred.
A warning will be displayed in the Windows Event Viewer if this happens.
-
“Disabled” can be used to disable the Queue for testing or troubleshooting purposes, or to show that the Queue is functioning properly but is not currently needed.
-
“Failed” signifies that the maximum number of restart retries has been exceeded.
6. (Optional) In the Polling Interval box, type the frequency in seconds with which the Queue should check for new Batches to process.
The default polling interval in seconds is 30.
7. (Optional) In the Not Ready Retries box, type the number of attempts that Gateway should make to execute the Queue before stopping the Queue’s Service or changing the Queue’s status to Failed.
The default number of Not Ready Retries is 10.
The determination of whether the Queue is failed or the Service is stopped depends upon how the Max Queue Errors Result setting was configured for the Queue’s Service.
For more information, see Step 8 “Creating and Configuring a Gateway Service”
8. (Optional) In the Out Of Service Delay box, type the duration in seconds that Gateway should wait before reattempting to execute the Queue after an error.
The default duration in seconds is 30.
9. To process file types natively without conversion, list the file type extensions separated by commas in the Additional File Types box.
If you want to save PDF files without converting them to TIFF images you must include PDF in the list. (For example if you want to save Microsoft Office 2010 Word and Excel files as well as PDF in their native file formats, enter “DOCX,XLSX,PDF” in the Additional File Types box.)
10. (Optional) If your company uses the TRANSFLO® Workflow application to control billing and payroll processes, the TRANSFLO® Import application can create a new Workflow case for each page in a Batch.
To configure this option, click the Enable Work Flow arrow, and then click the desired setting in the Enable Work Flow list.
To enable the option, click True.
To disable it, click False.
The default setting is False.
11. Select the Queue to which Batch data should be passed when the Batch is successfully processed.
Click the arrow button next to the Transflo Server Queue list to expand the list, and then click the name of the desired Queue.
The list displays all Queues currently configured on your TRANSFLO® server.
12. Select the Queue to which Batch data should be passed if the Batch cannot be processed.
Click the arrow button next to the Failed Server Queue list to expand the list, and then click the name of the desired Queue.
The list displays all Queues currently configured on your TRANSFLO® server.
1. (Optional) In the Maximum Batch Count box, type the maximum number of Batches that can be sent to each Queue.
For example, if the Maximum Batch Count is 50, and another Queue attempts to send this Queue 55 Batches, then the first 50 Batches will be sent and Gateway will display an error message alerting you that the Batch is full.
As soon as there is room again in the Queue, the remainder of the Batches will be sent.
If you do not wish to impose a maximum number of Batches, type 0.
The default setting is 0.
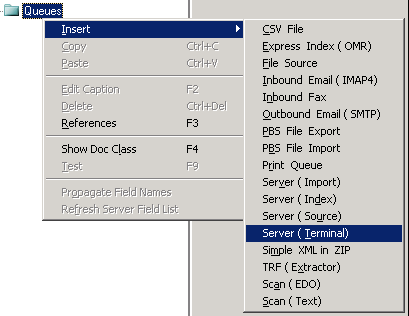
The Server Terminal Queue is used as the final Queue in a series, and provides an end point where TRANSFLO® Import or Index can receive Batch files from Gateway.
To create and configure a Server Terminal Queue:
1. In the tree pane, right-click the Queues node.
Point to Insert on the shortcut menu, and then click Server (Terminal).
The Gateway system creates a new Server Terminal Queue with a default name,
e.g., Server (Terminal)1.
2. The default Server Terminal Queue name is already selected and ready for editing.
To rename the new Server Terminal Queue, simply type a new name.
When you are done, press [Enter].
Configuring a Server Terminal Queue
Now that you have created the Server Terminal Queue, you can configure its settings via the text boxes on the right side of the window.

These settings are:
-
Service
-
Service Code
-
Allow Pass Thru
-
Next Queue
-
Status
-
Polling Interval
-
Not Ready Retries
-
Out of Service Delay
-
Additional File Types
-
Enable Work Flow
-
Transflo Server Queue
-
Failed Server Queue
-
Maximum Batch Count
To configure the Server Terminal Queue:
1 Click the Service arrow to expand the Service list, and then click the name of the Service that should be used by this Queue.
The Service list contains the Services that have been created via the Services node in the tree pane.
If the Service you need is not listed, then you must first create it before you can configure the Queue.
See “Creating and Configuring a Gateway Service” for more information.
2. (Optional) Gateway automatically assigns a default Service Code when a Queue is created.
The default Service Code for the Server Terminal Queue is “INPBS”, the same Service Code used by the Server Source Queue and the PBS Import Queue.
To change this, type a new code in the Service Code box.
3. Click the Allow Pass Thru arrow, and then click the desired setting in the Allow Pass Thru list to specify how Gateway will handle Batches that pass all of the Queue’s requirements.
If these Batches should be passed on to the next Queue, click True.
If Batches should be held at the Queue for further action, click False.
The default Allow Pass Thru setting is False.
4. Because a Terminal Queue is used to end a Gateway Queue sequence, there is no need to select a Queue to follow it.
Leave the Next Queue list blank, which is the default setting.

5. (Optional) Click the Status arrow, and then click the desired status setting in the Status list.
The default Status is Normal, and the Queue will function only if Normal is selected.
The three remaining settings -- TempOutOfService, Disabled, and Failed -- all serve the purpose of making the Queue nonfunctional.
The settings are differently named to denote the reason why the Queue is inactive.
-
“TempOutOfService” indicates that the Queue has been placed out of service by Gateway because an error occurred.
A warning will be displayed in the Windows Event Viewer if this happens.
-
“Disabled” can be used to disable the Queue for testing or troubleshooting purposes, or to show that the Queue is functioning properly but is not currently needed.
-
“Failed” signifies that the maximum number of restart retries has been exceeded.
6. (Optional) In the Polling Interval box, type the frequency in seconds with which the Queue should check for new Batches to process.
The default polling interval in seconds is 30.
7. (Optional) In the Not Ready Retries box, type the number of attempts that Gateway should make to execute the Queue before stopping the Queue’s Service or changing the Queue’s status to Failed.
The default number of Not Ready Retries is 10.
The determination of whether the Queue is failed or the Service is stopped depends upon how the Max Queue Errors Result setting was configured for the Queue’s Service.
For more information, see Step 8 of Creating and Configuring a Gateway Service.
8. (Optional) In the Out Of Service Delay box, type the duration in seconds that Gateway should wait before reattempting to execute the Queue after an error.
The default duration in seconds is 30.
9. To process file types natively without conversion, list the file type extensions separated by commas in the Additional File Types box.
If you want to save PDF files without converting them to TIFF images you must include PDF in the list. (For example if you want to save Microsoft Office 2010 Word and Excel files as well as PDF in their native file formats, enter “DOCX,XLSX,PDF” in the Additional File Types box.)
10. (Optional) If your company uses the TRANSFLO® Workflow application to control billing and payroll processes, the TRANSFLO® Import application can create a new Workflow case for each page in a Batch.
To configure this option, click the Enable Work Flow arrow, and then click the desired setting in the Enable Work Flow list.
To enable the option, click True.
To disable it, click False.
The default setting is False.
11. Select the Queue to which Batch data should be passed when the Batch is successfully processed.
Click the arrow button next to the Transflo Server Queue list to expand the list, and then click the name of the desired Queue.
The list displays all Queues currently configured on your TRANSFLO® server.
12. Select the Queue to which Batch data should be passed if the Batch cannot be processed.
Click the arrow button next to the Failed Server Queue list to expand the list, and then click the name of the desired Queue.
The list displays all Queues currently configured on your TRANSFLO® server.
13. (Optional) In the Maximum Batch Count box, type the maximum number of Batches that can be sent to each Queue.
For example, if the Maximum Batch Count is 50, and another Queue attempts to send this Queue 55 Batches, then the first 50 Batches will be sent and Gateway will display an error message alerting you that the Batch is full.
As soon as there is room again in the Queue, the remainder of the Batches will be sent.
If you do not wish to impose a maximum number of Batches, type 0.
The default setting is 0.
Note: If the TRANSFLO® database is on a different server as the TRANSFLO® Server, the Import activity timestamp will use the TRANSFLO® database’s time and not the TRANSFLO® Server’s time.
The Print Queue prints Document images to a selected printer as those Documents arrive in the Queue.
To create and configure a Print Queue:
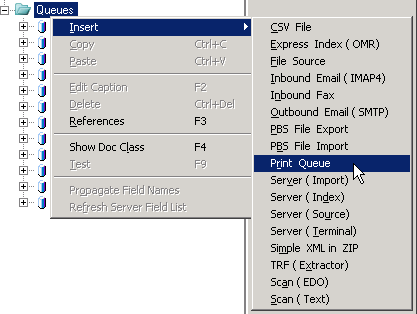
1. In the tree pane, right-click the Queues node. Point to Insert on the shortcut menu, and then click Print Queue.
The Gateway system creates a new Print Queue with a default name, e.g., Print Queue1.

2. The default Print Queue name is already selected and ready for editing.
To rename the new Print Queue, simply type a new name.
When you are done, press [Enter].
Configuring a Print Queue
Now that you have created the Print Queue, you can configure its settings via the text boxes on the right side of the window.
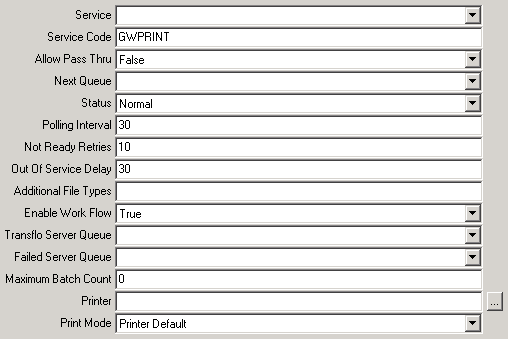
These settings are:
-
Service
-
Service Code
-
Allow Pass Thru
-
Next Queue
-
Status
-
Polling Interval
-
Not Ready Retries
-
Out of Service Delay
-
Additional File Types
-
Enable Work Flow
-
Transflo Server Queue
-
Failed Server Queue
-
Maximum Batch Count
-
Printer
-
PrintMode
To configure the Print Queue:
1. Click the Service arrow to expand the Service list, and then click the name of the Service that should be used by this Queue.
The Service list contains the Services that have been created via the Services node in the tree pane.
If the Service you need is not listed, then you must first create it before you can configure the Queue.
See “Creating and Configuring a Gateway Service” for more information.
Note: Currently, if the Service that you select is one that has been configured as an External Service, and the Print Queue does not have a “next Queue” assigned, then Batches will remain assigned to the Print Queue even after printing.
This is a known issue and will be addressed in a future release.
2. (Optional) Gateway automatically assigns a default Service Code when a Queue is created.
The default Service Code for the Print Queue is “GWPRINT”.
To change this, type a new code in the Service Code box.
3. Click the Allow Pass Thru arrow, and then click the desired setting in the Allow Pass Thru list to specify how Gateway will handle Batches that pass all of the Queue’s requirements.
If these Batches should be passed on to the next Queue, click True.
If the Batches should instead be held at the Queue for further action, click False.
The default Allow Pass Thru setting is False.
4. Click the Next Queue arrow to expand the Next Queue list, and then click the name of the Queue that should follow the current one in the Queue sequence.
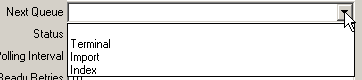
The Next Queue list contains the names of the other Queues that have been created for your current Gateway Document, so if the needed Queue is not listed, then you must create that Queue before you can finish configuring this one.
Remember that to avoid such a situation, it is recommended that you create Queues in reverse order of their appearance in the Queue sequence.
Note: The Server Source, CSV File, eScan (EDO), eScan (Text), Inbound Email, Inbound Fax, Simple XML in ZIP, PBS File Import, TRF (Extractor), and File Source Queues can be used only as the initial Queue in a series, so none of these Queues will ever appear in the Next Queue list.
5. (Optional) Click the Status arrow, and then click the desired status setting in the Status list.
The default Status is Normal, and the Queue will function only if Normal is selected.
The three remaining settings -- TempOutOfService, Disabled, and Failed -- all serve the purpose of making the Queue nonfunctional.
The settings are differently named to denote the reason why the Queue is inactive.
-
“TempOutOfService” indicates that the Queue has been placed out of service by Gateway because an error occurred.
A warning will be displayed in the Windows Event Viewer if this happens.
-
“Disabled” can be used to disable the Queue for testing or troubleshooting purposes, or to show that the Queue is functioning properly but is not currently needed.
-
“Failed” signifies that the maximum number of restart retries has been exceeded.
6. (Optional) In the Polling Interval box, type the frequency in seconds with which the Queue should check for new Batches to process.
The default polling interval in seconds is 30.
7. (Optional) In the Not Ready Retries box, type the number of attempts that Gateway should make to execute the Queue before stopping the Queue’s Service or changing the Queue’s status to Failed.
The default number of Not Ready Retries is 10.
The determination of whether the Queue is failed or the Service is stopped depends upon how the Max Queue Errors Result setting was configured for the Queue’s Service.
For more information, see Step 8 of “Creating and Configuring a Gateway Service,”
8. (Optional) In the Out Of Service Delay box, type the duration in seconds that Gateway should wait before reattempting to execute the Queue after an error.
The default duration in seconds is 30.
9. To process file types natively without conversion, list the file type extensions separated by commas in the Additional File Types box.
If you want to save PDF files without converting them to TIFF images you must include PDF in the list. (For example if you want to save Microsoft Office 2010 Word and Excel files as well as PDF in their native file formats, enter “DOCX,XLSX,PDF” in the Additional File Types box.)
Note: The Print Queue will only print documents that are image file types. Documents of all other file types will not be printed.
10. (Optional) If your company uses the TRANSFLO® Workflow application to control billing and payroll processes, the TRANSFLO® Import application can create a new Workflow case for each page in a Batch.
To configure this option, click the Enable Work Flow arrow, and then click the desired setting in the Enable Work Flow list.
To enable the option, click True.
To disable it, click False.
The default setting is False.
11. Select the Queue to which Batch data should be passed when the Batch is successfully processed.
Click the arrow button next to the Transflo Server Queue list to expand the list, and then click the name of the desired Queue.
The list displays all Queues currently configured on your TRANSFLO® server.
12. Select the Queue to which Batch data should be passed if the Batch cannot be processed.
Click the arrow button next to the Failed Server Queue list to expand the list, and then click the name of the desired Queue.
The list displays all Queues currently configured on your TRANSFLO® server.
13. (Optional) In the Maximum Batch Count box, type the maximum number of Batches that can be sent to each Queue.
For example, if the Maximum Batch Count is 50, and another Queue attempts to send this Queue 55 Batches, then the first 50 Batches will be sent and Gateway will display an error message alerting you that the Batch is full.
As soon as there is room again in the Queue, the remainder of the Batches will be sent.
If you do not wish to impose a maximum number of Batches, type 0.
The default setting is 0.
14. Specify the location of the printer to which the Document images should be sent.
Click the  Browse button to the right of the Printer box to open the Select Printer dialog box.
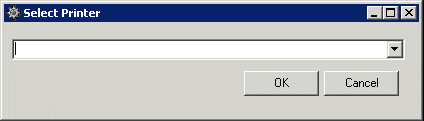
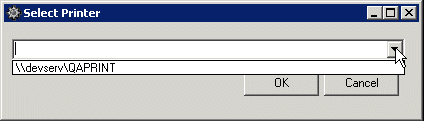
Click the arrow button to expand the list of available printers, and then click the name of the desired printer.
The list displays all printers that have been configured for the local computer, so if the desired printer is not in the list, you must first add the printer to the local computer.
Consult your Microsoft Windows Documentation for more information.
Note: There is a known issue with certain older printers (such as the HP LaserJet 4) in which the Gateway configuration application will lock up if a Print Queue printer is paused and the Print Queue processes a Batch.
If this happens, Gateway configuration must be closed via Windows Task Manager and re-started.
15. Select the print mode that the printer should use for printing Documents.
Click the arrow button next to the Print Mode list to expand the list, and then click the desired option.
If the printer should print on only one side of the paper, click Simplex.
If the printer should print on both sides of the paper, click Duplex.
To allow the printer’s Windows settings to determine whether simplex or duplex printing is used, click Printer Default.

The default setting is Printer Default.
Note: When selecting Duplex ensure the printer being configured supports Duplex printing. If it does not support Duplex, the printer will print Simplex and Gateway will not log an error.
Immediately below the name of each Queue in the tree pane is a Template node. Each Template has configurable settings, which are described below.
-
Reference Template List: The Reference Template feature is not used at this time, and the Reference Template list should be left untouched.
-
Batch Fields: Batch Fields are configured for each template.
-
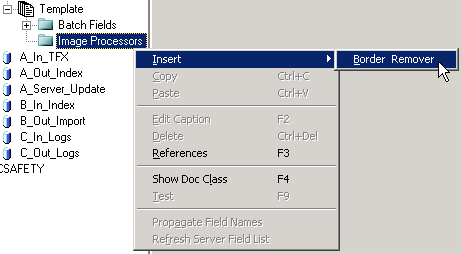
Image Processors: The Image Processor feature is available with all Queues, and provides the ability to remove borders from images. To enable this feature:
-
Right-click the Image Processors node, point to Insert on the shortcut menu, and then click Border Remover.

-
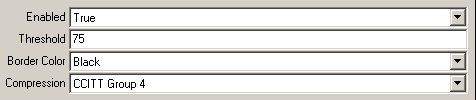
The Border Removal settings appear on the right side of the window.

-
The Enabled setting is toggled on or off by setting its value to True or False. To set the value, click the arrow button next to the Enabled list, and then click either True or False. The default value is True.

-
In the Threshold box, type the width in pixels of the border to be removed. The default width is 75.
-
Select the color of border to be removed. Click the Border Color arrow, and then in the Border Color list click the desired color. There are four color options available: Background (the page’s background color), Foreground (the page’s foreground color), Black, and White. The default color is Black.

-
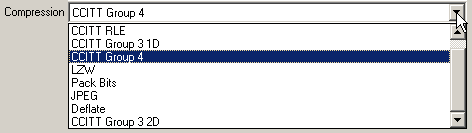
Select the compression algorithm that was used to compress the image. Click the Compression arrow, and then in the Compression list click the name of the algorithm used. The default setting is CCITT Group 4. If the image is not of a compressed format, an uncompressed setting is available.

-
-
Split Rules in Templates: You can configure optional split rules in queue templates to split data, document images, or both off of a batch when your predefined business logic or criteria are met. Not all templates include the Split Rules feature. Split Rules can be configured for templates in the following Queues:
-
Express Index
-
Outbound Email
-
PBS File Export
-
Print Queue
-
Server Import
-
Server Index
-
Server Terminal
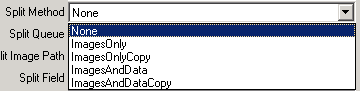
In addition to “None”, there are three types of Splits that Gateway may be configured to perform: ImagesAndData, ImagesAndDataCopy, ImagesOnly, and ImagesOnlyCopy.
-
ImagesAndData: In an ImagesAndData split, Gateway will take each Document in a Batch and will to pass it through the configured split rules until, either one of two things happen:
(1) the Document complies with ONE of the split rules in the list
or
(2) the Document is found to not comply to any of the configured rules.
If the Document does not comply with any of the rules (example 2), then it continues processing as part of the same Batch. However, if the Document meets the criteria of one of the split rules (example 1), that Document and its associated data is immediately split from the Batch into another Batch (with any others that may have been split from the same Batch). Once a Document meets the criteria, it is split immediately and will NOT process through any other split rules. All of this behavior occurs within the confines of the TRANSFLO® Database.
-
ImagesAndDataCopy: If one or more Documents in a Batch meet the criteria of one of the split rules, a new Batch is created and the Documents that met the split rule criteria are copied to the new Batch. The Documents are not removed from the original Batch. Split values can be set up to include a list of values or the entire Batch.
-
ImagesOnly: Like the ImagesAndData split, the ImagesOnly split will take each Document in a Batch and pass it through the configured split rules until either
(1) the Document complies with ONE OR MORE of the split rules in the list
or
(2) the Document is found to not comply to any of the configured rules.
If the Document does not comply to any of the rules (example 2), then it continues processing as part of the same Batch. However, if the Document meets the criteria of one of the split rules (example 1), the TIF image file for that Document will be copied into the configured folder location, and then Gateway will continue to process the Document through all of the other configured split rules. If another match is found, the image will be copied out again. Only after the Document has passed through ALL configured split rules will Gateway then mark any Documents, for which images were copied by the split rules, as Rejected in the TRANSFLO® Database.
-
ImagesOnlyCopy: ImagesOnlyCopy works identically to ImagesOnly type of split, except that it does not mark any Documents as rejected after the image(s) is/are copied to the configured folder.
-

To add a Split Rule to a Template:
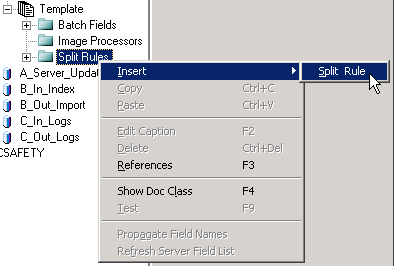
1. Expand the Template node beneath the Queue to which you wish to add a Split Rule.
Next, right-click Split Rules, point to Insert, and click Split Rule.
The Gateway system creates a new Split Rule with a default name, e.g., Rule00.
2. The default Split Rule name is already selected and ready for editing.
To rename the new Split Rule, simply type a new name.
When you are done, press [Enter].
The Split Rule interface appears in the right-hand pane.
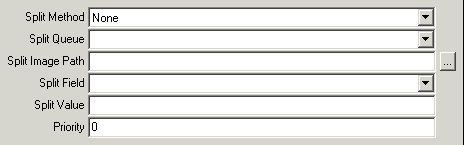
3. Select the type of split that the Split Rule should perform.
Click the arrow next to the Split Method list to expand the list, and then click the desired type of split.
-
To copy the Document images to a folder and delete them from the Batch, click ImagesOnly.
-
To copy the Document images to a folder but also leave them in the Batch, click ImagesOnlyCopy.
-
To create a new Batch and move to that Batch all pages that match the split criteria, click ImagesAndData.
-
To create a new Batch and copy to that Batch all pages that match the split criteria, click ImagesAndDataCopy.
-
To disable this split rule, click None.
4. (Optional, Conditional) If you selected ImagesAndData or ImagesAndDataCopy as the split method, you can split data off of the Batch.
A split is performed when a particular Field contains a particular value (you will define the value in a moment).
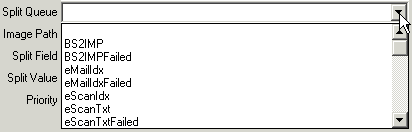
To split part of the Batch off to another Queue, select the Queue to which the portion of the Batch matching the value should be directed.
Click the arrow button next to the Split Queue list to expand the list, and then click the name of the desired Queue.
5. (Optional, Conditional) If you selected either ImagesOnly or ImagesOnlyCopy in the Split Method list, you must enter the path of the folder to which the split- off TIF image files should be written.
Click the Browse button to the right of the Split Image Path box to open the Browse for Folder dialog box.
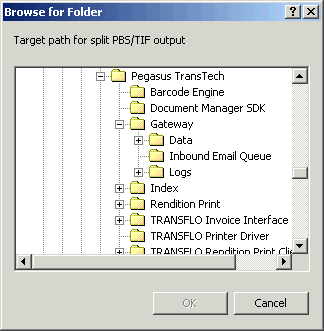
In the dialog box, browse to the folder where the TIF files should be written, click the folder to select it, and then click OK.
The folder’s path now appears in the Split Image Path box.
6. Select the DocClass Field upon which this Split Rule will be based.
When this Field contains the value that you will specify in the next step, the Split Rule will be triggered.
Click the arrow button next to the Split Field list to expand the list, and click the name of the desired DocClass Field.

7. In the Split Value box, type the value that, when found in the DocClass Field defined in the previous step, will trigger this Split Rule.
Type and asterisk (*) in the box to split the entire Batch.
You can also specify a list of values using the following syntax:
'List: [Value1], [Value2],...'
For example to specify a split rule for certain Document Types the following can be entered in the Split Value box.
List: BOL, TRP, INV, LOG
8. Multiple Split Rules can be configured for each Queue that allows splits.
In the Priority box, type the numeric rank of this Split Rule versus any other Split Rules configured for the current Queue.
If a single Document page image matches more than one Split Rule, this ranking determines the order in which the Split Rules are executed.
A Split Rule with a priority of 1 is executed first, a Split Rule with a priority of 2 is enacted second, and so on.
The default value is 0, meaning that no priority is assigned.
Continue adding Split Rules to the current Queue’s Template as needed.
Prior to deploying a Queue, you should test it to ensure that it works as expected. To do this, right-click the Queue’s node in the tree pane, and then click Test on the shortcut menu.
Gateway tests the Queue, and if the Queue has any errors, Gateway displays an error dialog box indicating the first error that it encounters. You should continue to test the Queue and correct any errors encountered.
All Gateway Queues can be tested manually from the Gateway configuration application. This is a powerful feature that allows you to configure and test your configuration incrementally and helps ensure that your system is configured properly.
To test a Queue configuration:
1. Stop all of the services that the Queue uses.
2. Select your Queue by clicking its name in the tree pane.
3. Press the F9 key on your keyboard.
The Test Queue window opens.
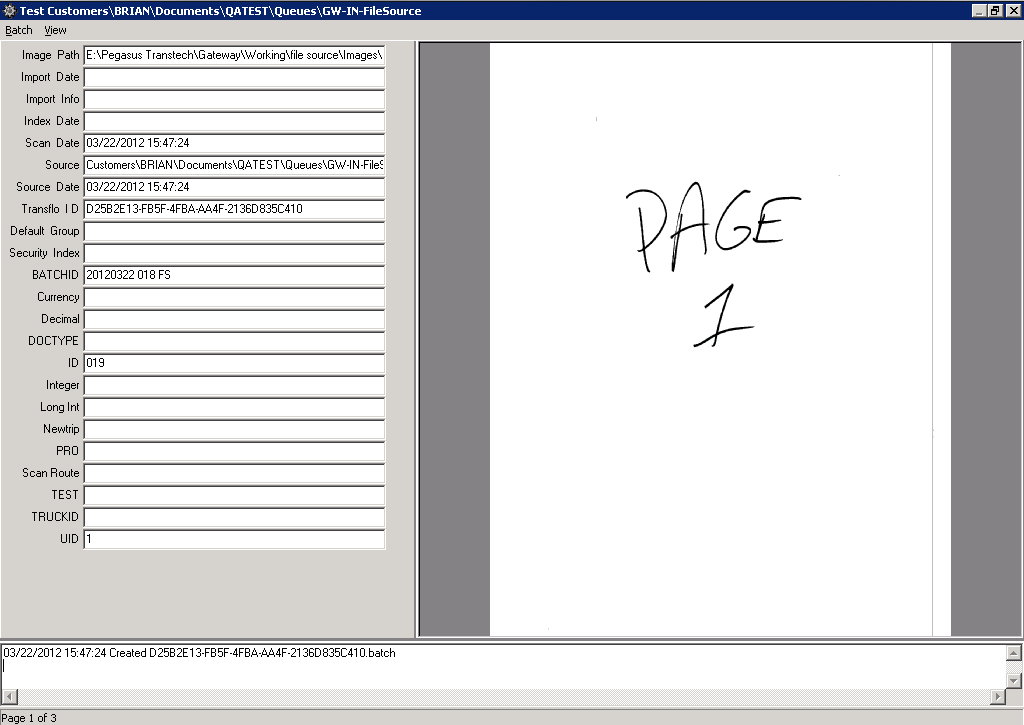
The left panel has your configuration settings and displays the values that are being recorded for this Document or Batch.
The right panel displays the images that were processed by the queue.
The bottom of the window has Batch information and the page that is displayed in the right panel.
Press F9 to see any errors in the lower-right corner of the Gateway configuration window.
To view a full description, double-click an error entry in the list.
4. Navigate the pages in the viewer by using the Page Down key on your keyboard to go to the next page and the Page Up key to go to the previous page.
5. If the file you are attempting to view cannot be displayed in the Gateway configuration preview window, you will see the screen below.
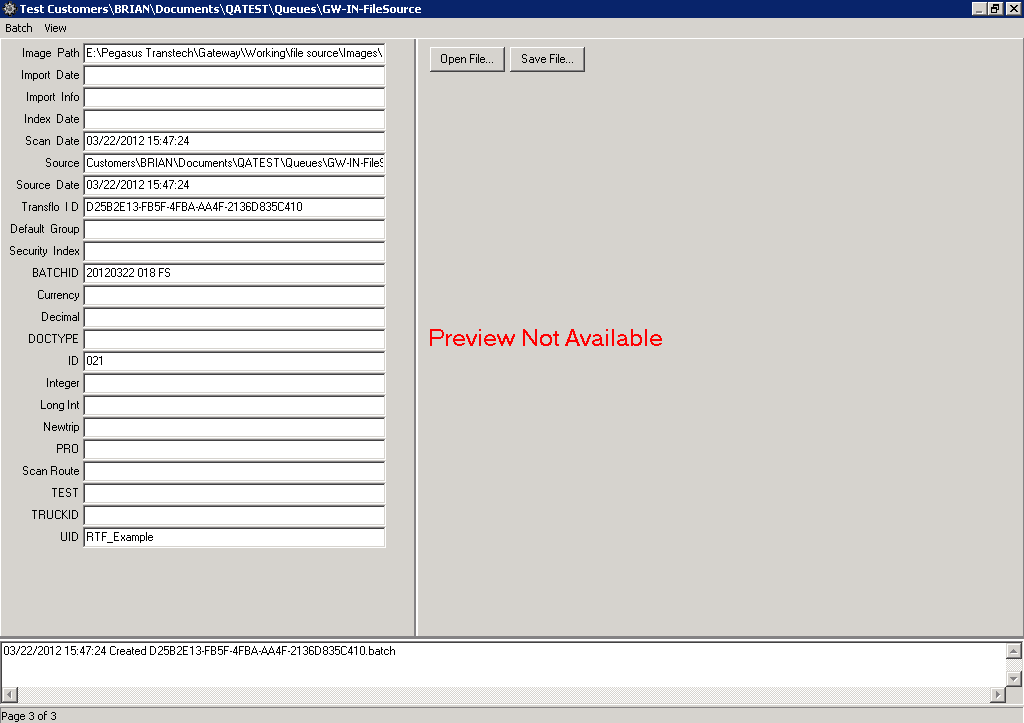
6. Click the Open File... button.
If your computer has an application registered to the file type, that application will open the file.
7. If your computer does not have an application that can open the file, a pop-up window will display the error,
“Error opening the file. Win32 Error. Code: 1155. No application is associated with the specified file for this operation.”
If this happens you can save the file to disk by clicking the Save File... button.
In Transflo DMS Gateway, a service must be assigned to a queue before the queue can be enabled. Gateway supports two (2) types of services:
-
Gateway Services: Windows services that carry out the work assigned to queues. Gateway services are more complex than external services.
-
External Services: This type of service works within Gateway to denote the end of a Gateway route and to indicate where an external process will continue routing the documents that Gateway processed.
Gateway queues are configured to manage the input and routing of documents from diverse sources, but queues cannot perform these tasks without Gateway Services. Each Gateway Service runs outside of Gateway as a Windows service, and executes the requirements configured within Gateway for each associated queue. Multiple queues can use the same Gateway Service or each queue can have its own Gateway Service with no difference in system performance between these two methods.
To prepare a Gateway service for future use, create it, configure its settings, and then install it as a Windows service.
-
In the tree pane, right-click Services and choose Insert, Gateway Service in the shortcut menu.

-
The Gateway system creates a new Gateway service with a default name such as Gateway Service1.

To rename the new service, enter a new name and press Enter.
-
The service can also be renamed in the future if necessary. To do this, right-click the service name, click Edit Caption on the shortcut menu, and then modify the service name.

-
Renaming any element within Gateway will impact any system component referring to that element, requiring you to update the impacted components with the new element name.
-
If you install the Gateway Service next, the Working Path and the Log Path will be pre-populated with default paths so you will not need to change these paths.
-
(Optional) Enter a description for your Gateway Service in the Description box.
-
(Optional) On the right side of the window, in the Working Path field, enter the path to the working folder where you want the service to write any data files it needs.
Example: C:\TRANSFLO\Gateway\Working
-
In the Log Path field, enter the path where the activity log for your new service is stored.
Example: E:\TRANSFLO\Gateway\Logs\CSV
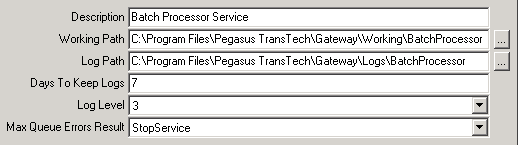
-
(Optional) In the Days to Keep Logs box, type the frequency with which Gateway should purge the Service’s log file. The default value is 7, meaning that every seven days, Gateway will wipe clean the Service’s log file. Note that this is a total purge of the log file, not a rolling purge. In other words, data in the log file will be purged whether that data is one day old or seven days old.
-
(Optional) Gateway can log Service data at escalating levels of complexity. Select the level at which the data for this Service should be logged, from the Log Level drop-down.

0: No data is logged
1: Only errors and warnings
2: Errors and warnings, and minimal process information
3: Errors and warnings, and detailed process information (the default log level is 3)
-
In the Max Queue Errors Result field, specify how you want the Gateway system to respond if any queue using this service exceeds the queue error threshold set in the Not Ready Error Retriesfield for the queue. Select StopService or FailQueue .

If the service encounters an error, the following results occur:
-
If you set this field to StopService, the service is stopped after the maximum error threshold for the queue is passed. The default error result is StopService.
-
If you set this field to FailQueue, Gateway stops attempting to process items, but the service will remain running.
-
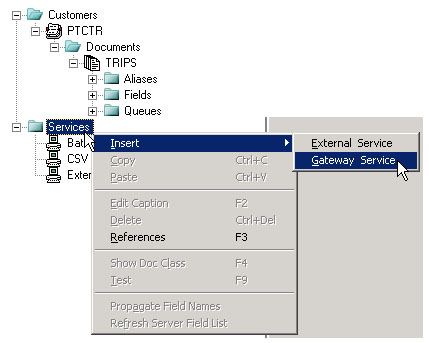
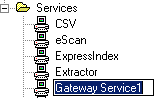
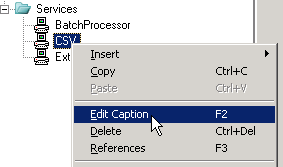
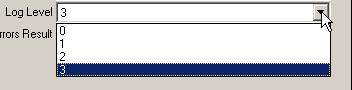

After you configure a Gateway service, continue to the next article to install and start it.
Once a Gateway Service is created and configured it must be installed and started so it can run as a Windows Service.
To install a Gateway Service:
1. Right-click the Service name, click Install Service on the shortcut menu.
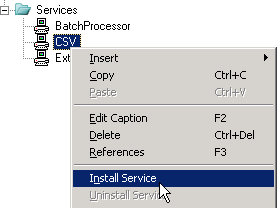
2. A message box opens indicating that the service installed successfully.
Click OK.
3. Right-click the Service name, click Start Service on the shortcut menu.
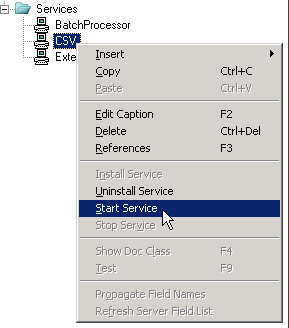
4. Open the Windows Administrative Tools Services window.
Locate the name of the Service to verify that it started.
The Service name will be prefixed with the name “Transflo” .
For example, if you named the Service “Source”, then in Windows it would be called “Transflo Source”.
5. If the Service started properly the word “Started” will be displayed in the Status column next to the Service’s name.
Note: The Gateway Services shortcut menu also has options to stop a running Gateway Service and to uninstall a Gateway Service.
Note: Although Gateway Services can be created, installed and started from within Gateway, you will still need to use the Windows Services Administration Tool to assign accounts and set recovery options.
Gateway Services can be installed and uninstalled from the Windows command line.
To install a Gateway Service:
1. Open a cmd prompt window.
2. Navigate to the directory where Gateway is installed.
The default is:
c:\program files\pegasus transtech\Gateway
3. Run the following command:
GatewayRuntime.exe -install /ServiceName="<NameOfService>"
Where,
<NameOfService>is the name of the Gateway Service to be installed.
To uninstall a Gateway Service:
1. Open a cmd prompt window.
2. Navigate to the directory where Gateway is installed.
The default is:
c:\program files\pegasus transtech\Gateway
3. Run the following command:
GatewayRuntime.exe -uninstall /ServiceName="<NameOfService>"
Where,
<NameOfService>is the name of the Gateway Service to be removed.
Delete this text and replace it with your own content.
External services are much less complex than Gateway services. External services have no configurable settings and are not Windows services like Gateway services. They are internal to Gateway and serve only to indicate the exit point of a Gateway route. Assigning an external service to a queue informs the Gateway system that it has finished its work on the documents being routed. An external service should always be assigned to the final queue in a document route.
To create an external service, follow these steps:
-
In the tree pane, right-click Services and choose Insert, External Service.

The Gateway system creates the new external service with a default name such as External Service1.

-
To rename the new Service, enter a new name and press Enter.
-
You can also rename a service later as needed by right-clicking the service name and choosing Edit Caption on the pop-up menu.
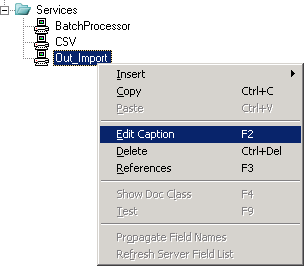
-
Renaming any element in Gateway will impact any system component referring to that element, requiring you to update the impacted components with the new element name.
-
The external service is now created and ready to be assigned to a queue.