Set Up Recipients, Fleets, or Brokers (Classic Design)
You can add, change, or delete a designated recipient, which is typically a carrier fleet or broker, but broadly defined as any registered recipient for all your load transactions, documents, and other mobile app data. If you change your primary recipient (for example, you change your fleet or broker), the information you view, send, and receive in your mobile app changes.
Tip: A new release of Transflo Mobile+ introduces new steps for fleet management. Until you download and become familiar with the new steps, you can continue to follow the old legacy or classic steps on this help page.
Tip: Always confirm your broker ID, fleet ID, or recipient ID with your supervisor or accounting team.
-
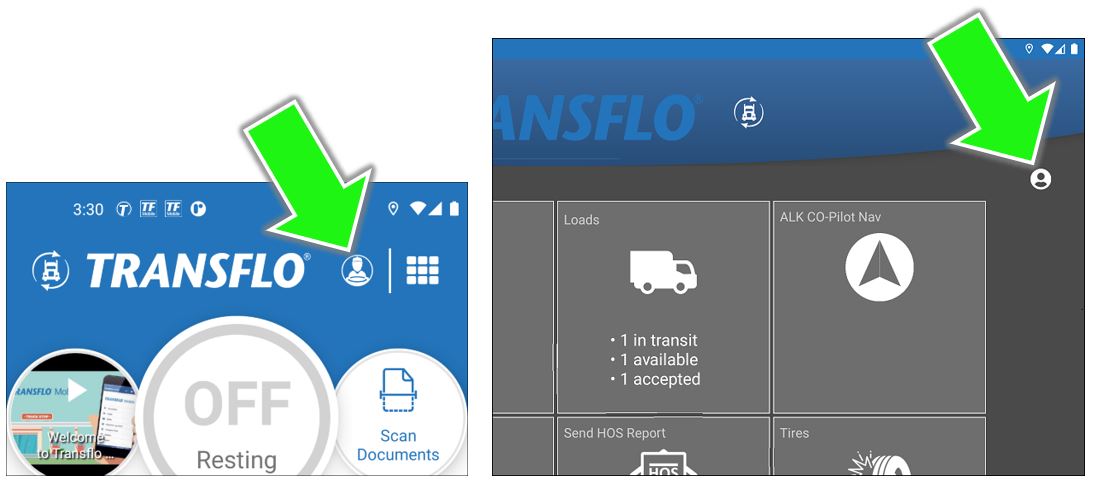
On the Dashboard, tap
 User Settings.
 -
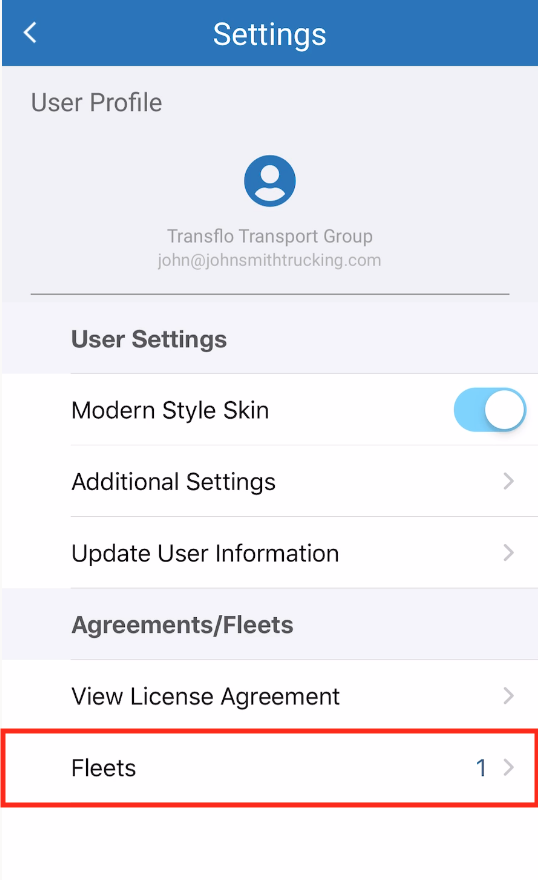
On the Settings page, under Agreements/Fleets, tap Fleets.
-
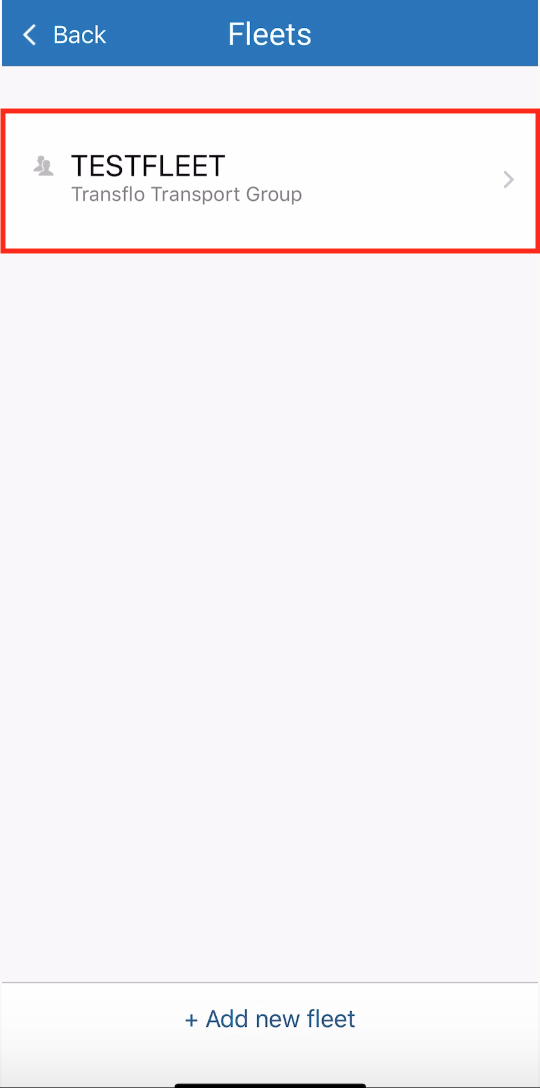
Your current recipient, fleet, or broker appears. To view more details, tap a recipient, fleet, or broker.
-
To edit the Driver ID or Recipient ID, tap Edit in the top right corner.
-
Make your changes and tap Save.
-
To return to the Home screen or dashboard, tap
 Back.
Back. -
Tap
 Fleets.
 -
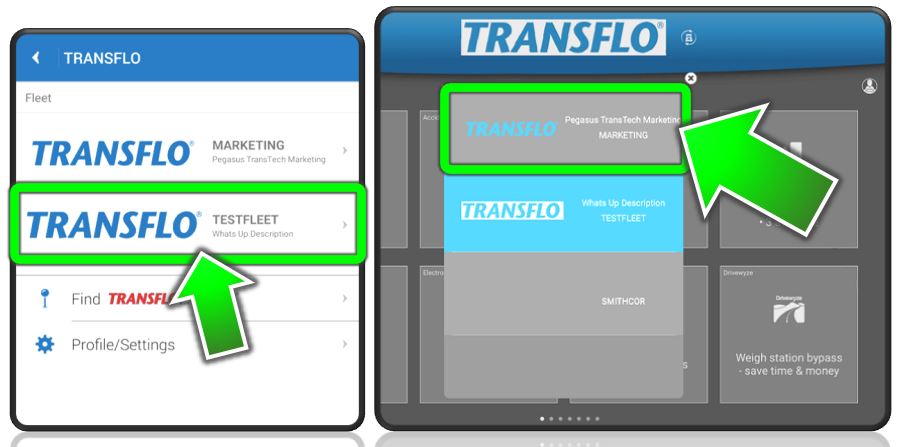
Tap an entry in the list to change your fleet.
-
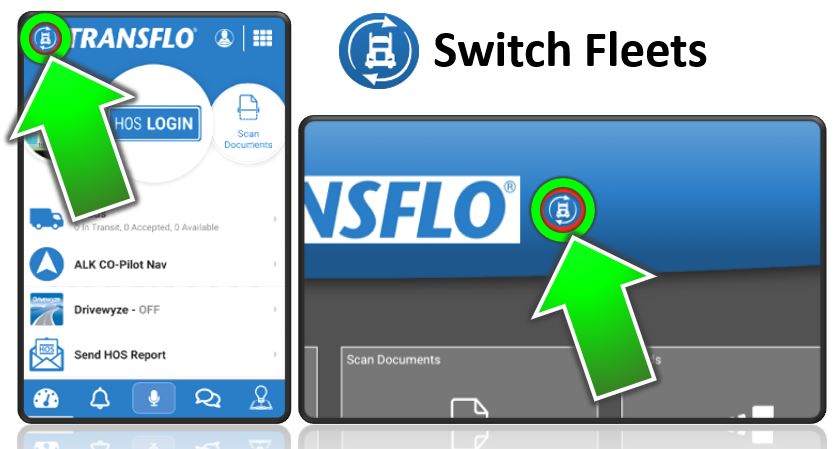
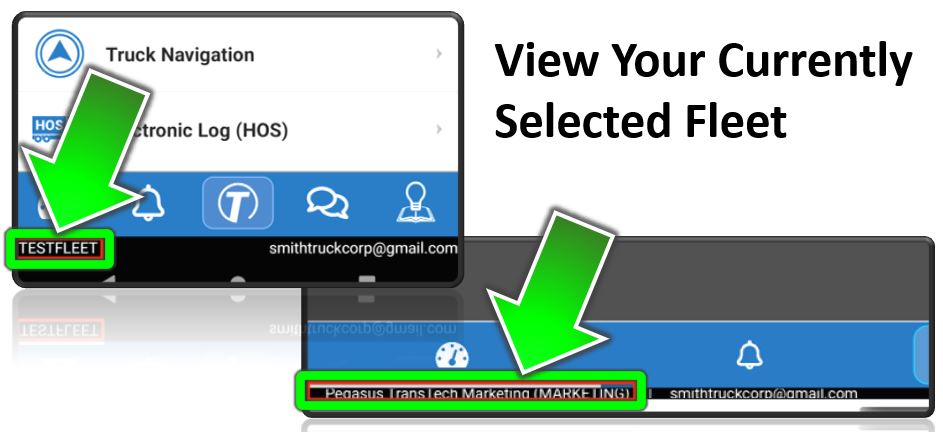
The new fleet you just selected appears at bottom left.
For your Fleet ID or Broker ID to work, your Fleet or must be authorized to use the app. Recipients are entities that receive documents from the Mobile+ application. Examples of Recipients are Fleets and Brokers.
-
On the Dashboard, tap
 User Settings at the top to open the Settings screen.
 -
Under Agreements and Fleets, tap Fleets.
-
To add a new recipient, tap +Add new recipient.
-
Enter the Recipient ID provided to you by your organization or fleet administrator.
-
Tap Next.
-
Tap Proceed to confirm.
-
Enter the Driver ID (this can be any name of your choice) and then tap Next.
-
(Optional) To add more recipients, tap Add Another Recipient and repeat these steps until all the recipients have been added.
Note: If you have multiple recipients set up, always remember to select your correct recipient, before scanning documents.
-
To add the one or more recipients that you just defined, tap Submit Registration.
You are taken to the Dashboard of the new fleet, broker, or recipient. The recipient name appears on the bottom left.
You can delete a previously defined recipient, fleet, or broker from your mobile app.
-
On the Dashboard, tap
 User Settings.
 -
On the Settings page, under Agreements/Fleets, tap Fleets.
-
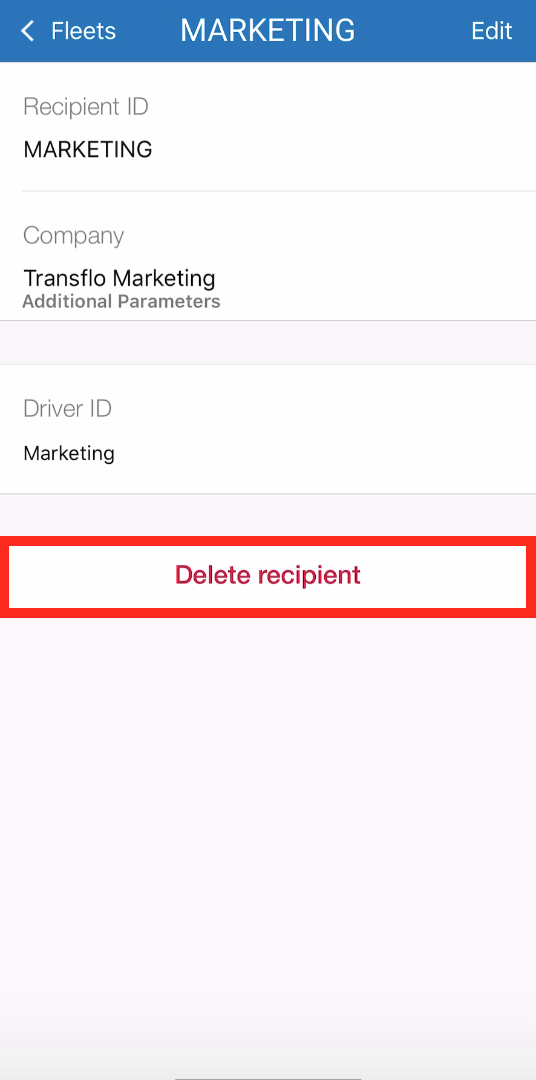
Tap your current recipient, fleet, or broker.
-
Tap Delete recipient.
-
In the Delete confirmation window, tap DELETE.
-
The fleet or other named recipient no longer appears on the Fleets screen.
![]() View a demonstration of these steps in one or more Transflo videos:
View a demonstration of these steps in one or more Transflo videos:
![]() View a demonstration of these steps in one or more Transflo videos:
View a demonstration of these steps in one or more Transflo videos:
