Synergize Web Explorer Client
The legacy or classic Synergize Web Explorer client is a Java-based web application that is no longer supported (deprecated) but that can be used with Java IcedTea-Web WebStart. You can use the web client to interact with the Synergize repository to add documents, search for documents, and view documents. You can also process documents through a workflow.
Tip: Oracle no longer provides free global support for Java. The legacy Java version of our Web Client has been replaced by a new HTML5 version. An open source version of Java called OpenJDK is available and supported by Amazon in the form of Amazon Corretto. If you still need to launch our Java-based client, we recommend that you install Amazon Corretto and use IcedTea-Web.
Synergize also offers a new web-based interface to access your content in the repository. See New Synergize Explorer HTML5 Edition or Synergize Explorer Lite.
-
Launch the Web Client using IcedTea-Web. (You can no longer launch the Web Client using Java Web Start.)
-
(Optional) Launch a web browser that supports NPAPI and enter the URL for the Synergize Web Client.
Example:
http://writer.dev.local/synergize/synergize.html
-
At the Synergize Web Client Welcome screen, enter the following information:
-
Username: <your Synergize username>
-
Password: <your password>
-
Domain: <select your domain from the list> or leave blank for non-Windows authentication
-
-
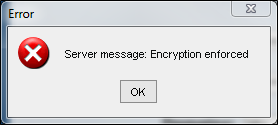
If you have not set up encryption, do so before continuing. If you do not change encryption settings, you will see an error when you try to log in.
-
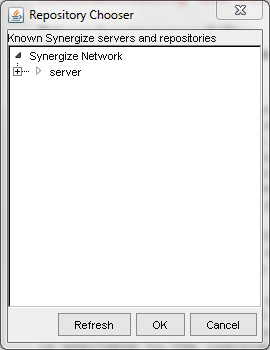
If you are logging in for the first time or you have selected Login with the default preferences, you see the Repository Chooser window.
-
Select the “+” next to your server name to expand the list and choose a repository.
-
Click OK. The system remembers your selection the next time you log in.
-
After you search for documents, you can view them in the search results.
-
Double-click on a document to view it in the Synergize Image Viewer.
-
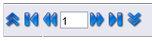
If the document is a multi-page file, use the page arrows to navigate to the next or previous page.
-
To close the Synergize Image Viewer, click X Close in the top-right corner of the window.
-
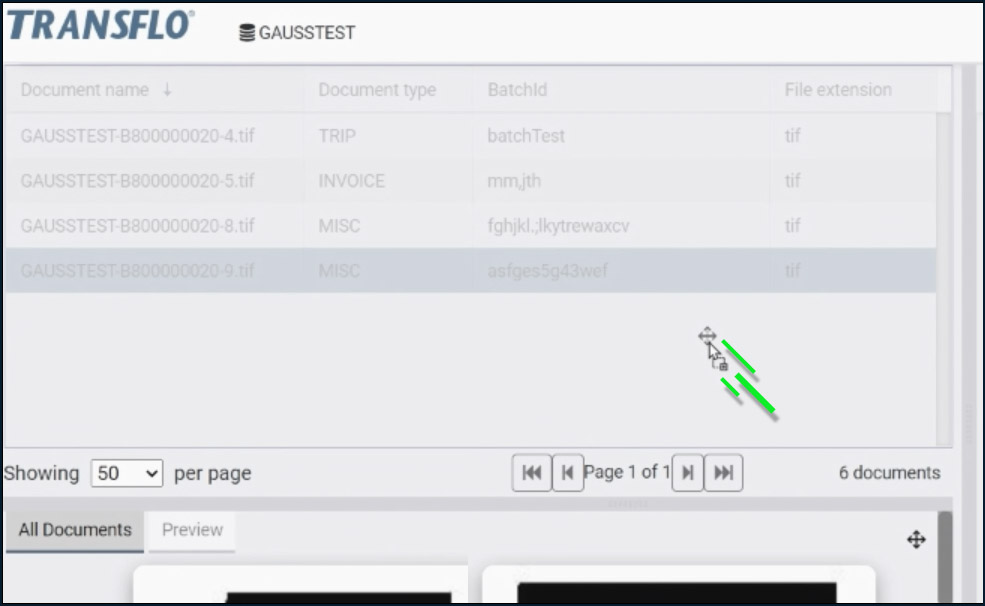
To split your current view so that you can drag and divide the list on the left and image preview thumbnails on the right, click and drag the Split View: Drag and Divide icon. (This feature was introduced in August 2024.)
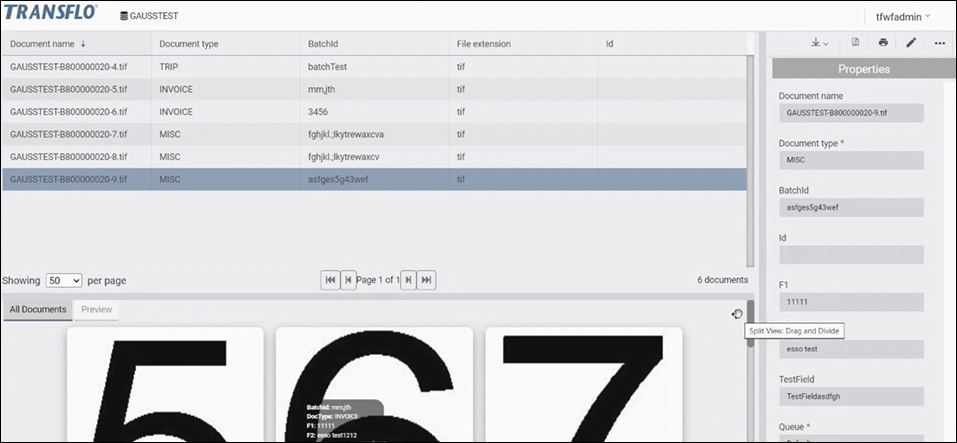
- Drag-and-drop the icon anywhere in the list. (Drag up and release the mouse on the list.)
-
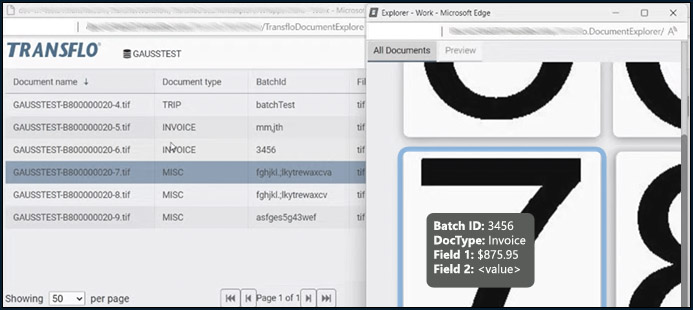
Synergize Explorer thumbnail images now appear in a split window on the right and the list of document pages remains on the left.
-
Click a row on the left to view the matching page on the right.
-
Mouse over a page to view document batch information.
-
-
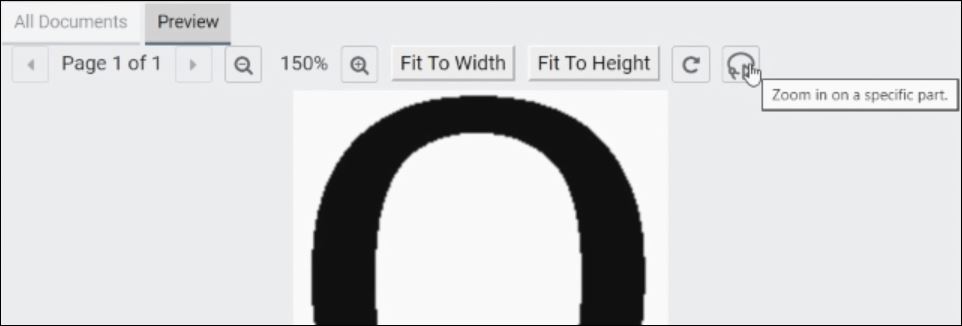
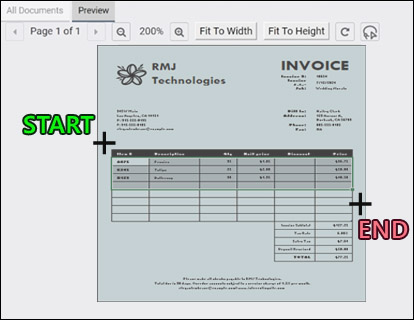
To focus your attention on a specific portion of a page, Synergize now supports a new zoom by selection feature. (This feature was also introduced in August 2024.) Click Zoom in on a specific part.
-
Click and hold the mouse pointer down to draw a rectangle to define the screen region you want to enlarge.
-
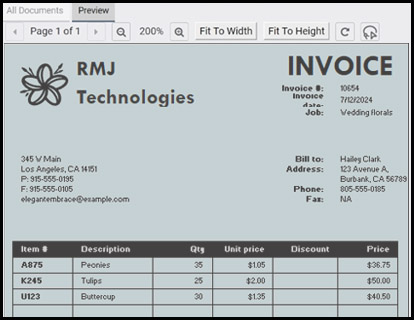
The preview window zooms to show the selected area.
Tip: You are zooming in, not cropping, so the entire page remains available when you click Fit to Height or Fit to Width even though it might not be visible at the moment.
-
To close the split preview window, click X Close.
You can also view documents that have similar indexes and are related to the documents on the search results screen.
-
Use any method to search for a document in the repository.
-
Click on a document in your search results screen and select the Related Documents tab.
-
On the right side of the Related Documents tab, select an index type from the drop-down list of available index entries.
-
The results area shows the documents that are related to each other, based on the index type you selected.
1. Use any method to search for a document in the repository.
2. Double-click on the document to open it in Synergize Image Viewer.
3. Verify that the document displayed is the one you wish to print.
Select “File” at the top of the Image Viewer and then select “Print Document”.
Use this article to send a document in Synergize Web Explorer as an attached file by email.
-
Locate a document to send by email. Use any method to search for a document in the repository.
-
Choose one of the following methods to send a document:
-
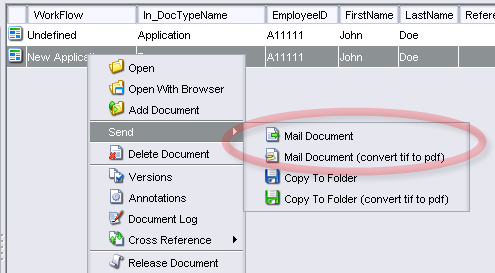
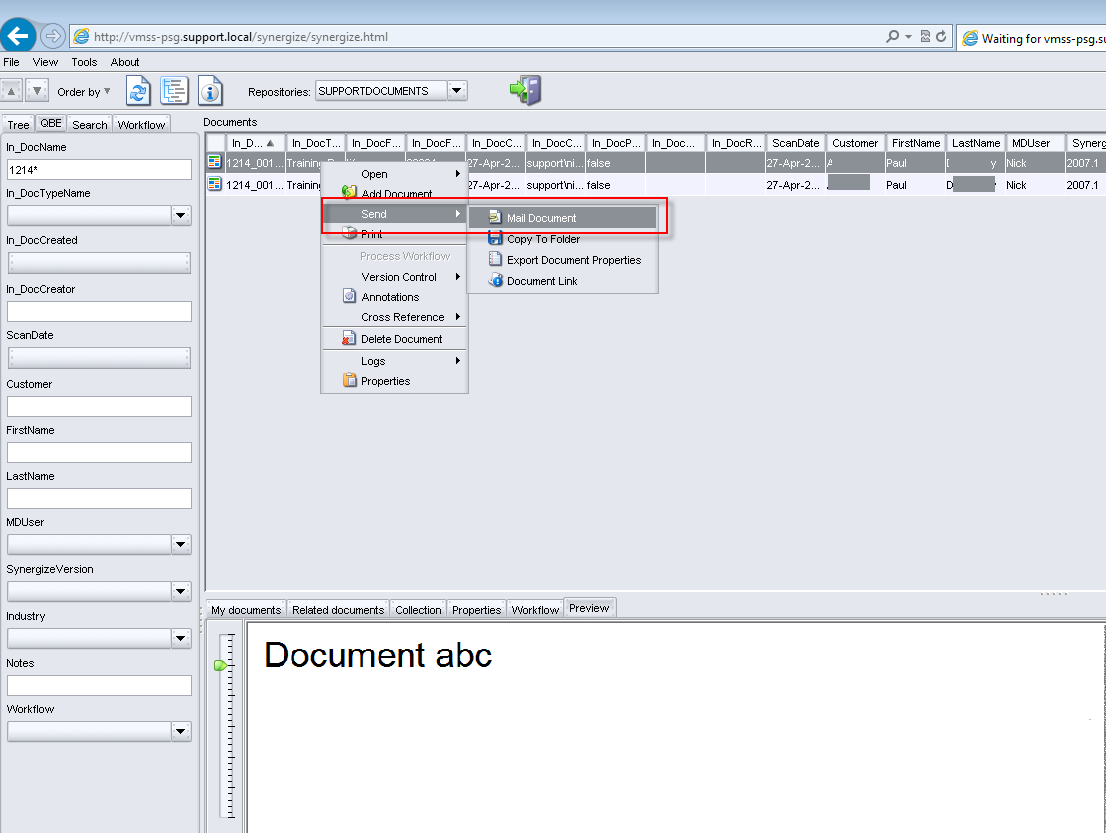
Right-click the document and choose Send, Mail Document.
-
You can also double-click on a document to open it. The document appears in Synergize Image Viewer. Verify that the document is the one you want to email. In the main menu, choose File, Send, Mail Document.
-
-
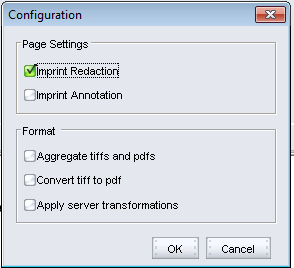
The Configuration window might appear the first time you use this feature.
-
The first option attaches a TIFF document.
-
The second option attaches a PDF document.
Click OK.
-
-
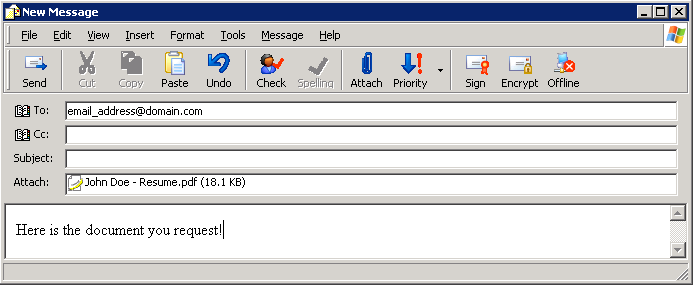
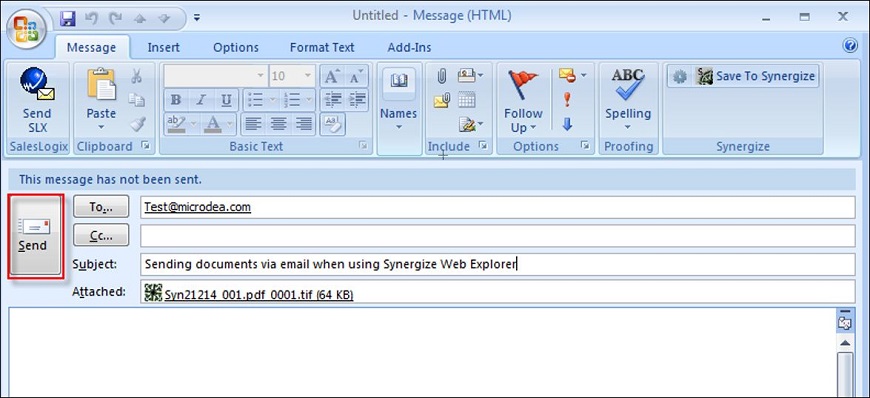
Your document is attached in a new mail message. Synergize converts the document and sends it to the email client for delivery. Synergize uses the default email application installed and configured on your computer to send the document.
-
Edit your message, enter one or more recipients, and then click Send.
Synergize Explorer offers three possible document retrieval methods:
-
Tree (navigate using a tree like structure)
-
QBE: Query By Example (enter search data into index fields)
-
Search Tab (advanced users can query the database using queries)
1. From the Repositories drop-down on the toolbar, select a repository.
2. Select the Tree tab.
3. Double-click a folder in the tree to expand its subfolders. Each subfolder expands when it is double-clicked, until you have drilled down far enough to reach the documents that are contained in that folder.
The naming of the folders and subfolders uses the index information, for the documents that are contained in the folder.
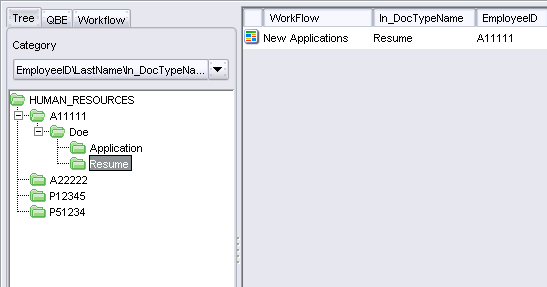
4. In the results window, locate your documents. The index information for each document appears in the horizontal grid.
1. From the Repositories drop-down on the toolbar, select a repository.
2. Select the QBE tab.
3. The QBE tab shows the index fields available for search.
Enter your search criteria into the appropriate index fields(1) and select Search (2).
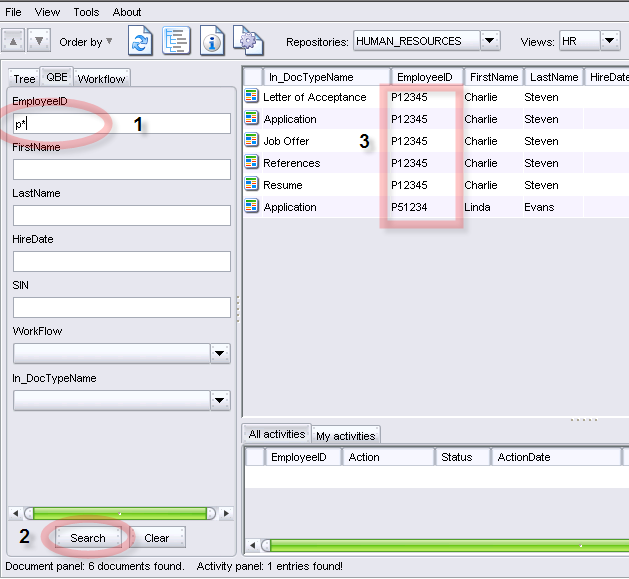
4. In the results window(3), locate your documents.
The index information for each document is displayed, in the horizontal grid.
1. From the Repositories drop-down on the toolbar, select a repository.
2. Select the Search tab.
3. Enter a query in the area provided.
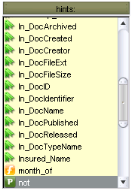
Use the hints window to choose field and function names.
Use double quotes around strings.
If your entry includes a syntax error, it is highlighted in red.
The syntax used is very similar to SQL.
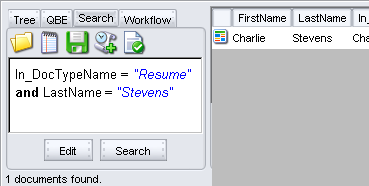
4. In the results window, locate your documents.
The index information for each document is displayed in the horizontal grid.
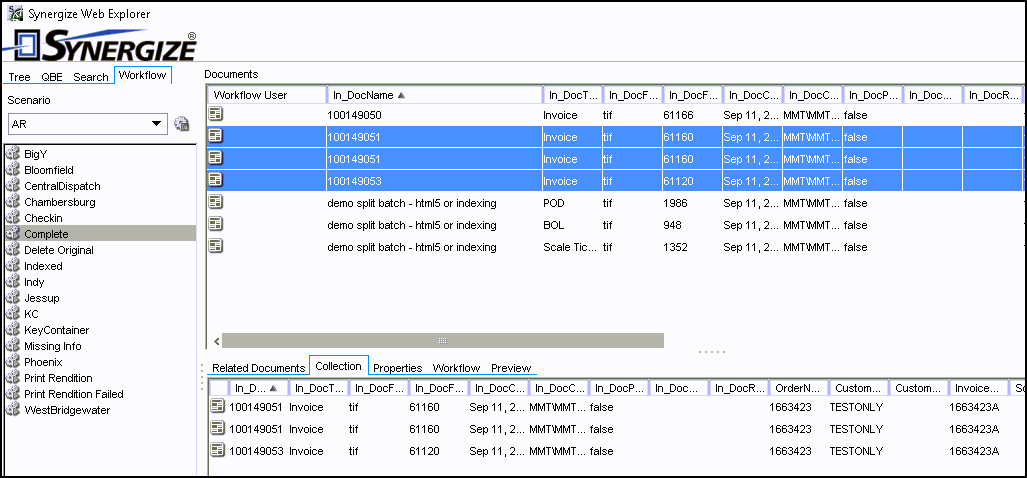
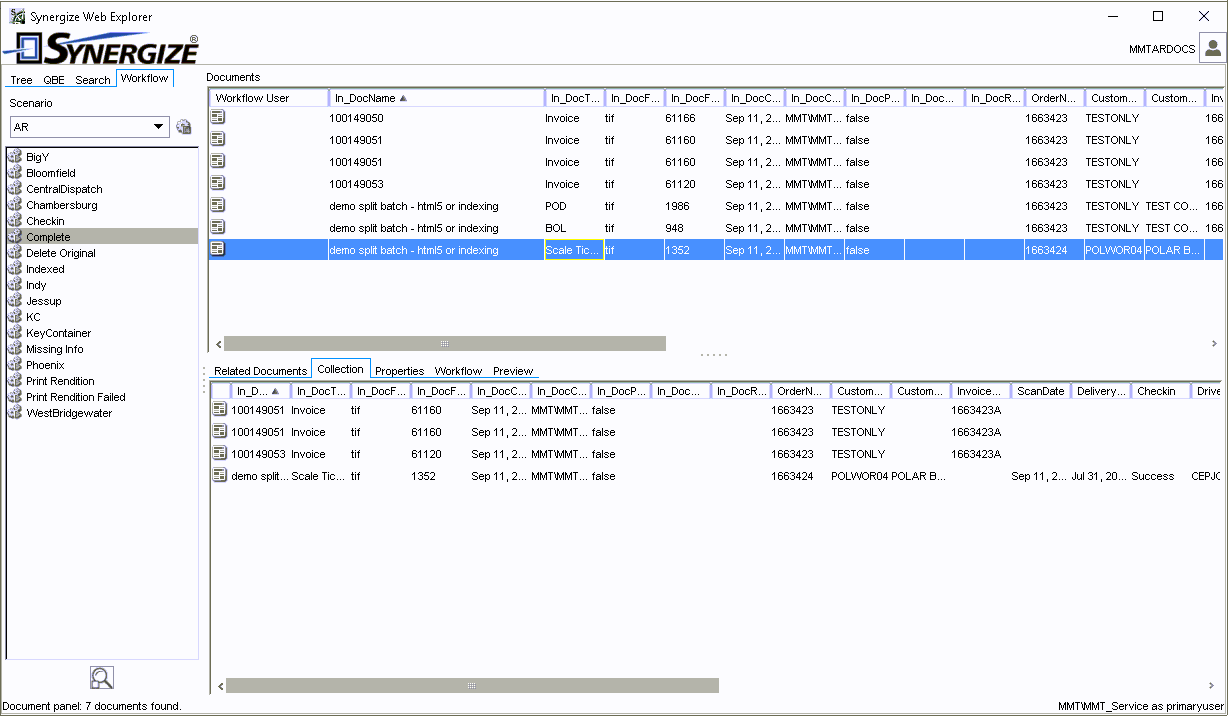
The classic Web Explorer Java client edition of Synergize includes a Collection tab. Use the Collection tab to select multiple documents from different workflows and perform common tasks such as viewing, printing, or exporting the aggregate content.
Tip: In the Feb 2025 release of Synergize 16.4, the legacy Collection tab functionality was migrated to the new HTML5 Edition of Synergize Explorer.
You can use the Collection tab in the legacy web explorer (and it now appears in the new HTML5 edition of Synergize Explorer as of Synergize 16.4 or newer in February 2025; the features and steps are similar).
-
In Synergize Web Explorer, open one or more documents from one or more workflows. (Tip: You can also perform similar steps in the HTML5 edition of Synergize Explorer 16.4 or newer.)
-
On the Workflow tab, select a scenario in the Scenario field. You can also find documents on the Tree, QBE, or Search tabs.
-
In the list of documents, select one or more documents.
-
Click the Collection tab.
-
Drag your documents to the Collection tab.
-
As needed, you can continue to drag one or more documents to the Collection tab.

-
You can assemble documents from multiple workflows and drag them to the Collection tab.
-
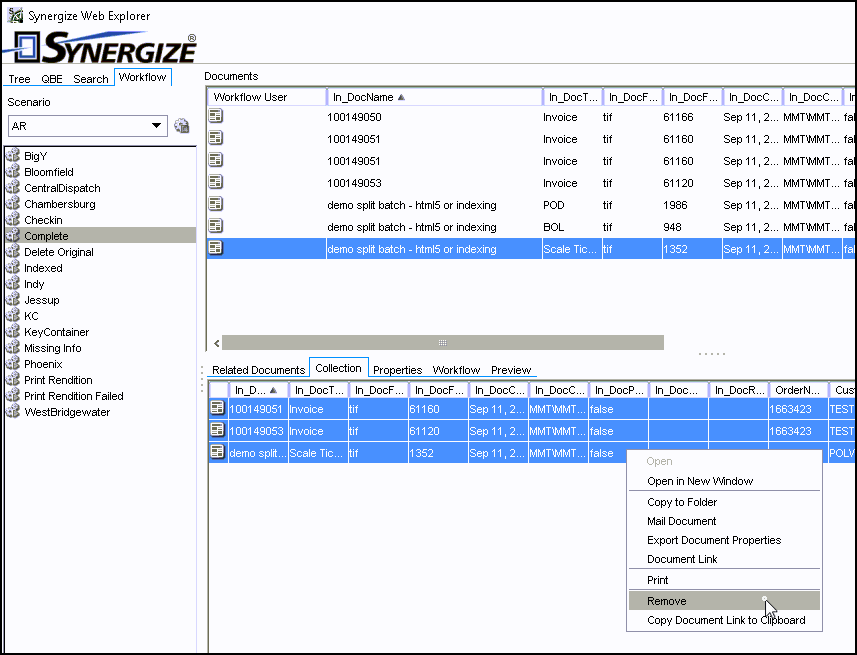
To remove an item from the current Collection tab, select one or more documents, and then click Remove.
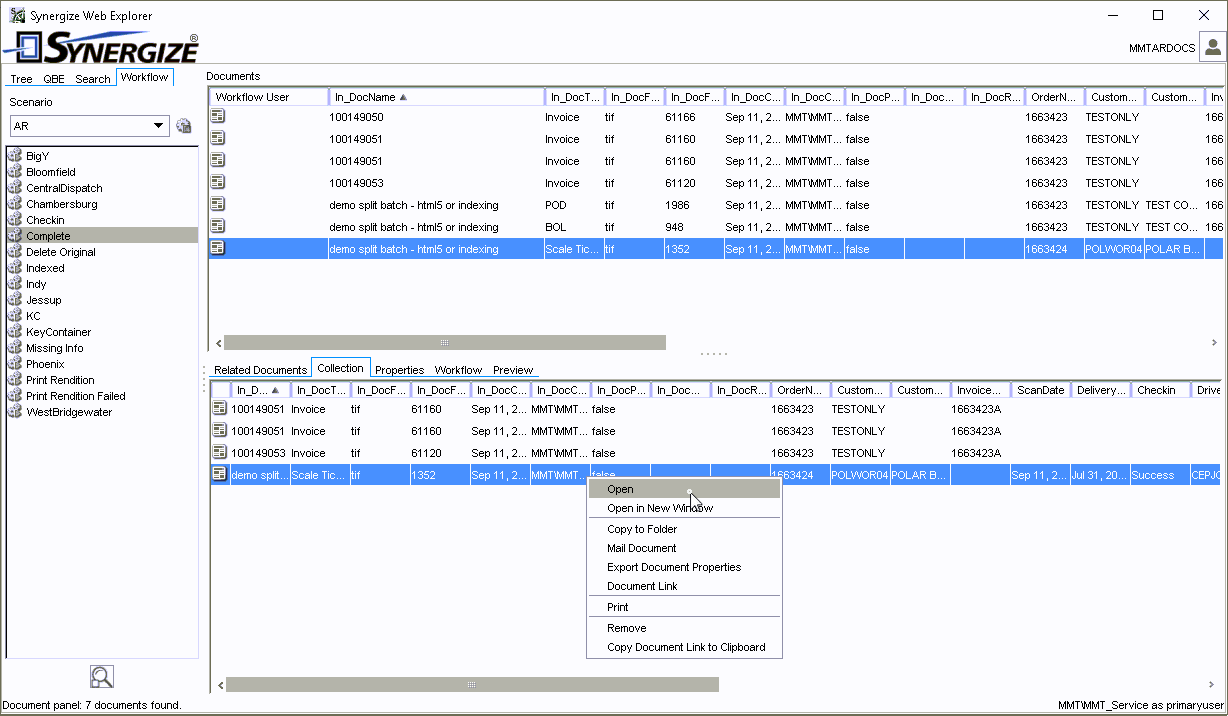
To open and view the documents, follow these steps.
-
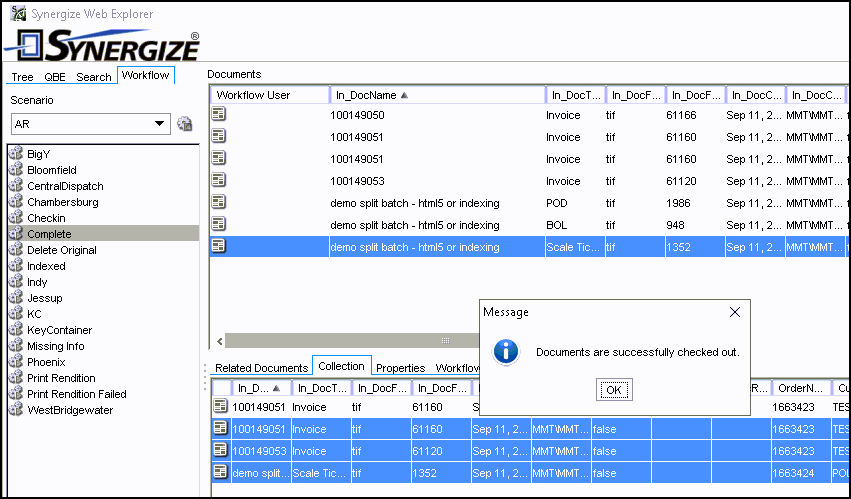
Select one or more documents on the Collection tab.
-
Right-click and choose Open.
-
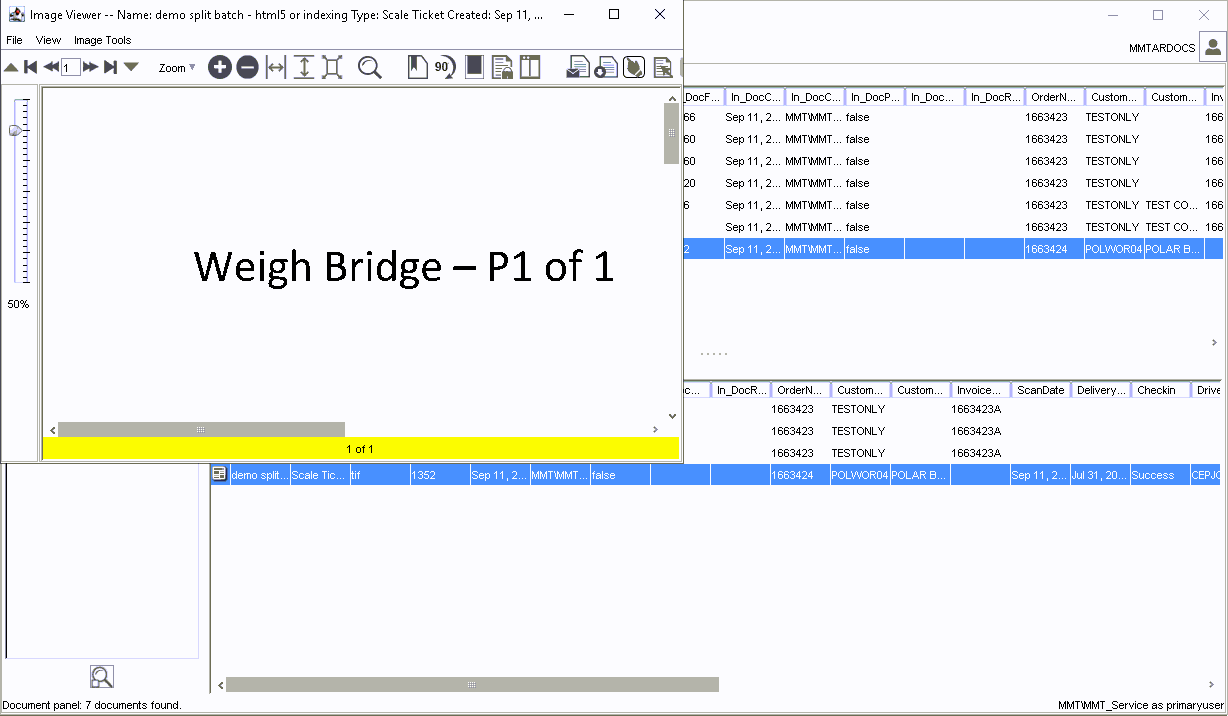
When you open just one document, it appears in a single Image Viewer window over the current window.
-
To view one or more documents in a new window, select them, right-click and choose Open in New Window.
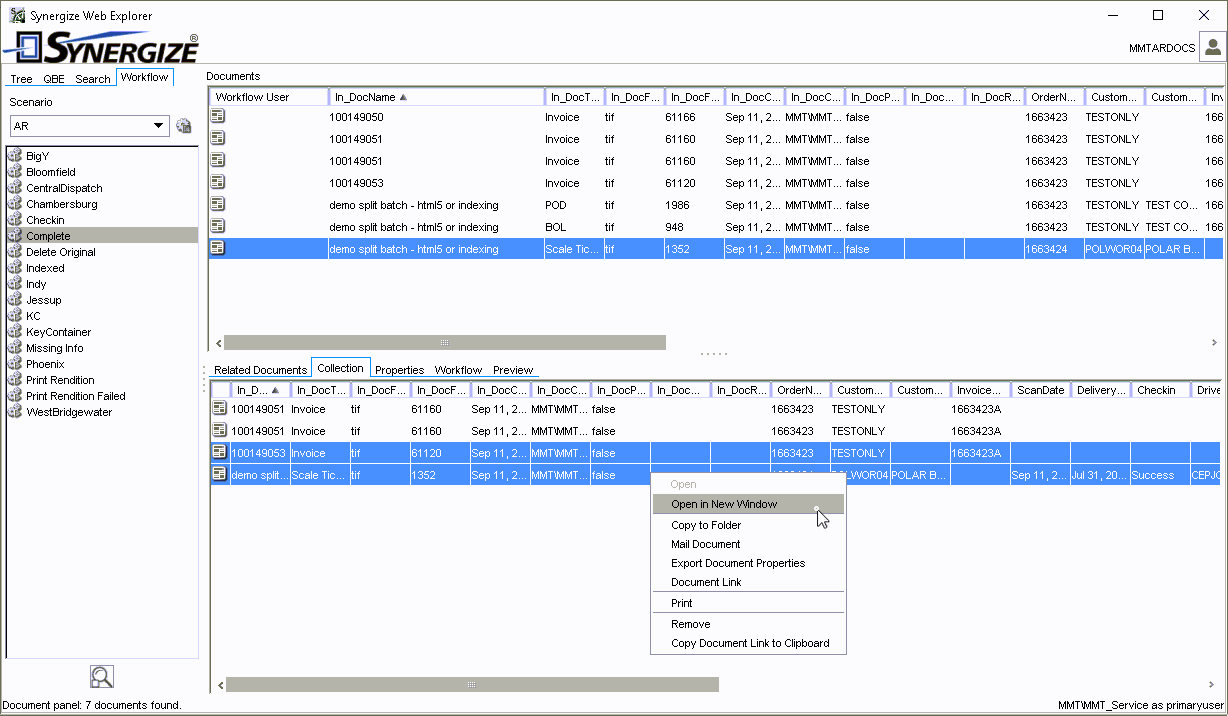
-
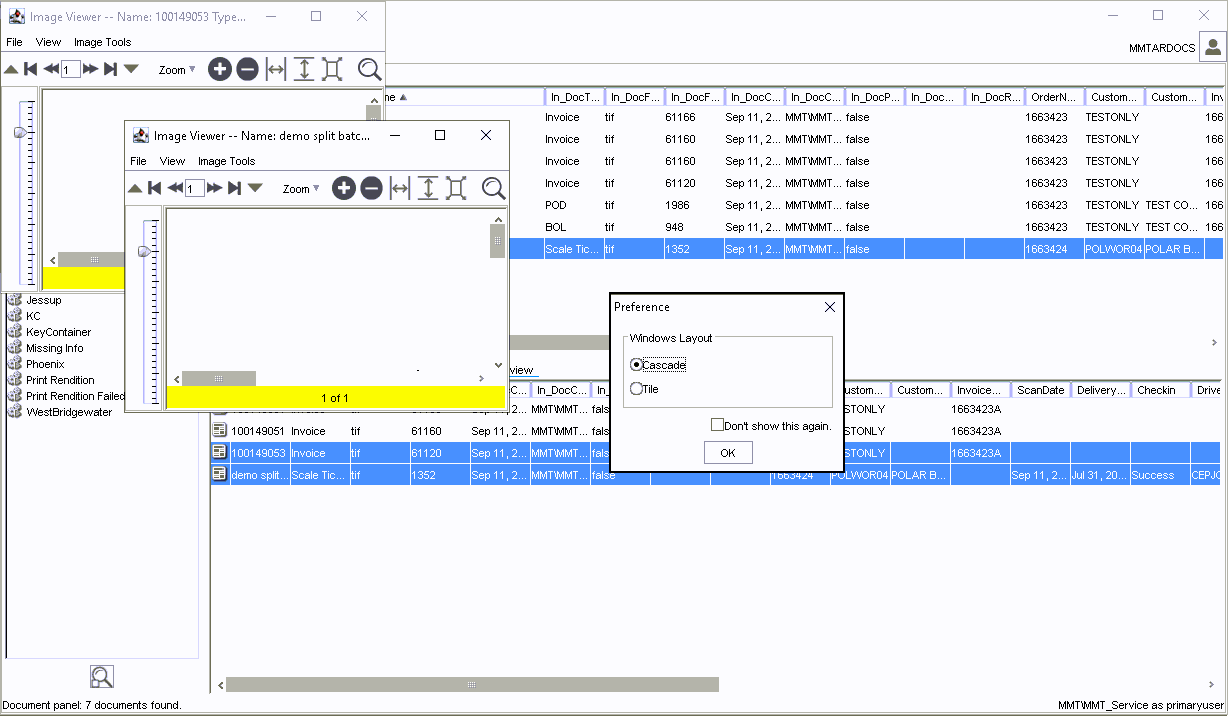
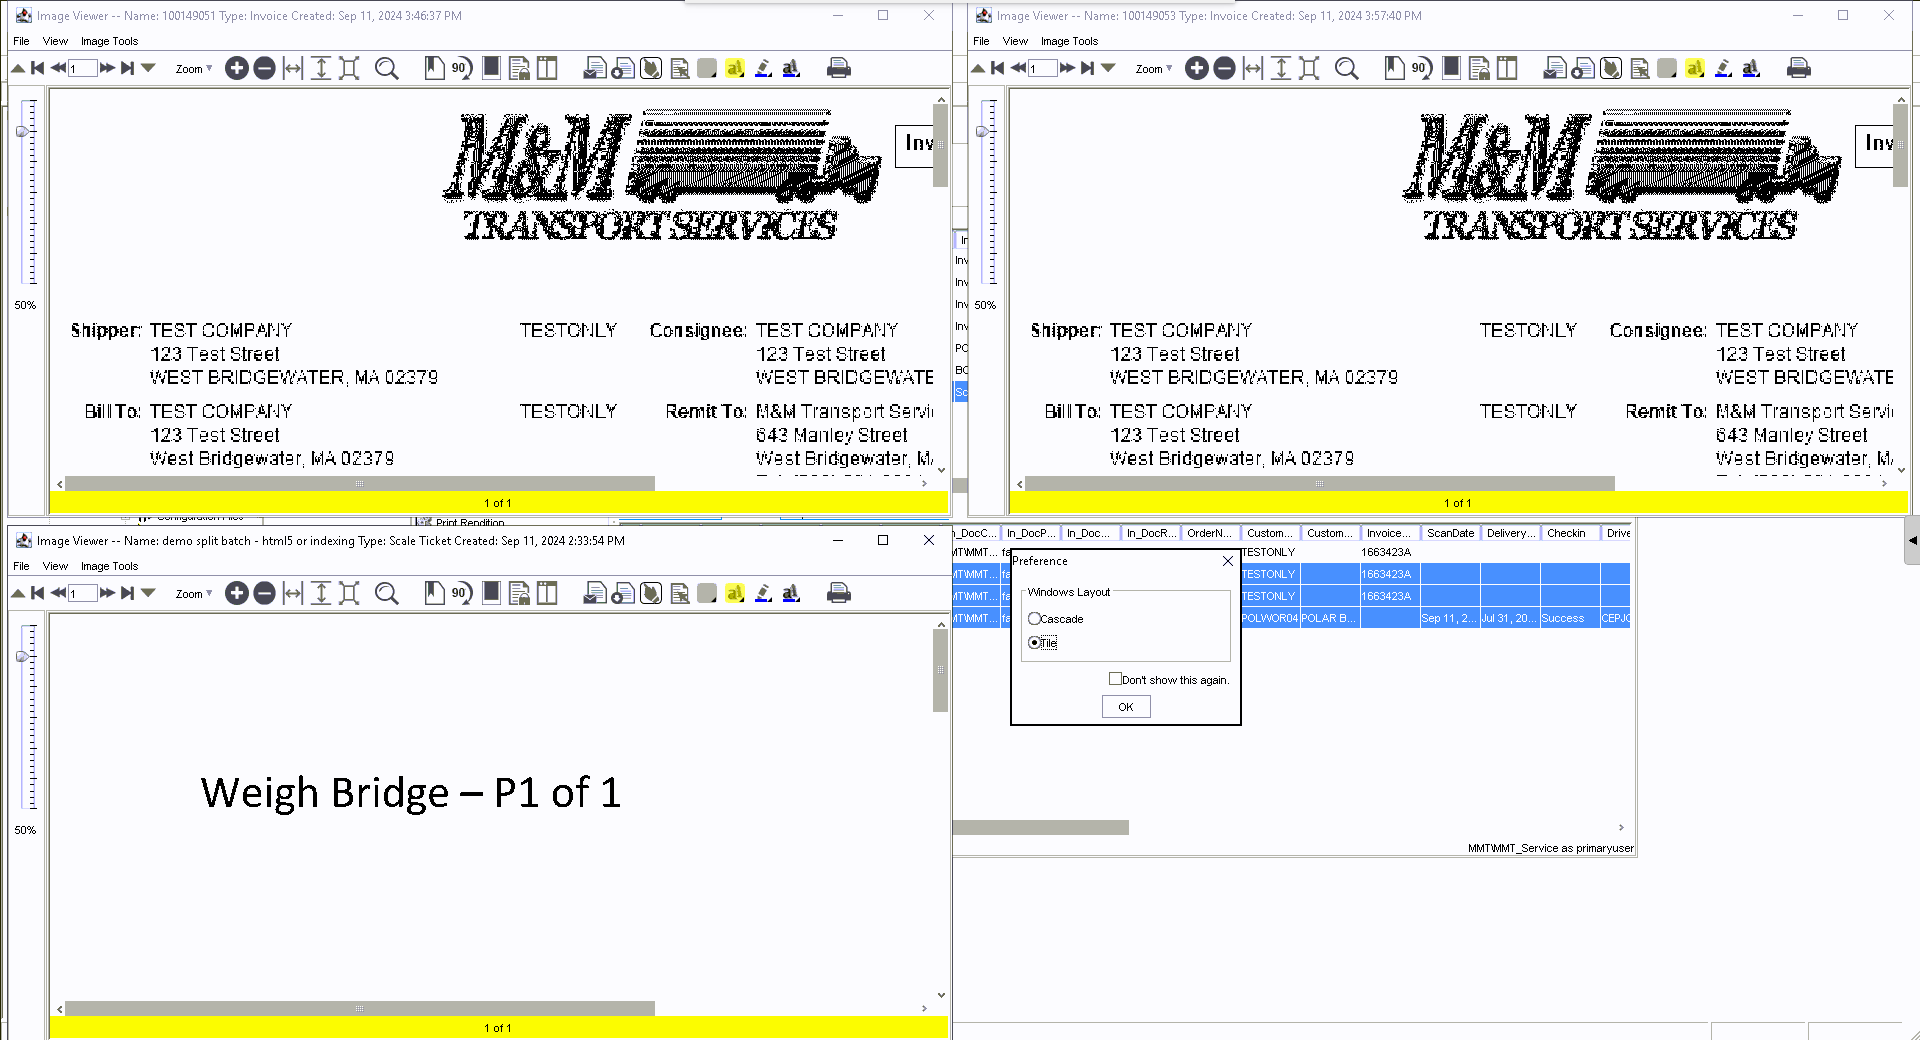
When you open multiple documents, you can view them in a cascading layout of overlapping windows or space them apart as separate window tiles. In the Preference window, select a window layout:
-
Cascade
-
Tile
-
You can save a backup copy of one or more documents on the Collection tab to a folder on your local PC or a shared network folder.
-
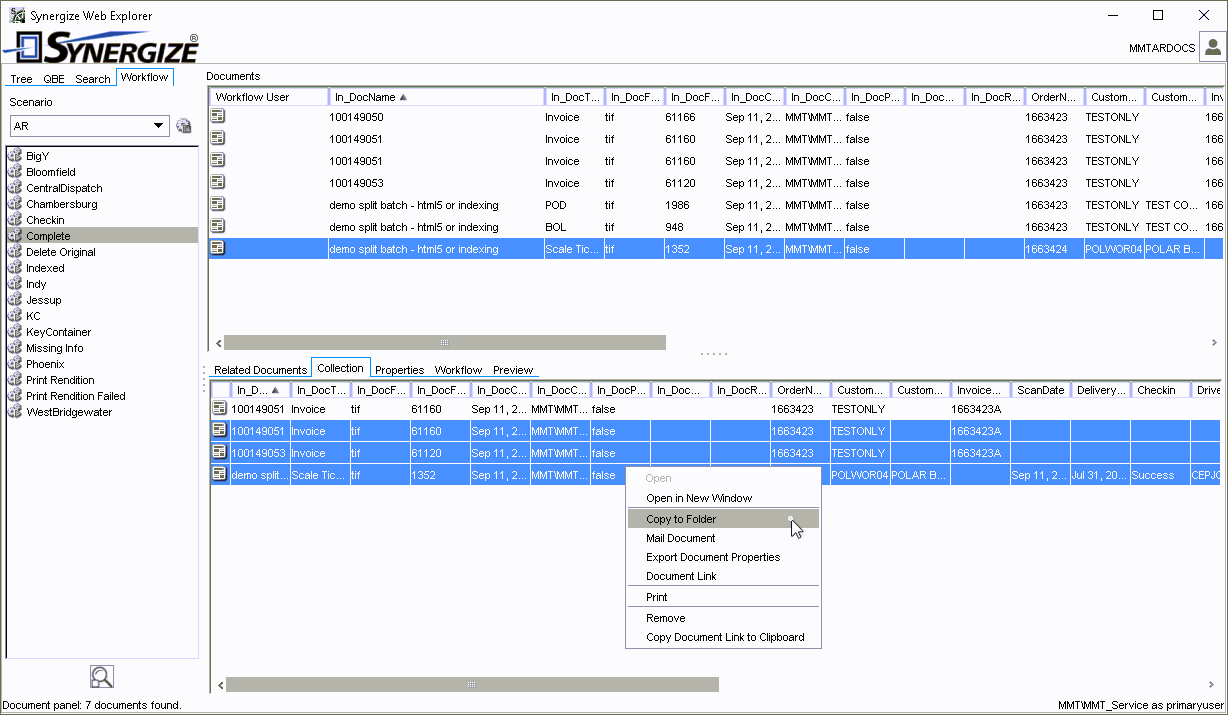
Select one or more documents on the Collection tab.
-
Right-click and choose Copy to Folder.
-
In the Configuration window, select the format and page settings and click OK.
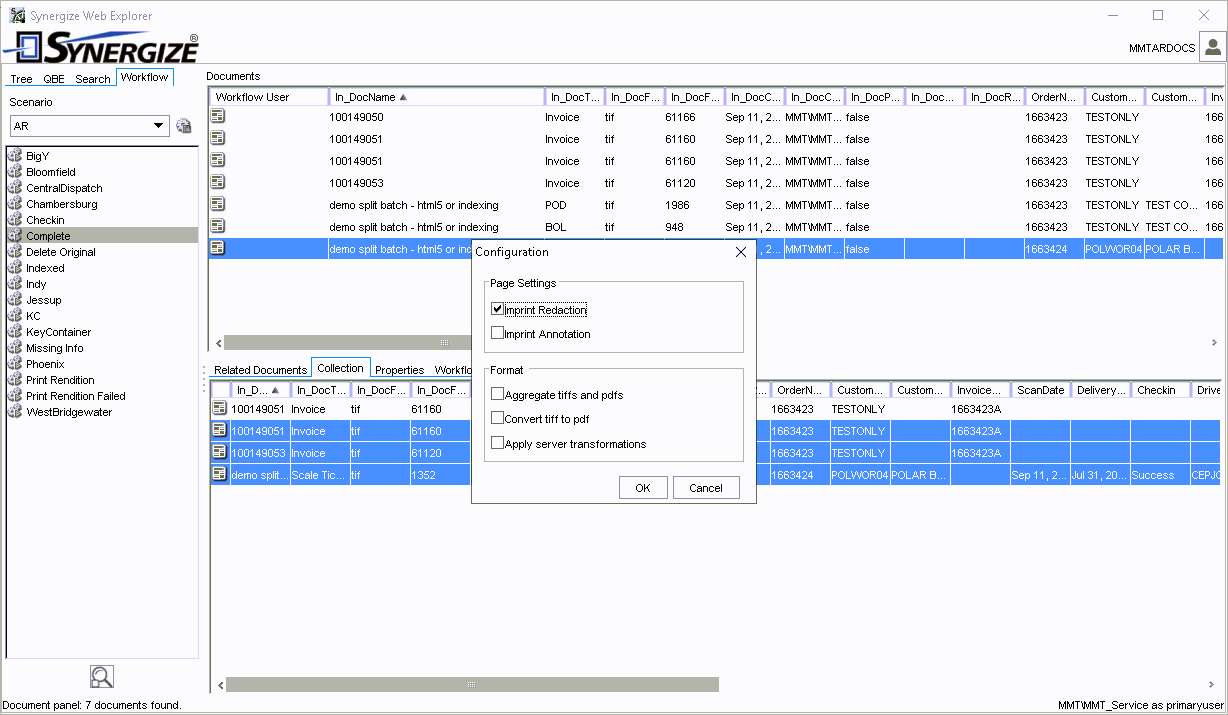
You can save TIFF and PDF files or convert any TIFF files to PDF to enforce a PDF-only standard. In general, PDF files are smaller without losing quality.
-
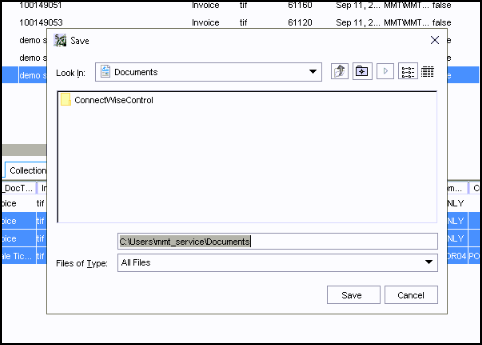
In the Save window, browse to the destination folder or enter the full drive letter and path. Click Save.
Example: C:\Documents\March-2027\PH-134
-
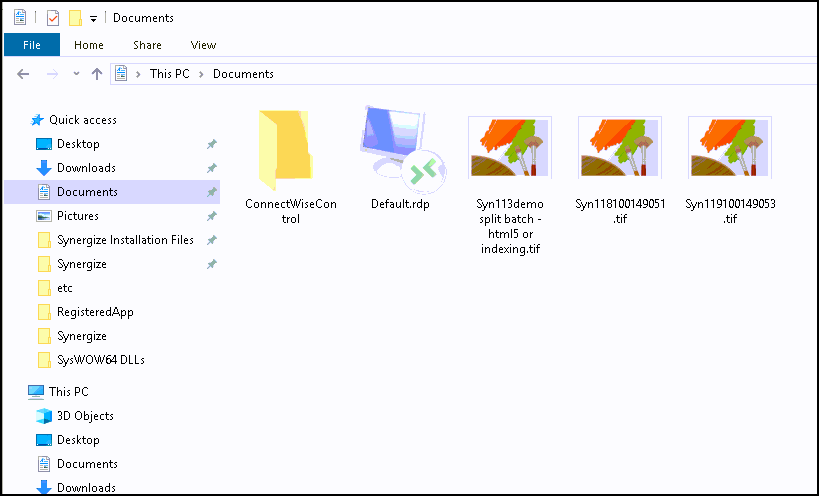
Copies of your documents now appear in the folder.
Follow these steps to print one or more documents on the Collections tab. You could also print the content to a PDF file and then send it as an e-mail attachment.
-
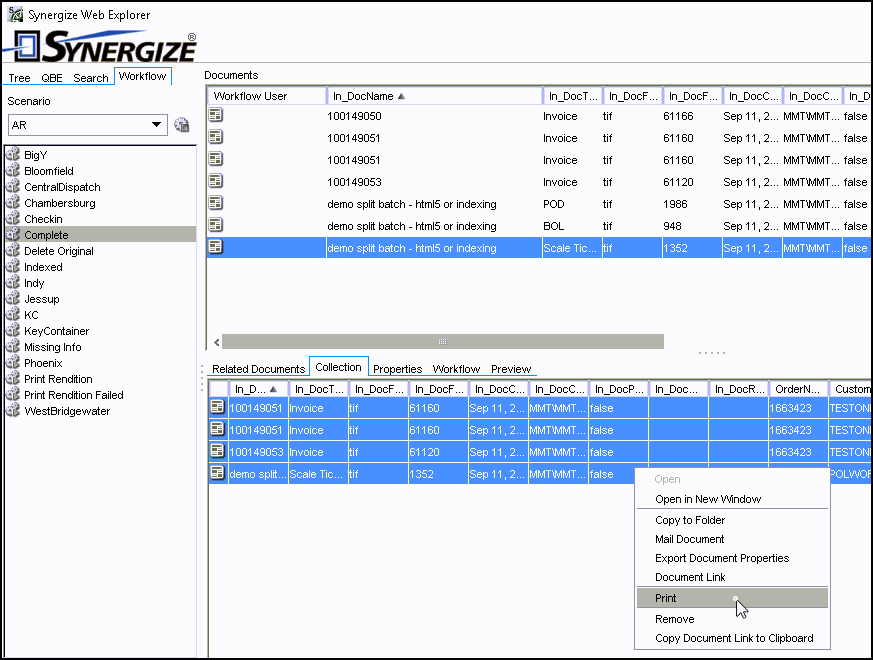
Select one or more documents on the Collection tab.
-
Right-click and choose Print.
-
In the Configuration window, select the print and batch settings and click OK.
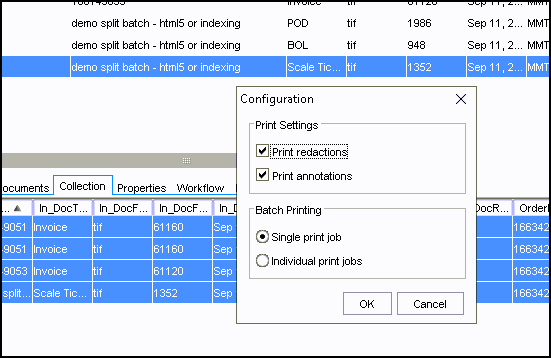
-
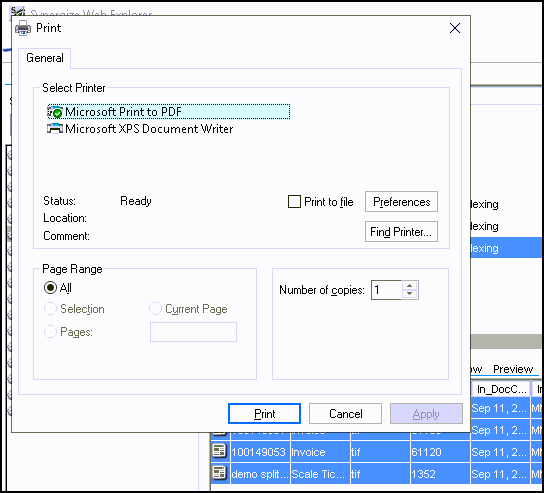
Set specific preferences and options in the Print window. Options vary based on the type of printer you select such as a network printing queue, laser printer, inkjet printer, or PDF. When finished, click Print.
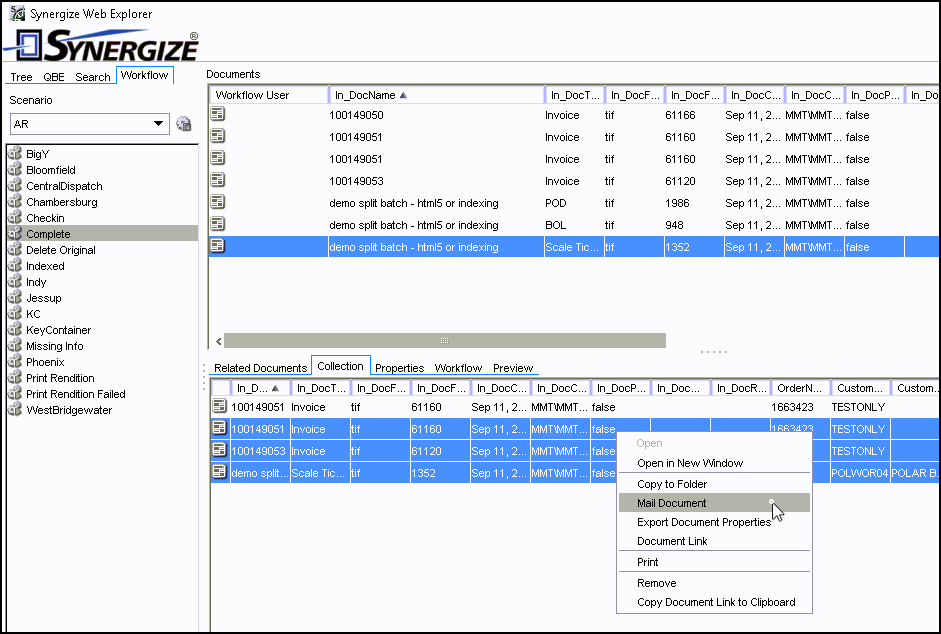
Follow these steps to email one or more documents on the Collections tab. You could also print the content to a PDF file and then send it as an e-mail attachment. You could also copy one or more files to a storage folder and then e-mail them as attachments.
-
Select one or more documents on the Collection tab.
-
Right-click and choose Mail Document.
-
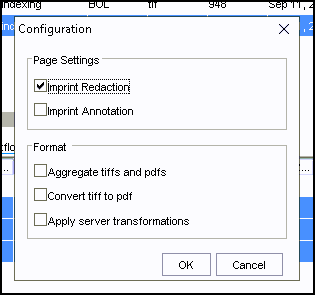
In the Configuration window, select the format and page settings and click OK.
You can save TIFF and PDF files or convert any TIFF files to PDF to enforce a PDF-only standard. In general, PDF files are smaller without losing quality.
-
Your default e-mail application opens and a new draft message is prepared for you to send your documents as TIFF or PDF attachments. Review the draft and click Send.

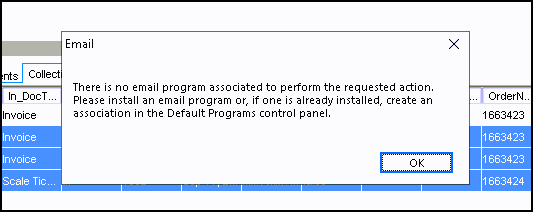
Note: You must have an e-mail application or service associated with the URL:MailTo protocol in the Default Programs control panel or the Apps page in Windows 11 Settings. If you have not set an associated e-mail solution, the following message appears in Synergize:
There is no email program associated to perform the requested action. Please install an e-mail program, or if one is already installed, create an association in the Default Programs control panel.
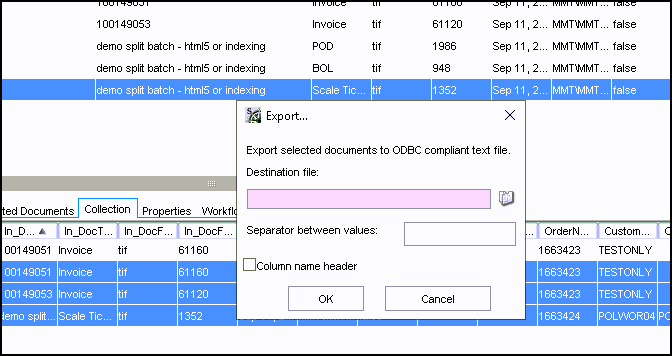
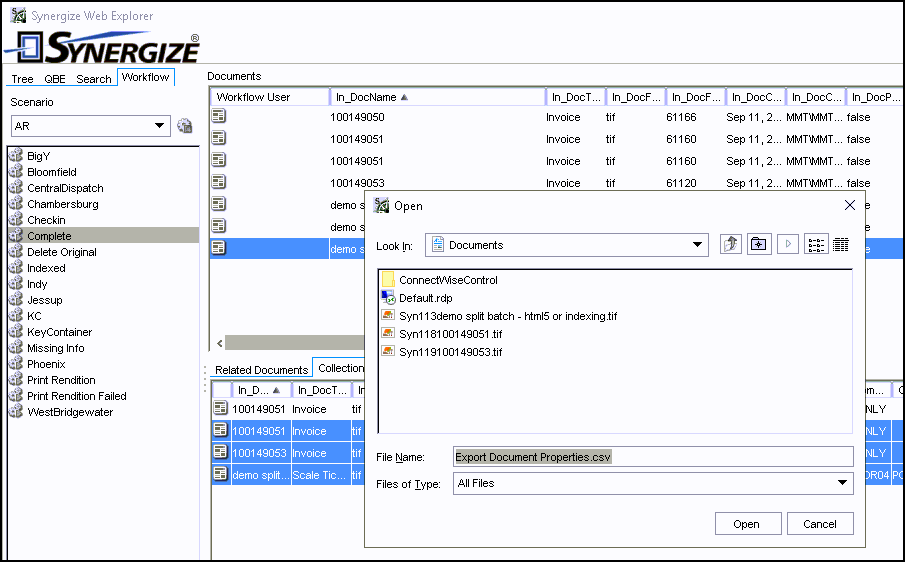
You can export the Synergize field data for the documents in your collection. Instead of a PDF or TIFF file, your data is exported as an ODBC compliant text file with your choice of separator between data values. The most common file type is a comma-separated values (CSV) file with a comma between field values (value1,value2,value3).
-
Select one or more documents on the Collection tab.
-
Right-click and choose Export Document Properties.

-
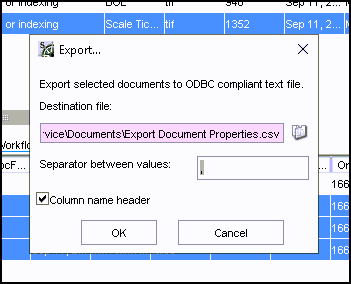
In the Export window, complete the Destination File and Separator between values fields. To include the field names in the first row of exported data, select the Column name header check box.
Example:
-
Your document data is exported. Click OK.
-
To verify or use the data, open the exported CSV file in a spreadsheet application, database, or text editor.
-
The exported data values appear.

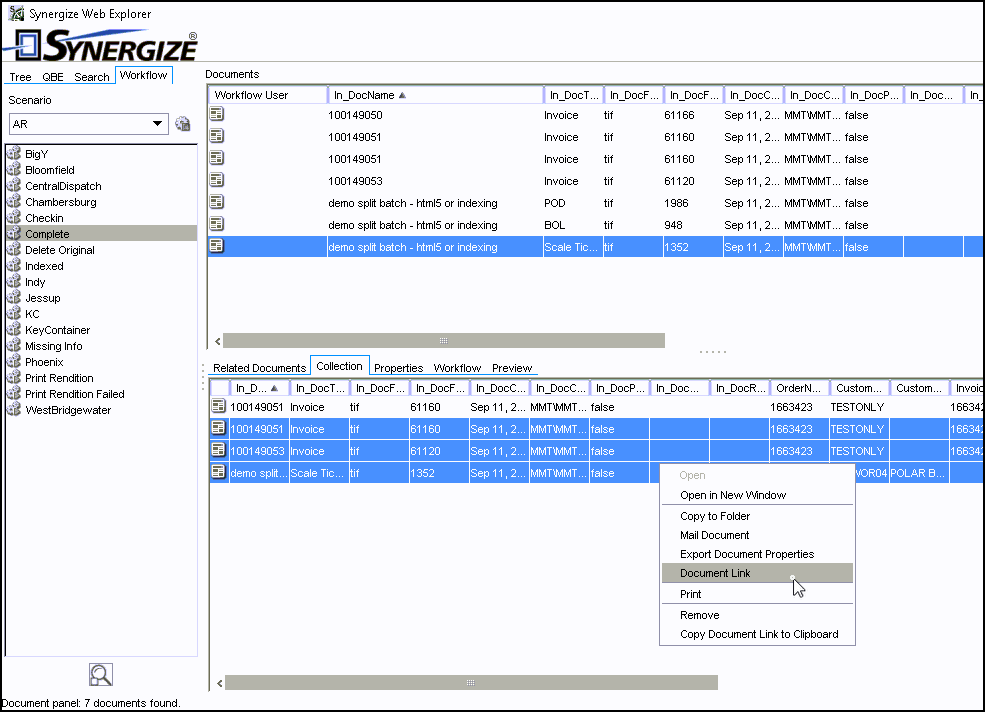
You can create a dynamic link to share the content of a collection. The legacy Synergize Web Explorer requires a Java applet or compatible substitute. Other methods of sharing the data include email, print, export, or switching to the new HTML5 edition of Synergize Explorer 16.4 or newer (Feb 2025).
-
Select one or more documents on the Collection tab.
-
Right-click and choose Document Link.
-
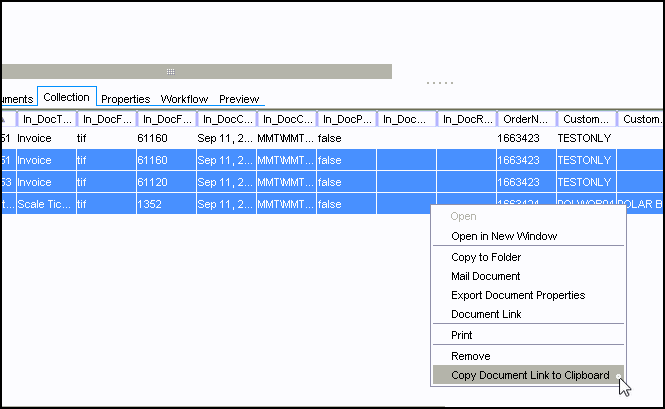
The system generates a dynamic URL or http link for internal use (the link is not https). To copy the link and paste it in your web browser or share it through email or chat with a co-worker, right-click and choose Copy Document Link to Clipboard.
-
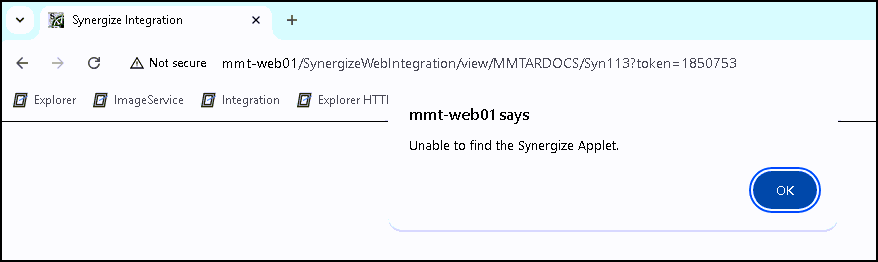
Paste the link in a supported web browser (requires an applet to view).
If your user account has been configured to participate in a workflow process, follow these steps:
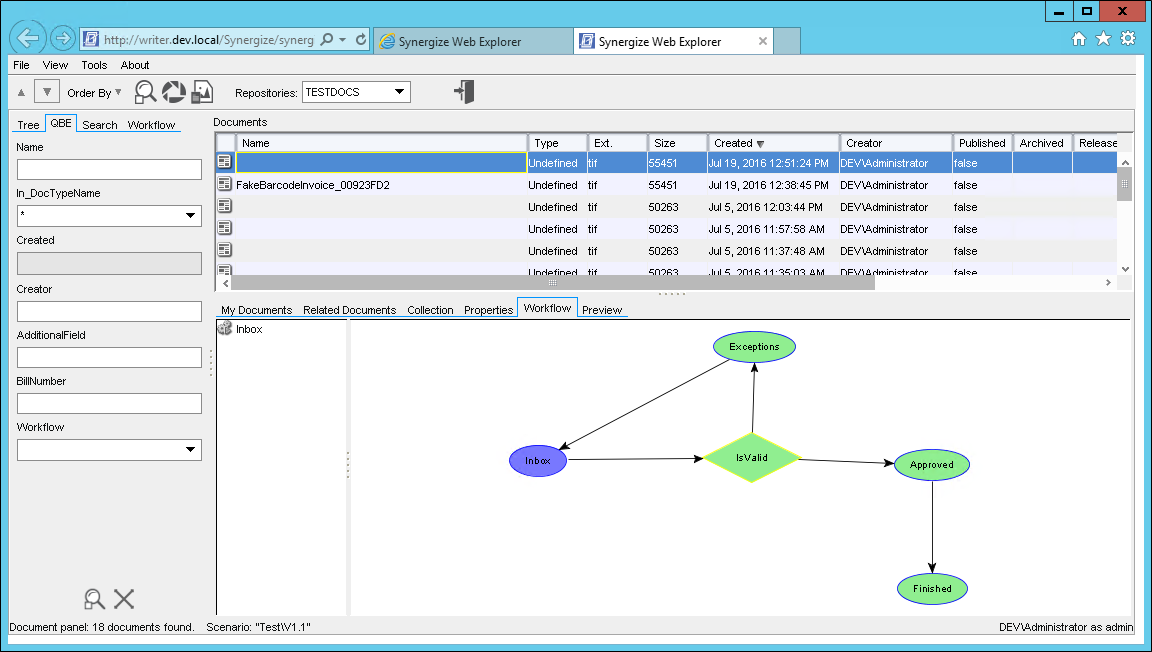
1. Select the Workflow tab.
If you see the Tree, QBE, and Search tabs but not the Workflow tab, speak with your system Administrator, to have your account configured for workflow.
2. The Workflow tab shows a list of the workflow queues you have permission to access.
There may be as few as one queue displayed.
3. From the list, select a workflow queue.
Documents in that queue are shown in the results area.
Select the document you wish to process.
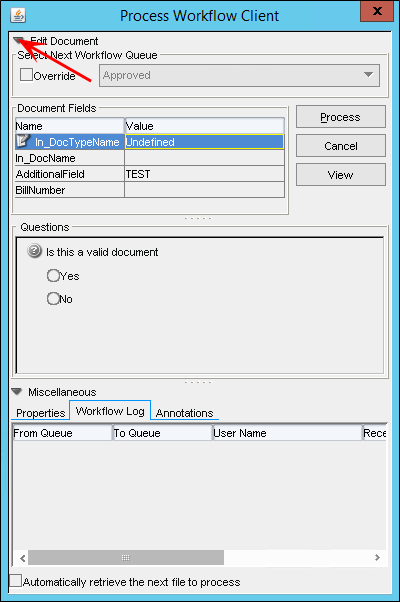
4. Right-click on the selected document and click Process Workflow.
A pop-up window shows the index values associated with the document.
A challenge question may also be presented.
5. Select an option for processing:
-
Select Process, to move the document to the next step in the configured workflow.
-
Select Cancel, so that the document does not move to the next step in the configured workflow. It will remain in your workflow queue to be processed at another time.
-
Select View, to display the document in the viewer. You can then review the document to make your workflow approval decision.
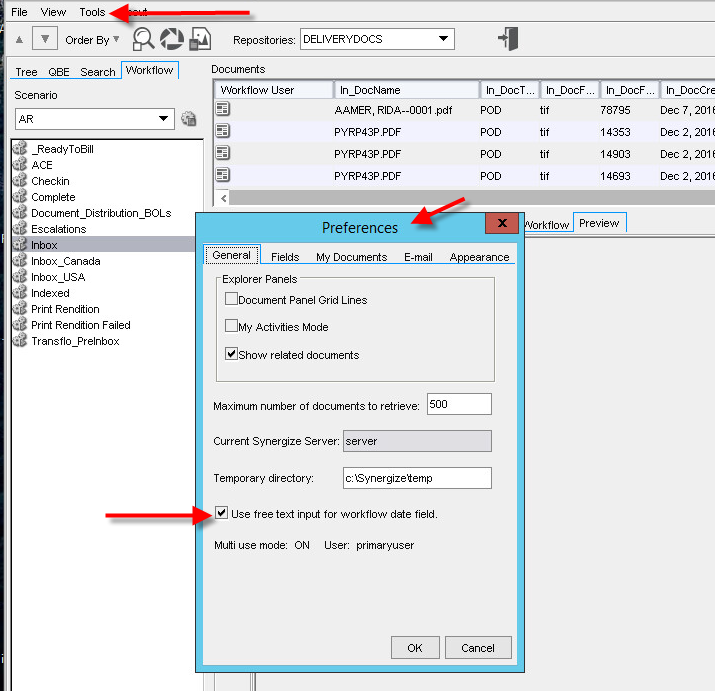
Tip: If you need to enter dates when processing workflow, the default is to not allow free text entry and to allow you to use only the calendar tool. You can change the default by selecting Tools > Preferences > General. On the General tab, check Use free text input for workflow date field.
Note that the date format is either month/day/year or day/month/year, depending on the search date setting under Repository settings > Options in EMC.
When processing a document, the basic action is to move a document to the next queue in a workflow.
For multi-page Tiff documents you can split them out into smaller batches.
You can index the smaller batches with different values.
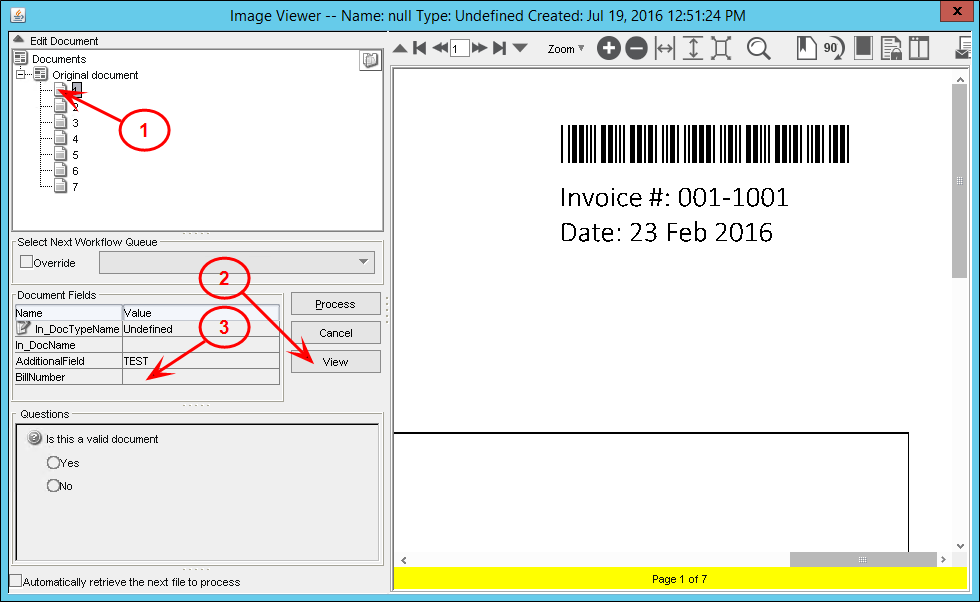
Here is a simple workflow with a 7-page Tiff document.
First, right-click on the document you want to process and select Process Workflow.

Instead of immediately processing the file, expand the Edit Document section, by clicking on the down arrow.
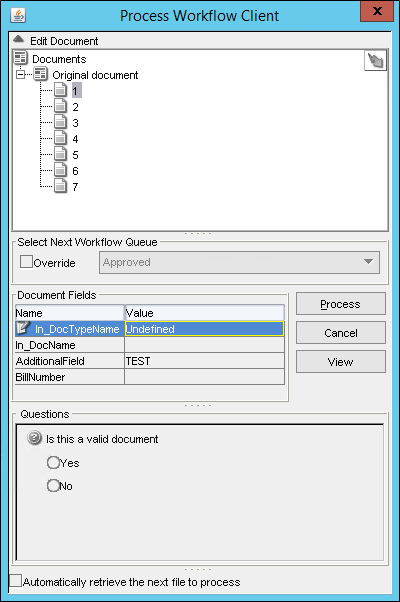
Do the following, to apply the correct index value to your document:
1. Select the first page of the document.
2. Click View.
Read the document in the image viewer for index values to use and to check for legibility and validity.
3. Type the relevant index value in the appropriate document field.
Toggle between Quick Mode and Safe Mode, by clicking the icon in the top-right corner of the document tree view.
In Quick Mode (which is active when the lightning bolt is shown in the top-right corner of the document tree view), after you type the new index value and hit enter, the document is automatically split for you.
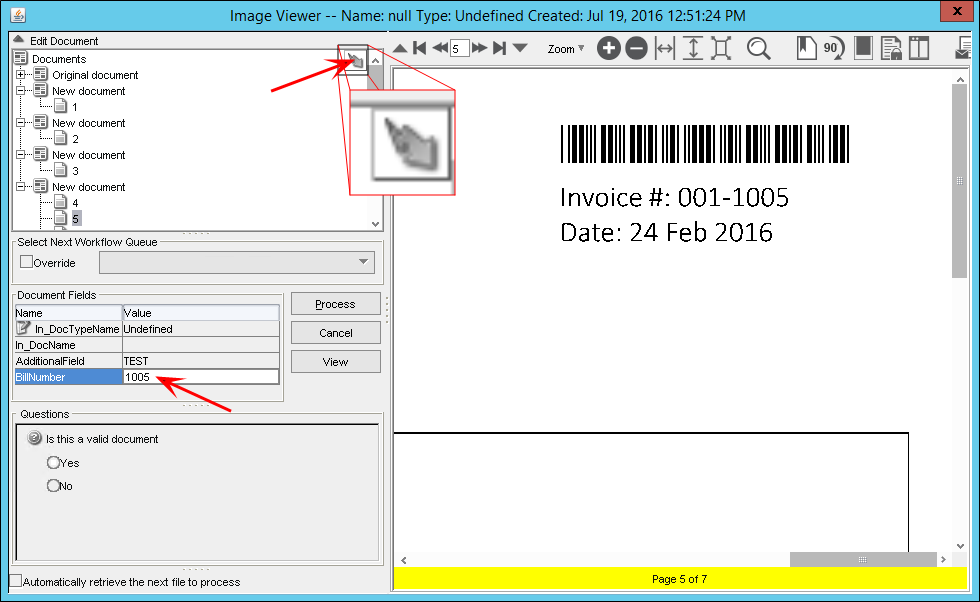
When not in quick mode, you need to split the document manually.
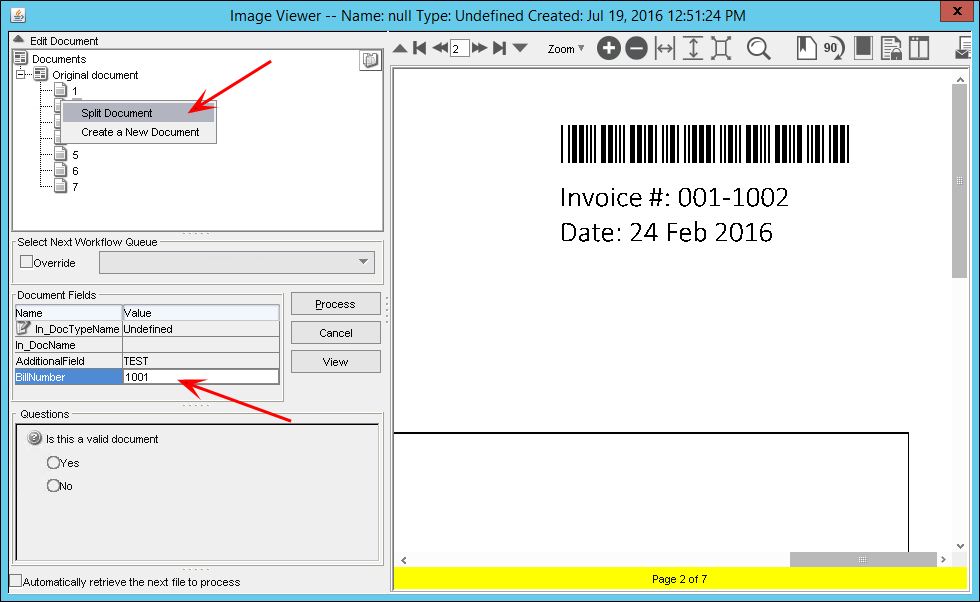
Right-click on the next page of the original document and select Split Document.
Note that the value you entered for the first page will be carried forward into the new document, and you may need to enter a new value.
In this example, the first page was invoice 1001 and the next page should have a value of 1002.
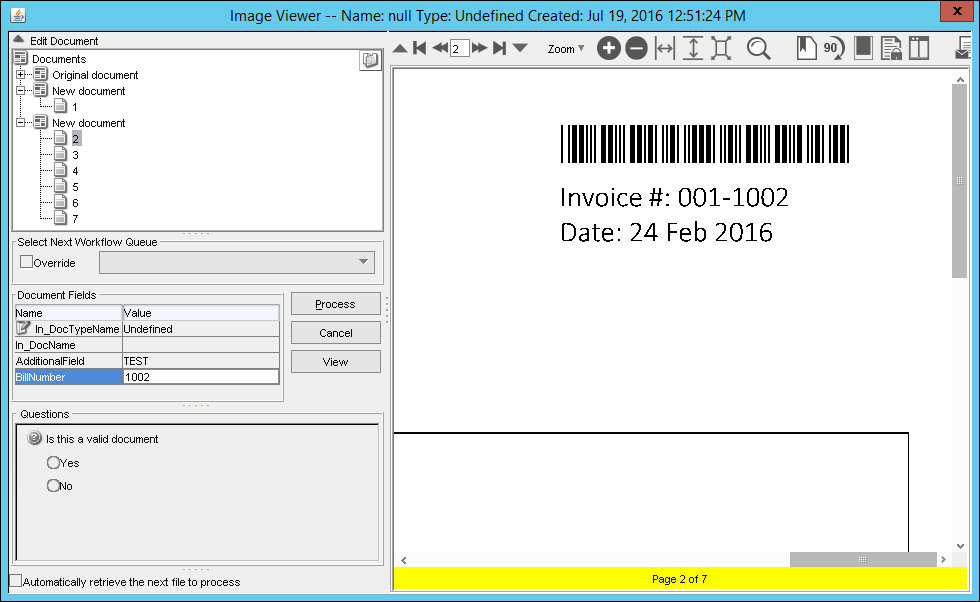
Once you have split the document and entered its index values to your satisfaction, answer the questions (if any) and click Process as you normally would, to move the document along the workflow into the next queue.
1. Use any method to search for a document in the repository.
2. To view the log for a document, right-click the document in the results screen.
Hover over the Logs button then select Document Log.
A pop up box displays the document log.
1. Use any method to search for a document in the repository.
2. To view the workflow log for a document, right-click the document in the results screen.
Hover over the Logs button then select Workflow Log.
A pop up box displays the workflow log.