Install the DMS Workflow Engine and Add-On
As an administrator, use this article to install the Transflo DMS Enterprise Workflow Engine, install the Workflow Engine Add-On, create the Workflow database, install the Workflow components, verify the running status of the Transflo DMS Enterprise iProcess Engine, and apply any additional hot fixes.
The TRANSFLO® Workflow Engine installer creates the Workflow database and the Workflow components. To install the TRANSFLO® Workflow Engine on your server, follow these steps:
-
Launch TRANSFLO® Workflow Engine Setup.exe from the installation CD.
-
The TRANSFLO® Workflow Engine Setup Wizard opens. Click Next.
-
The installer checks for prerequisites.
If the installer does not find the Microsoft .NET Framework, it will attempt to install it.
Note: See the Third Party Software Requirements section of the TRANSFLO® Hardware Specification System Administrator's Knowledge Base, for .NET Framework requirements and installation instructions.
-
The installer checks your system and starts installing necessary components for your TRANSFLO® Workflow Engine. This may take several minutes. Wait until the TIBCO iProcess™ Engine installer initializes.

-
If the JRE installation fails, check to see if the jre-6u27-windows-i586.exe file is in the TIBIPE folder.
-
The TIBCO iProcess™ Engine splash screen opens indicating that TIBCO iProcess™ Engine installer is initializing. The TIBCO iProcess™ Engine InstallShield® Wizard initializes showing you the progress.
-
The TIBCO iProcess™ Engine Setup Welcome window opens.
-
Close all of your other Windows applications.
-
Click Next.

-
-
The Software License Agreement window opens. Read the agreement and scroll to the bottom of the agreement. The Yes button is enabled. Click Yes.

-
The Setup Type window opens. Select the Custom radio button and click Next.

-
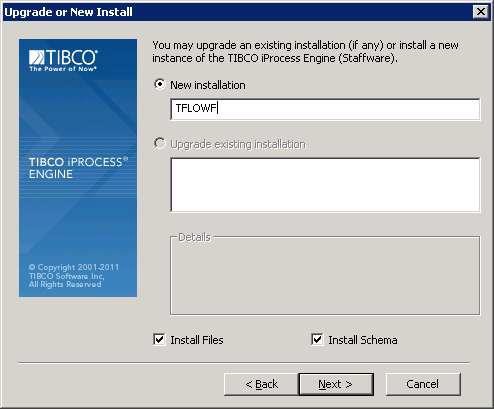
The Upgrade or New Install window opens.
-
In the text box under the new installation radio button, type “TFLOWF”.
-
Check both the Install Files and Install Schema check boxes to install iProcess Engine files and schema tables simultaneously.
-
Click Next.
-
-
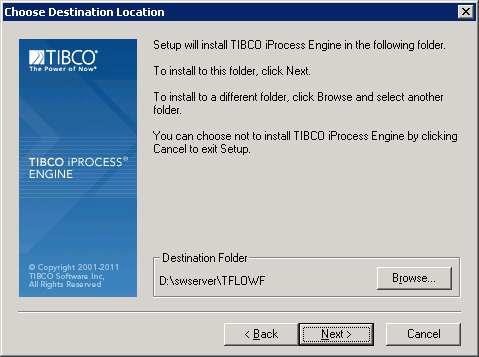
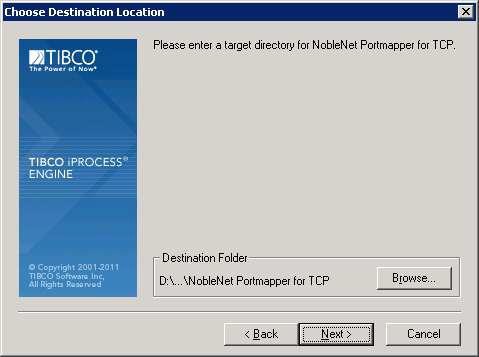
The Choose Destination Location window opens.
-
(Optional) To change the drive mapping for your installation, click the Browse button and change the drive letter only. For example, to change the drive to your E drive, type E:\swserver\TFLOWF. If you are prompted to create the folder, click Yes.
-
When the Destination Folder for the iProcess Engine is selected, click Next.
-
-
The Choose Destination Location window for NobleNet Portmapper for TCP opens. Click Next.
-
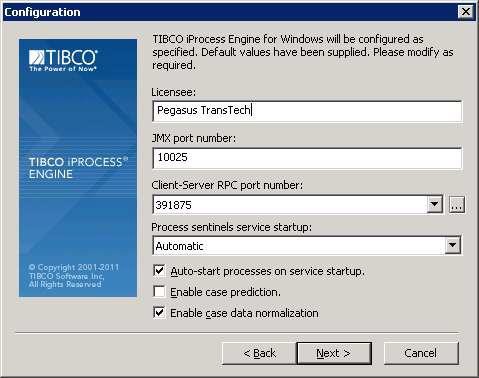
The Configuration window opens.
-
With the exception of the Licensee field, it is important that you do not change any of the default values in this window. The entry in the Licensee field can be your company name. It must be greater than 4 characters long.
-
Click Next.
-
-
The Operating System Users Location window opens. Select a location and click Next.
-
The Users and Groups Configuration window opens.
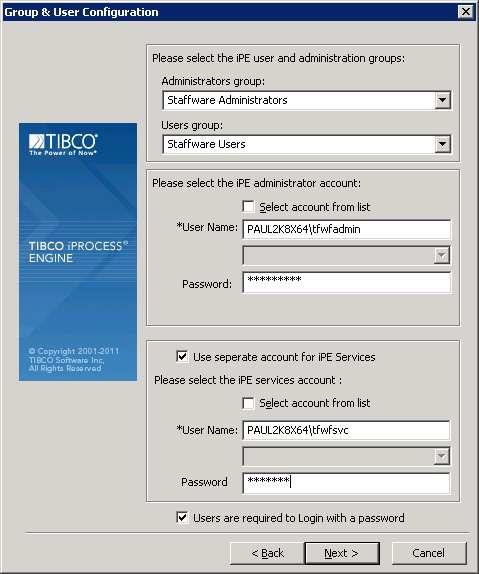
Note: It is recommended that two separate Users that belong to the Administrators group be created prior to installation. One will be used as the iPE administrator account. The other will be used as the Administrator account for iPE Services. The recommended convention is:
-
iPE Administrator: tfwadmin
-
iPE Services Administrator: tfwfsvc
-
Enter the fully qualified user name and password for the iPE administrator account in the User Name and Password text boxes respectively.
-
Check the Use separate account for iPE Services check box.
-
Enter the fully qualified user name and password for the iPE services account in the User Name and Password text boxes respectively.
-
If you want TRANSFLO® Workflow to check for a valid domain user (end user accounts) but not require the user to enter a password, un-check the Users are required to Login with a passwordcheck box. (This is not a recommended practice.)
-
Click Next.
-
-
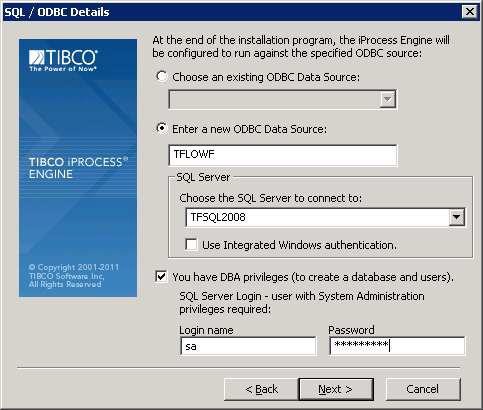
The SQL / ODBC Details window opens.
-
The ODBCDataSource box must contain the Node name. This is the default and must not be changed.
-
Select the SQL Server for your iProcess Engine from the drop down in the SQL Server group box.
If you are using a named instance for your TRANSFLO® Workflow database you must type the fully qualified named instance in the Choose the SQL Server to connect to drop-down in the following format:
<Server>\<Named Instance>
Note: This step does not create the TRANSFLO® Workflow database; it only creates the ODBC Data Source that TRANSFLO® Workflow will use to communicate to the database.
Note: If the ODBC data source already exists on 64 bit platforms verify the ODBC entry exists on odbcad32.exe in the C:\Windows\SysWOW64 folder.
See http://support.microsoft.com/kb/942976/en-us for more information.
-
Enter the Login name and Password for the SQL Server Administrator in the respective text boxes.
-
Click Next.
-
-
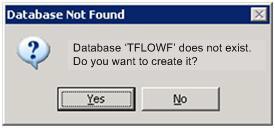
The ODBC Source Not Found message box opens. Click Yes to create it.

-
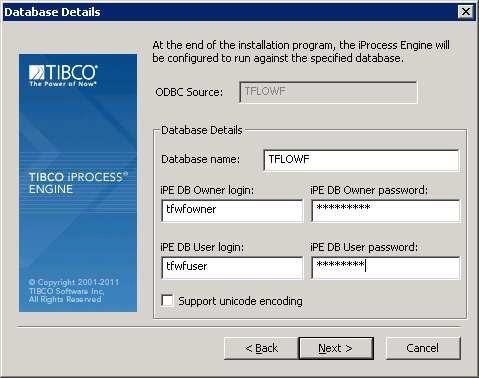
The Database Details window opens.
-
Type TFLOWF in the Database Name field.
-
Type the iProcess Engine database owner’s login id and password in the iPE DBOwnerlogin and iPEDBOwner password text boxes respectively. (The recommended name for iPE DB Ownerlogin is “tfwfowner”.)
The iPE DB Owner login and password must match the login and password that you will set in the TRANSFLO® Administration tool, on the Workflow tab. See Configure Workflow Connection Parameters.
-
Type the iProcess Engine database user login id and password in the iPEDB User login and iPE DB User password text boxes respectively. (The recommended name for iPE DB Owner is “tfwfuser”.) These user names and passwords must conform to the password policy that was enabled in your SQL Server database.
-
Un-check the Support unicode encoding check box. (Unicode encoding is only used for languages other than English that require special characters.)
-
Click Next.
-
-
When prompted to create the following entities, click Yes for all three (3) messages:
-
The TFLOWF database.
-
The tfwowner user.
-
The tfwuser user.
-
-
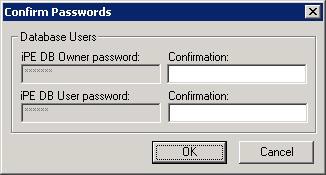
The Confirm Passwords dialog box opens. Re-enter the iPE DB User login and iPE DB User password in the respective Confirmation text boxes.
-
The Select components to configure window opens. Ensure that the following check boxes are not checked:
-
Register EAICOM server plug-in
-
Enable IAP
-
Enable iProcess Objects Director.
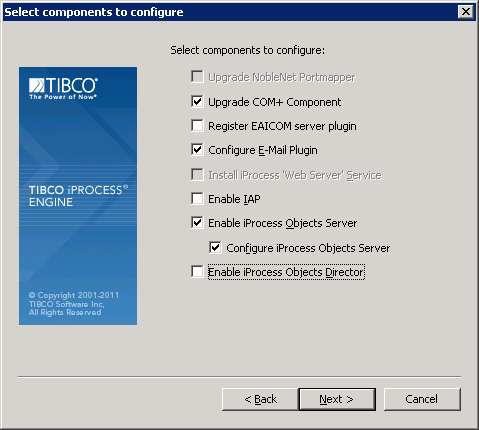
Ensure that the following check boxes are checked:
-
Upgrade COM+ Component
-
Configure E-Mail Plug-in
-
Enable iProcess Objects Server
-
Configure iProcess Objects Server.
Click Next.
-
-
The SMTP Server Parameters window opens. Enter the email address that you want to show in your “mail from” for automated emails in the Mail From text box. Enter your mail server host name in the Host text box and the email port in the Port text box. Leave the Specify SMTP Backup Hosts and Specify Mail Message Headers check boxes unchecked.
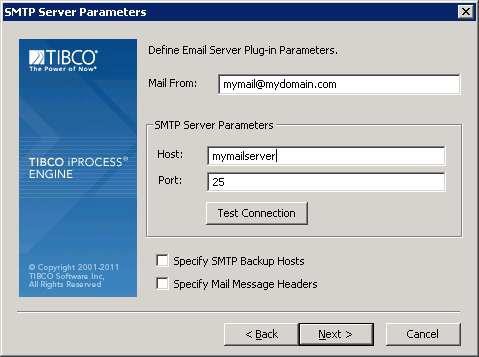
Note: The SMTP Server Parameters must be supplied by your mail server system administrator.
Click the Test Connection button.
The following message box indicates a successful connection to your mail server. Click OK to close the message box. Click Next on the SMTP Server Parameters window.

-
The StartCopyingFiles window opens. Review the contents to ensure they reflect the configuration you chose in the previous steps of this installation. Click Next to execute the installation scripts.

-
The Running Database Scripts window opens and runs the database scripts to create and configure the TFLOWF database.

-
The installer copies the iProcess engine program files to your file system.
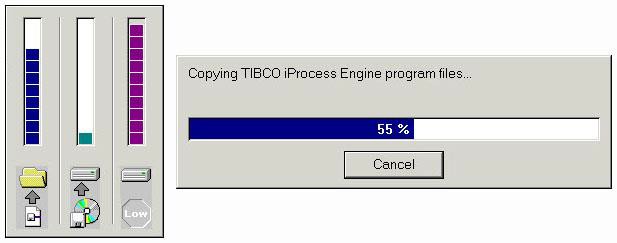
All of the components of the iProcess Engine are then installed. This may take a few minutes. This window might go blank several times. If this happens the installer is still running in the background.

-
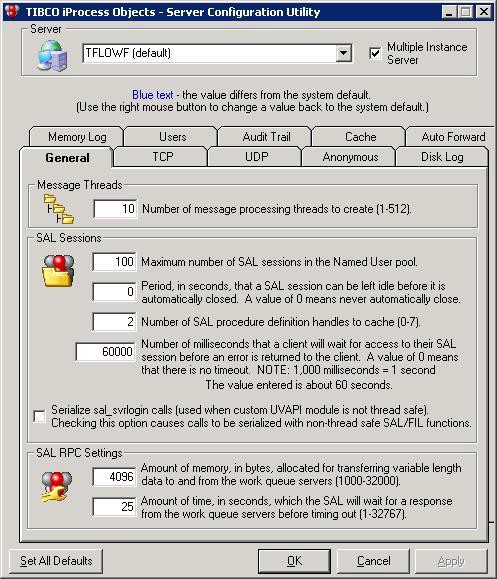
The TIBCO iProcess Objects – Server Configuration Utility opens.
-
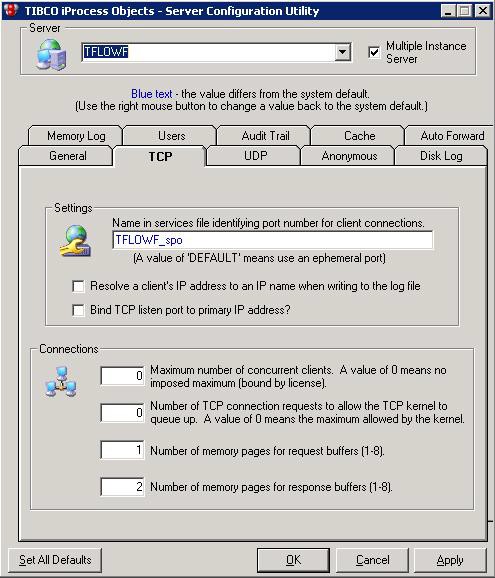
Click the TCP tab.
-
In the Settings section, verify the Name in services file identifying port number for client connections box is populated with the Workflow node name, e.g. “TFLOWF_spo” and not “DEFAULT”.
If it is “DEFAULT”, change it to the Workflow node name. Click Apply. A message will appear letting the user know that the changes will be made and saved. Click OK.
-
-
The installer checks all of the configured Events.

-
The window below notifies you that the Workflow Engine has been successfully installed. It contains information about your license, machine name and password as a GUID. Click OK.

-
You are prompted to restart your computer. Since you still have another server installation to complete, select the No, I will restart my computer later radio button. Click Finish.
You will restart your computer after you install the TRANSFLO® Workflow Engine Add-on described in the next procedure.

-
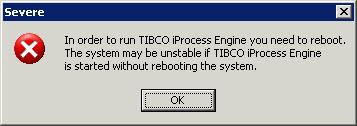
Click OK in the warning window below. As a reminder, you will reboot your computer after you install the TRANSFLO® Workflow Engine Add-on.
After you install the TRANSFLO® Workflow Engine, you must install the TRANSFLO® Workflow Engine Add-on. To install the TRANSFLO® Workflow Engine Add-on on your server, perform the following steps:
-
Launch TRANSFLO® Workflow Engine Add-on Setup.exe from the installation CD.
-
The Welcome screen for the TRANSFLO® Workflow Engine Add-on Setup opens.
Click Next.
-
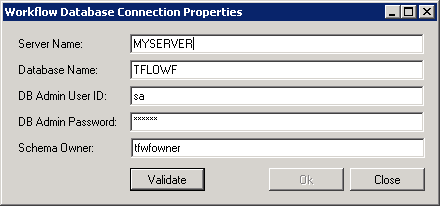
The Workflow Database Connection Properties window opens.

-
Ensure the name of your Workflow database server is in the Server Name box.
-
Ensure “TFLOWF” in the Database Name box.
-
Type “sa” in the DB Admin User ID box.
-
Type the password for the sa user in the DB Admin Password box.
-
Type “tfwfowner” in the Schema Owner box.
Note: If this window does not appear it is because is it behind the Setup window. To give it focus, select Workflow Database Connection Properties from the Windows® Task Bar.
-
-
Click the Validate button. The Validation Successful message box opens. Click OK.

-
The Ok button is enabled on the Workflow Database Connection Properties window. Click Ok.

-
Setup installs the Workflow Engine Add-on.

-
The window below indicates that your installation is complete. Select the Yes, restart the computer now check box, and click Finish.

-
After your computer restarts, check to see if the iProcess Engine is running. To check the status, perform the following sub-steps:
-
Log on to your Workflow Server with user name “tfwfadmin”.
-
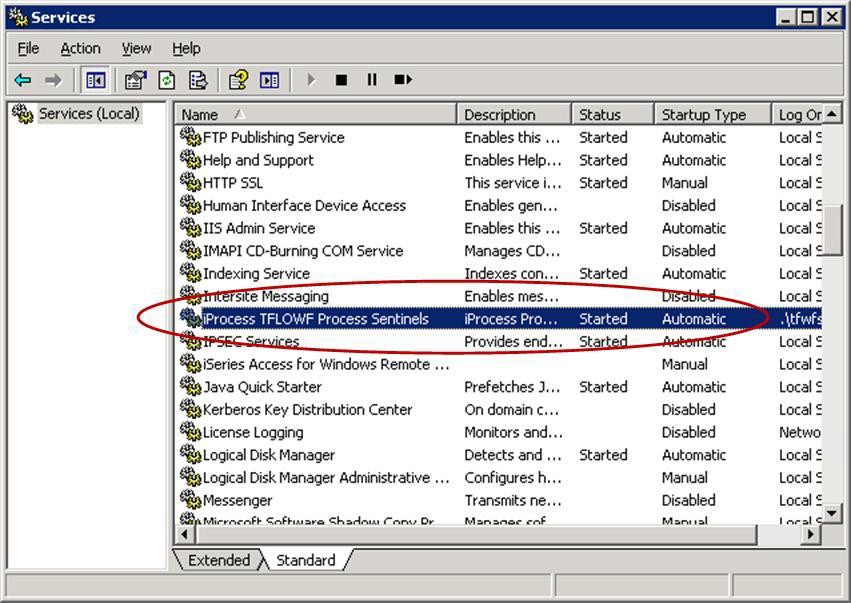
Open Services from the Administrative Tools on the Start menu.
-
Ensure that the iProcess TFLOWF Process Sentinels process shows a status of Started
-
On the Start menu click Run. Type cmd and click OK.
-
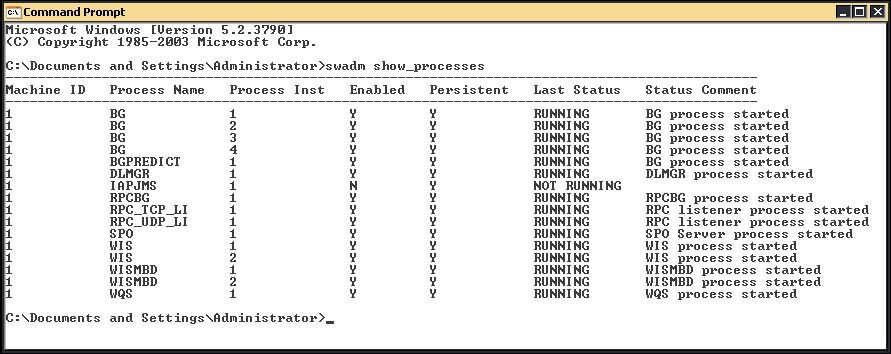
At the command prompt type swadm show_processes. All of the processes should show a Last Status of RUNNING with the exception of IAPJMS.
-
To make the processes easier to read, re-size your command prompt to 120 by 40.
-
You may need to restart the iProcess TFLOWF Process Sentinels service. If you do this, you may need to run the command swadm show_processes a few times until all of the processes are running.
-
-
-
After you have confirmed that the iProcess Engine is running, check for hot fixes:
-
Check the TIBIPE directory on your installation media for the iProcess Engine Hot Fix folder. The presence of this folder indicates that one or more hot fixes for your iProcess Engine are available.
-
The hot fixes must be applied in order by number.
-
In the iProcess Engine Hot Fix folder, open the text file with instructions for applying the hot fixes. Follow these instructions to apply the hot fixes.
-
If you apply any pending hot fixes, reboot your computer.
-