4: Sign Documents
-
To search and select a different document than the current one, you can go back to 2: Loads List or start over back at 1: Home Screen.
-
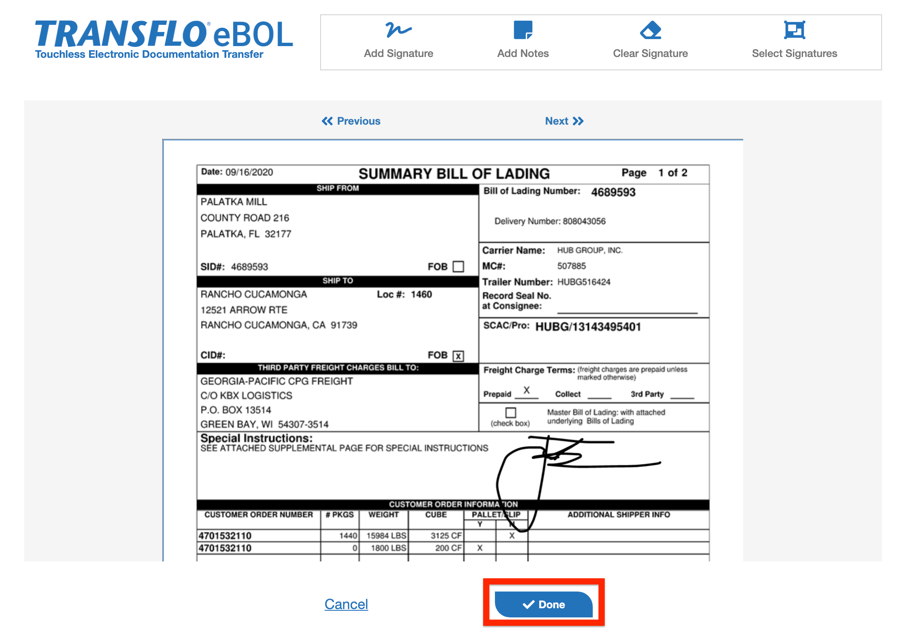
After adding your Name and any Notes the selected document opens in a new window.

 Add Signature: Adds your signature to the document. Sign the document using your finger or a stylus.
 Add Notes: Adds optional notes to the document.
 Clear Signature: Erases your signature from the document.
 Select Signature: Selects the current Signature and drags it to different locations, on the document.
 << Previous Page: Navigates to the previous page (if more than one page available in the document batch).
 Next Page >>: Navigates to the next page (if more than one page available in the document batch).
 Cancel: Returns back to the Documents screen (Name and Notes).
  Done: Select Done after adding a Signature and any Notes to a document to navigate back to the Document screen.
 -
Once you complete signing all the pages for the current document, tap Done.
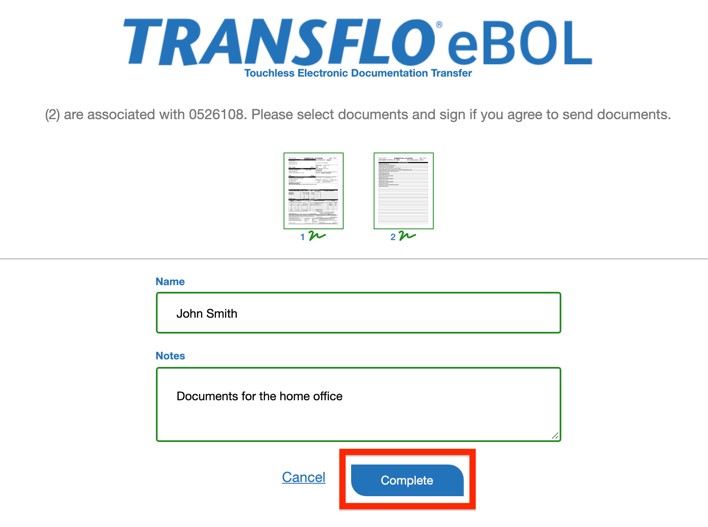
Result: You are back on the Load Document Pages screen.

Tip: Once a signature is added, the green signed
 icon appears next to each document number.
 -
Repeat the process if needed to open each document and sign one or more pages.
-
(Optional) If you need to cancel, tap Cancel to go back to the search results page for the last shipper or load number you entered. You can start over.
-
To finalize the entire eBOL process of searching for load documents and then adding a name, notes, and signatures, tap the Complete button.
-
(Optional) To print a document, see 5: Print Documents.