Asset Inspection (formerly DVIR: Driver Vehicle Inspection Report) [retail driver retailadmin administrator hos-app tfm]
As a driver, your fleet may require a pre-trip inspection to be completed every day. Perform an inspection at the start or at the completion of each workday, and sometimes both as required. Submit reports to your motor carrier upon returning to your home terminal.
You have a legal duty of care to inspect and be satisfied that both the power unit and the trailer are in safe operating condition. Drivers must perform an asset inspection to take corrective action on any identified issues and update the inspection report with notes about repairs made or deemed unnecessary. If the asset requires repairs, the appropriate staff member must review the inspection. You must have the required security clearance to perform or certify an inspection or to repair defects. To learn more, contact your administrator and see Driver's Guide to Asset Inspections.
Follow these steps to create a vehicle inspection record in your HOS app. Your pre-trip or post-trip inspection can then be used in applicable safety and compliance reporting.
-
You might be able to skip this first step and go to step 2 especially if you have a menu item named Asset Inspection (formerly DVIR) on your app. The initial login steps vary based on which app you are using: HOS or Mobile+.
-
HOS app: As a retail ELD user, log in to your HOS app.
-
Each customer interface can be customized, so you might tap HOS LOGIN.

-
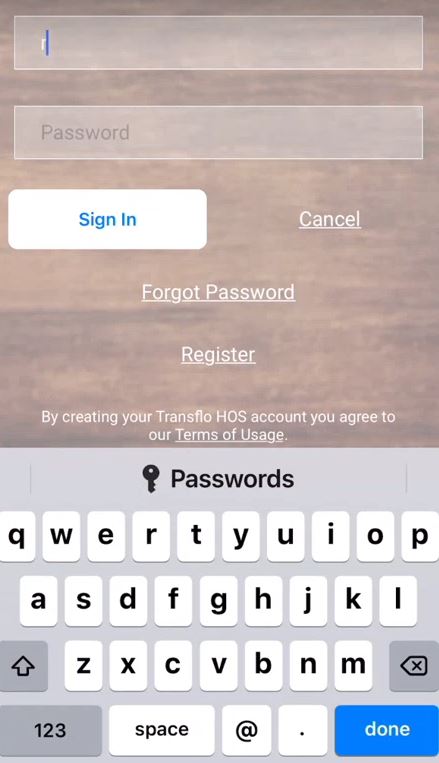
Enter your Username and Password and tap Sign In.
-
On the Home screen, tap Electronic Logs (HOS). Type your Truck Number, VIN, or Device ID (serial number) to pull up the vehicle.

-
-
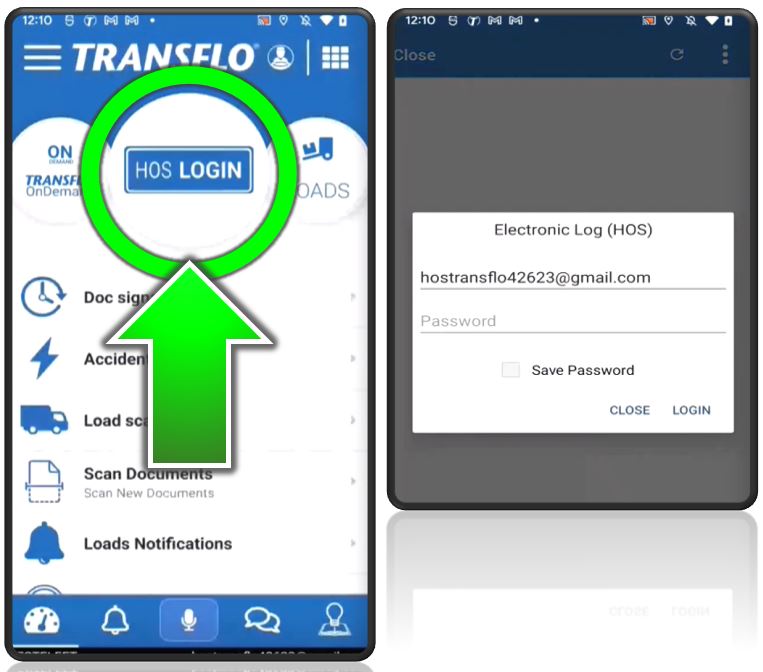
Transflo Mobile+ app: As a fleet ELD user with the Transflo Mobile+ app, tap HOS LOGIN.
-
Enter your username (typically the same email address you used when you registered).
-
Enter your password.
-
Tap LOGIN.
-
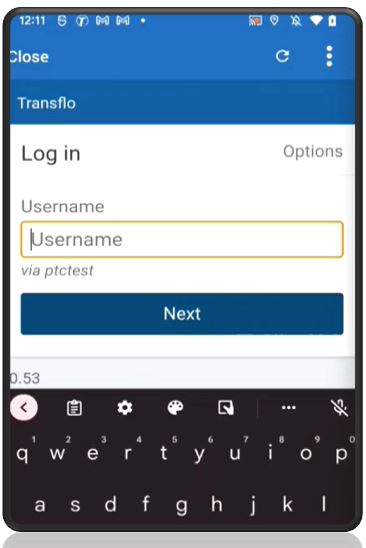
The next time you log in, the screens might look a little different. Enter your username and tap Next.
-
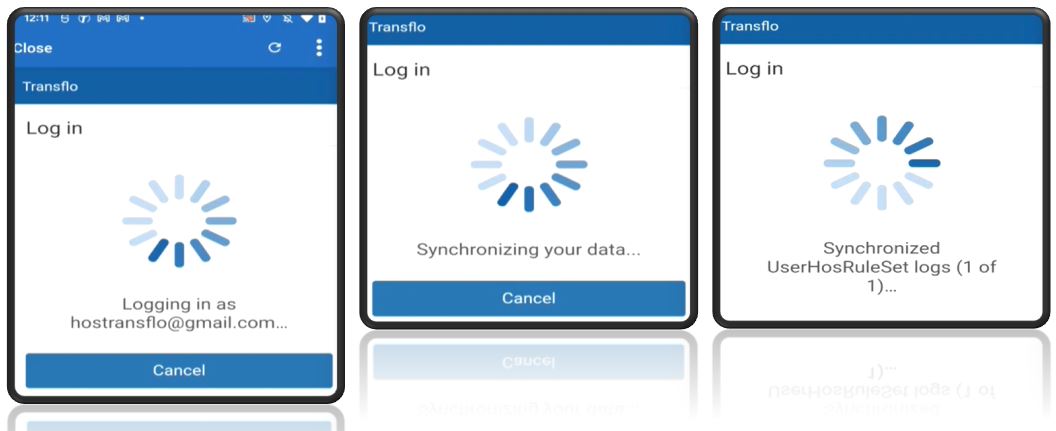
The screens in the app appear and change quickly. Do not be concerned that you do not have time to see what they are showing. Typically, the screens go through logging in as the driver identity you provided, synchronizing the data for that driver, and then applying an HOS rule set.
-
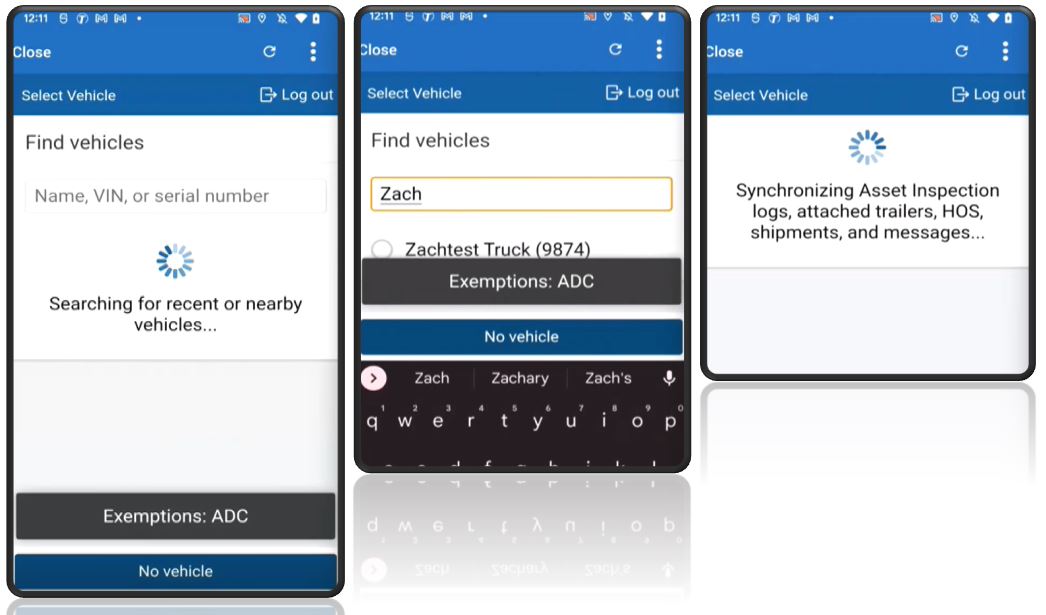
The app searches for recent or nearby vehicles. To search for your vehicle, enter its name. In the resulting list of matching vehicles, select your truck or vehicle.
-
The app synchronizes the asset inspection logs, trailers, HOS data, shipments, and messages for you.
-
-
-
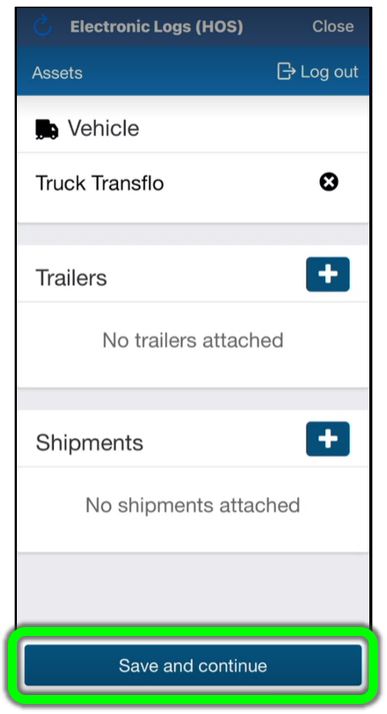
If you need to add a vehicle, truck, or trailer, you can add them and then see them listed as assets. Tap Save and Continue.
-
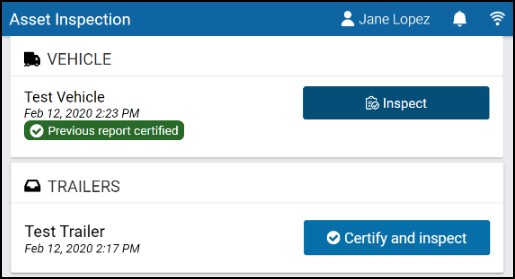
When you select a truck, the last inspection date and time appears. Tap Inspect.

In some configurations of Transflo Mobile+, you can tap Asset Inspection on the dashboard or Home page. To create a vehicle inspection, you might see a blue Certify and Inspect button under the vehicle name.
-
Go outside and physically inspect the vehicle.
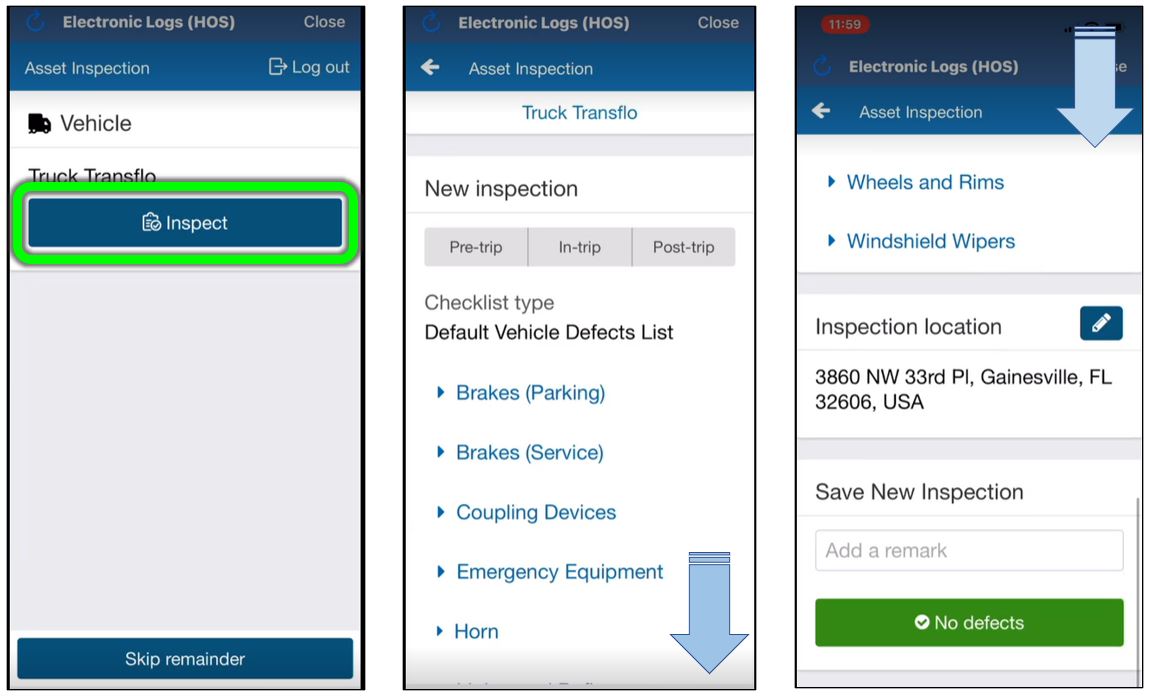
Note: Performing this function denotes a Pre-Trip Inspection and will place the driver in ON duty status. If you are not ready to go on duty, tap Skip Remainder. You can perform the inspection at a later time when you are ready to drive on duty.
-
Select Pre-trip or Post-trip inspection type.

-
Location is automatically captured when starting the inspection, but can be edited. Enter the address or location where the inspection is being performed by tapping Edit (the pencil icon). Enter the address or intersection and tap OK.
-
Select No Defects or select the boxes of the items that have issues. Tap any of the check boxes to select Vehicle defects and add a remark. You may need to scroll down, on a tablet device.
-
If a defect is repairable at a later date, tap the red Repair button under the vehicle, tap the Not necessary check box, and tap Save. Tap Certify as safe or Certify as unsafe.
-
After selecting any defects, scroll down and select Pre-trip, In-trip, or Post-trip. Scroll to the bottom and select Done to save your new inspection.
-
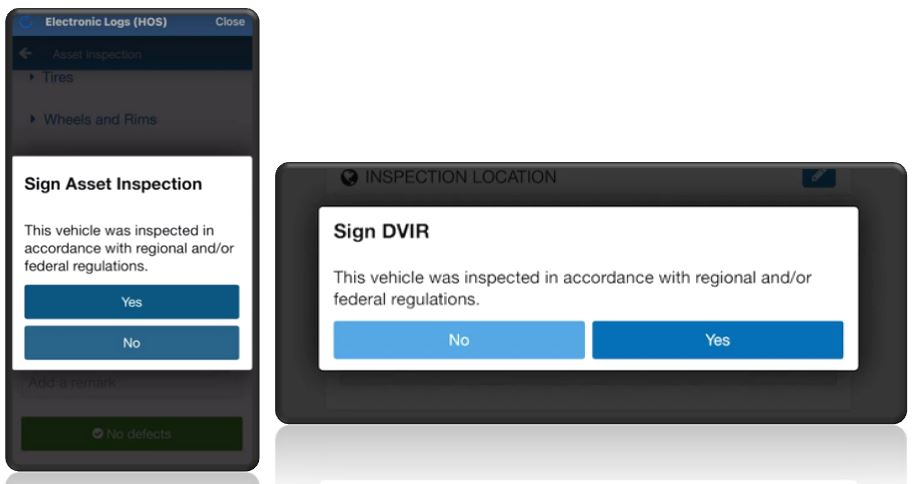
Certify the inspection by signing the Asset Inspection. To sign and complete the inspection, tap Yes on the Sign Asset Inspection screen.
-
The app takes you back to the Asset Inspection screen. Repeat the same steps above to certify and inspect the trailer. If there are no trailer defects, select No Defects.
-
If there are repairs to attend to, select Repair. These steps require the Mark Asset Inspection logs as repaired clearance. If you do not have this clearance, contact your administrator.
-
For each defect, select the appropriate resolution and add a remark with a detailed explanation:
-
If the defect could not be repaired, select Not repaired.
-
If the defect was repaired or it turns out to no longer be an issue, select Repaired or not a defect.
-
If a relatively minor defect is repairable at a later date, select Repair not necessary for the safe operation of the vehicle.
-
-
After you review all defects, press Save.
-
Review the inspection and certify as Safe or Unsafe. Certify and Sign the Trailer inspection.
-
Sign the Asset Inspection.
-
Your inspections are now complete.

![]() View a demonstration of these steps in one or more Transflo videos:
View a demonstration of these steps in one or more Transflo videos:
Smartphone
Tablet