People Management
With appropriate permissions, you can manage the people (human resources) your business relies on to carry out your mission in the portal including drivers, users, and groups. The People Management application module in Transflo One Portal helps you track contact information, define user access to applications, manage teams or business units in consistent secure user groups, and organize your drivers, users, and groups by divisions (fleets).
Tip: The applications available to you in Transflo One Portal as seen in your main menu and buttons on the dashboard are determined by your user permissions as configured by your administrator. Access to users, groups, and drivers is typically restricted to fleet managers, driver managers, and customer administrators.
-
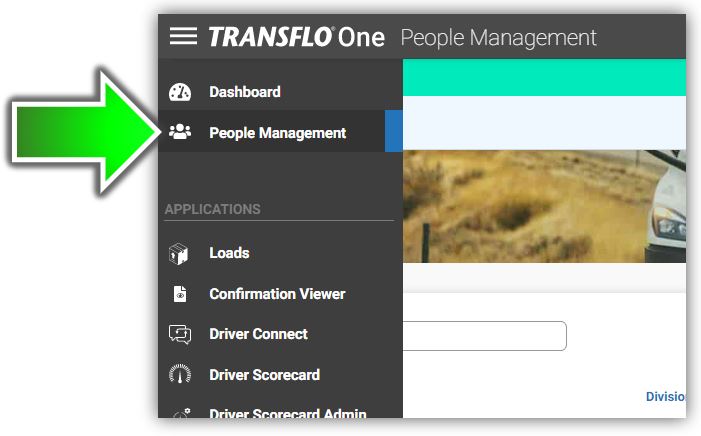
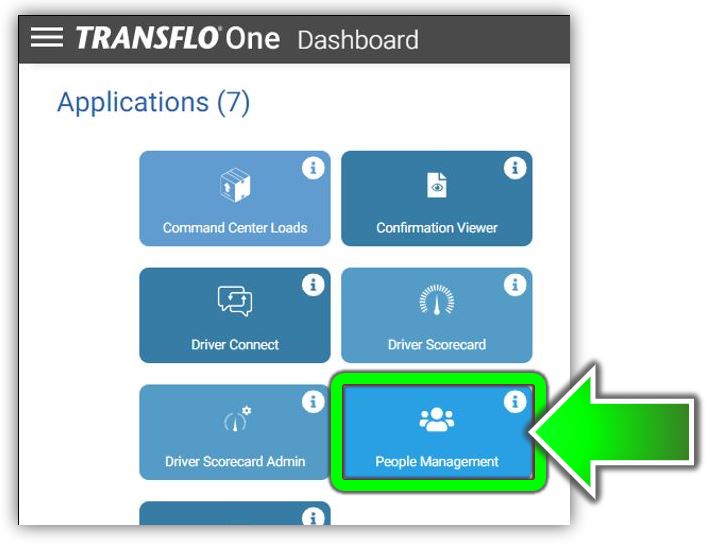
Navigate to the People Management module in Transflo One Portal.
-
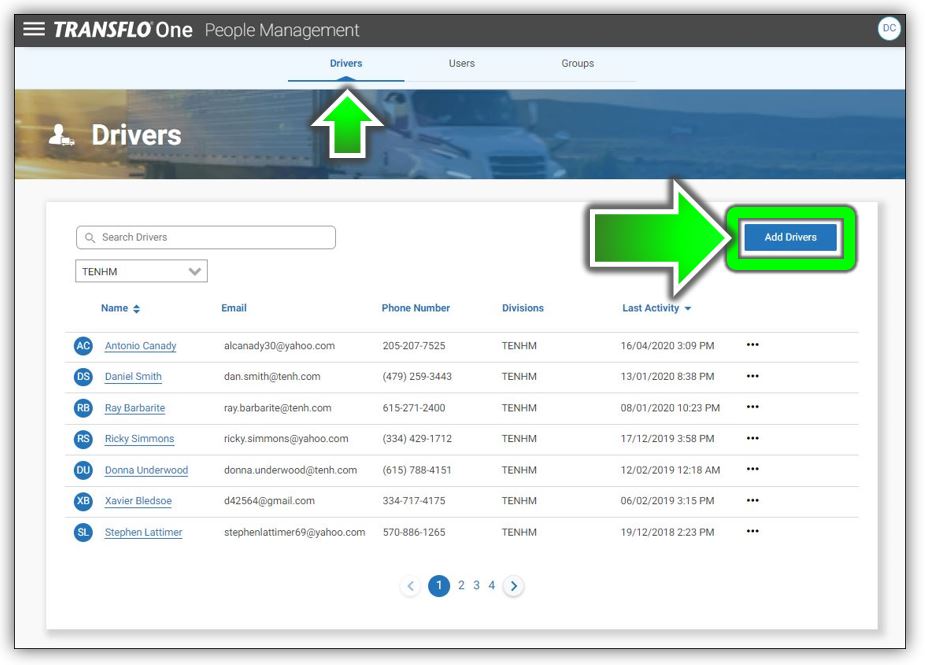
At the top of the People Management page, click Drivers.
-
On the Drivers page, click Add Drivers.
-
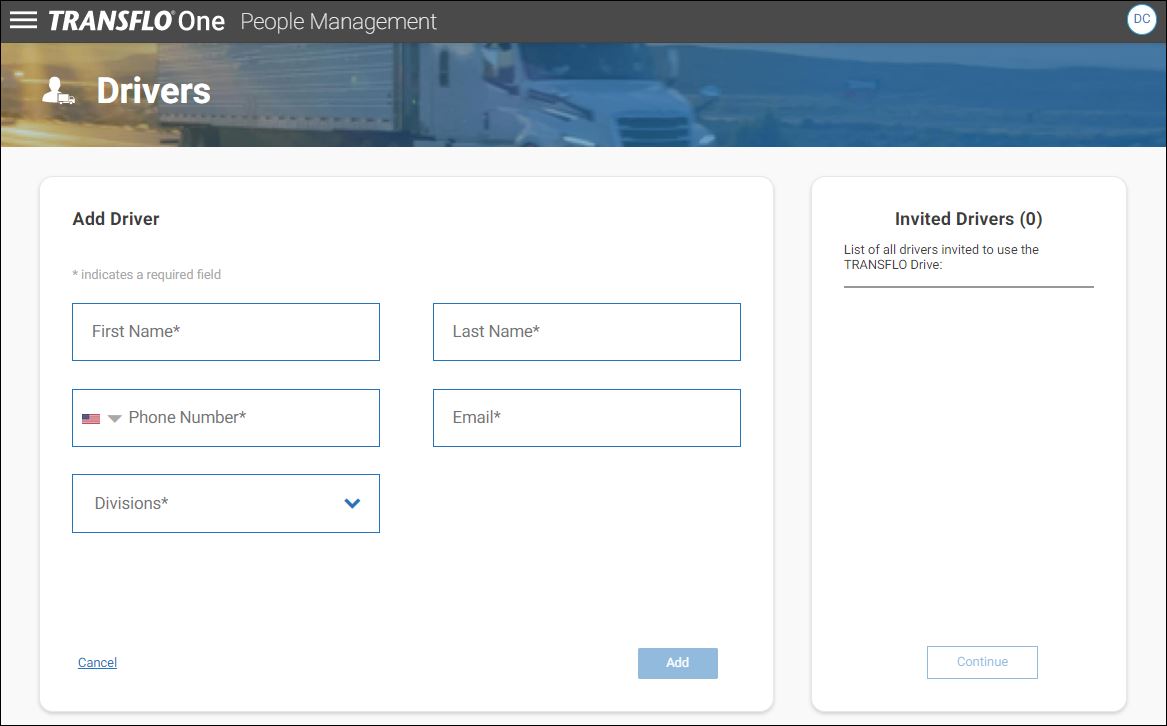
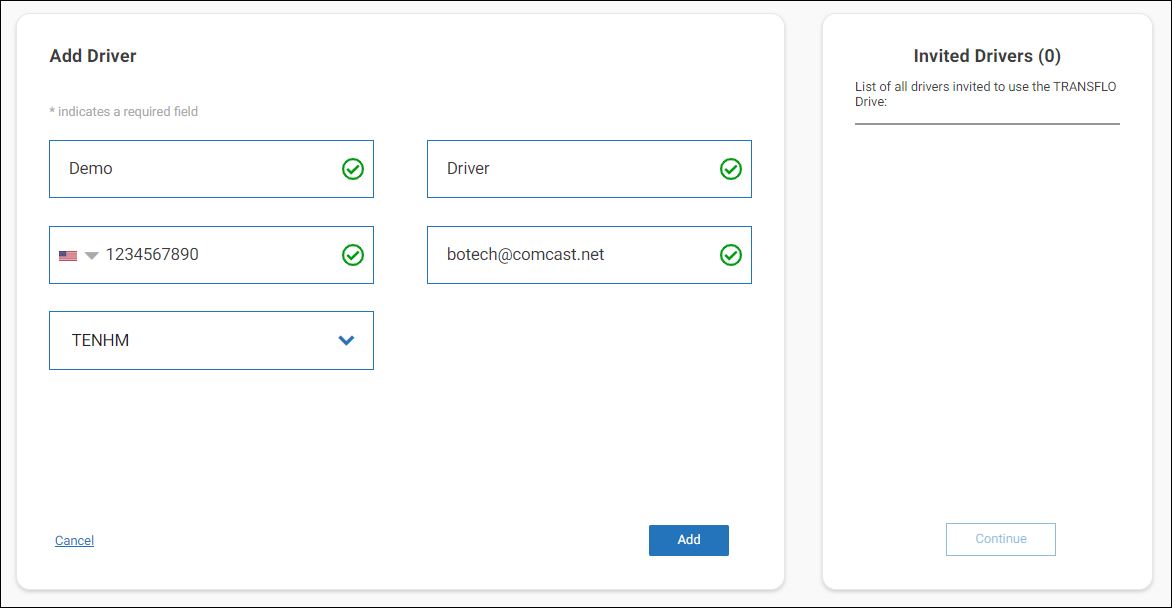
On the Add Driver page, complete the following required fields:
-
First Name and Last Name: Enter a first name and last name.
-
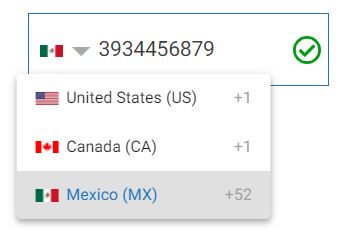
Phone Number: Enter a valid phone number. To select a different country, click the flag and select a country.
-
Email: Enter a valid email address. You can edit the name and phone for a driver at a later time; however, you typically cannot edit the registered email address for a driver or their assigned fleet or division.
-
Division: Select a pre-defined division, fleet, carrier, broker, shipper, or other company code.

Tip: To assign a driver to more than one division (fleet), add that driver again with the exact same e-mail address (their phone number can also be the same) and select a different division. The system won't let you add the same driver email address to more than one unique driver in the same division. When you add a driver more than one time with the exact same e-mail address, the driver can more easily remain in the Mobile+ app and switch fleets.

Tip: You can also enter the same driver multiple times to different divisions (fleets) with a different e-mail address each time. In this scenario, the driver will have to register for the Mobile+ app multiple times and log out whenever they want to switch fleets. The Mobile+ app allows a driver to log in and use the app under one identity (e-mail address) at a time. Consult with your drivers, fleet management, and administrator to decide whether to use the same or different e-mail addresses when the same driver needs to be added more than once to support more than one division (fleet).
-
-
When finished adding driver data, click Add.
-
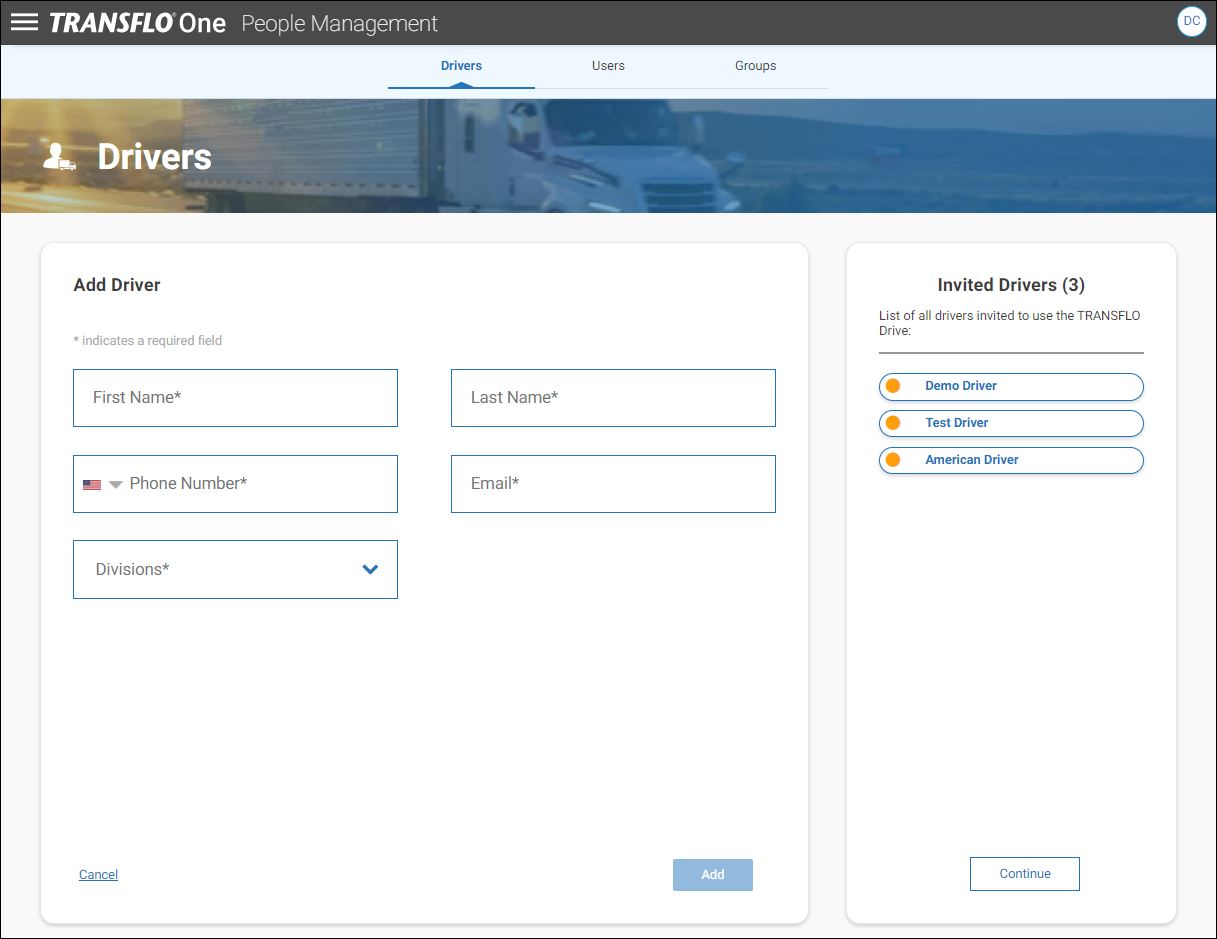
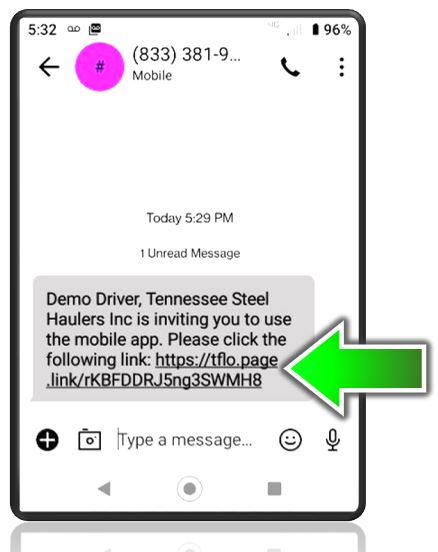
As you continue adding drivers, the Invited Drivers section shows their names. The system sends each driver an invitation (by email and SMS text message) to download and register the Transflo Mobile+ app.
-
When you are finished adding drivers, click Continue to return to the Drivers page.
- Follow up with your fleet managers to make sure each driver registers on their mobile phone or tablet device. Remind them to open their text messages or email from Transflo and click the link to register.

Tip: If you require your drivers to enter a Driver ID when they register, make sure you let them know what their Driver ID is. For example, it could be a unique code your organization generates or it could be their unique e-mail address.
As a driver, follow these steps on your smartphone or tablet:
-
Download the TRANSFLO® Mobile+ app from the Google Play or App Store depending on your device.
-
Look in your email inbox or SMS text messaging app for an invitation to register. Tap the link.

Tip: Your mobile device needs to be connected to a mobile data network such as AT&T, Verizon, T-Mobile, Rogers Wireless, Bell Mobility, or another carrier, or connected through Bluetooth as a paired device with network access, or connected to a wireless internet network (Wi-Fi).
-
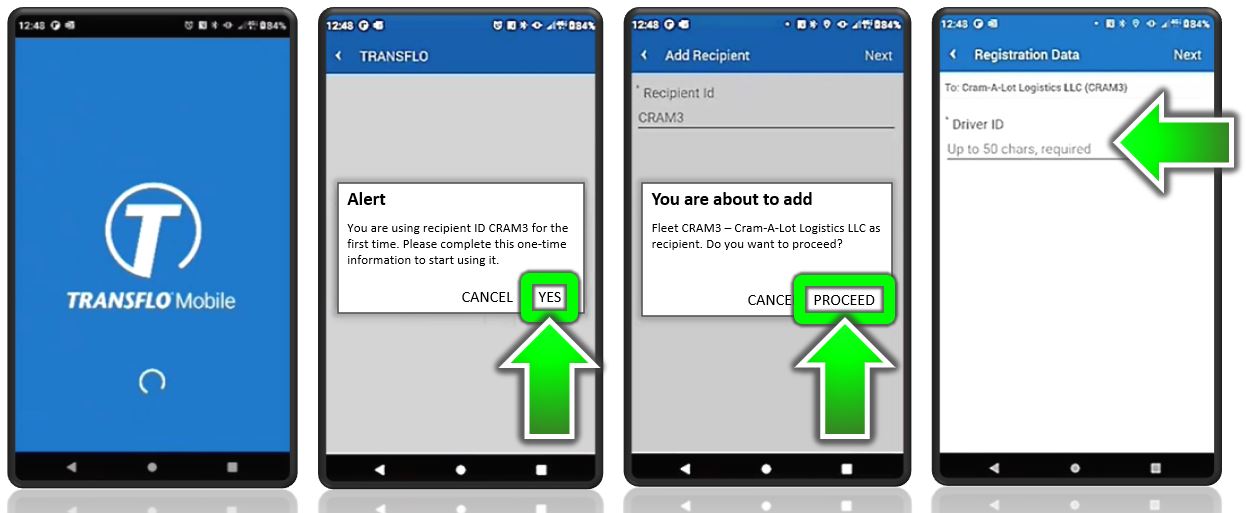
The link auto-starts your Mobile+ app that you just downloaded in Step 1.
-
An Alert shows the new recipient ID (a recipient is any division or fleet that receives your load paperwork as electronic documents). Powered by the Transflo One Portal, a recipient might be a carrier, a broker, a shipper, or a fleet management organization. In the examples below, the recipient ID is CRAM3. Click YES.
-
Tap PROCEED.
-
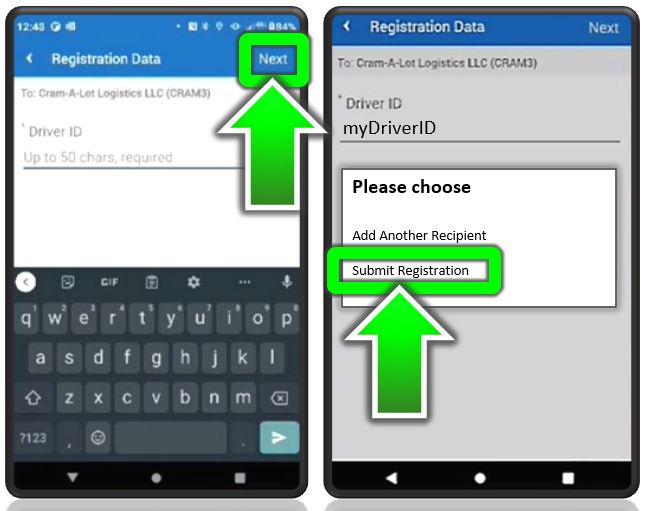
If required, enter your Driver ID. This identifier might be your e-mail address or another unique code generated by your employer. Tap Next.
-
-
At the Please choose prompt:
-
Allow time for the app to show you it is Registering... you and Checking registration... for you. You also see that a confirmation email message has been send to you. You do not need to tap anything on these two screens as they appear automatically.
-
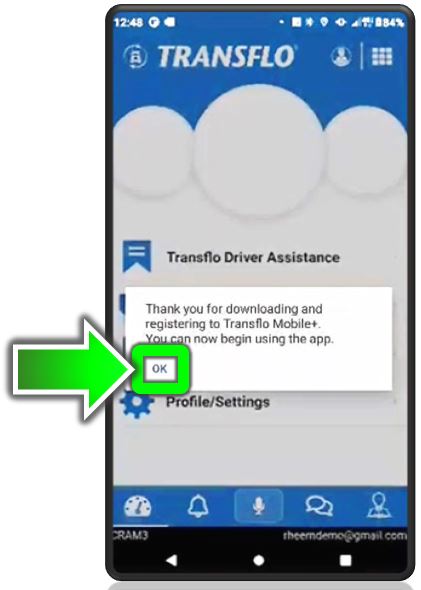
The registration process ends. At the Thank you... you can now begin using the app message, tap OK.
-
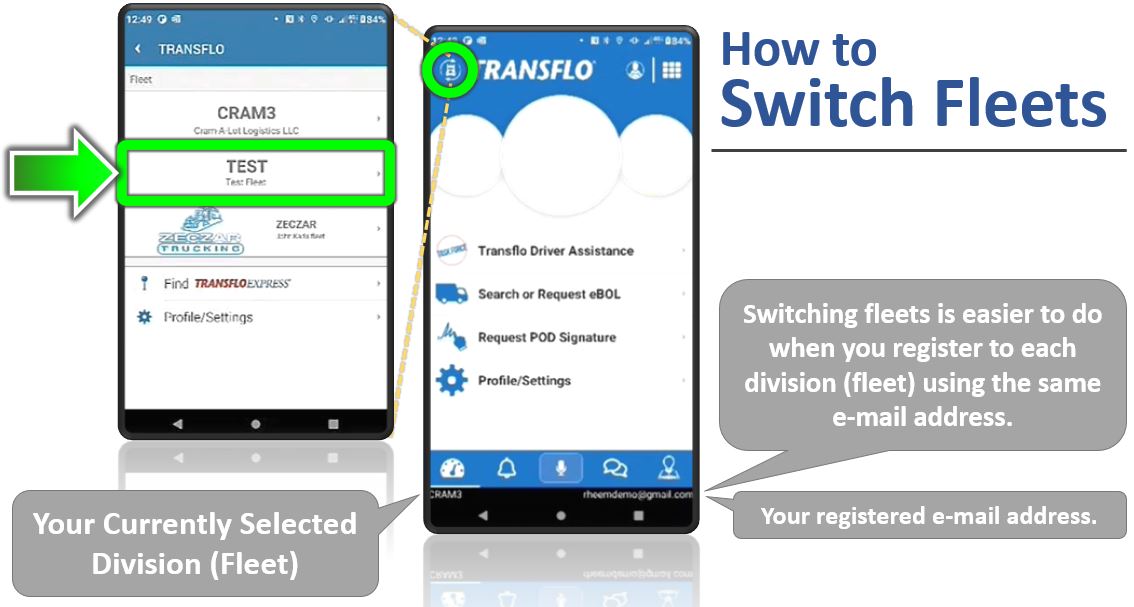
If you registered with multiple recipients, divisions, or fleets under the same e-mail address, you can switch fleets with a few taps. In the example below, the driver registered with CRAM3 and delivered four (4) loads and is now in California where the driver switches to the TEST fleet to accept a load from California to Tennessee.
You can update the name, email, phone, and fleet for a driver.
-
Navigate to the People Management module in Transflo One Portal.
-
At the top of the People Management page, click Drivers.
-
On the Driverspage, search, sort, or filter the list of drivers until you locate the driver you want to edit.
-
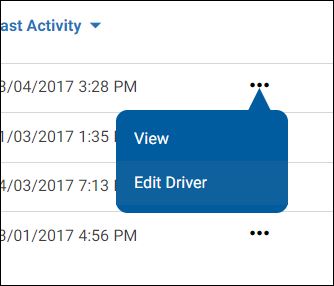
Click the … Options button indicated by the ellipsis (three dots) and choose Edit Driver.
-
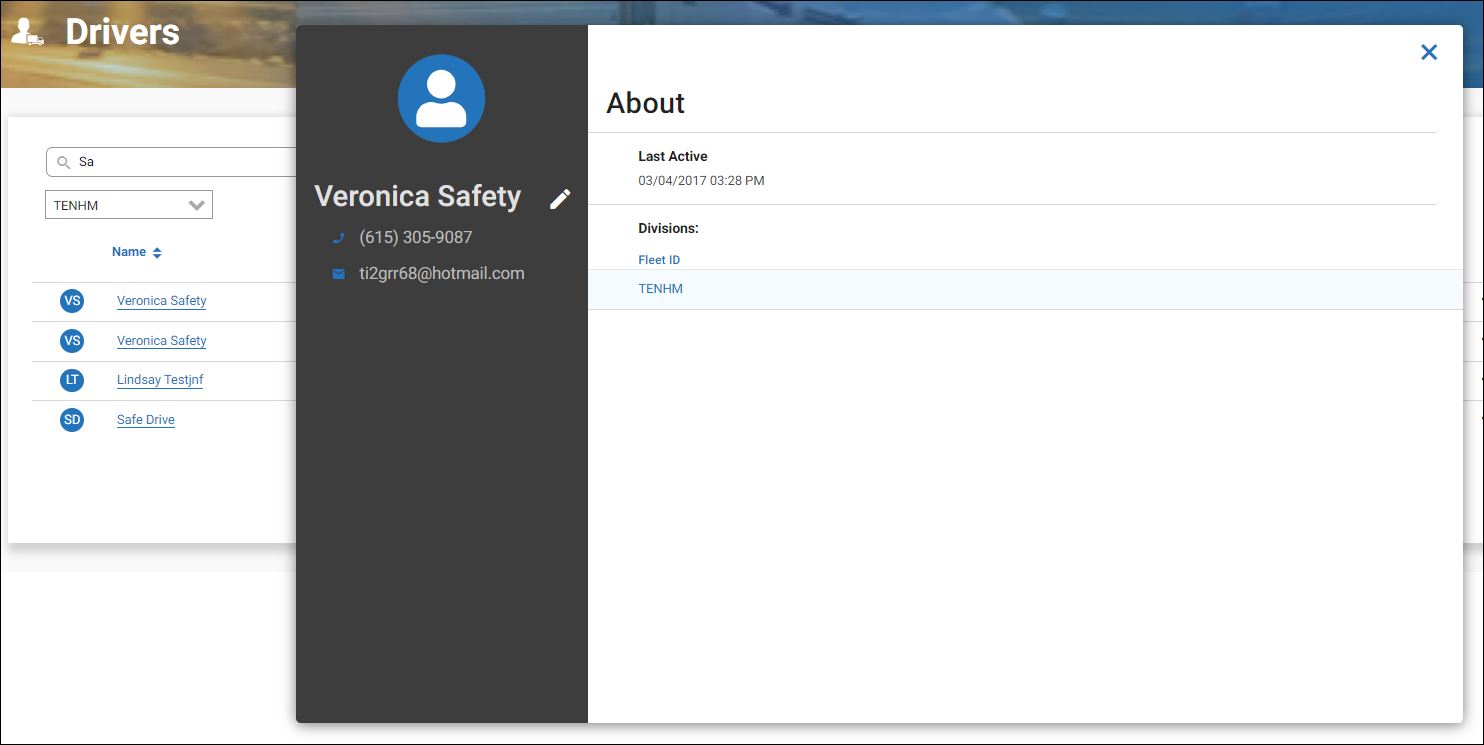
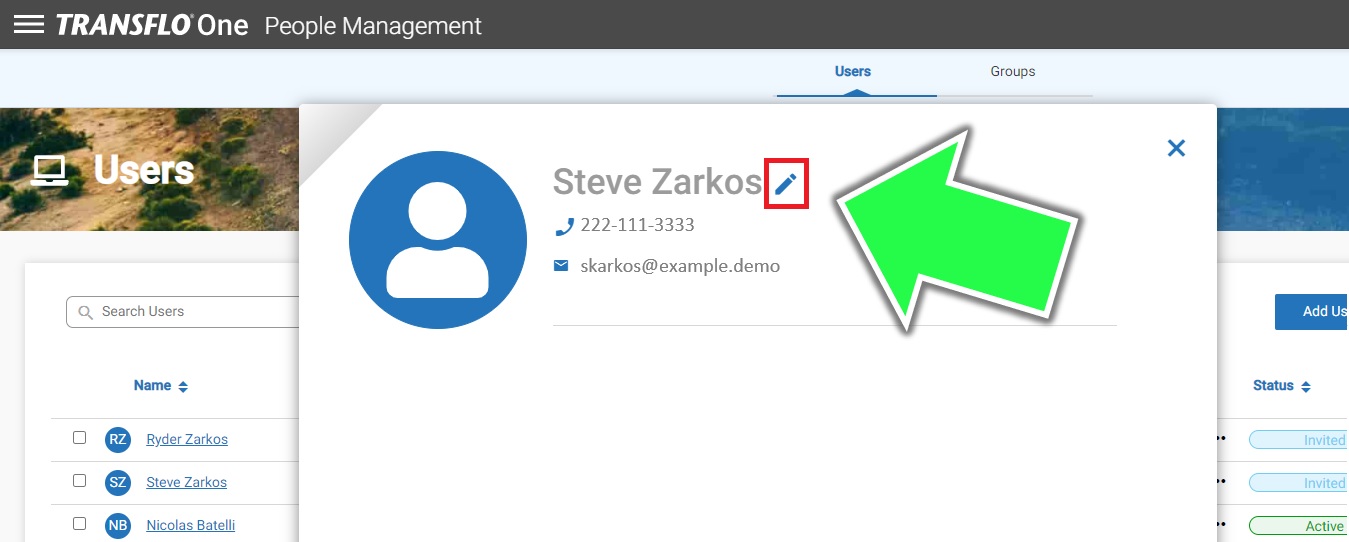
Or, click directly on the name of a driver in the list. On the resulting driver profile page, click
 Edit.
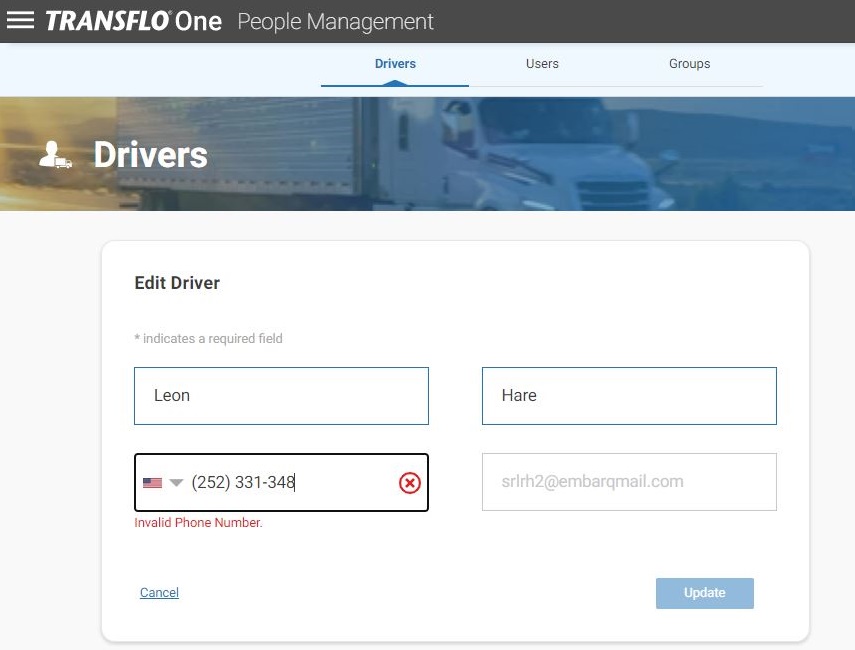
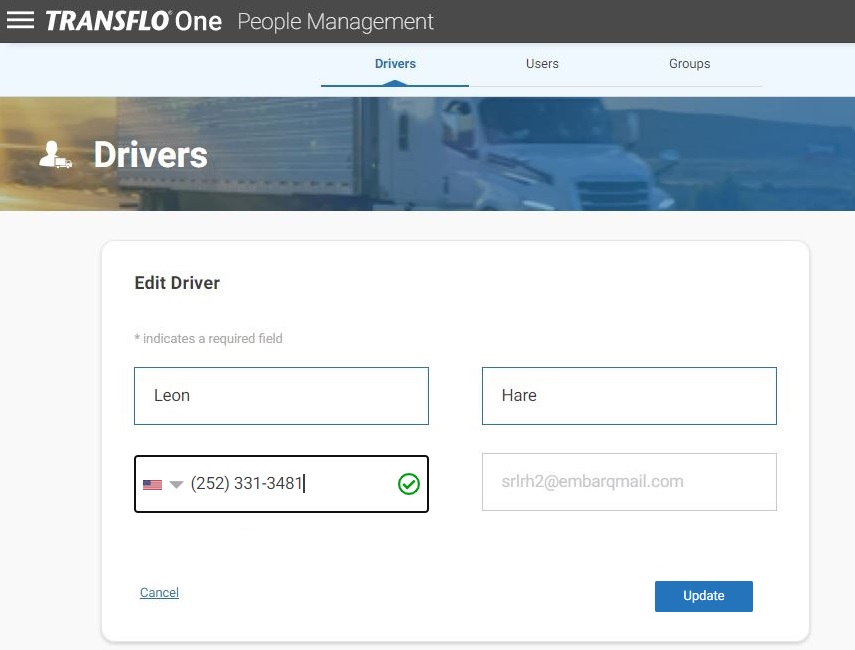
Edit. - Edit the driver name or phone.
-
You can typically adjust the North American country for a driver phone number. The required country code to use before calling the number appears (for example, +1 or +52).
-
When you are done making edits, click Update.
-
Navigate to the People Management module in Transflo One Portal.
-
At the top of the People Management page, click Drivers.
-
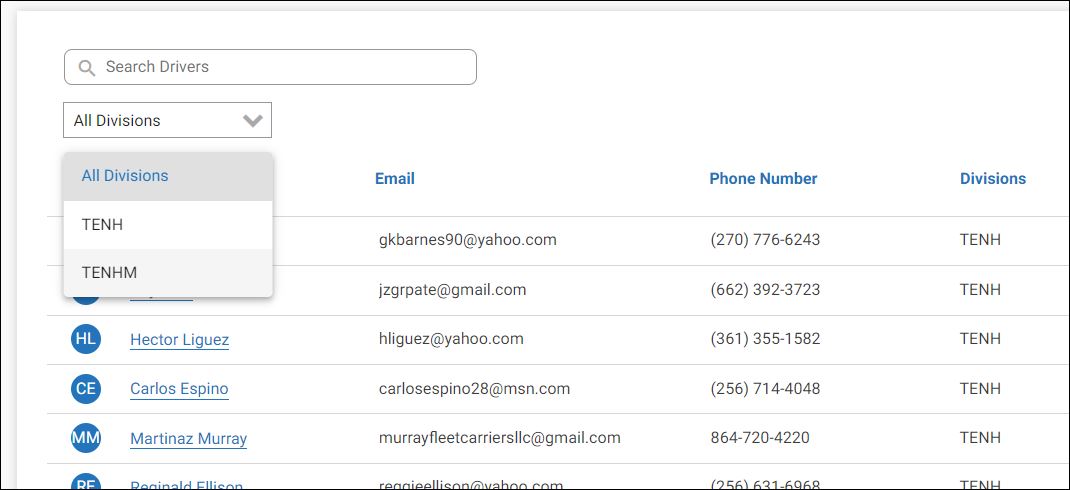
On the Driverspage, to filter the list of drivers, click All Divisions and choose one division (fleet) from the list.
-
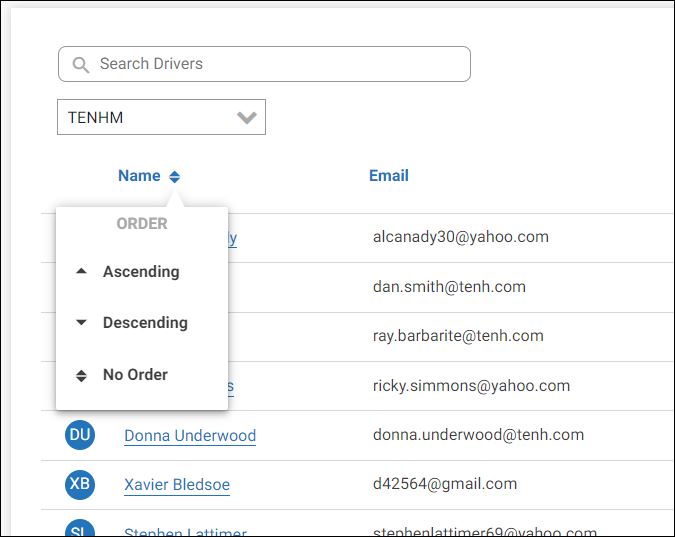
To sort the list of drivers by name, click the Name column header and select Ascending or Descending order.
You can also sort the Last Activity column.
-
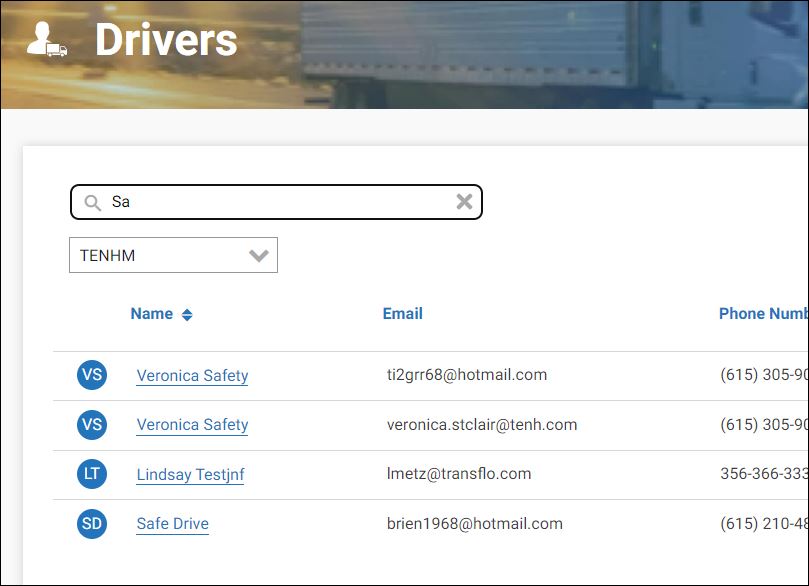
To search for a driver, enter all or part of a search phrase or data.
Example 1: Enter 615 to search for all drivers with the digits 615 in any data such as their phone or e-mail address.
Example 2: Enter Sa to search for all drivers with the letters sa in any data such as their name or e-mail address.
-
Navigate to the People Management module in Transflo One Portal.
-
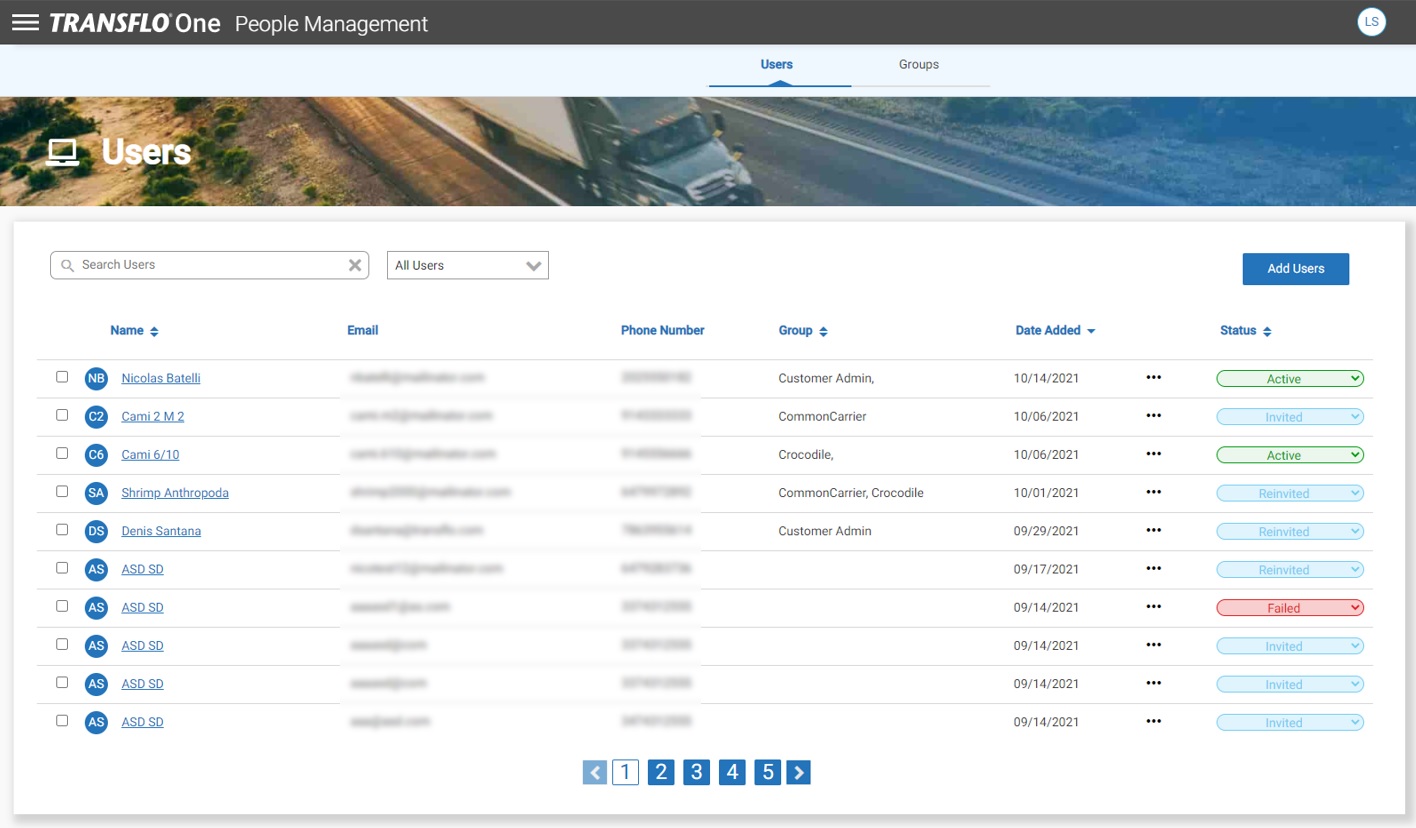
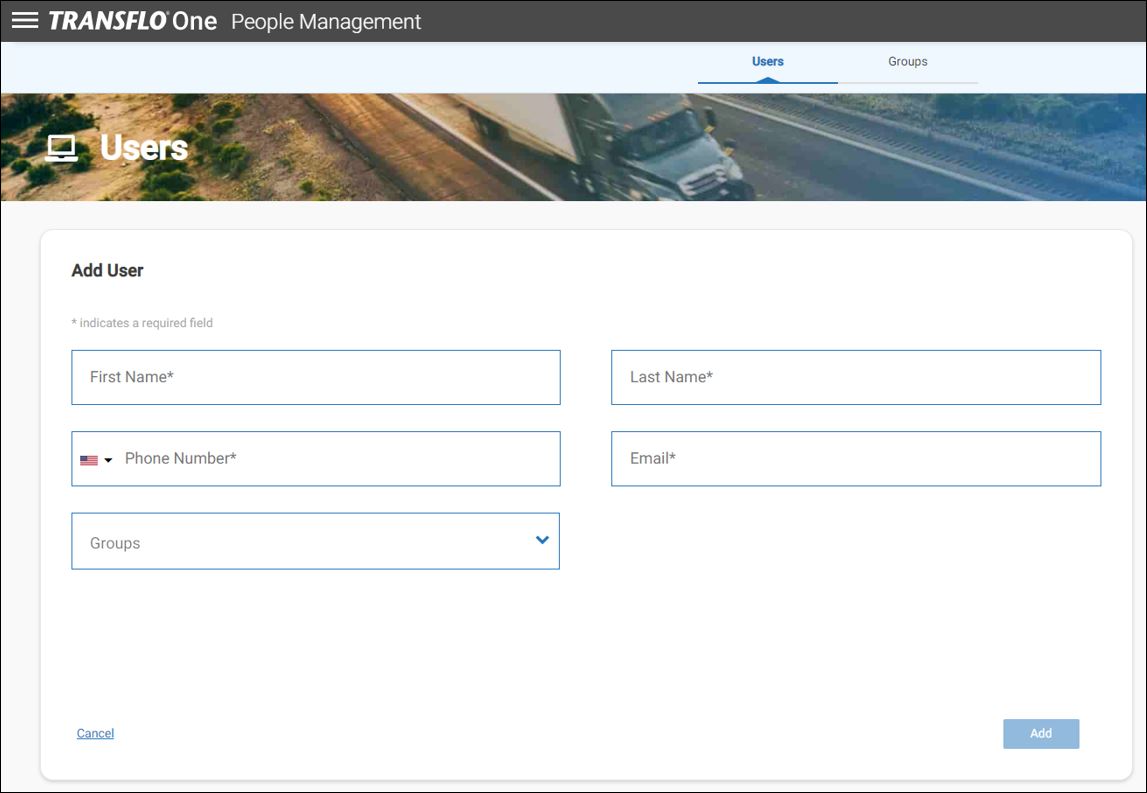
On the Users page, click Add Users.
-
Complete the required fields for the first and last name, phone, and email.
-
(Optional) In the Groups field, select one of the pre-defined groups from the drop-down list. As a best practice, add users to groups by role. For example, group A might include members with more access permissions than group B. As an administrator, you can make changes just one time at the group level and the system applies the changes to all users in the group.
-
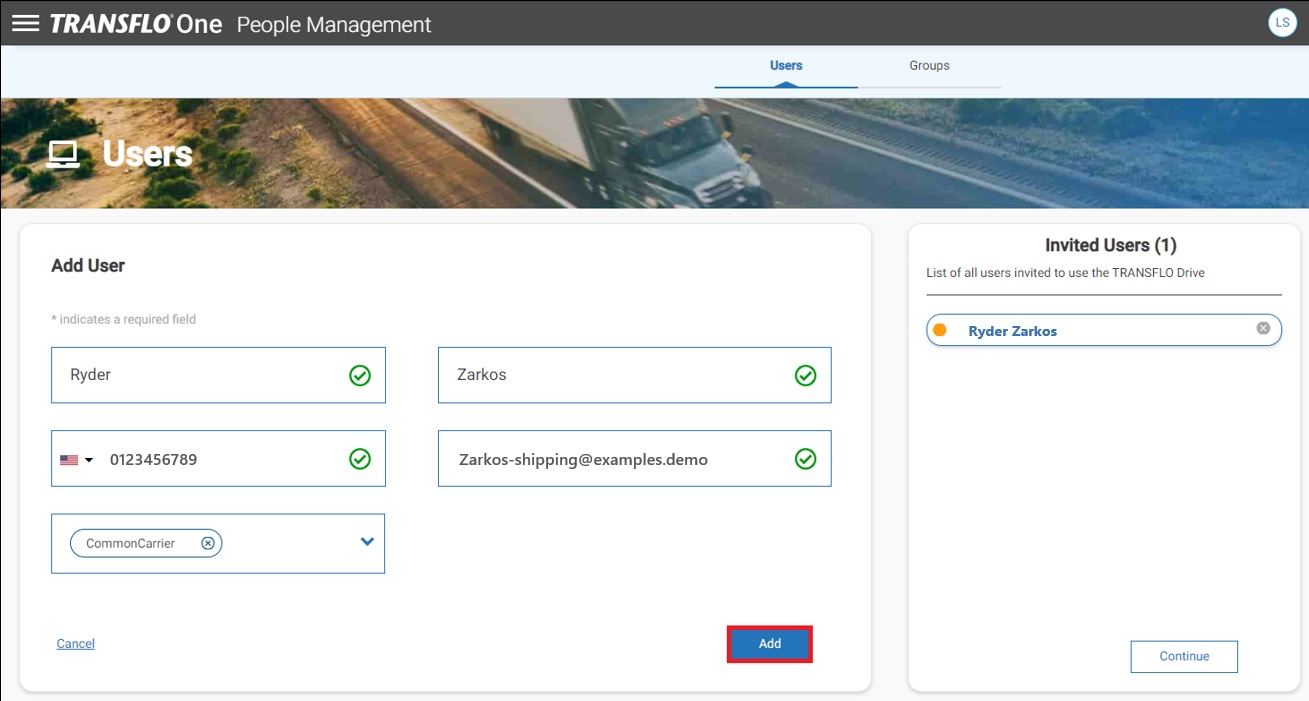
Click Add.
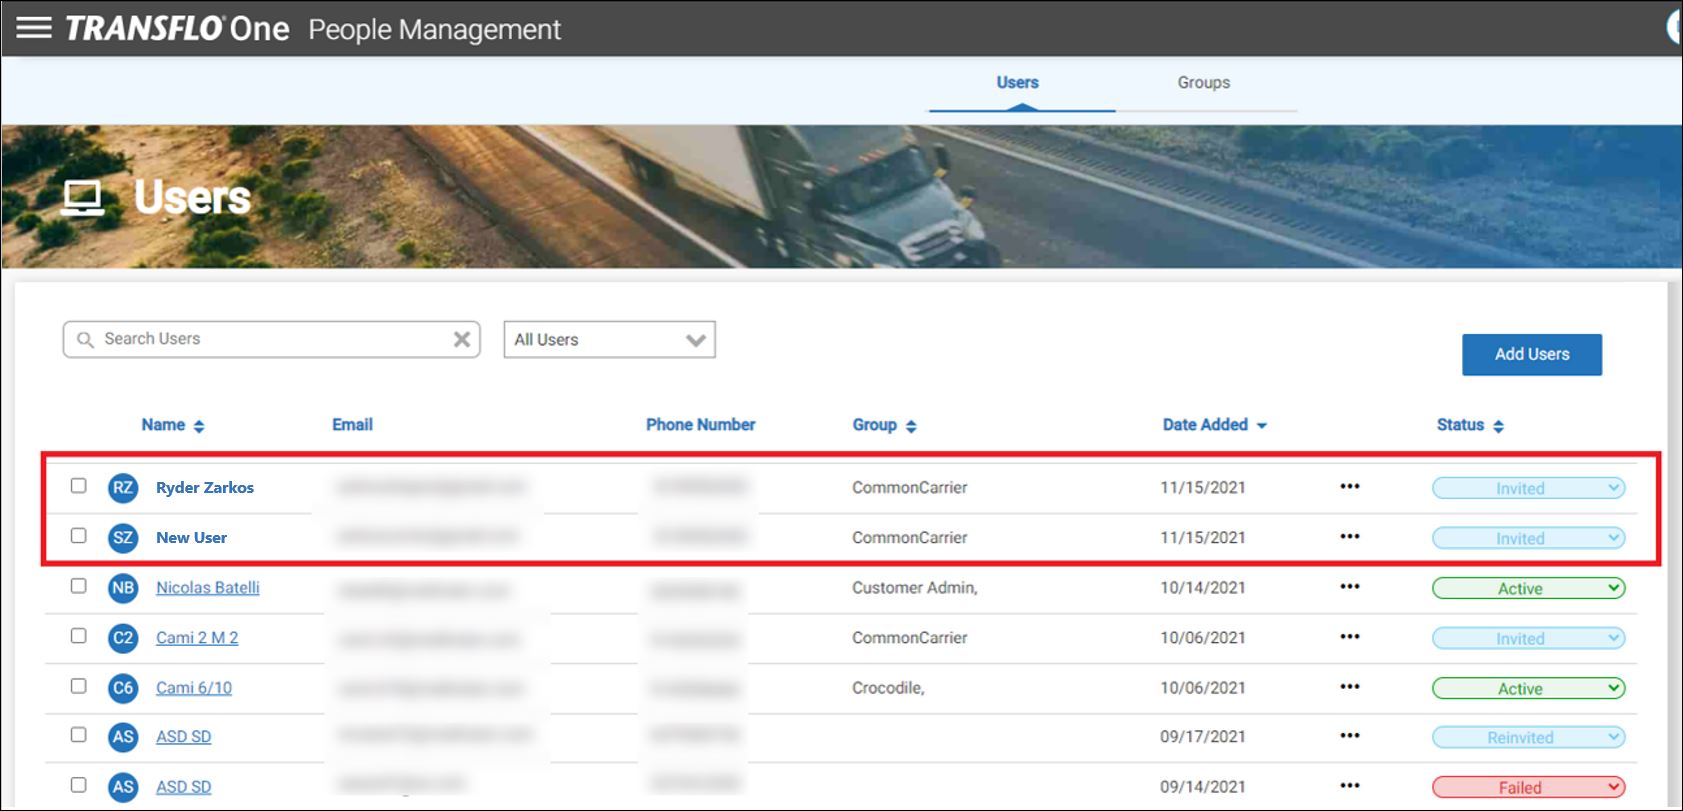
Example: In the following example, a new user has been added to the CommonCarrier group.
-
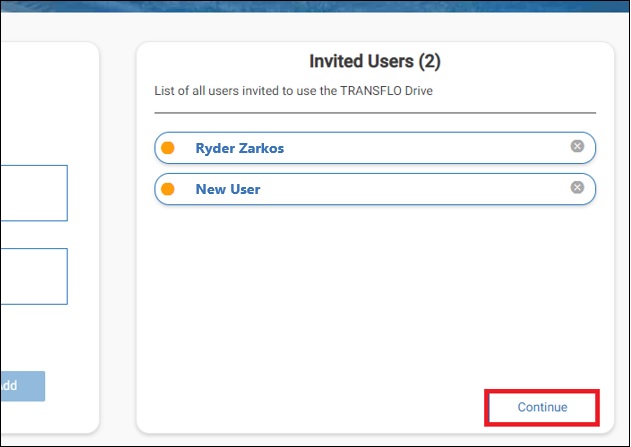
Enter one or more additional users and click Add for each user.
-
As you add users, they appear in the Invited Users list. When you are ready to send invitations to each new user requesting them to create a new Transflo One Portal account, click Continue.
-
Each new user is added to the Users page with a status of Invited.
-
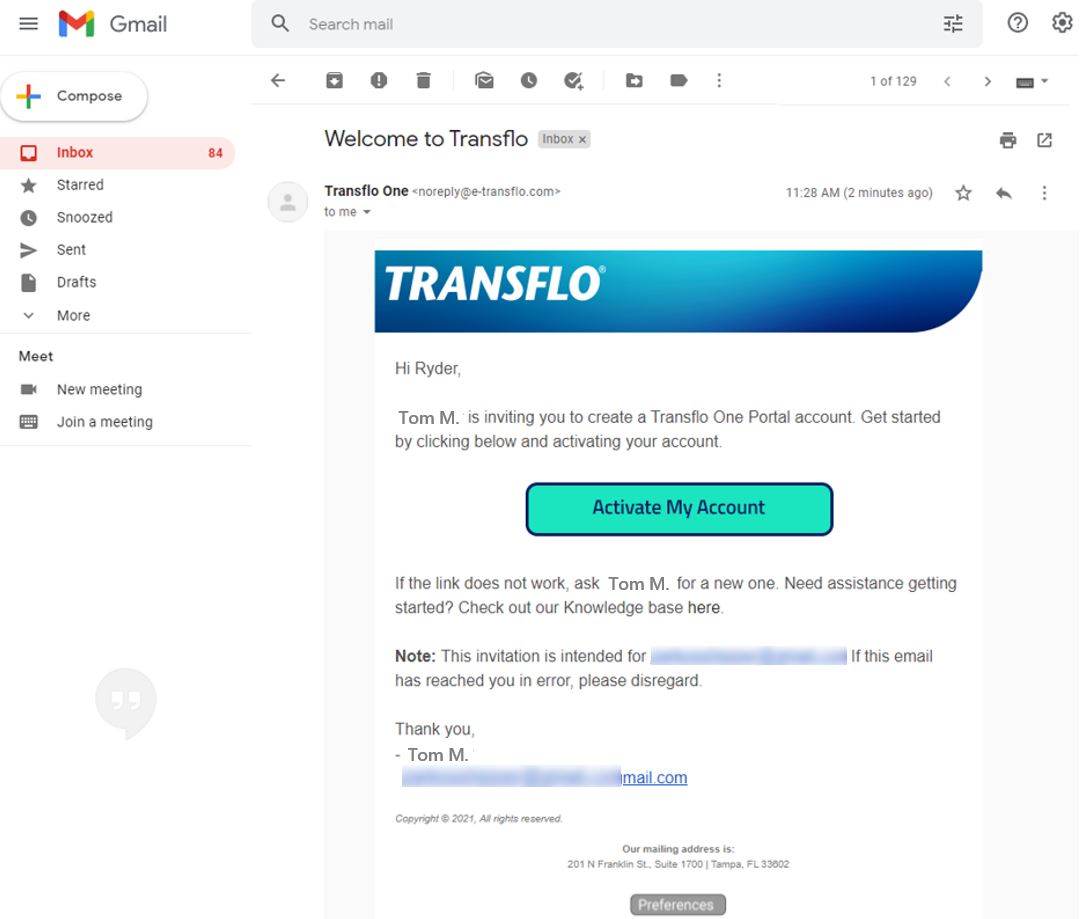
Each user receives an email invitation to set up a new account. As a user, click Activate My Account. As an administrator, you may have to remind or coach users to click Activate My Account from their email application or online service.
-
As a new user, set up your account, including your username, password, and photo or avatar image.
-
Navigate to the People Management module in Transflo One Portal.
-
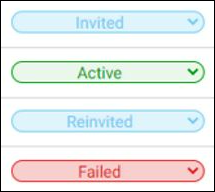
On the Users page, view the Status column.
-
If a user is Invited, remind them to check their email and click Activate My Account.
-
If a user is Active, they are ready to use the portal or the Transflo Mobile+ app.
-
If a user lost their invitation, you can open their user record and resend a new invitation. The status changes to Reinvited.
-
If a user invitation Failed, they might have given you the wrong email address. Verify the email field is correct and reinvite them.
-
You can create user groups and assign users to the group. In the future, instead of editing each user, you make changes one time to the group and all the assigned users in the group receive those changes.
-
Navigate to the People Management module in Transflo One Portal.
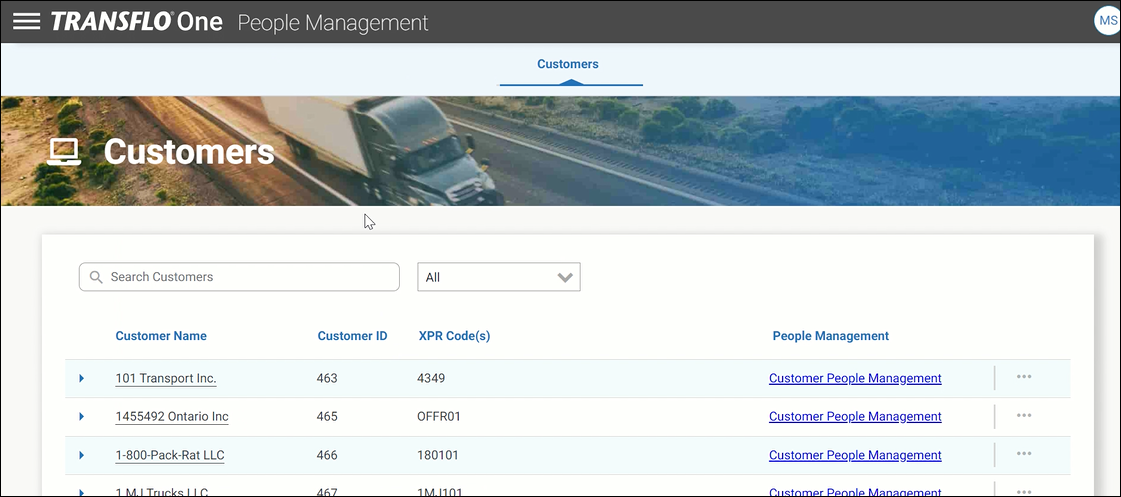
Result: The default Customers page appears for admins. Without admin access to all customers, the Users page appears.
-
On the Customers page, enter a search word or phrase in the Search Customers field. In the matching search results list, locate the row you want and click Customer People Management.
-
The People Management page opens to the default Users page.
-
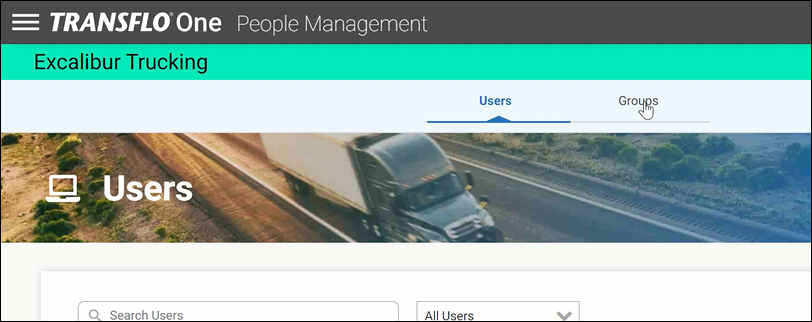
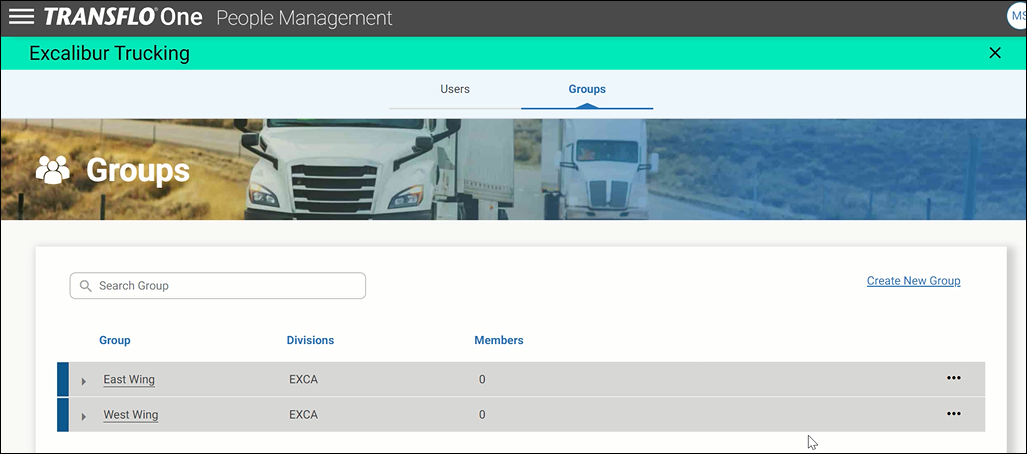
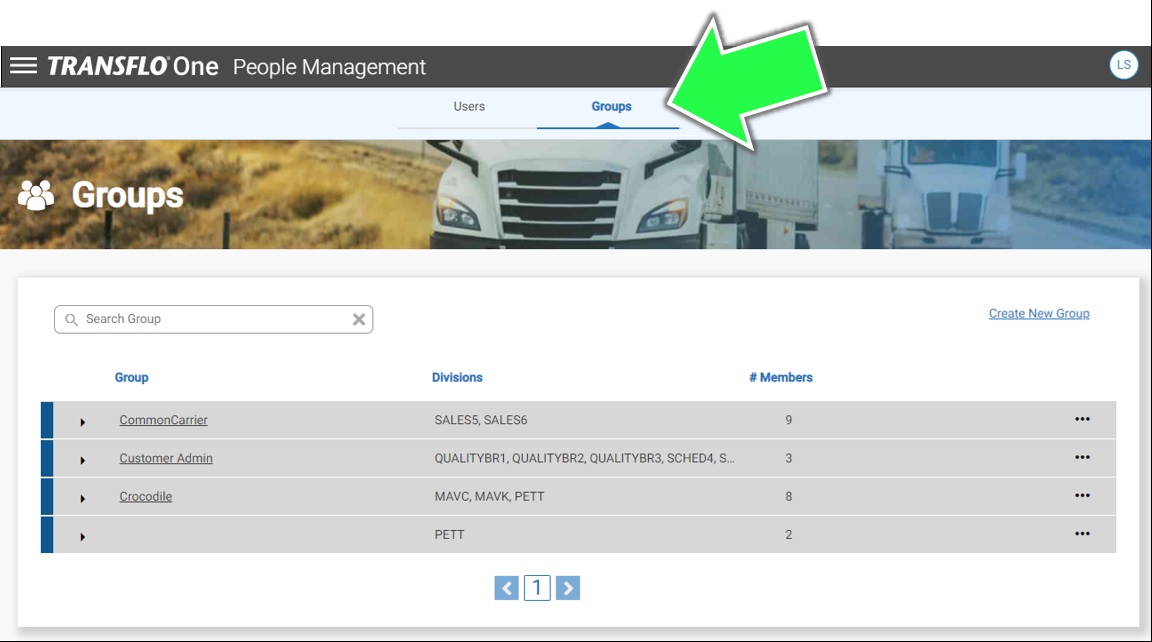
Click the Groups tab.
-
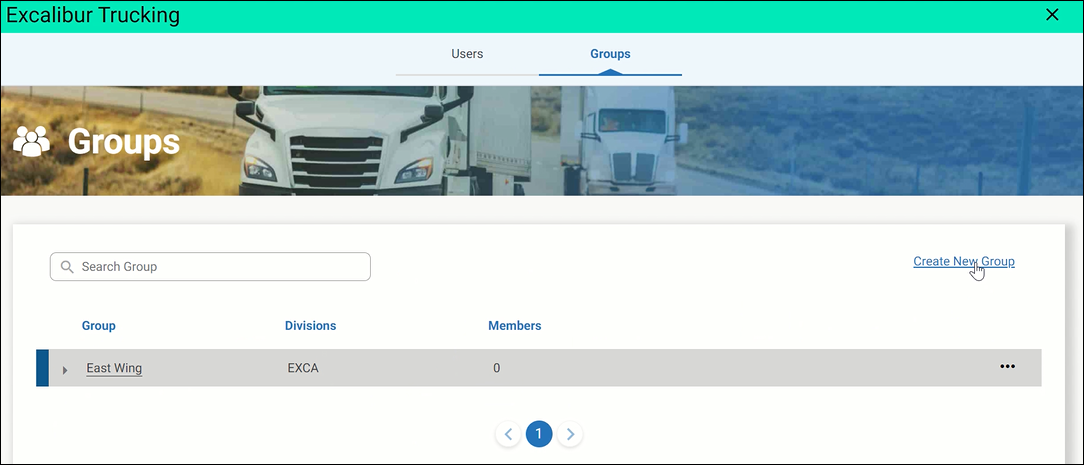
On the Groups page, click Create New Group.
-
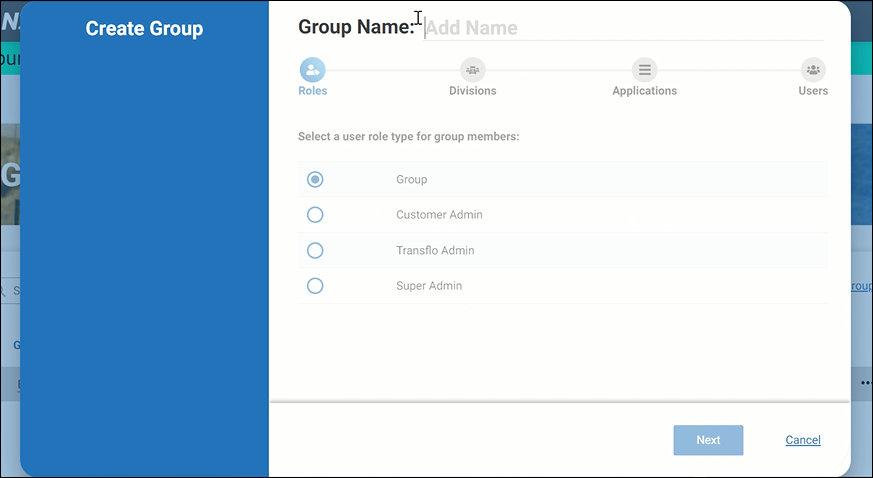
On the Create Group page, the grayed-out screen elements provide hints to help you plan ahead.
For example, to create your new group, you will need to complete the following steps:
-
Enter a name for your new group...
...and complete the following sections:
-
Roles
-
Divisions
-
Applications
-
Users
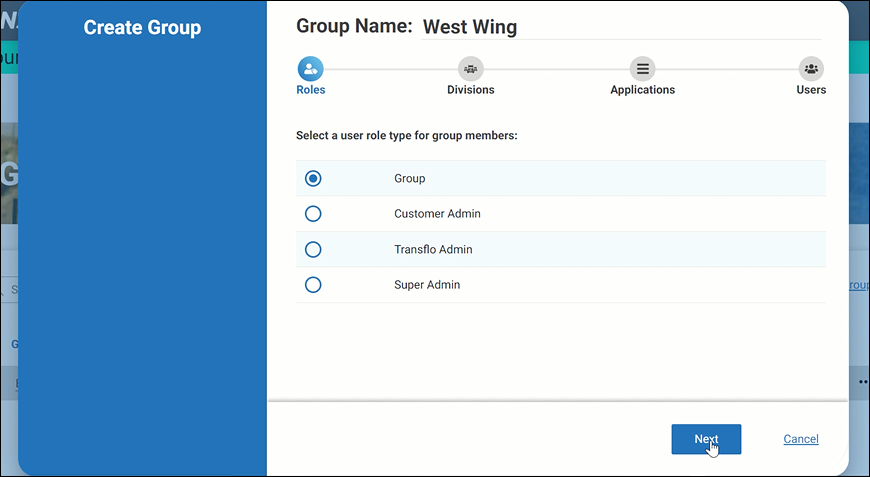
Enter a name for your new group:
-
-
On the Roles page, select a user role type that you want all members (users) of the group to have. In this example, we are leaving the default user role type (Group) selected. Click Next.
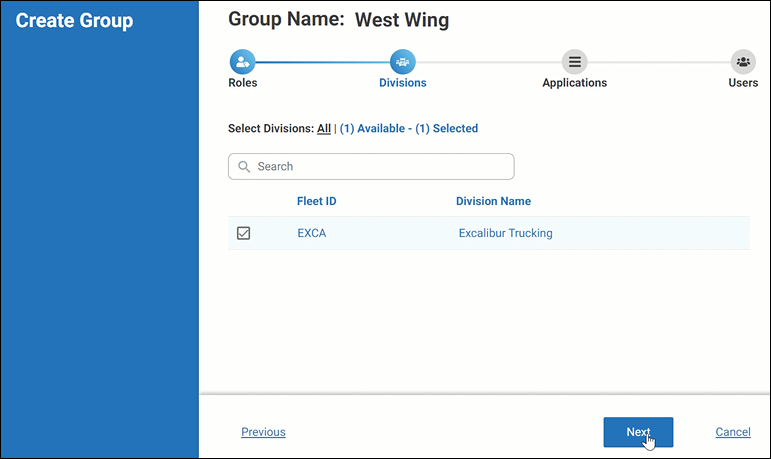
- On the Divisions page, search for a division and select one or more fleet divisions to assign to the users of your new group. Click Next.
-
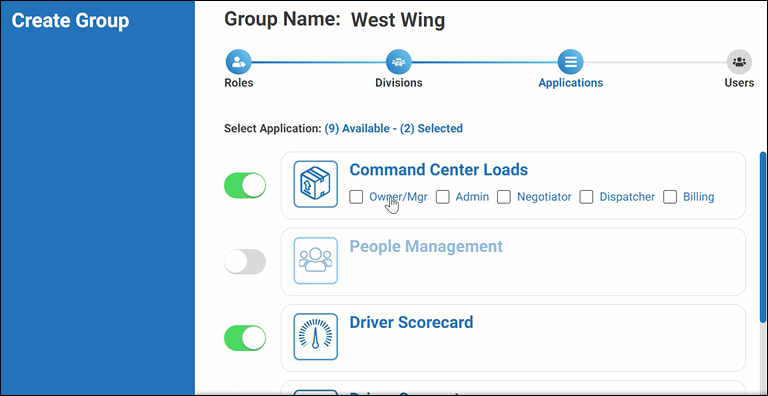
On the Applications page, scroll up or down the list and enable or disable the applications in OnePortal that you want members of this group to access. Some applications also show check boxes for various components. For example, you might create a group for dispatchers with Dispatcher access to applications or a billing group with Billing access.
In this example, we select Owner/Mgr under Command Center Loads.
-
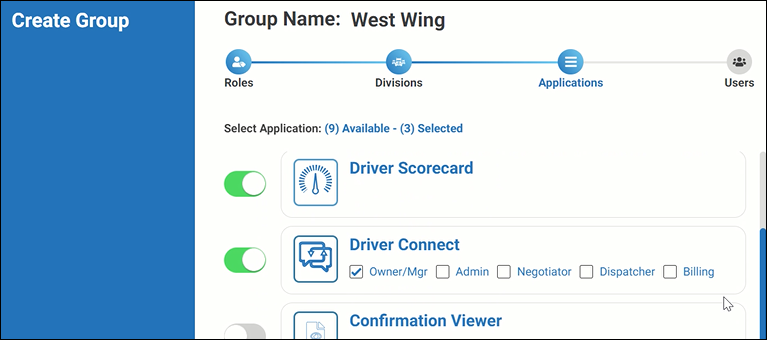
In the following example, we scrolled down to enable access to the Driver Connect application where we also assigned members of this group to the Owner/Mgr access level and features in that application. Click Next.
-
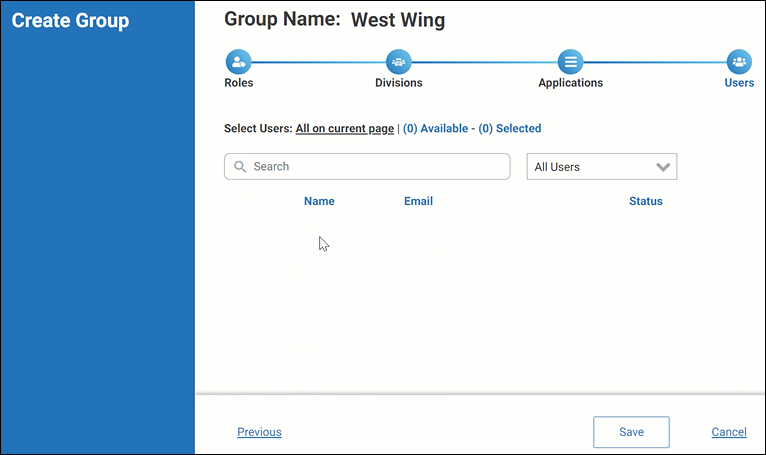
On the Users page, search for users and assign them to the group.
-
Click Save.
Result: Your new group appears on the Groups page.
Follow these steps to edit a group. You can edit the group name, roles, divisions, applications, and users assigned to the group.
After you create user groups and assign users to a group, instead of editing the permissions for each separate user, you can make changes just one time to the group and all the assigned users in the group receive those changes.
-
Navigate to the People Management module in Transflo One Portal.
-
At the top of the Users page, click Groups.
-
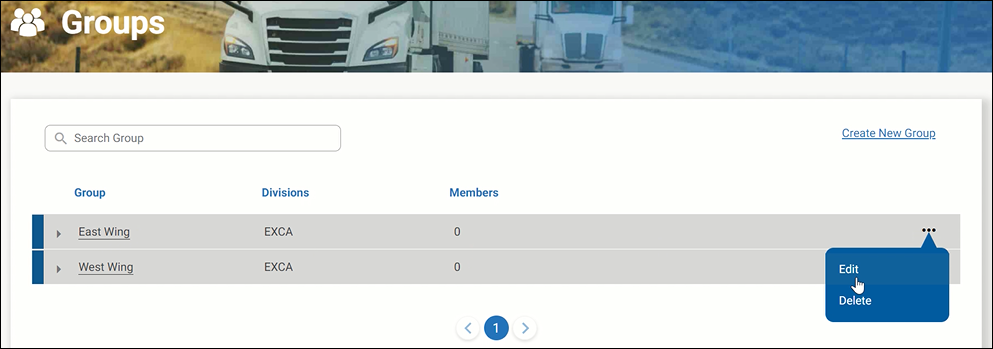
On the Groups page, search or browse for a group.
-
At the far right side of the row for a group, click … Options and choose Edit.
-
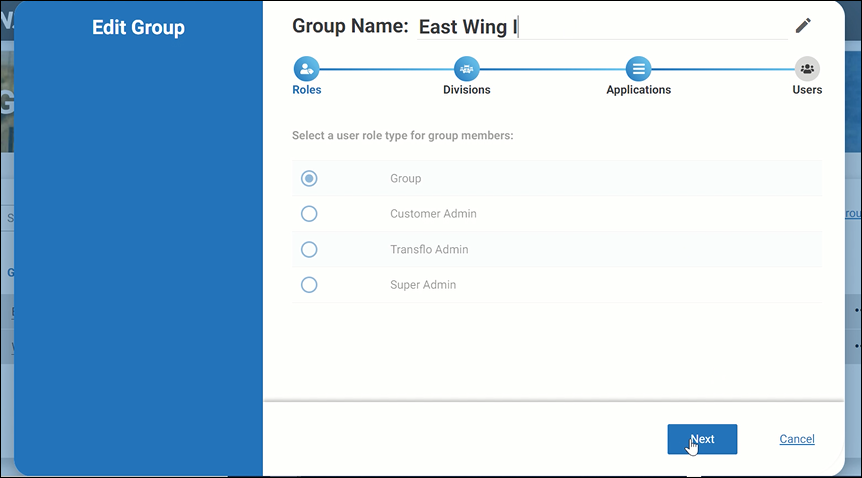
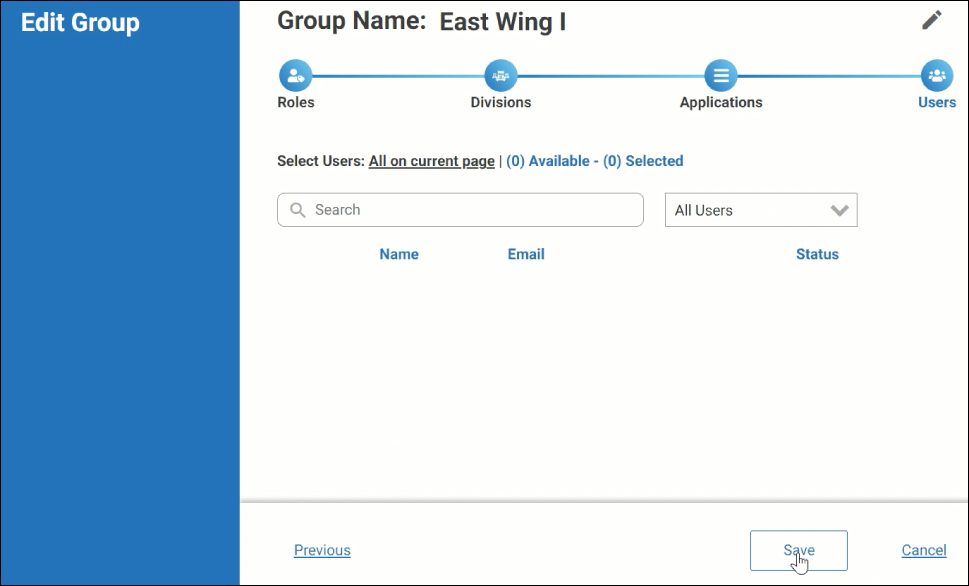
On the Edit Group page, to edit the name of the group, click
 Edit and then enter the new name for the group.
 -
To make other edits, click Next.
-
When editing a group, you can click Previous or Next to make any needed edits on the Roles, Divisions, Applications, or Users tabs. You can also click (or tap on touch-screen devices) directly on the icons for those sections.
-
When you are done editing, click Save.
When you create or edit user groups on the Groups page, you can assign users to the group at the same time instead of going back to the Users page.
-
Navigate to the People Management module in Transflo One Portal.
-
At the top of the Users page, click Groups.
-
Click the name of a group or create a new group.
-
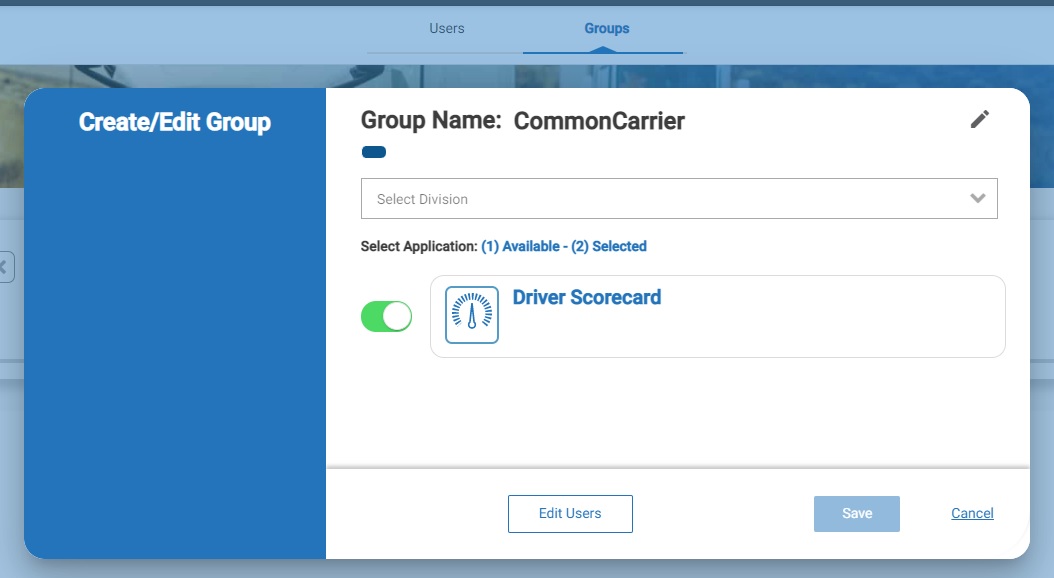
Verify the name of the group, selected division, and portal applications that are appropriate for all members of the group.
-
Click Add Users for a new group or click Edit Users for an existing group you are editing.
-
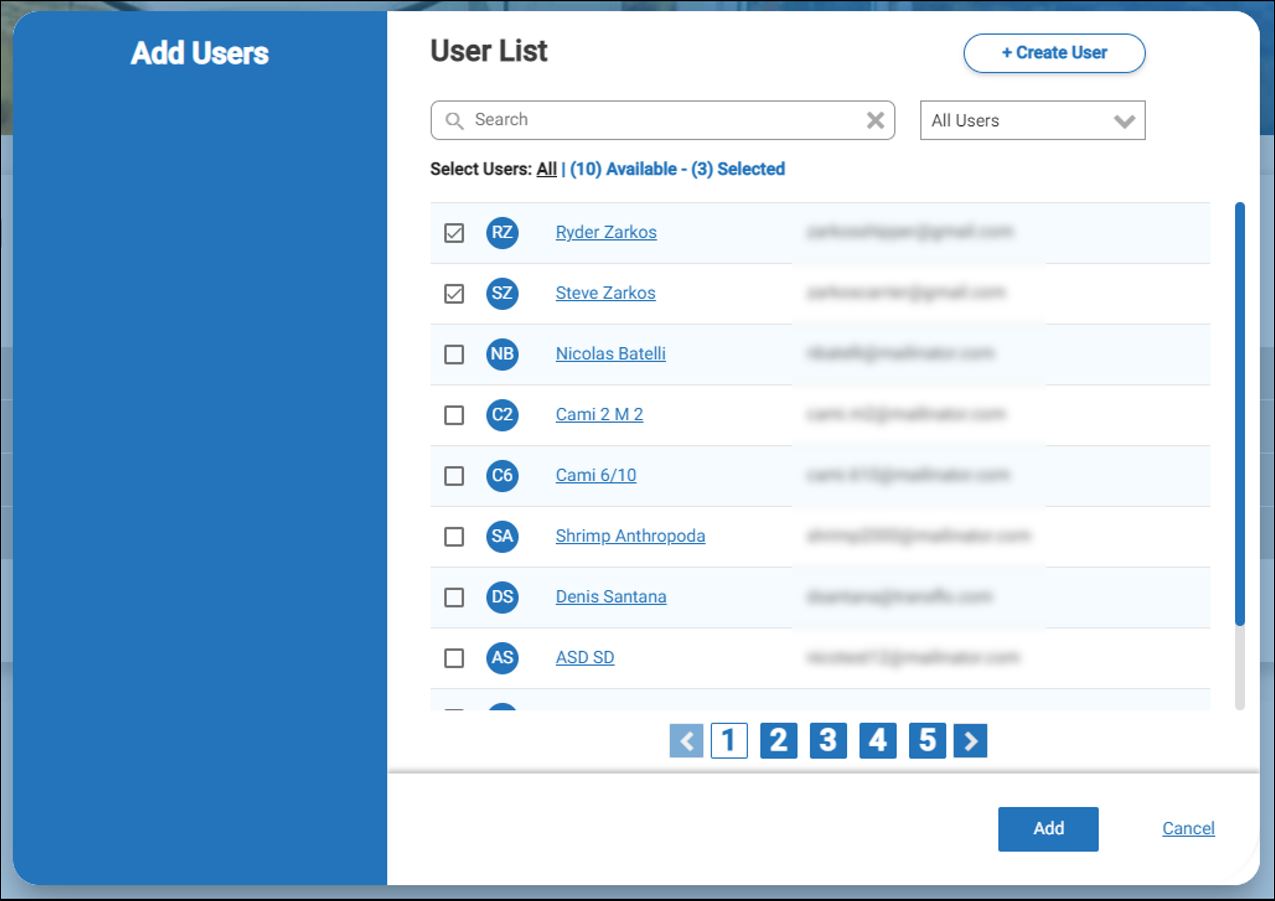
In the resulting list of users, select the check box for one or more users and then click Add.
-
(Optional) To help you select users to add or remove from the group, the following optional features are available:
-
To move to different pages showing more users, use the page navigation buttons.
-
To search for users to add or remove from the group, use the Search field.
-
To filter the list of users, select a filter value. The default filter is All Users.
-
To create a new user, click +Create User.
-
-
Click Save.
-
As a customer administrator with elevated permissions for your division, fleet, broker, or other entity, you can access and configure almost all application modules and features yourself.
-
Depending on your account subscription, integrations, and arrangements for managed or professional services, customers might sometimes need technical support from a Transflo administrator with restricted security access.
-
To escalate an issue, be prepared to provide your current software release version and the steps you perform to repeat the issue with a short description of both the actual result now and what you would like the expected result to be if your issue can be resolved.
