Install and Configure Transflo DMS Index Validation
TRANSFLO® applications store index data in the Transflo database prior to being imported into Docubase (no longer supported), Gauss, or FileNet for permanent storage. Each image or document is described by a group of fields in the database. Some of this data also can be stored in a corporate information system for use throughout the organization. Batch Scan, Capture, Field Imaging, and other Transflo DMS Enterprise intelligent automation applications can retrieve this data directly from other systems so that it is not necessary to re-enter the data manually or update the host system.
Index Validation is not strictly a retrieval mechanism. It is an application component that encapsulates an ODBC call to a host source (DB2, SQL Server, or any ODBC-compliant platform). It was designed to replace the older DLL plug-ins in TRANSFLO® applications. Any system that alters an ODBC driver should be accessible through Index Validation.
Configuration of Index Validation involves defining both input and output fields and then mapping the Index Validation fields to data fields in the calling application. Index Validation ships with two access methods: Simple Query and Parsed Procedure.
-
Simple Query: Simple Query uses a SQL statement. The inputs and outputs of the query are mapped to data fields. If the query returns more than one result, you are presented with a pick list.
-
Parsed Procedure: Parsed Procedure is more complex. It can be used for all stored procedures, regardless of whether or not they contain parsed fields. To use Parsed Procedure, either a stored procedure is created in the script or an existing stored procedure in the host database is called by Index Validation. To use the latter method, you must know the name of the stored procedure on the server and the input and output parameters to be used. All input and output parameters can be mapped to data fields. Optionally, output fields can be parsed into individual fields and individually mapped to data fields. If multiple output parameters are defined as being parsed and more than one contain data, the user is presented with a pick list.
All TRANSFLO® applications that use Index Validation including Index, Import, and Batch Scan have a tab or button to configure Index Validation.
Index Validation is very flexible. Before you begin creating an Index Validation script, you should define your objective and determine your source data. You can access anything from simple DBF files in a directory, to an MS SQL Server database, to an AS/400 system. Since you can access the source data only via a Stored Procedure or SQL query, you must first determine which of these the external system supports.
-
If you use a SQL query, you must have access to the database schema required to write the query.
-
If you use a Stored Procedure, you must determine if the Stored Procedure already exists, and if it does not, you must create it.
-
Maximum of 100 Index Validation fields in a Parsed script
-
Processor: 800MHz
-
RAM: 512MB
-
Disk Space: 5GB
-
Screen Resolution: 1024x768
-
Processor: 1 x1.8Ghz
-
RAM: 1GB
-
Disk Space: 5GB
-
Screen Resolution: 1024x768
-
Microsoft Windows® 10
The following is a list of required third-party software:
-
Database Drivers are required for database calls
To install TRANSFLO® Index Validation do the following:
-
Run the TRANSFLO® Index Validation Setup.exe file.
-
The Setup Welcome window opens. Click Next.
-
In the Select Destination Location window, browse to the location where you would like TRANSFLO® Index Validation to be installed. Click Next.
-
In the Ready to Install window, verify that the information is correct and click Next.
-
Setup installs TRANSFLO® Index Validation on your computer and then indicates that your installation is complete. Click Finish.
To upgrade TRANSFLO® Index Validation run the TRANSFLO® Index Validation file on your new installation CD.
Follow the steps above.
Setup will skip Step 3, since the location has already been determined.
The critical files for Index Validation are any HEC scripts that you create via the Index Administration application. You should back up these files on a regular basis. To back up these and any other HEC files, simply copy them to a safe location.
You should also back up the Windows registry settings for Index Validation. To do this, export the following registry subkey to a REG file for safe keeping:
HKEY_LOCAL_MACHINE\SOFTWARE\Pegasus TransTech\HEC
For instructions on accessing the Windows registry and exporting settings, refer to your Windows documentation.
In order for TRANSFLO® client applications to communicate with TRANSFLO® Server, the TRANSFLO® Client Configuration application must be properly configured. If you are experiencing connection problems with TRANSFLO® Server, you should verify the settings via this application.
To access the TRANSFLO® Client Configuration application and verify its settings:
1. Click the Windows Start button, point to Programs, point to TRANSFLO®, and click Client Configuration.
2. The TRANSFLO® Client Configuration window appears.
To configure or verify settings:
-
In the Web Service URL box, type the address of the TRANSFLO® Web service being used for communications with TRANSFLO® Server.
The default address is shown in the above screen capture.
Click Validate to ensure that the connection is active.
-
If your TRANSFLO® Server installation requires authentication, select the Authenticated Access check box and type the appropriate user name and password in the boxes provided.
-
If the local computer connects to the Internet via a proxy server, select the Use Proxy Server check box and type the proxy server address, connection port number, user name, and password in the boxes provided.
When you have finished entering or verifying connection information, click Apply, and then click the Logging tab.
3. On the Logging tab of the TRANSFLO® Client Configuration window, enter or verify the logging settings that should be used for TRANSFLO® applications.
To enter or verify logging settings:
-
Expand the Logging Level list and click the desired level of complexity for logged events.
-
In the Days to keep box, enter the number of days that events should remain in the log before being erased.
- When you have finished configuring the logging settings for your TRANSFLO® client applications, click Apply to save your changes.
- When you have finished entering your logging settings, click Apply, and then click the Authentication tab.
4. To use TRANSFLO® authentication, on the Authentication tab of the TRANSFLO® Client Configuration window select the Store TRANSFLO® Authentication Information check box and enter a User Name and Password in the corresponding boxes.
When you have finished configuring your TRANSFLO® Client Configuration, click OK.
For troubleshooting purposes you can temporarily override the Log Level from the file system.
1. Navigate to the TRANSFLO® Client log folder.
This is typically is C:\Program Files\Common Files\Pegasus TransTech\Transflo Client\Logs\Transflo.ClientConfig
2. Create a text file in the log folder and rename it to Log.Config.
3. Open the file with a text editor and add the following line to the file:
<Config LogLevel="[Level]" />
where,
[Level] is an integer between 0 and 4 indicating the log level.
The available log levels are:
-
- No Logging
-
- Errors Only
-
- Errors and Warnings
-
- Detailed
-
- Trace
Example: For the log level to be set to Trace the entry in the Log.Config file will be:
<Config LogLevel="4" />
4. Save and close the Log.Config file.
The log level has changed.
5. To disable this feature and revert to the configured log level, rename the Log.Configfile to Log.Config.Old.
Client Access ODBC drivers can be used to integrate TRANSFLO® applications with IBM® iSeries (formerly known as AS400). To do this, a system data source first must be created. Follow the steps below to create the system data source:
-
On the Windows task bar, click the Start button, point to Settings, and then click Control Panel.
-
In the Control Panel window, double-click Administrative Tools.
Note: If you are configuring an ODBC connection on a Windows 7 x64 or Windows 2008 x64 machine be sure to use the ODBC Configuration shortcut in the Start menu under the TRANSFLO® Group instead of the shortcut in the Administrative Tools window.
-
Hover your mouse on the right side of the screen and click Settings. In the top right side, click on Tiles, and select Yes to Show Administrative Tools.
-
Select the 32 bit ODBC Configuration shortcut.
-
In the ODBC Data Source Administrator window, click the System DSN tab.
-
Click the Add button.
-
In the Create New Data Source window, click Client Access ODBC Driver (32-bit) if it is not already selected, and then click Finish.
-
In the System iAccess for Windows ODBC Setup window, enter a name for the data source in the Data source name box. Select an iSeries (AS/400) system in the System list.
-
Click the Server tab. In the SQL default library box, type the name of the SQL library to be used.
-
Click the Data Types tab. Accept the default settings.
-
Click the Packages tab. If the Enable extended dynamic (package) support check box is selected, clear it.
-
Click OK to save the information and close the window. Click OK on the ODBC Data Source Administrator dialog box.
Depending on the stored procedure being accessed, creating a parsed procedure script can be more complex. You must determine if a stored procedure already exists, and if so you must then determine its required parameters.
Each database and server has stored procedure languages that differ. Most stored procedures are able to return result sets. The Parsed Procedure in TRANSFLO® Index was designed to accommodate databases whose stored procedures could not return result sets.
To create a parsed procedure script, follow these steps:
-
On the Host tab in the Capture section of TRANSFLO® Administration Tool, click the Edit Scripts link.
To access the Host tab in the TRANSFLO® Administration Tool, see Transflo DMS Enterprise Administration Tool.
-
If a File Download - Security Warning dialog box asks if you want to run or save the file HECtool.hta, click the Run button.
-
The Login - HecConfig dialog box appears. In the User Name field, enter your assigned Transflo user name. Enter your password in the Password field. Click OK.
-
The HEC Configuration Application window appears.
-
Click the Configure all local HEC scripts button.
-
The Configure Scripts dialog box opens.
-
The path shown in the Script Path box defaults to the Index Validation installation folder.
-
If any scripts have already been saved in this folder, they are listed in the Available Scripts box.
-
To delete an existing script, click its name in the Available Scripts box, and then click the Delete button.
-
To exit the Configure Scripts dialog box, click Close.
-
-
To create a script in a folder other than the Index Validation folder, or to access a script that is not saved in the Index Validation folder, you must perform the following sub-steps to change the Script Path.
-
You are now ready add a new script or edit an existing script.
-
To edit an existing script, click the script name in the Available Scripts box and then click the Edit button. Skip the next step about adding a script.
-
To add a new script, click the Add button.
-
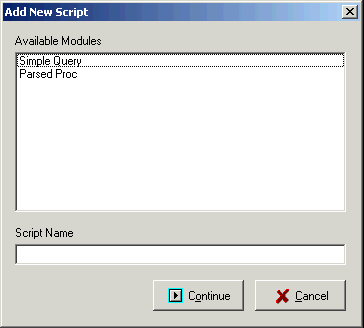
The Add New Script dialog box opens. In the Available Modules box, click Parsed Proc.
-
In the Script Name box, type a name for your new script and then click Continue.
-
-
The Edit Script window opens in its Parsed Procedure Configuration.
-
These steps assume that you accepted the Advanced Mode setting in the Configure Scripts dialog box, meaning that the Edit Script window is tab-based. If you did not accept this setting, when the instructions below state that you should click the next tab in the series, click the Next button instead.
-
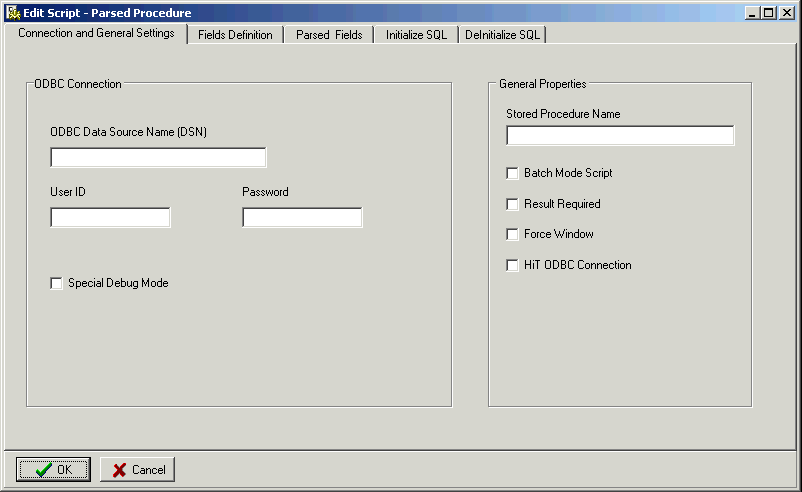
On the Connection and General Settings tab, enter the connection information for the SQL database to be queried by the script, and configure the properties for the stored procedure.
-
In the ODBC Connection section, click in theODBC Data Source Name (DSN) box, and type the SQL database DSN.
-
Enter the connection user name and password in the User ID and Password fields. The user ID entered on the Connection and General Settings tab must have the rights to drop and create stored procedures.
-
The Special Debug Mode is used during the execution of the stored procedure. A debug log file named hecpsp.log can be created in the Windows folder. To create the log file, select the Special Debug Mode check box.
-
In the General Properties section, enter information about your new stored procedure.
-
In the Stored Procedure Name box, type a name for the stored procedure to be created.
-
TRANSFLO® Index Validation can route error messages to a hecpsp.log file in a Windows directory instead of displaying them on the screen. This is beneficial for programs that run as services or server applications. To enable this feature, select the Batch Mode Script check box.
-
All Index Validation procedures return a result of either TRUE or FALSE, depending on whether or not they are executed successfully. If the Result Required check box is selected, Index Validation checks to see that queries have result sets and that required parameters have values. If the result of this check is that a query lacks a result set or one or more required parameters lacks a value, Index Validation returns a result of FALSE. If the Result Required check box is not selected, Index Validation always returns a result of TRUE. Select the Result Required check box if you want Index Validation to always check for a value.
-
If the Force Window check box is selected, the multiple select window will appear in Index even if the query returns only a single record. Otherwise, when a single result is returned, it will be entered into Index automatically. To force the multiple select window to always appear, select the Force Window check box.
-
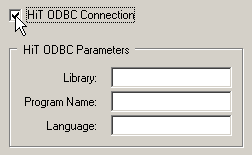
A HiT ODBC connection is a special type of ODBC connection to an AS/400 system. If you are not using this type of connection, skip ahead to the next step. If you are using a HiT ODBC connection, you must configure additional parameters. To begin, select the HiT ODBC Connection check box.
The HiT ODBC Parameters area appears.
-
In the Library box, type the name of the AS/400 library where the input/output program you are using is located.
-
In the Program Name box, type the file name of the program being used.
-
In the Language box, type the coding language in which the program is written (for example, RPG IV, C, C++, etc.). For assistance with these parameters, consult your AS/400 System Administrator.
-
-
-
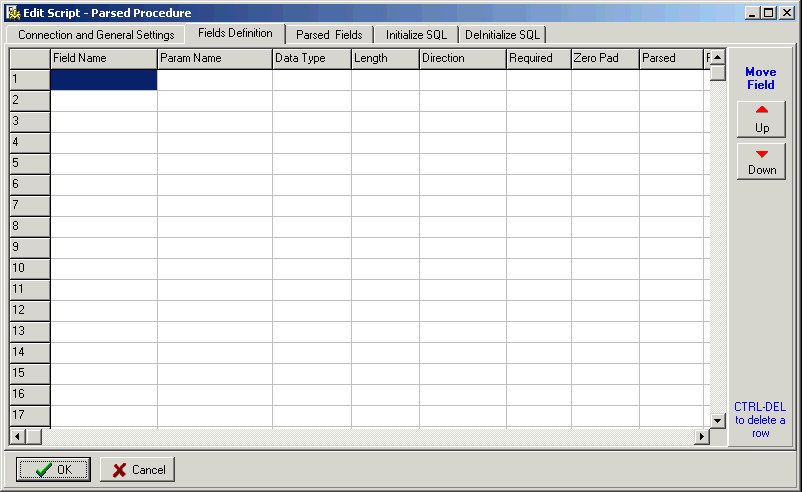
Click the Fields Definition tab. This tab is used to define the input and output fields for the stored procedure.
-
If the field will be exposed to the client application, click the Field Name cell and type the field name.
-
If the field will be used only within Index Validation, you do not need to enter the field name.
-
Click the Param Name cell to select it. In the Param Name cell, type the stored procedure parameter name. For SQL Server, the name must be prepended with an at sign (@).
-
Click the Data Type cell to select it, and then click it a second time to activate the Data Type list in that cell. Click the list arrow to expand the list, and then click the data type for the field, either CHAR, INT, FLOAT, or DATE (the required date format is MMDDYYYY).
If you selected CHAR as the data type, click the Length cell and type the character length of the field value.
-
Click the Direction cell to select it, and then click it a second time to activate the Direction list in that cell. Click the list arrow to expand the list, and then click one of the following directions for the field:
Direction Description INPUT - The field passes input to the stored procedure.
OUTPUT - The field returns output from the stored procedure.
INPUT/OUTPUT - The field is used to pass input to the stored procedure and return the modified value to Index Validation.
INPUT USER ID - The field passes the user ID to the stored procedure.*
INPUT COMPUTER NAME - The field passes the local computer name to the stored procedure.*
* If INPUT USER ID or INPUT COMPUTER NAME is selected, any field name entered will be erased since the field will not be visible to the calling application, and the Data Type will be forced to CHAR.
-
Click the Required cell to select it, click it a second time to activate the Required list, and then click the list arrow to expand the list. If the output parameter must be populated after calling the stored procedure, click True. Otherwise, click False.
-
Click the Zero Pad cell to select it, and then click it a second time to activate the Zero Pad list in that cell. Click the list arrow to expand the list, and then click either True or False to indicate whether or not the field value should have zeroes added to its left side if the value is shorter than the length specified in the Length cell.
-
Click the Parsed cell to select it, click it a second time to activate the Parsed list in that cell, and then click the list arrow to expand the list. If the field will be parsed into multiple output fields, click True. Otherwise, click False.
-
-
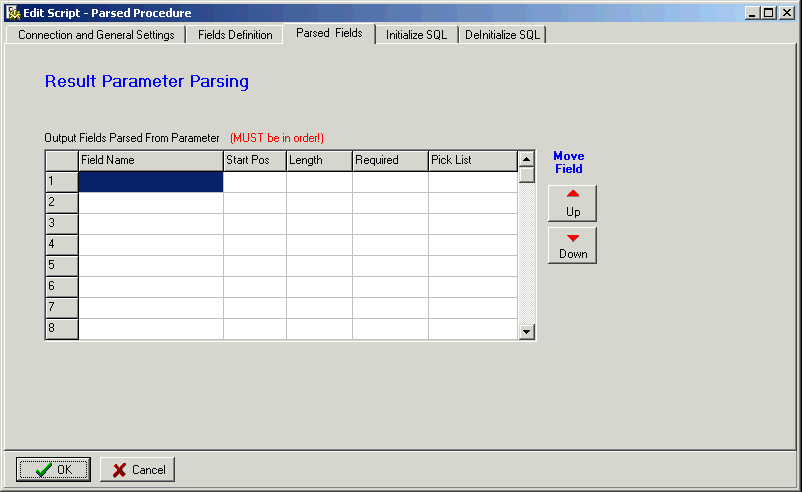
Click the Parsed Fields tab. The actual parsing configuration is performed on the Parsed Fields tab.
-
Click the Preset cell to select it, click it a second time to activate the Preset list in that cell, and then click the list arrow to expand the list.
-
If you are configuring a CHAR output field, and Index Validation should fill the field with spaces prior to calling the stored procedure, click True. Otherwise, click False.
-
-
Back on the Fields Definition tab, click the Message cell to select it, and then click it a second time to activate the Message list. If you are configuring a CHAR field that should be used as a message field, click True. Otherwise, click False.
-
Message fields allow the computer running the stored procedure to pass messages back to the user via a message box.
-
Message fields cannot have a Field Name, so if you click True, any value entered in the Field Name cell will be deleted.
-
Continue entering fields in the remaining rows as needed. Up to 100 rows can be entered.
-
To move a row up or down in the order, click either the up or down Move Field buttons on the right edge of the tab.
-
To delete all settings in a particular row, click any cell in that row, and then press Ctrl + Del on the keyboard.
-
When you click the next tab or the OK button, a dialog box appears asking if you wish to rebuild the stored procedure creation header. Click Yes.
-
-
Click the Parsed Fields tab again to configure the multiple output fields for the parameters that were identified as parsed. The listing order of the fields is important and must match the order of the parsed parameters from the Fields Definition tab.
-
Click the Field Name cell and type the name of the first parsed parameter from the Fields Definition tab.
-
Click theStart Pos cell, and type the position number of the first character to be parsed.
-
To begin parsing with the first character, type 1.
-
To begin parsing with the fifth character, type 5.
-
-
Click the Length cell, and type the number of characters to be parsed.
-
Click the Required cell to select it, click it a second time to activate the Required list, and then click the list arrow to expand the list. If the field must return a value, click True. Otherwise, click False.
If the field is required, and the query does not return a value for this field, then the query is considered invalid even if there are values for other fields.
-
Click the Pick List cell to select it, click it a second time to activate the Pick List list, and then click the list arrow to expand the list. When multiple parsed parameters are returned from a stored procedure, they can be displayed in a pick list from which the user can choose the desired value. To enable this function, click True. Otherwise, click False.
-
Continue entering fields in the remaining rows as needed. Up to 100 rows can be entered.
-
To move a row up or down in the order, click either the up or down Move Field buttons on the right edge of the tab.
-
To delete all settings in a particular row, click any cell in that row, and then pressCtrl + Del on the keyboard.
-
-
Click the Initialize SQL tab. The stored procedure creation header for the fields you entered already appears on the tab. To create a SQL initialization statement, first enter a SQL statement in the box provided, if desired. Entering a SQL statement is not required.
Next, type or paste the body of your stored procedure below the creation header. Place a blank line between the stored procedure header and body, or wrap the body of the stored procedure with BEGIN / END. This prevents it from being erased when the header is rebuilt.
-
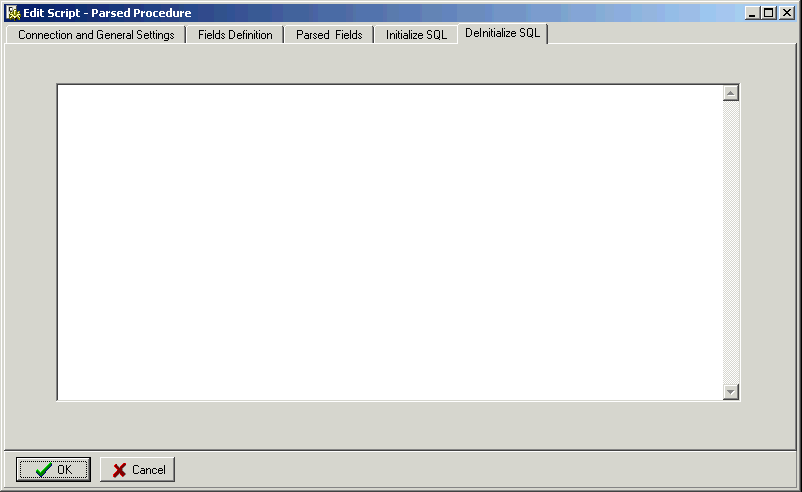
Click the DeInitialize SQL tab. The drop script command for the stored procedure should already be entered in the box provided. This is done automatically by Index Validation after you enter field and parameter information on the Fields Definition tab. You can modify the drop script if needed.
-
When you finish configuring the necessary tabs in the Edit Script window, click OK.
-
On the Configure Scripts dialog box, click the Close button.
For configuration instructions for the Remote Host Interface / Custom Plugin tab, see Configure Transflo DMS Capture.


