Configure Transflo DMS Management Reports
The TRANSFLO® Administration Tool website allows system administrators to perform data maintenance and configure document classes, groups, users, and field mappings.
The TRANSFLO® Management Reports application has two components and corresponding views:
All of the configuration for TRANSFLO® Management Reports is performed on the TRANSFLO® Administration website. Only users with Administrator privileges can use the TRANSFLO® Administration website.

The Reports menu is located on the left-side navigation bar. It is a static menu provided you are in the ‘Reports’ section of the application. The Reports Menu provides a list of available reports.
When a report is selected from the list, the applicable Report Criteria page for the corresponding report prompts the user to enter criteria for the report. The user will then be able to run the report. The Report menu is displayed when the Home link is selected.
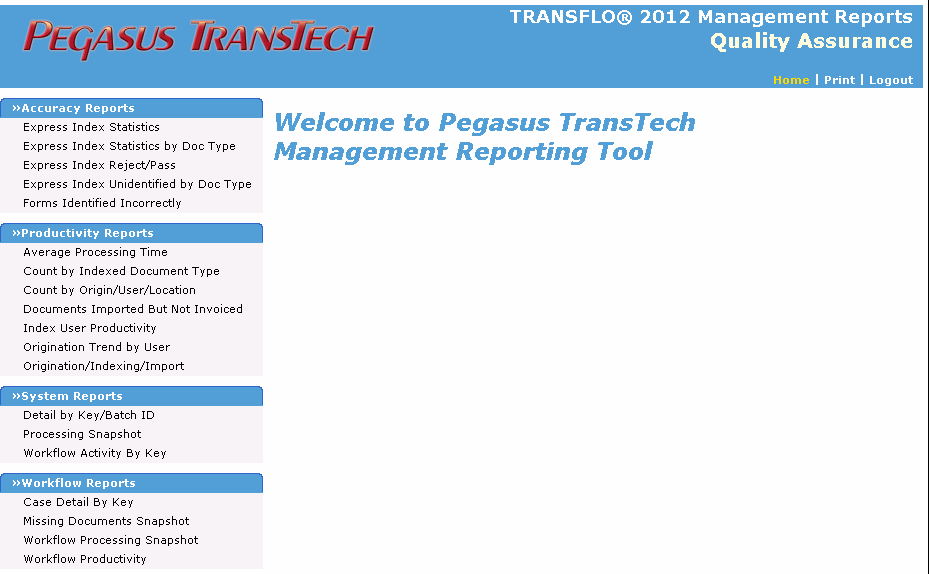
The toolbar is located at the top of the web page under the application title. It lists all of the available options that are available for the user.
The menu bar (top right) is available from the Home link in the application. The available options include:
-
Home: A link to the main default web page.
-
Print: Link that displays the ‘Print’ dialog box.
-
Logout: Link that allows the user to log out of the application.
As an administrator, your configuration controls what users can use to create reports in the report system. You can also give users some administrative privileges.
-
Open a web browser and enter the URL for the TRANSFLO® Administration tool. The URL convention is http://<server name>/Transflo.Admin.
-
<server name> is the DNS name of the TRANSFLO® Server.
-
If you are running the TRANSFLO® Administration Tool from Windows Server 2008 you must add the Transflo.Admin web site to your trusted sites.
-
To run Management Reports using older editions of Windows or Windows Server, set your Edge browser to use Internet Explorer compatibility mode.
-
-
On the Login page, enter your Administrator Login ID and Password to log on. Use your Email address if your company uses Email as a standard for Login ID.
-
The TRANSFLO® Administration Tool opens to the main page.

-
Click the Company link in the Main Menu on the left side of the Administration Tool main page.
-
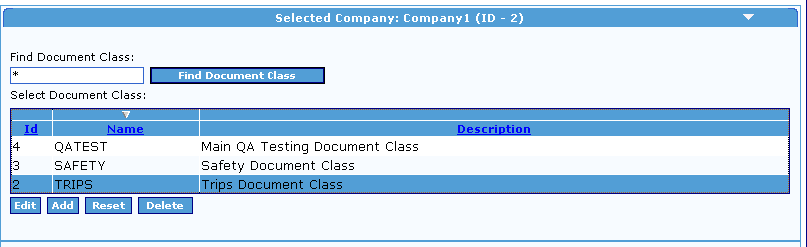
The Company page opens in the right pane. Click a company to configure Management Reports.

-
Click the Document Class link on the menu tree in the left pane.
-
On the Document Class page, select a Document Class from the list.

-
In the menu tree, below the Document Class node, click the Fields menu item.
-
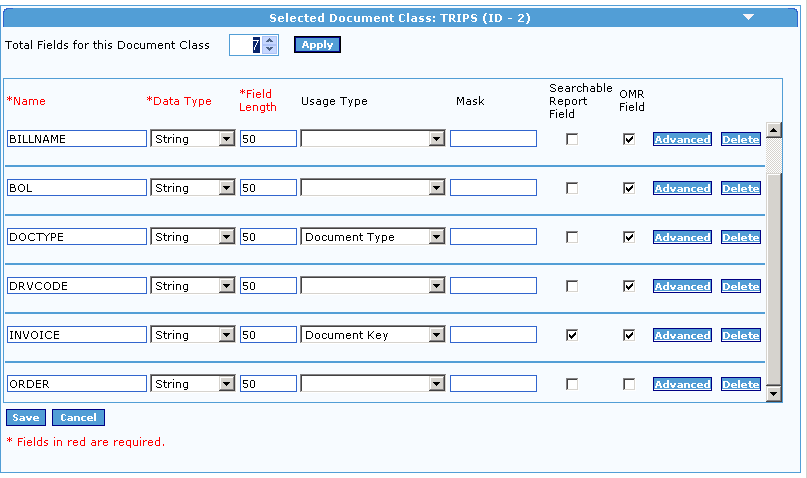
The Add/Create field page opens in the right pane.

-
Specify fields at the Field level and at the Management Reports Configuration level. Make certain fields available for the Express Index Accuracy report and the Detail by Batchid report at the Field level.
-
For Fields that will be used as search criteria for the Detail by Batch ID report, select Document Key from the Usage Type drop-down, and check the Searchable Report Field check box.
-
For Fields that are to be made available as custom Fields in the Express Index Accuracy report, check the OMR Field check box.
-
Several fields can be made available as OMR fields. When configuring the Express Index Accuracy report however, only two OMR fields may appear on the report.
-
-
After all fields have been configured for management reports, click Save.
-
After fields are configured for Management Reports at the Field level, you are ready to configure the reports themselves. This involves selecting which reports will be enabled, and customizing the Express Index Accuracy report.
-
Click the Reports link in the menu tree.
-
On the Management Reports Administration page in the right pane, select the Enable Company Reporting check box in the top left corner.

-
Select Express Index Statistics from the list of reports on the Management Reports Administration page, and click the Edit button.
-
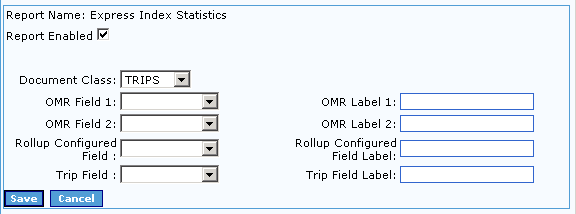
The Express Index Statistics Report Configuration page opens.

-
Ensure that the Report Enabled check box is checked.
-
Select a Document Class from the Document Class drop-down.
-
Select two custom fields for your report from the OMR 1 and OMR 2 list boxes. The fields available in the drop-down are the fields you selected as OMR Fields in the Configuring Fields section of this topic.
-
Type in report headings for your OMR custom fields in the OMR Label 1 and OMR Label 2 text boxes.
-
(Optional) Select a field by which to measure accuracy from the Rollup Configured Field drop-down list box. The fields available in the drop-down are the fields you selected as OMR Fields in the Configuring Fields section of this topic. If a Rollup Configured Field was selected, enter a Label for the report in the Rollup Configured Field Label text box.
-
Select a Trip Field from the Trip Field drop-down list box. The fields available in the drop-down are the fields you selected as OMR Fields in the Configuring Fields section of this topic.
-
Enter a label for the Trip Field in the Trip Field Label text box.
-
Repeat these steps for the remaining Express Index reports.


All reports are enabled by default.
To disable a report perform the following:
1. Click on the report name in the list, and click the Edit button.
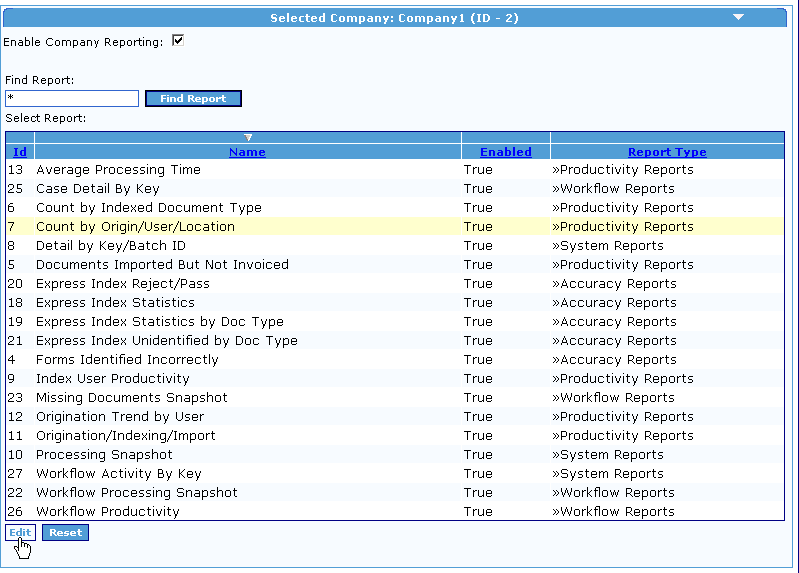
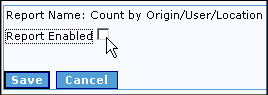
2. The Report Configuration page opens in the right pane with the report name in the top left hand corner.
Un-check the Report Enabled check box and click Save to disable the report.
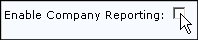
To disable all reports, un-check the Enable Company Reporting check box at the top of the Management Reports Administration page and click Save.
You can exclude Document Types from the Documents Imported but not Invoiced report. For example, you might want to view ORDERS that do not have invoices associated with them.
To exclude Document Types from the Documents Imported but not Invoiced report, do the following:
1. Log into SQL Server Management Studio, and expand the TRANSFLO® Database.
2. Under Tables, open the tf_doc_type_category table.
3. Insert a row with “not required for invoice” in the Name column.
4. Log into the TRANSFLO® Administration Tool, and select a Company, a Document Class, and an Alias.
5. Click on Document Type in the menu.
6. The Document Type list opens in the right panel.
Click on the Document Type that you want to exclude from the Documents Imported but not Invoiced report, and click Edit.

7. The Document Type form opens in the right panel.
Select “not required for invoice” from the Category drop down list, and click Save.

8. The Document Type you selected will not appear on the Documents Imported but not Invoiced report.
Note:Document Types with a Category of “Log” will also not appear on the Documents Imported but not Invoiced report.
The TRANSFLO® Administration Tool uses Groups and Users to restrict or grant access to information that is gathered in Management Reports.
A Group is assigned to a set of Document Classes, Queues, and Aliases.
Also, Groups may be administrative or non- administrative.
A User is assigned to one or more Groups.
A User is granted a unique User ID and Password.
When an employee logs on to Management Reports with a User ID, that employee can see reports based on the Document Classes, Queues, and Aliases associated with the group(s) assigned to that User.
To create a Group perform the following:
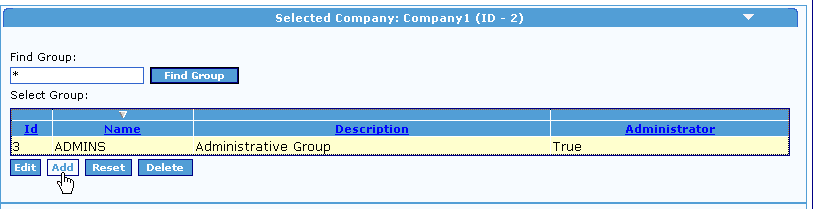
1. Click the Groups and Permissions menu item in the menu tree.
2. The Groups and Permissions Administration page opens.
Click the Add button.
3. The Add/Edit Groups page opens.
Enter a name for your group in the Name text box.
The Administrative check box allows the user to view more options than a non-administrative user in the Administration Tool.
Users without Administrative rights have very limited rights to the Administration Tool.
If you wish your user to have Administrative rights, check the Administrative check box.
Type in a description for your group in the Description text box.
Click on the arrow on the right to expand the Permissions pane.

4. Select the Document Classes you want to grant permissions to your group in the Available Document Classes list box by holding down the CTRL key and clicking on the individual Document Classes.
Click on the > button to move these to the Selected Document Classes list box.
Repeat this step to add Queues to the Selected Queues list box.
Click on the Save button to save your group.

Note: Selected Document Classes and Queues can be removed by clicking on the corresponding < arrow.
Note: The Available Alias and the Selected Alias list boxes are used primarily for Capture Users.
To learn more about Alias administration see the TRANSFLO® Administration Tool Knowledge Base.
To delete a group do the following:
1. Click on the Groups and Permissions menu item in the menu tree.
2. Click on the group you wish to delete to select it.
Once the page refreshes click on the Delete button.
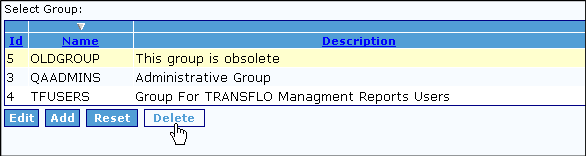
The Delete Group Confirmation box opens.
Click on the OK button to delete the group.
To add a User and to assign the User to a Group:
1. Click on the Company Users menu item in the menu tree.
2. A list of Users is displayed in the right pane.
To create a new user click the Add button.
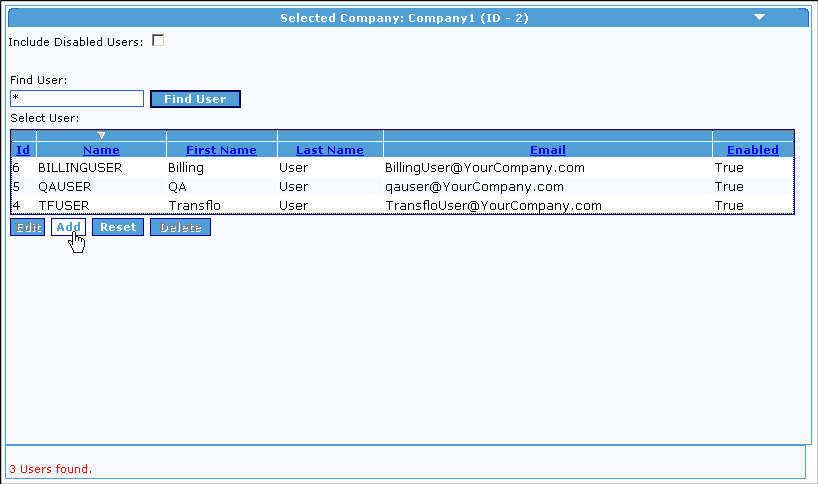
Note: An existing user can be add to your group by clicking on the user in the list and when the page refreshes click on the Edit button.
Note: To view disabled users along with enabled Users in the list check the Include Disabled Users check box.
Disabled Users will then be displayed in the list with the word False in the Enabled column.(This check box is unchecked by default.)
3. The Add/Edit User page opens in the right frame.
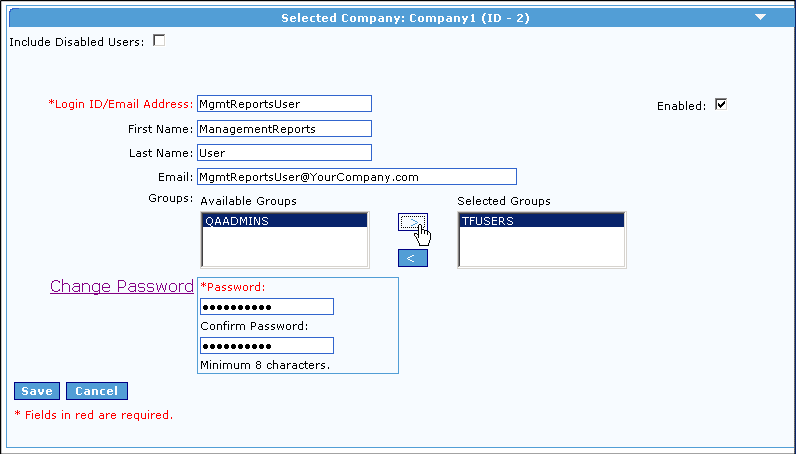
4. Ensure the Enabled Checkbox, in the top right hand side of the frame, is checked. (This check box is unchecked by default.)
5. Enter a username for your user in the Login ID/Email Address text box.
If your organization uses email addresses as a convention for usernames, enter a valid email address in the Login ID/Email Address text box.
6. Optional: Enter the User’s first name in the First Name text box.
7. Optional: Enter the User’s last name in the Last Name text box.
8. Optional: Enter the User’s email address in the Email text box.
9. Select the Group(s) you want to associate your user with in the Available Groups list box by holding down the CTRL key and clicking on the individual group(s).
Click on the > button to move these to the Selected Groups list box.
Note:Selected Groups can be removed from the Selected Groups list box by clicking on the < arrow.
10. Type a password for the user in the Password text box.
Note: Passwords are optional as long as TRANSFLO® authentication is not being used. For more information on authentication and how it works, see the TRANSFLO® Administration Tool Knowledge Base.
11. Retype the password in the Confirm Password text box.
12. Existing passwords can be changed by clicking on the Change Password link.
13 To disable a user un-check the Enabled check box.
To display the TRANSFLO® Workflow Reports in the reports list, follow these steps:
-
Configure your Workflow Server. See Install and Configure Transflo DMS Workflow Server.
-
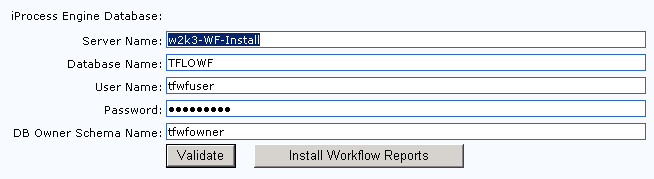
Install the Workflow reports:
-
In the TRANSFLO® Administration Tool click the Workflow menu item.
The Workflow Configuration page appears.
-
Click the Install Workflow Reports button.

-
When the installation finishes, this button is disabled (grayed out) and shows Workflow Reports Installed.
-
When you upgrade your TRANSFLO® Server, the label for this button changes to Upgrade/Re-Install Workflow Reports. To install Workflow Management Reports updates on your TRANSFLO® Server click the Upgrade/Re-Install Workflow Reports button.
-
Once you have installed the Workflow Reports you must configure the Workflow Procedures that the reports will be based on.
To configure Workflow Procedures,
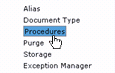
1. Click the Procedures menu item.
This menu item is only visible when you install Workflow Reports.
2. The Configure Workflow Procedures interface opens in the right pane.
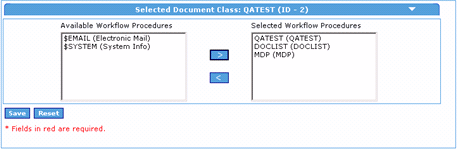
3. To select Workflow Procedures to be available for Management Reports, hold down the [Ctrl] key on you keyboard and click the Procedures you want to include in the Available Workflow Procedures box.
4. Click the  button.
The procedures you selected move to the Selected Workflow Procedures box.
5. To remove Workflow Procedures available for Management Reports, hold down the [Ctrl] key on you keyboard and click the Procedures you want to remove in the Selected Workflow Procedures box.
6. Click the  button.
The procedures you selected move to the Available Workflow Procedures box and will no longer be available to Management Reports.
The TRANSFLO® server creates two logs for Management Reports in a default folder at the following path:
C:\Program Files\Pegasus TransTech\TRANSFLO® Server\Logs
Each log exists in separate sub-folders:
TRANSFLO® .ReportAgent: Logs activities from the TRANSFLO® Report Agent used to create and deliver Management Reports subscriptions.
TRANSFLO® .Reports: Logs activities from the TRANSFLO® Management Reports website.
New log files are created each day whenever Management Reports activity occurs in the respective modules that are being logged.
To change the log level for any of these server logs,
1. Create a text file in the Log Folder and rename it to Log.Config.
2. Open the file with a text editor and add the following line to the file:
<Config LogLevel="[Level]" />
where,
[Level] is an integer between 0 and 4 indicating the log level.
The available log levels are:
-
- No Logging
-
- Errors Only
-
- Errors and Warnings
-
- Detailed
-
- Trace
Example: For the log level to be set to Trace the entry in the Log.Config file will be:
<Config LogLevel="4" />
3. Save and close the Log.Config file.
The log level has changed.
4. To disable this feature and revert to the default log level, rename the Log.Config file to Log.Config.Old.
As of TRANSFLO® 2012 R3, Management Reports Roll Ups are no longer part of the TRANSFLO® System Agent or configured in the TRANSFLO® Admin Site. These have been moved to the TRANSFLO® SQL Server database as SQL Server Agent Jobs and get installed when the TRANSFLO® Database is installed.
Note:SQL Server Agent must be installed on the SQL Server before running the TRANSFLO® Database installation in order for the Management Report Roll up job to be created.
To start the SQL Server Agent service do the following:
1. Log on to Microsoft SQL Server Management Studio.
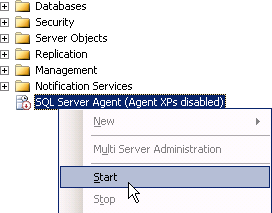
2. Ensure that the SQL Server Agent is running.
If it is not running, right-click it in the Object Explorer, and click Start from the context menu.
You can also start the SQL Server Agent service by opening the Services window from the Windows Administrative Tools, and start the SQL Server Agent service.

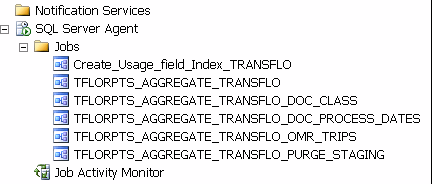
3. Under the SQL Server Agent node in SQL Server Management Studio, there are 5 SQL Server Agent Roll Up jobs, as shown below.
These begin with the prefix “TFLORPTS”.
The default settings for these jobs are as follows:
-
TFLORPTS_AGGREGATE_TRANSFLO
The default is every 19 minutes running all day (from 12:00:00 AM to 11:59:59 PM).
-
TFLORPTS_AGGREGATE_TRANSFLO_DOC_CLASS
The default is every 7 minutes running all day (from 12:00:00 AM to 11:59:59 PM).
-
TFLORPTS_AGGREGATE_TRANSFLO_DOC_PROCESS_DATES The default is every 5 minutes running all day (from 12:00:00 AM to 11:59:59 PM).
-
TFLORPTS_AGGREGATE_TRANSFLO_OMR_TRIPS
The default is every 4 minutes running all day (from 12:00:00 AM to 11:59:59 PM).
-
TFLORPTS_AGGREGATE_TRANSFLO_PURGE_STAGING
The default is every 9 minutes running all day (from 12:00:00 AM to 11:59:59 PM).
Important! Do not make changes to the TRANSFLO Reports SQL Server Agent jobs. These jobs have been pre-configured by the Server Installer to optimize performance. Changing these settings may result in unexpected behavior.