Report Lost or Damaged Cargo
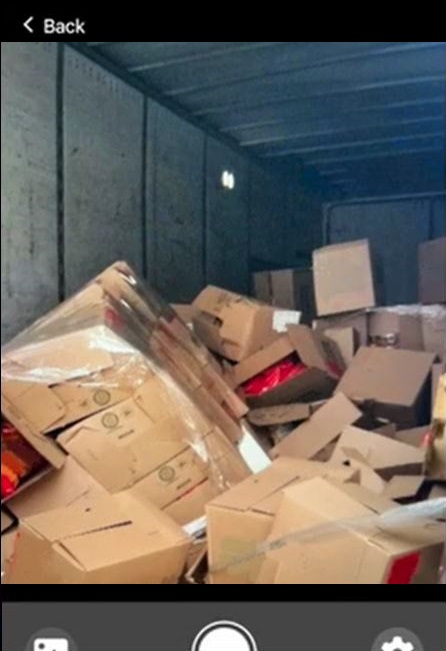
If your edition of the mobile app supports this safety feature, you can report a mistake, theft, shrinkage, inventory receiving discrepancy, outbound loss, damage, vandalized tarp, empty trailer, or a spilled load, all collectively known as OS&D (over, short, or damaged) cargo. (Sometimes known as over, short, or inventory damage or OSID.) You can submit any supporting forms, documents, or photos to your carrier, dispatcher, fleet supervisor, or the inventory, warehouse, receiving, or shipping team.
-
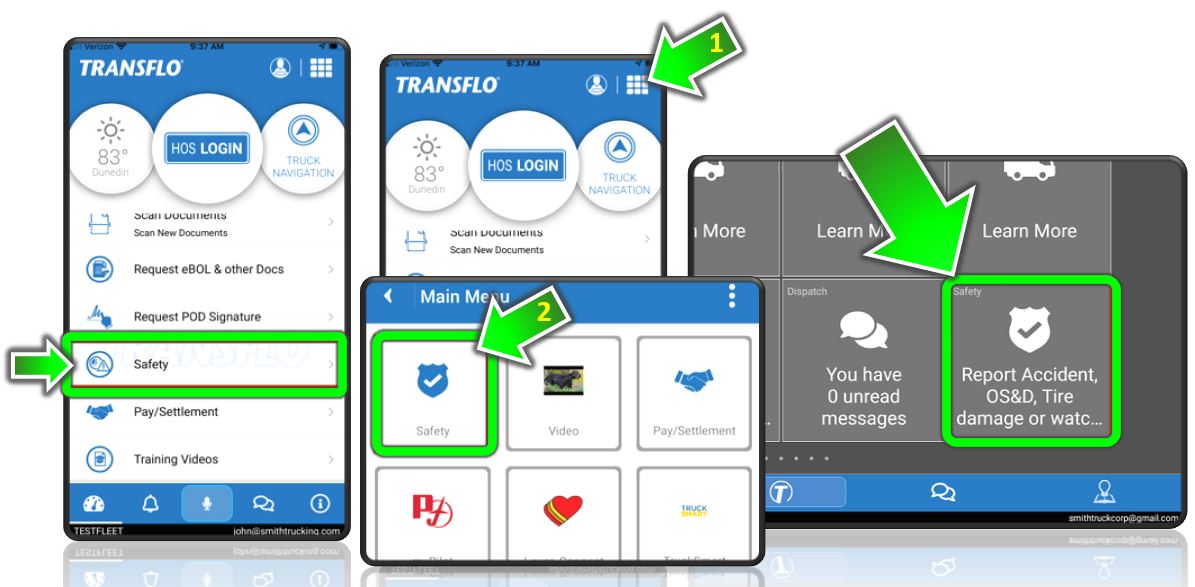
On the Home screen or dashboard, tap Safety. You might have to tap Main Menu first and then select Safety.
-
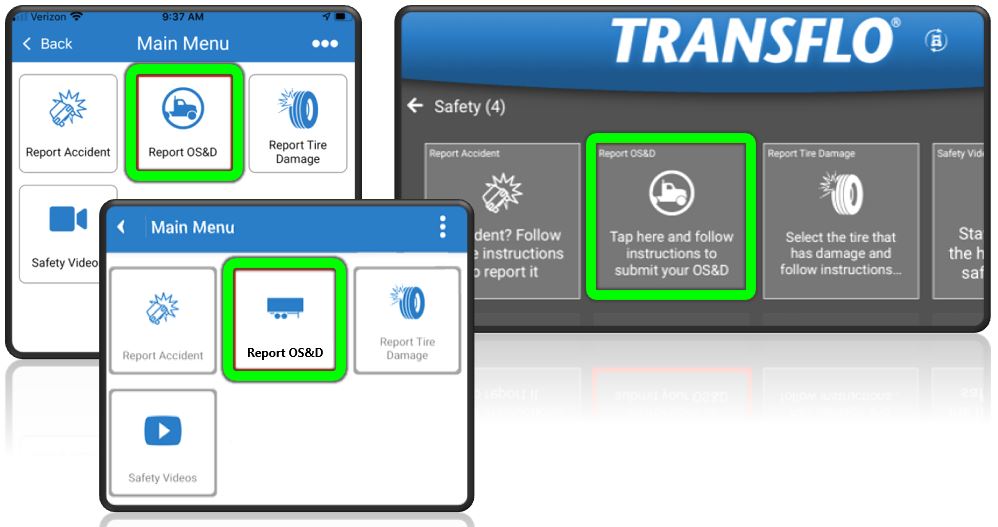
On the Safety menu, tap Report OS&D.
-
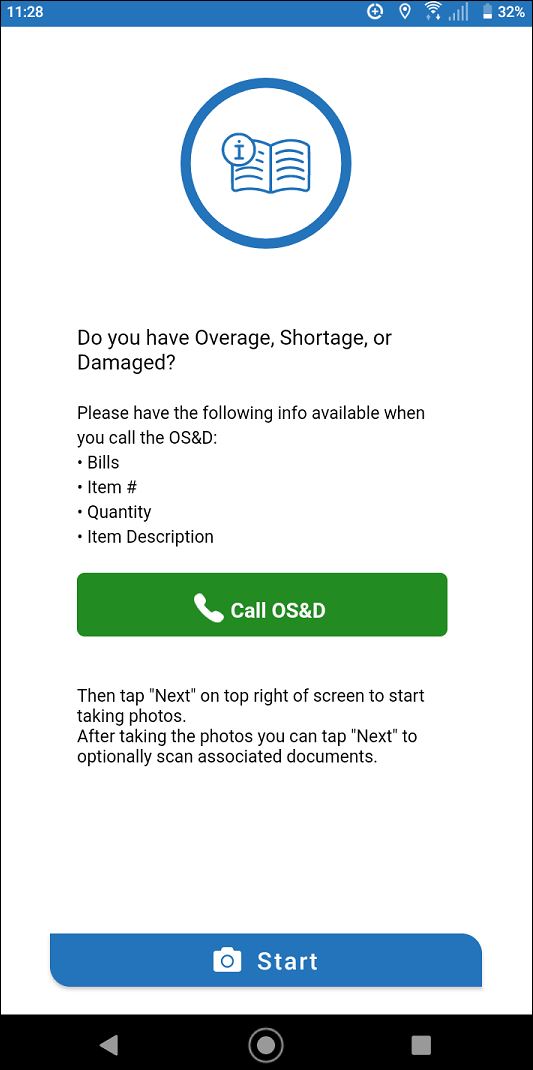
On the Instructions screen:
-
Fill out the details, on the OS&D Data screen, then tap Next.
-
On the OS&D Photos screen, you can tap the blue ADD EXISTING button, to add photos already on your mobile device. To take a new photo, tap the green TAKE PHOTO button. After adding photos, tap Next.
-
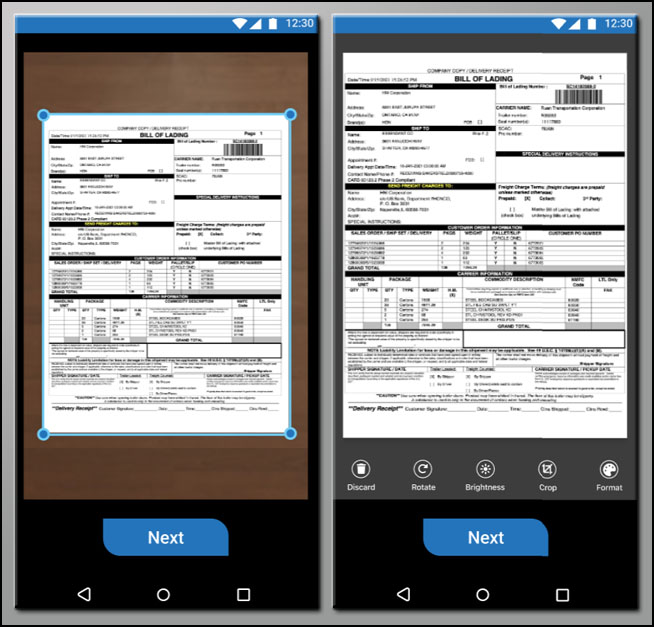
Add any documents associated with the OS&D.
- Make any necessary edits to the document, using the buttons on the bottom of the screen. Tap Next.
- Select the type of document from the pop-up window.
-
Repeat these same steps for adding files or snapping new ones until you are ready to submit your documents and photos. Review the list of documents. Add more or tap X to remove a document. When done, tap Next.
-
On the Send Confirmation screen, review the options:
-
To take more photos or attach more images, tap Add Photos.
-
To upload more documents, tap Add Pages.
-
To submit all the selected forms, photos, and document images, tap Send All.
-
To delete all photos and document pages and cancel this accident report, tap Discard All.
-
-
After you select Send All, the Confirmation screen appears with a confirmation number you can save or receive in your e-mail to pull up the OS&D report documents again within the next 14 days. Tap Close to go back to the Safety menu.
A new document scanning and photo capture user interface is now available when you download or upgrade to the latest release (R6.0 after July 31, 2023). To learn more, see Scan and Send Load Documents.
-
On the Home screen or dashboard, tap Safety. You might have to tap Main Menu first and then select Safety.
-
On the Safety menu, tap Report OS&D.
-
On the Instructions screen:
-
Fill out the details, on the OS&D Data screen, then tap Next.
-
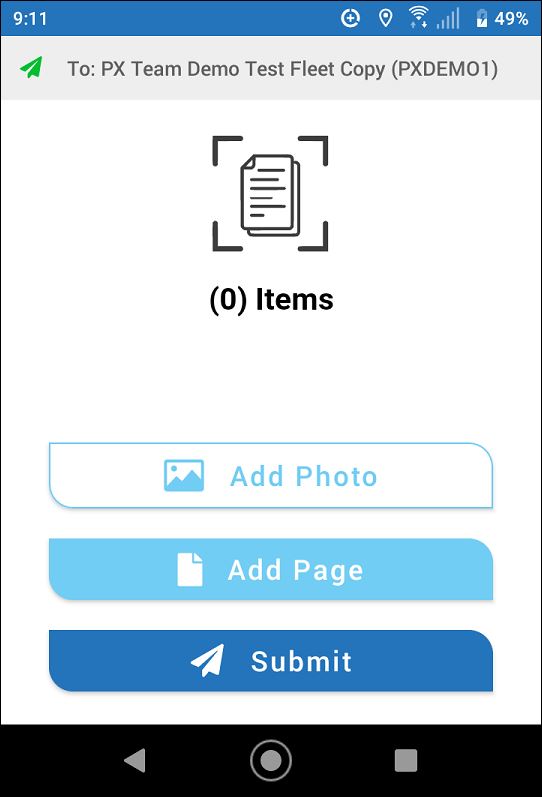
Repeat the following steps to build a list of the items (documents and photos) you want to send with your lost or damaged cargo report:
-
To add a photo, tap Add Photo and then perform one of the following next steps:
-
To add a document, tap Add Page and then perform one of the following next steps:
-
Aim the camera on your device toward the document and have the app auto-snap a new document scan or manually scan your own document.
-
Upload an older document image file about the lost or damaged cargo from your device.
-
(Optional) You can make any necessary adjustments. The same set of standard options are available: Discard, Rotate, Brightness, Crop, or Format. When done, tap Next.
-
- Select the type of document from the pop-up window.
-
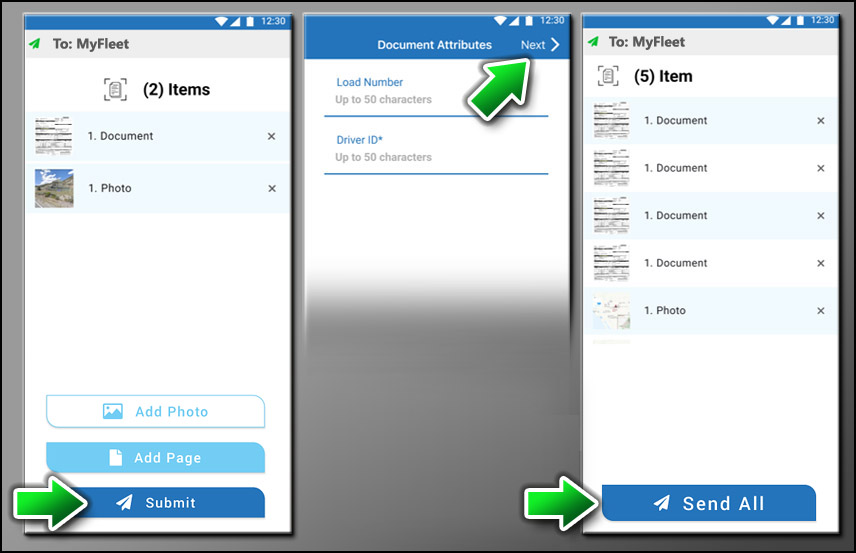
Repeat these steps to add and format the photos and documents you want to include in your accident report. To remove an item, click X Remove. When ready, tap Submit.
-
Complete the fields set up by your fleet on the Document Attributes screen and then tap Next.
-
On the Send Confirmation screen, review everything one more time:
-
To take more photos or attach more pages, tap Back and add them.
-
To remove an item, click X Remove.
-
When ready, tap Send All.
-
(Optional) To delete all photos and documents and start over or cancel the entire accident report, clear or close the app. You can start over with the same reference number or call and get a new one.
-
-
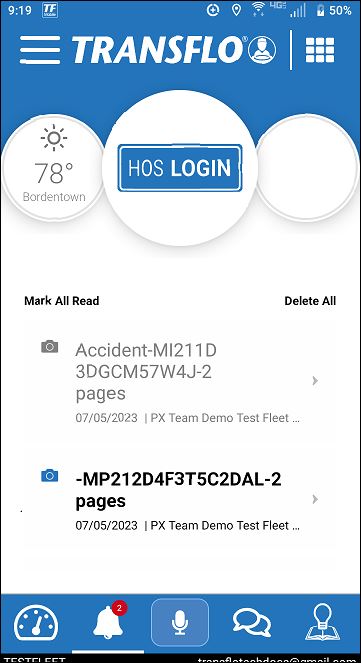
After you select Send All, the Confirmation screen appears with a confirmation number. You can also find the confirmation number in the app notifications or outside the app in your e-mail. Use the confirmation ID if you want to pull up the accident report documents again within the next 14 days at transfloexpress.com.
-
You can view your accident report now (tap View Document) or tap Close to go back to the Safety menu.
-
To help you identify an accident report later, your notifications show the OSD- prefix in front of the confirmation number.
-
After you tap Send All, a confirmation screen appears with a confirmation ID.
Tip 1: To optimize camera photos and prevent them from being too large, do not take photos with HDRON. Turn high-definition resolution (HDR) OFF.
Tip 2: When taking accident claim photos at night or away from natural sunlight such as in a loading dock, turn the flash ON.
The steps above apply for all releases. When you download or upgrade to the latest release (R6.0 in August 2023), you get new screens for adding documents and photos but the steps are generally the same. To view more details about the new R6.0 scanning user interface, see Scan and Send Load Documents.
|
|
Reminder: Transflo is the premier provider of popular commercial apps, custom white label apps, in-cab tablet editions, embedded handset editions, and thousands of additional fleet-specific integrated features. Due to all the possible product configuration changes for your specific fleet, it is possible that user interface labels, buttons, links, dials, tiles, icons, colors, logos, and placement on the screen can vary. Features can also be hidden from your view based on customer account, fleet ID, or user permissions. In the documentation, we cover a default setup with screen examples that are generally similar for smart phones and tablets running either iOS or Android OS. Adjust certain steps, if needed, to reflect your actual device, product configuration, and company policies.
|
![]() View a demonstration of these steps in one or more Transflo videos:
View a demonstration of these steps in one or more Transflo videos:
