Install and Configure DMS ezView
The TRANSFLO® ezView web server application allows you to retrieve images based on your search criteria and update data in your DMS image repository. TRANSFLO ezView retrieves images from the image repositories supported by the Transflo server, primarily the Transflo repository and any optional Gauss repository.
The TRANSFLO® ezView Configuration component is used to associate TRANSFLO® Groups with TRANSFLO® Users and Document Classes. This article contains instructions for configuring Groups for TRANSFLO® ezView. This section explains how to add, edit, or delete TRANSFLO® Groups to configure Transflo DMS ezView. It also shows you how to associate groups with Document Classes and Users.
Note: ezView only uses Groups, Users, Document Classes, and Document Class fields.
TRANSFLO® Batch Scan is used for high-volume production scanning. After a set of documents is scanned into the TRANSFLO® System a batch is created. A batch consists of a set of document images (stored in TIFF or JPEG formats) and index data for the batch. With Batch Scan, the batch can be viewed, and pages within the batch can be added or deleted. After it is processed in Batch Scan, each batch can be transferred to a central production environment for indexing or sent directly to Import.
For recommended hardware specifications and third party software requirements, see the TRANSFLO® Hardware Specification System Administrators Knowledge Base.
For installation instructions, see Install Transflo DMS Server Components.
To start TRANSFLO® ezView for initial use:
1. Double-click the TRANSFLO® ezView Website shortcut on your desktop.
The TRANSFLO® ezView Log On page opens (This may take several seconds the first time you open ezView).
2. Enter your User Name and Password in the respective boxes and click Log On.
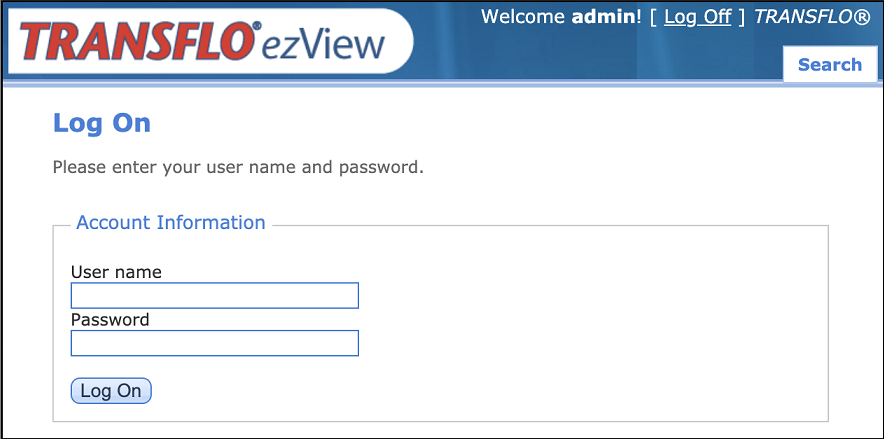
The main search page opens indicating you have successfully started ezView.
ezView writes to log files in the installation folder. These log files can be used to trouble shoot issues with the ezView website. The location of the logs on your web server is typically in a path similar to:
C:\Program Files\Pegasus TransTech\TRANSFLO® ezView\Logs
In order to further debug an ezView issue, you can change the log level so that more information is written to the log. After the problem is fixed or during normal operations, log levels are set lower to minimize I/O processing.
To change the log level for ezView logs:
1. Using Windows® Explorer, navigate to the log folder.
2. Create a text file in the log folder and rename it to Log.Config.
3. Open the file with a text editor and add the following line to the file:
<Config LogLevel="[Level]" />
where
[Level] is an integer between 0 and 4 indicating the log level.
The available log levels are:
0: No Logging
1: Errors Only
2: Errors and Warnings
3: Detailed
4: Trace
Example: For the log level to be set to Trace the entry in the Log.Config file will be:
<Config LogLevel="4" />
4. Save and close the Log.Config file.
The log level has changed.
To disable this feature and revert to the default log level, rename the Log.Config file to Log.Config.Old.
The ezView component in DMS offers an optional encrypted configuration. It is similar to an Admin tool configuration; however, it is not truly part of the Admin tool. To encrypt the value for the configuration key, change a key to mark it as encrypted and run the Encryptor tool.
-
Pre-pend the encrypted key word to the setting key. This is not case sensitive.
-
Run the tool.
-
From the command line:
ConfigEncryptor.exe -f=”C:\websites\application\web.config”
Tip: Running the tool without parameters will display help about how to run it.
-
Or, drag-and-drop the config file onto the ConfigEncryptor application icon.
In either case, the file is altered in place with the new config value.
-
-
To support the security of the web and app config files on the client servers, we have created a tool to encrypt the app settings. This tool will encrypt any setting that starts with the following string:
Encrypted
-
The PTC libraries that are used to get the config values from the config file have a special mode that will automatically decrypt the value from Encrypted settings.
-
References to the config values are done without the Encrypted keyword and the PTCSettings class looks for an encrypted version when it cannot find a standard version.
-
Web.config
<add key="DatabasePlatform" value="Db2iSeries" />
<add key="EncryptedConnectionString" value="YOdARDUm8wNzqfXrPC5Fe45RE2gBZJjbqJcpmt3RShjz8ffDUFuYfeqmzseUbJPmO+6OVEG5q0ki/DDIeT6E0hhrIoXHcFCX/08PoWDRmmPDBXEInMLcu2FDog8q7WkWbK/uKeOvSbAWMxxnyQuUqiQOx/jFlPt8UJ2pQlzS4OUqdhhCqFgW4CGCFI8TYPZdSdCjt5eEocsY4N7+A89q8anoZVDaOKEOqrvCprs6H30AJH0X60SllSBYBjLjQc4YwpHv5volL+8DzaPpKYz6+IBYSrXzHCzxjUWNj5nTyltKnVSwikvieay8xaZsFbeN+fpGlPD7GTz+CV8+7h9zfQ=="/>
Code
var platform = GetStringValue("DatabasePlatform ");
var conString = GetStringValue("ConnectionString ");
The settings class will see that there is no ConnectionString value and look for an EncryptedConnectionString key.
To create a new group:
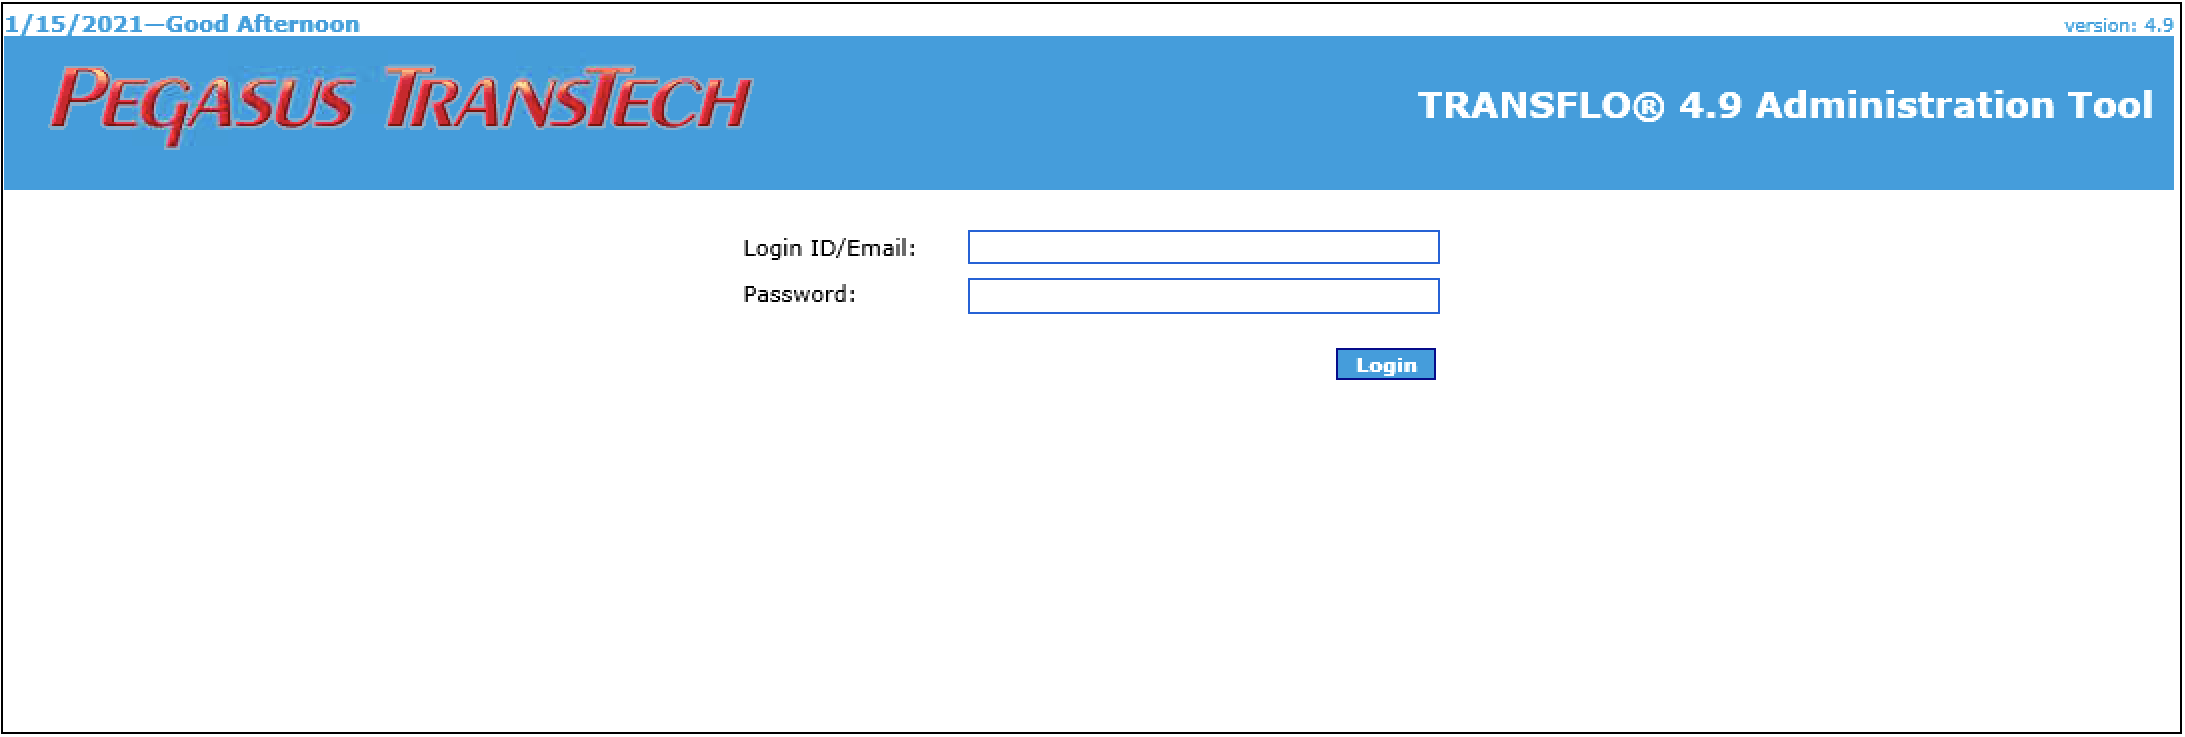
1. Log in to the TRANSFLO® Administration Tool.
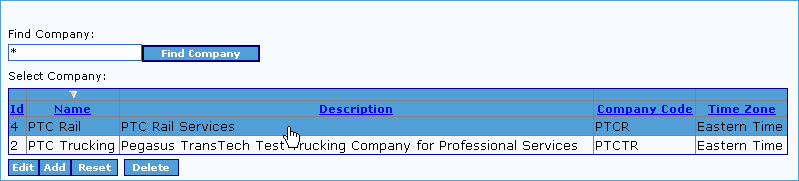
2. In the right panel, select a Company from the list by clicking its row.
3. Click Viewers in the menu tree.

Note: If you are using Internet Explorer 11, make sure you set the browser to use Compatibility mode. As of 2022, IE 11 is no longer supported; you can use Microsoft Edge and can optionally use Edge in IE 11 compatibility mode.
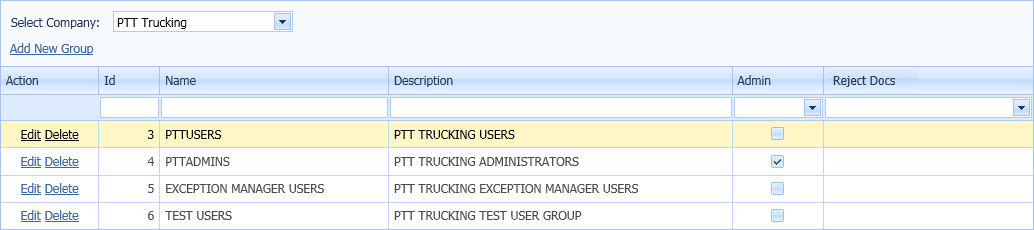
The Viewers Configuration page opens.
If you have more than one Company, you can select a different company from the Select Company drop down (This drop-down is not visible if you only have one Company).
Note: The first time you open the Viewers Configuration page, it may take some time to load.
4. Click the Add New Group link in the top left hand corner.
A new editable row appears in the Group grid at the top of the page with an Update link and a Cancel link.

The cell in the Id column is not editable.
This value will automatically be generated when you create the Group.
5. In the Name column, enter a name for your Group in the cell.
6. (Optional) In the Description column, enter a description for your Group.
7. If you are creating an Administration Group, select Checked in the Admin column drop-down.
8. To enable the ability to reject documents within TRANSFLO®, select Checked in the Reject Docs column drop-down.
9. Click the Update link.
The new group is added to the list.
TRANSFLO® ezView provides a means for you to change general Group information for existing Groups.
To edit general Group information:
1. If you have more than one Company configured in the TRANSFLO® System, verify that the correct Company is selected.
2. Find the group you want to change and click the Edit link.
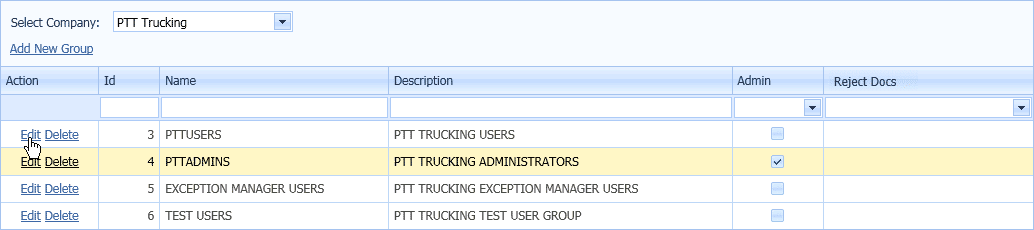
The Groups row is now editable.
3. In the Name column, update your Groups’ name.
4. In the Description column, update the description for your Group.
5. If necessary, select a different value in the Admin column drop down.
6. If necessary, in the Reject Docs column drop down, select a different value.
7. Click the Update link.
The new Group is updated in the list.
Note: When you switch between Groups, wait a few seconds for the rest of the configuration page to refresh.
TRANSFLO® ezView provides a means to remove entire Groups from the TRANSFLO® System.
To remove a Group:
1. Locate the Group in the Group List, and click the corresponding Delete link.
2. Click OK in the message box to confirm the deletion.
A Group list can be filtered by entering filter criteria in the column headers.
To Filter a group list:
1. In the column headers, type the initial characters you wish to use as filter criteria.

The list is filtered by the values in the columns using a Begins-with filter.
2. To further filter the list, repeat this in other columns.
3. To filter by values in columns that have drop down lists in the Header, select a value from the drop down that you wish to filter the list by.
TRANSFLO® Document Classes can be associated with Groups in TRANSFLO® ezView. Document Class Fields can also be configured as TRANSFLO® ezView search criteria and can be visible or editable in TRANSFLO® ezView search results.
To configure Document Classes and Field Permissions for a Group:
1. Log in to the TRANSFLO® Administration Tool.
2. In the right panel, select a Company from the list by clicking its row.
3. In the menu tree, click Viewers.
ezView Configuration opens in the right panel.
4. Verify that the correct Company is selected if you have more than one Company configured in the TRANSFLO® System.
5. Verify that the correct Group is selected in the Group List.
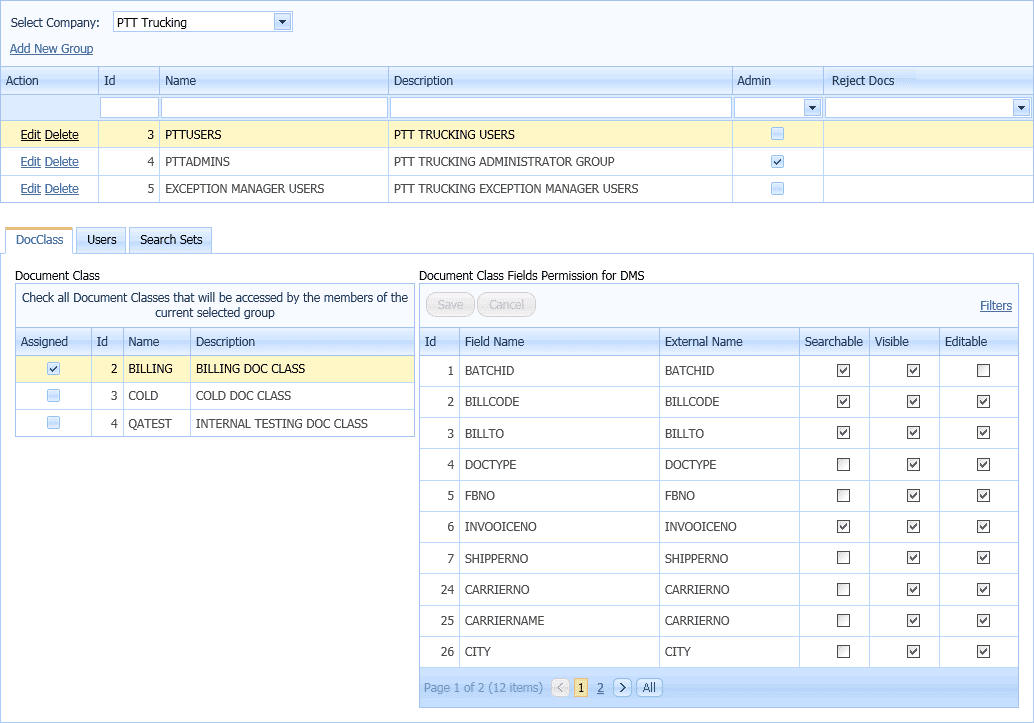
6. Click the DocClass tab in the bottom panel.
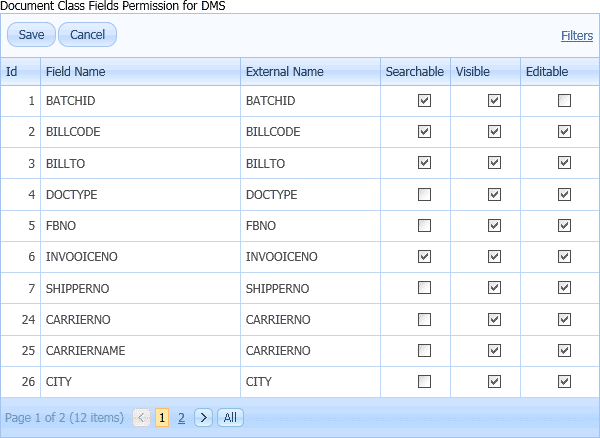
A list of Document Classes displays on the left of the DocClass tab and a list of Document Class Fields displays on the right.

7. Select a Group by clicking on its row in the Group list.
8. To assign Document Classes to the group, select the check boxes in the Assigned column for the respective Document Classes in the Document Class list.

9. Click the row of one of the assigned Document Classes to select it.
The selected row will be highlighted in pale yellow.
10. You can configure any Field for the selected Document Class as searchable, visible, and/or editable.
Note: If you are connecting to a Document Class that is associated with an external image repository, see the following sections in the TRANSFLO® Administration Tool Knowledge Base, to verify that External Field names are configured properly:
11. If you want to search by the Field in TRANSFLO® ezView, select the check box in the Searchable column. Otherwise, clear the check box.
12. If you want the Field to be visible in the search results, select the check box in the Visible column.
Otherwise, clear the check box.
13. To make a Field editable in the search results, select the check box in the Editable column.
Otherwise, clear the check box.
14. Repeat these steps until all Fields are configured.
15. Click the Save button to save your changes.
Click the Cancel button to discard your changes.
Note: The order the Fields display in the “Document Class Fields Permission for ezView” list is configured in the TRANSFLO® Administration Tool in the Document Class Configuration.
If you change this Field order, be sure to change any Rendition Print Template that uses this Field order to match your Document Class change.
Note: The Filters link is only used by TRANSFLO® QuickView.
All panels use paging to display ten rows at a time by default.
The Navigation bar allows you to view different pages of results or all of the results.

-
Click the < Previous button to view the previous page, the > Next button to view the next page, or the All button to view all of the results on one page.
-
Click a page number link to navigate to a specific page of results.
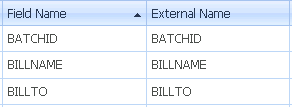
You can sort any list by the values in a column.
-
To sort the list in ascending order, click the column header once. The column header has an up arrow indicating the list is sorted ascending by the values in the column.

-
To sort the list in descending order by the column, click the column header a second time. A down arrow appears in the column header indicating the list is sorted descending by the values in the column.


TRANSFLO® Users can be associated with Groups in TRANSFLO® ezView.
To add users to a group:
1. Log in to the TRANSFLO® Administration Tool.
2. In the right panel, select a Company from the list by clicking its row.
3. In the menu tree, click Viewers.
ezView Configuration opens in the right panel.
4. If you have more than one Company configured in the TRANSFLO® System, verify that the correct Company is selected.
5. Verify that the correct Group is selected in the Group List.
6. In the bottom panel, click the Users tab.
A list of Users displays in the Users tab.
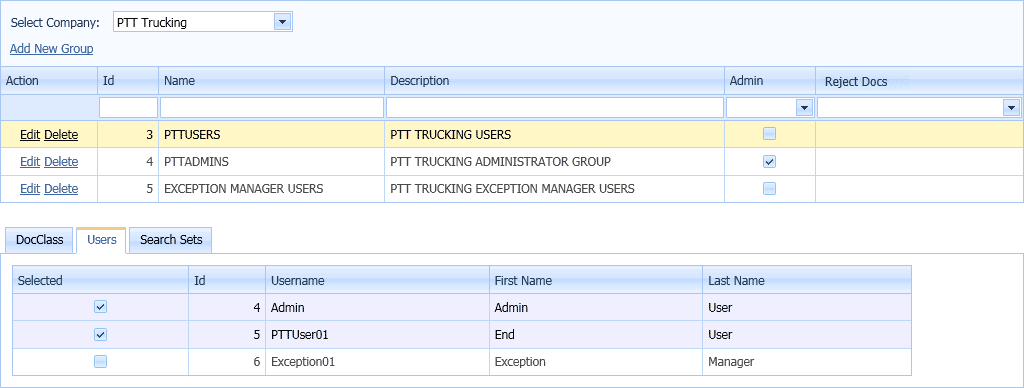
7. In the Group list, select a Group by clicking on its row.
8. In the Selected column of the Users list, select Users to be assigned to the Group by checking the appropriate check boxes.
Note: The Search Sets tab is currently only used by QuickView.