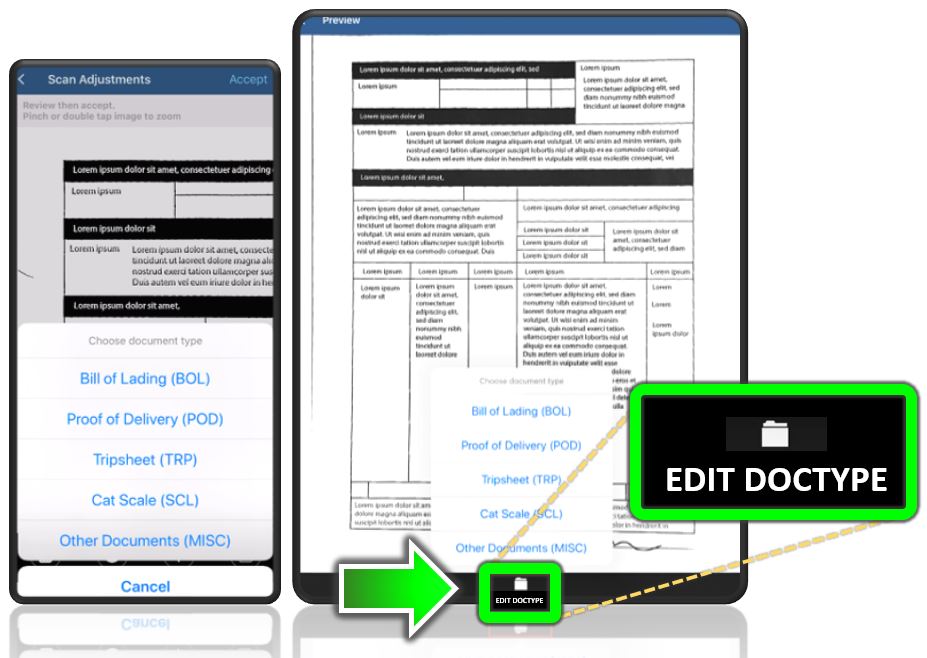
Choose a Document Type
If your fleet, carrier, broker, or employer requires that every document be assigned a document type, you are prompted to select a document type when you capture or add documents before sending them from your phone or tablet. The app allows you to change the doc type before sending.
-
After making any edits on the Scan Adjustments screen, tap Next.
-
On the Choose document type pop-up, select a document type for the image you just scanned or document photo you just captured. Repeat this step until all of your documents have been scanned and assigned to a document type (also known as indexing a document so it can be found later).
-
To change the document type, select a document on the Scan Documents screen and tap EDIT DOCTYPE at the bottom of the screen.
-
From the pop-up, select the new document type.
-
After changing the document type, tap the back button arrow, to return to the Scan Documents screen.
-
Once complete, tap Next, on the top right-hand corner of the screen.
-
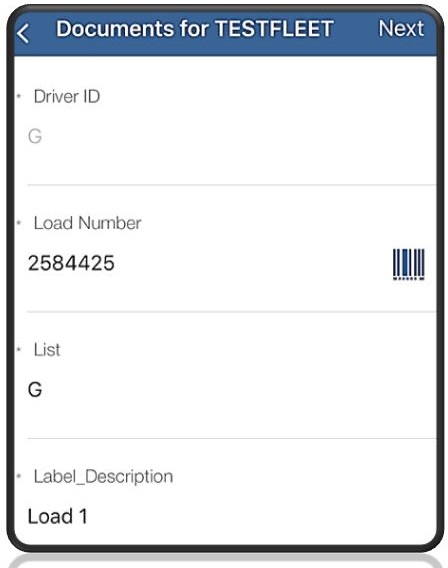
From the Document Attributes screen, enter the required Load Number, to proceed to the next step.
-
(Optional) Update the Driver ID or enter a Description, if necessary.
-
In the Load Number field, tap the bar code icon to scan any bar codes related to that specific load. A new screen appears where you can scan the bar code and attach the image to the load.
-
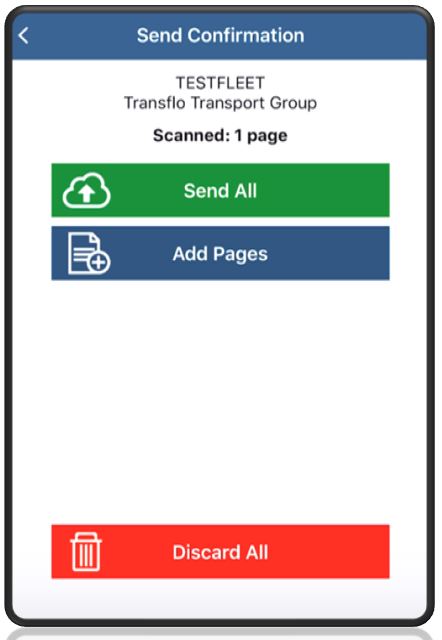
After entering all document attributes and adding any bar codes, tap Next.
-
The Send Confirmation screen appears. You can add more pages, delete images, or send all the scanned document images in the batch for the load.
![]() View a demonstration of these steps in one or more Transflo videos:
View a demonstration of these steps in one or more Transflo videos: