New! Transflo Loads 2.0 List for Drivers
As a driver, follow these simple steps to get to a list of loads where you can search, sort, and get more load details as you need.
-
Launch the Transflo Mobile+ app. (As of December 2025, to view the new user workflows known as Loads 2.0, you must be running Release 6.7.3 or later of the Mobile+ app. Transflo Loads Workflow 2.0 is also available as an API and mobile SDK. In 2026, you can also use another supported driver app with the integrated Transflo Loads features running inside it, such as Transflo HOS, your company-branded Transflo white-label app, Geotab Drive, Platform Science, or your own third-party fleet app.)
-
If prompted to log in, enter your e-mail address or user ID, enter your password, and tap Login.
Example: This example shows the new Loads 2.0 workflow and user login features in Transflo Mobile+ running on a mobile device handset engineered for freight shipping and delivery personnel.
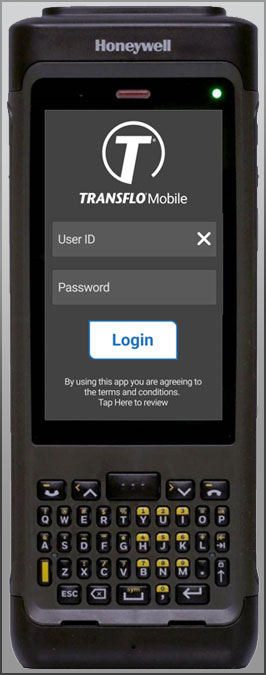
Tip: Your username (user ID for handsets; on other hardware, it can be a user ID or e-mail address) should be the same for your Transflo Mobile+ account registration and your Geotab HOS/ELD registration. Use the same user ID for those two (2) separate driver accounts. Later, when you tap HOS Login, if configured for your fleet, an easy single-sign on (SSO) process automatically authorizes you and logs you in based on the User ID you already entered when you logged in.
-
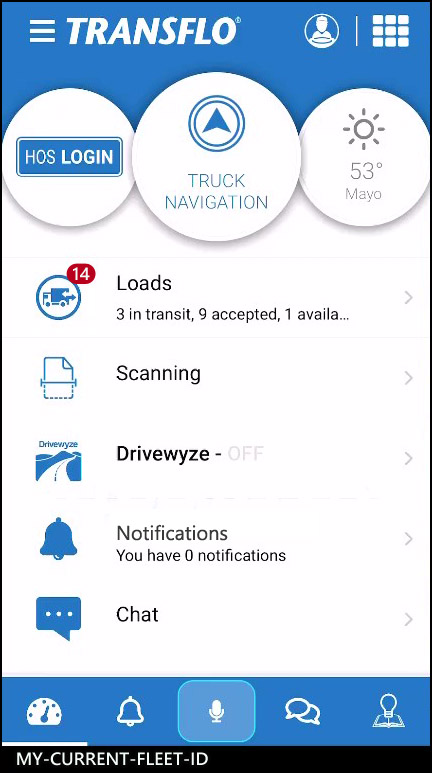
Tap Loads.
-
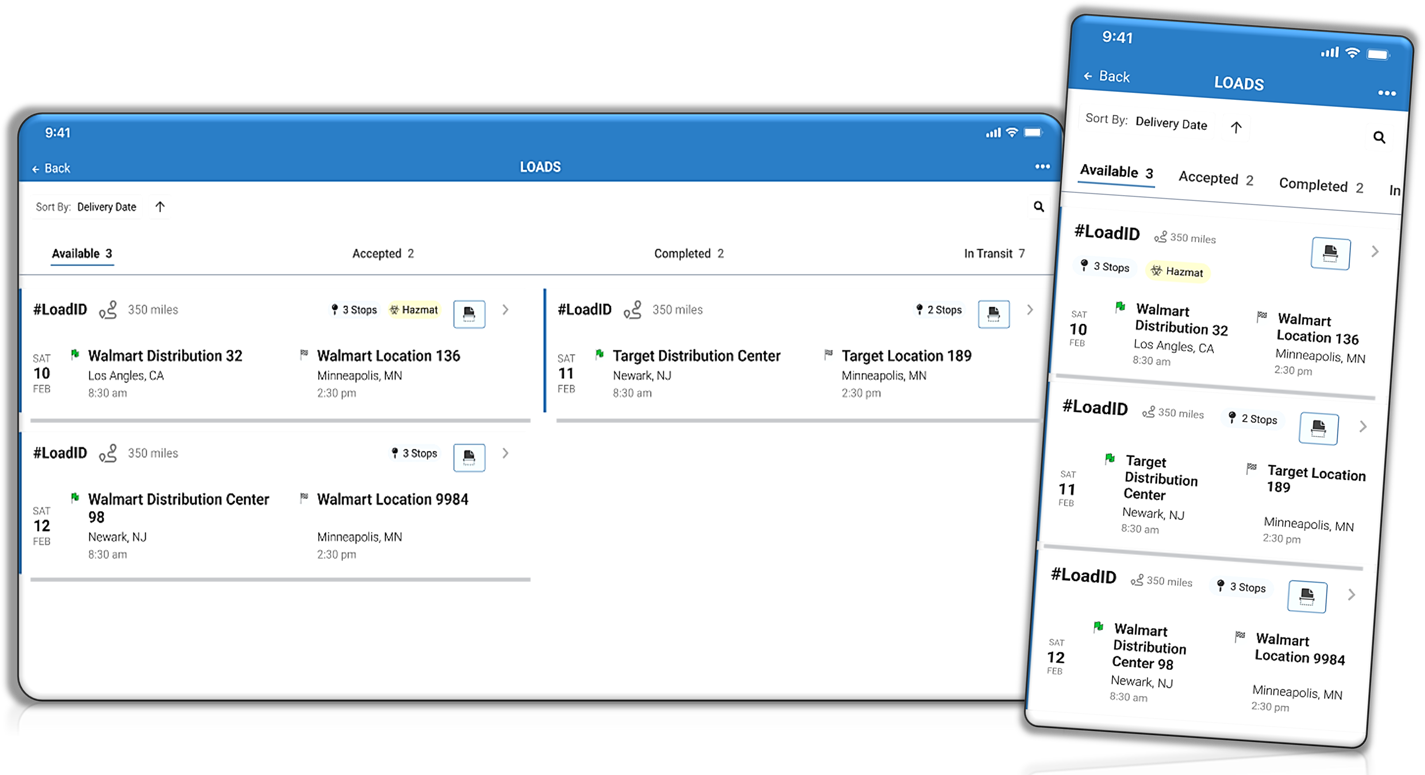
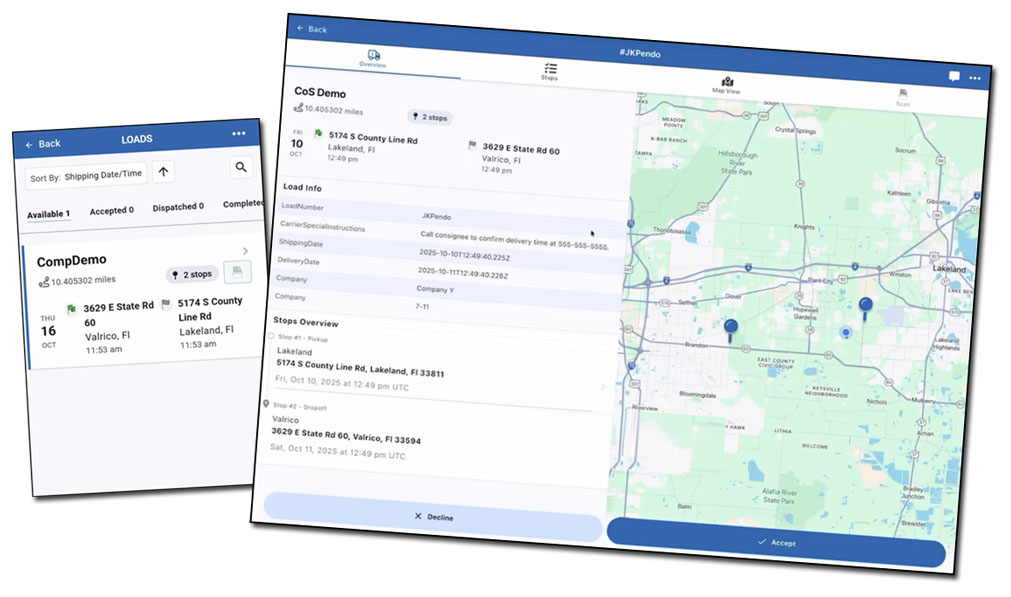
The Loads List screen appears.
-
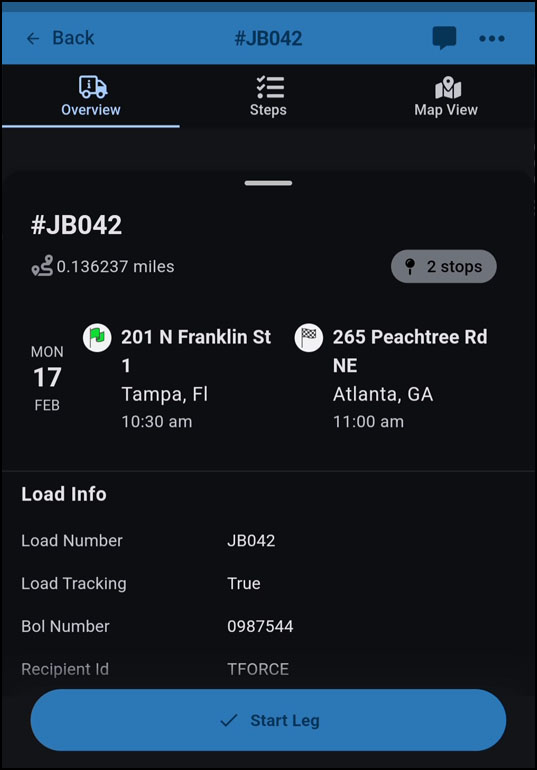
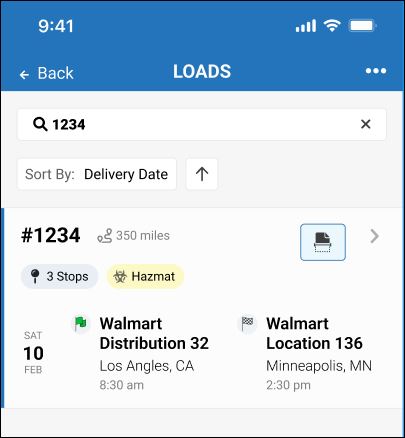
Review the details about each load:
-
Load ID
-
Estimates miles
-
Start Date, Time, and Location
-
Delivery Date, Time, and Location
-
Tags such as Hazmat, Refrigerated, or Wide-Load
-
-
You can also view loads by status, sort loads, or search for a load (as described below).
-
(Optional) To instantly scan, upload, and send a bill-of-lading (BOL), lumper, fuel receipt, trip sheet, expenses, weight tickets, and other load documents or paperwork, click the Scan button. To learn more about scanning and sending your load documents, see Scan.
You can view the same load data on a smart phone, tablet, or special handsets (if configured). Although tablet screens present a larger viewing area and more content on their larger screens, the information and supported options (for example, zoom in or out on the map view) are the same on any device.
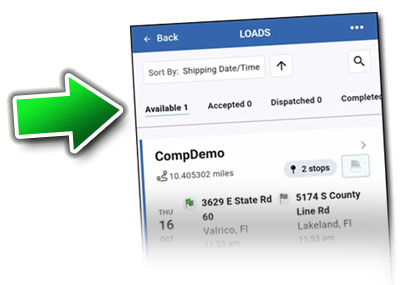
Tap a load status value to view loads by status:
-
Available
-
Accepted
-
In-Transit
-
Declined
-
Completed
The load status values vary by fleet. In the following example image, the number of Dispatched loads is also shown.
As loads enter the system, new ones might appear on top of older loads. You can sort the loads in your list (including search results) to arrange their order from top to bottom however you want.
-
Open the Loads List screen.
-
At the top of the list, tap a load status such as Accepted or search for loads.
-
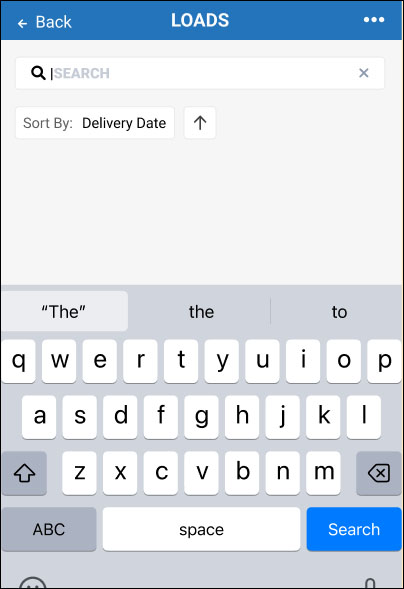
The resulting list of loads is typically sorted by a default setting or your last sort setting such as Delivery Date with an ↑ ascending order (UP arrow). For example, it shows loads for March 5, March 6, and then March 7.
-
To change from ascending to descending order, tap the arrow to make it go from UP to DOWN (↓ descending order). For example, you want it to show loads for March 7, March 6, and then March 5.
-
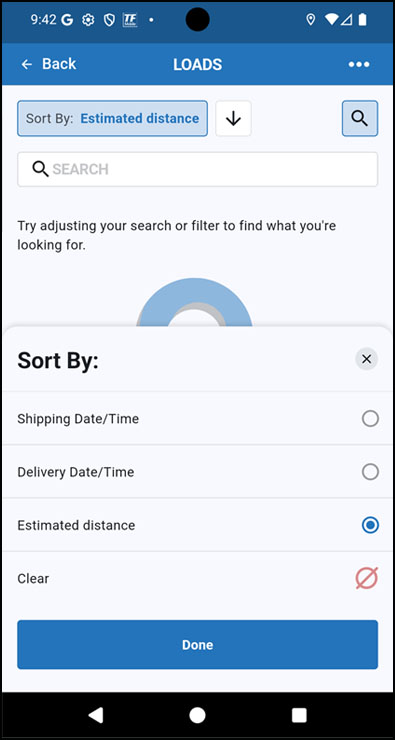
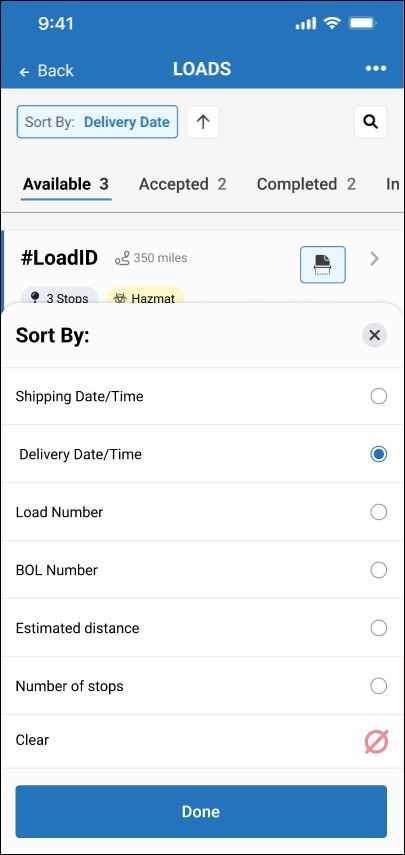
To sort the list by your choice of load data, tap the current filter, for example, Sort by Delivery Date and select one of the following sort options:
-
Shipping Date/Time
-
Delivery Date/Time
-
Estimated Distance
Some configurations include the following additional sort options:
-
Load ID
-
BOL Number
-
Number of stops
-
-
-
(Optional) To restore the system default sort order where new loads appear over older ones, tap Clear.
-
To view the sorted results, tap Done.
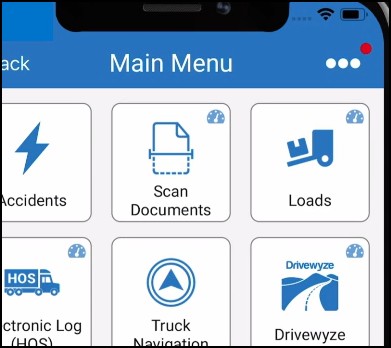
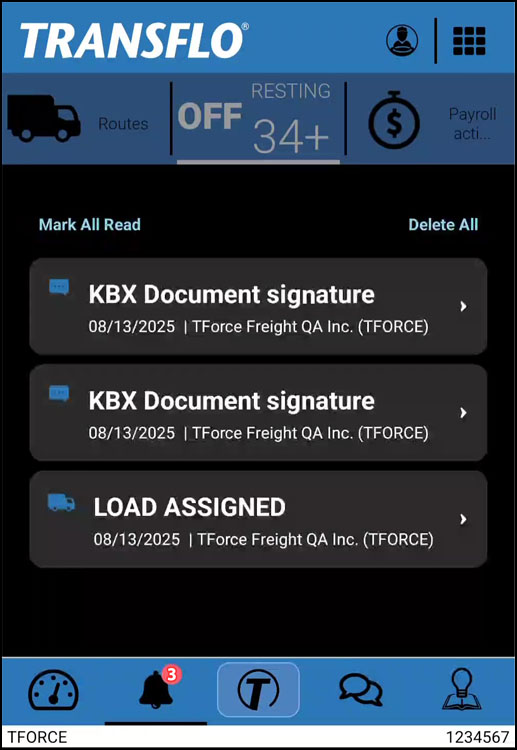
Be sure to keep an eye out for new notifications. They help you know when an electronic signature has been received, when a new load is assigned to you, and other important events.
-
A red dot in the Main Menu indicates one or more unread notifications.
-
A number in a red circle on the bell at the bottom indicates how many new unread notifications you have.
-
Follow up as needed. For example, after receiving a new LOAD ASSIGNED notification, navigate to the Loads feature and review the new load details or tap Start Leg.
-
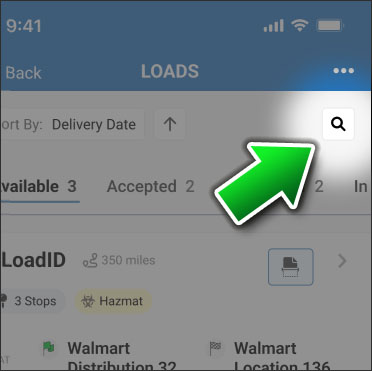
At top right, tap Search.
-
Enter something to start the search. For example, enter a load ID, a warehouse name, a date, or a city.
-
Tap Search.
-
You can sort the results or refine your search until you find better results. If your search results are not as expected, clear your search and try again. It is also possible that the load you expect to find was already cleared from the system; in this case, consult your supervisor.
-
To clear your search, tap X Close.