New! Configure Bulk Print General or Scenario E-Mail Settings
In previous releases of the Synergize Bulk Print application, only one email setting was supported. For example, Bulk Print used the email setting to send automated email with an attached invoice and one or more supporting documents. This single email configuration worked well for a single EMC instance configured for one company.
In 2026, Synergize Bulk Print 16.4 was updated to support multi-tenant, multi-company e-mail configurations. For example, a company using Synergize might need four (4) repositories to support documents for drivers, equipment, accounts receivable (AR), and accounts payable (AP).
To configure Bulk Print e-mail settings, follow these steps:
-
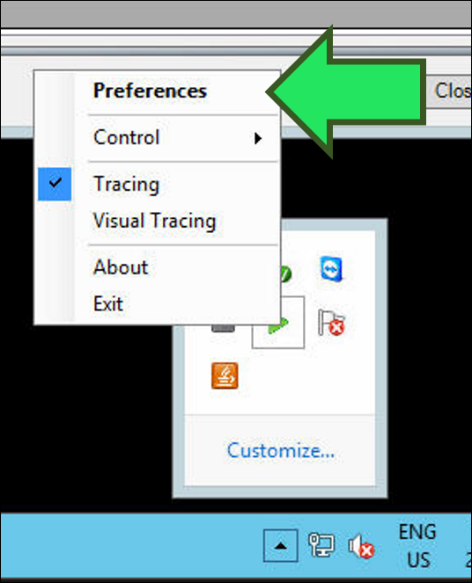
Open Synergize Bulk Print Preferences.
-
Skip this step if you want to use the new scenario-level settings. To keep using or revert to the default one-size-fits-all global e-mail settings:
-
Click a scenario.
-
Clear the Use Scenario Email Settings check box.
-
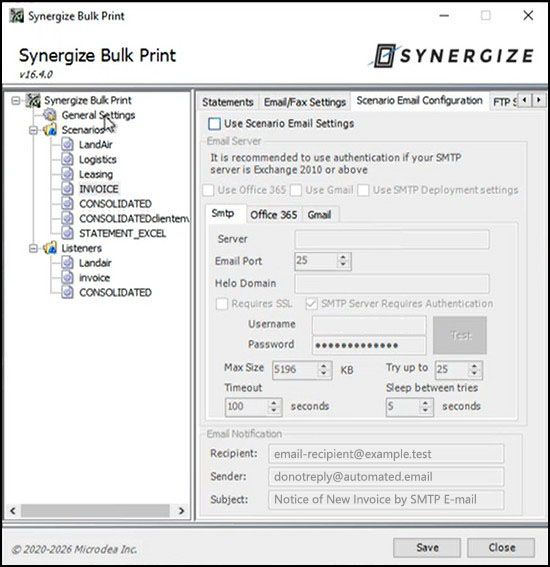
In the left tree-view, click General Settings.
-
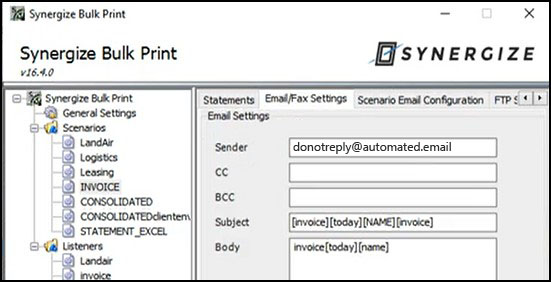
On the Email Settings tab, configure the Email Server and Email Notification fields for SMTP, Office 365, or Gmail.
-
Click Save.
-
-
To configure the new scenario-level email settings:
-
Click a scenario.
-
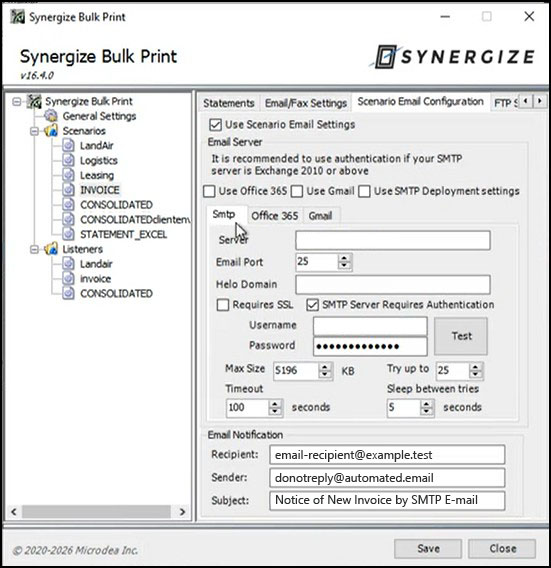
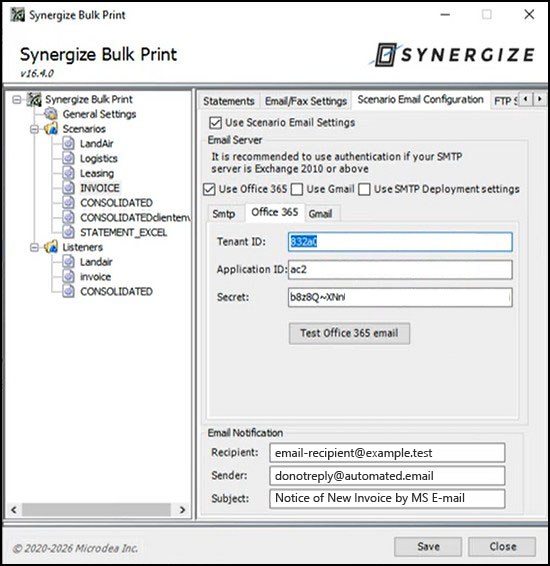
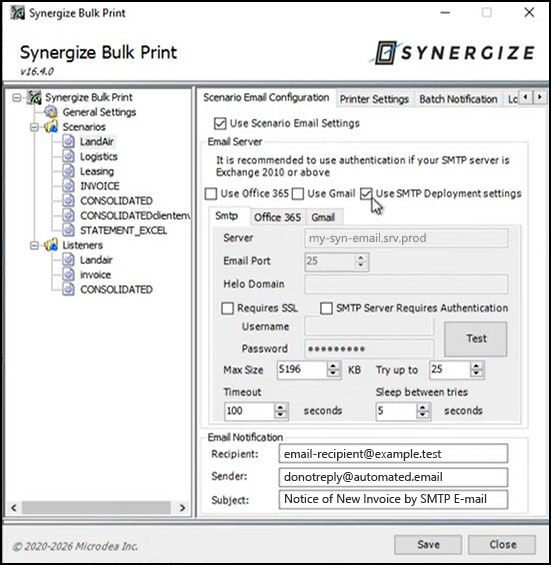
On the Scenario Email Configuration tab, select the Use Scenario Email Settings check box.
-
When you select the check box, the scenario uses its own dedicated email configuration instead of the global settings.
-
If you clear the check box, the scenario uses the global email settings configured in General Settings. That was the standard default behavior in previous editions of Bulk Print before this updated new feature was released.
-
-
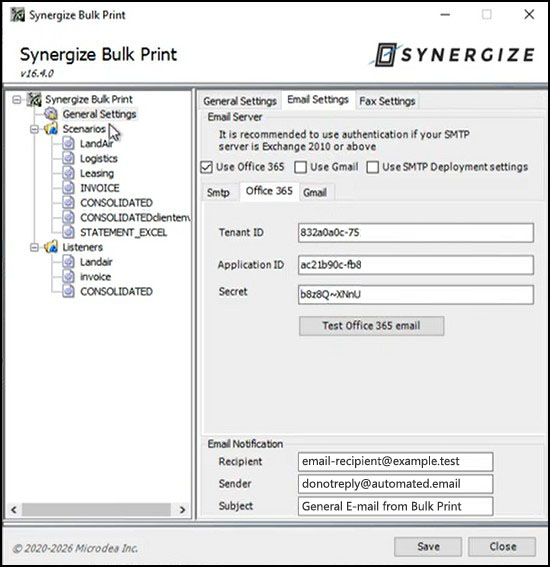
Configure the Email Server and Email Notification settings. The scenario-level email settings include all the same global options available in General Settings for Office 365, Gmail, or SMTP.
-
In most configurations, the Sender field for SMTP, Office 365, or Gmail should match the value of the Sender field on the Email/Fax Settings tab.
-
To set up SMTP, select Use SMTP Deployment Settings. Complete any provider-specific configuration fields such as Timeout, Retry Attempts (Try up to n times), and Max Size.
-
Click Save.
-
-
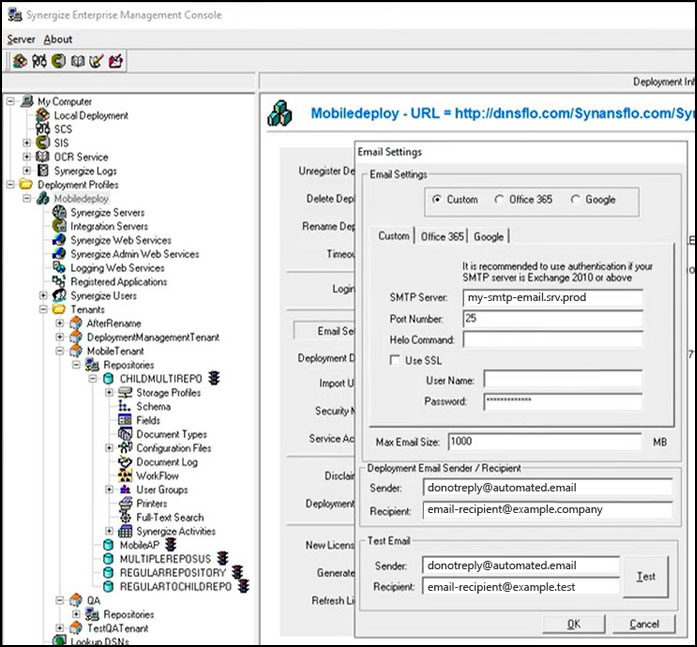
If using SMTP, the scenario uses the credentials and settings in the deployment configured in EMC. Verify the email settings in EMC:
-
Launch EMC.
-
Click a deployment profile.
-
Click Email Settings.
-
In the Email Settings window, select and configure Custom, Office 365, or Google (Gmail).
-
Click OK.
-
-
(Optional) This new feature supports powerful multi-company configurations using more than one scenario and even multiple deployment profiles. As an administrator, you can have multiple email settings for separate Office 365 tenant IDs which Bulk Print can use for each company.
-
Your settings are persistent. All scenario email settings are saved when the scenario is saved and are loaded again when the scenario is reopened.