Manage Additional User Settings
To configure your preferences for auto-detect borders, load events in chat messages, remember HOS password, and delay document uploads until you have a wireless connection, follow these steps.
-
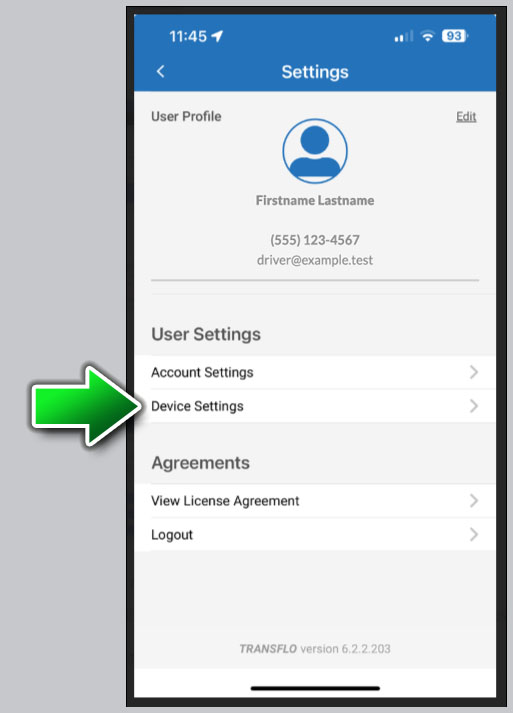
On the dashboard, tap
 User Settings in the top right corner of the screen to open the Settings screen.
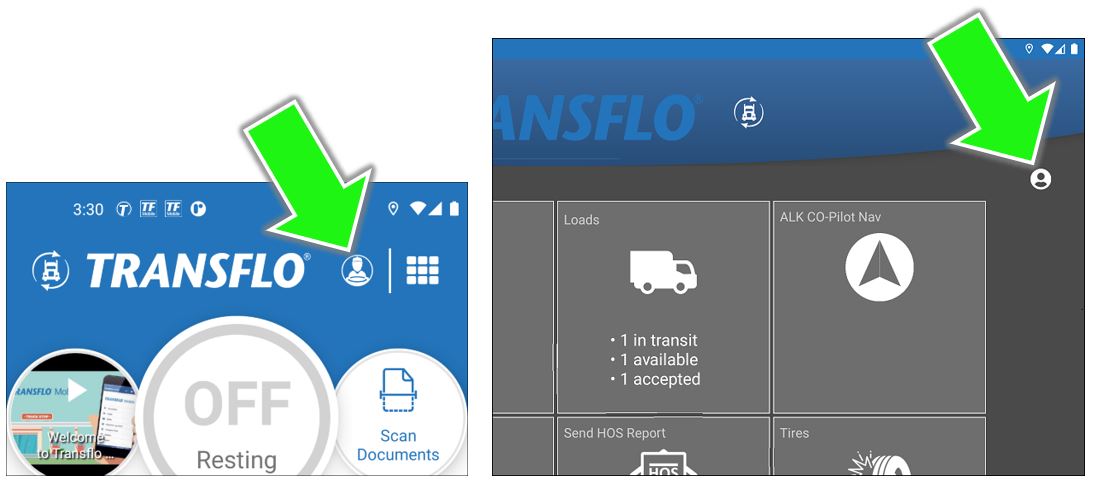
-
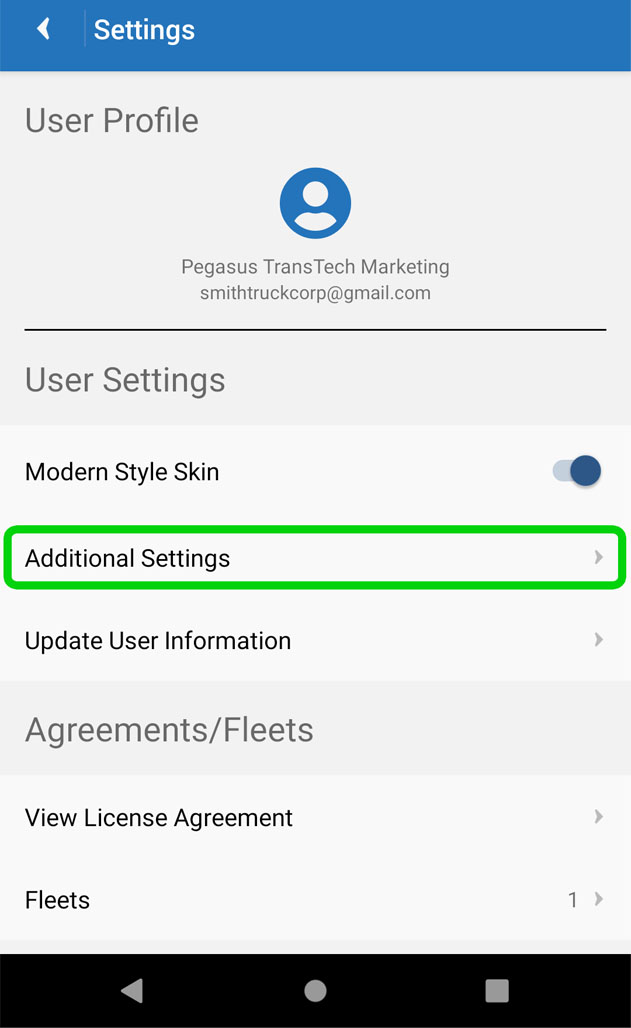
Under User Settings, tap Additional Settings.
-
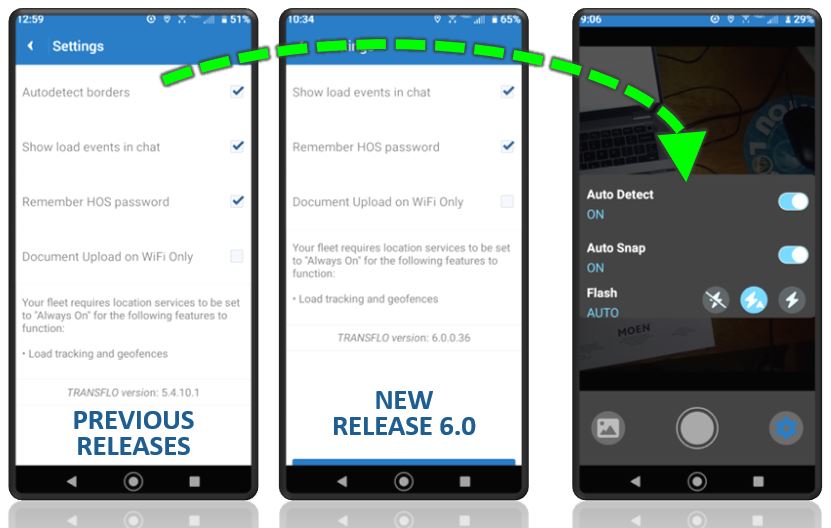
The next screen displays other user-configurable settings. Tap the check boxes
 next to the items in the list.
-
To turn on the Autodetect Borders feature, tap the check box to the right of Autodetect Borders. After you upgrade to R6.0, the Auto Detect setting can be found in your new document scanning settings.
-
To automatically show load events in the Chat feature, tap the check box to the right of Show load events in chat.
-
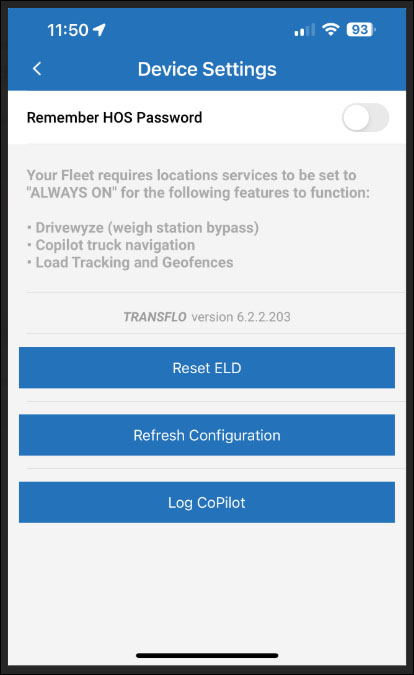
To retain the HOS password, tap the check box to the right of Remember HOS Password.
-
To upload documents only when you have a wireless network connection, tap the check box for Document Upload on WiFi Only. Some users prefer this setting to save their monthly mobile data allowance, avoid going over a limited data plan, or for performance reasons.
-
-
Your changes immediately take effect. On some devices, close and then re-launch the app.
-
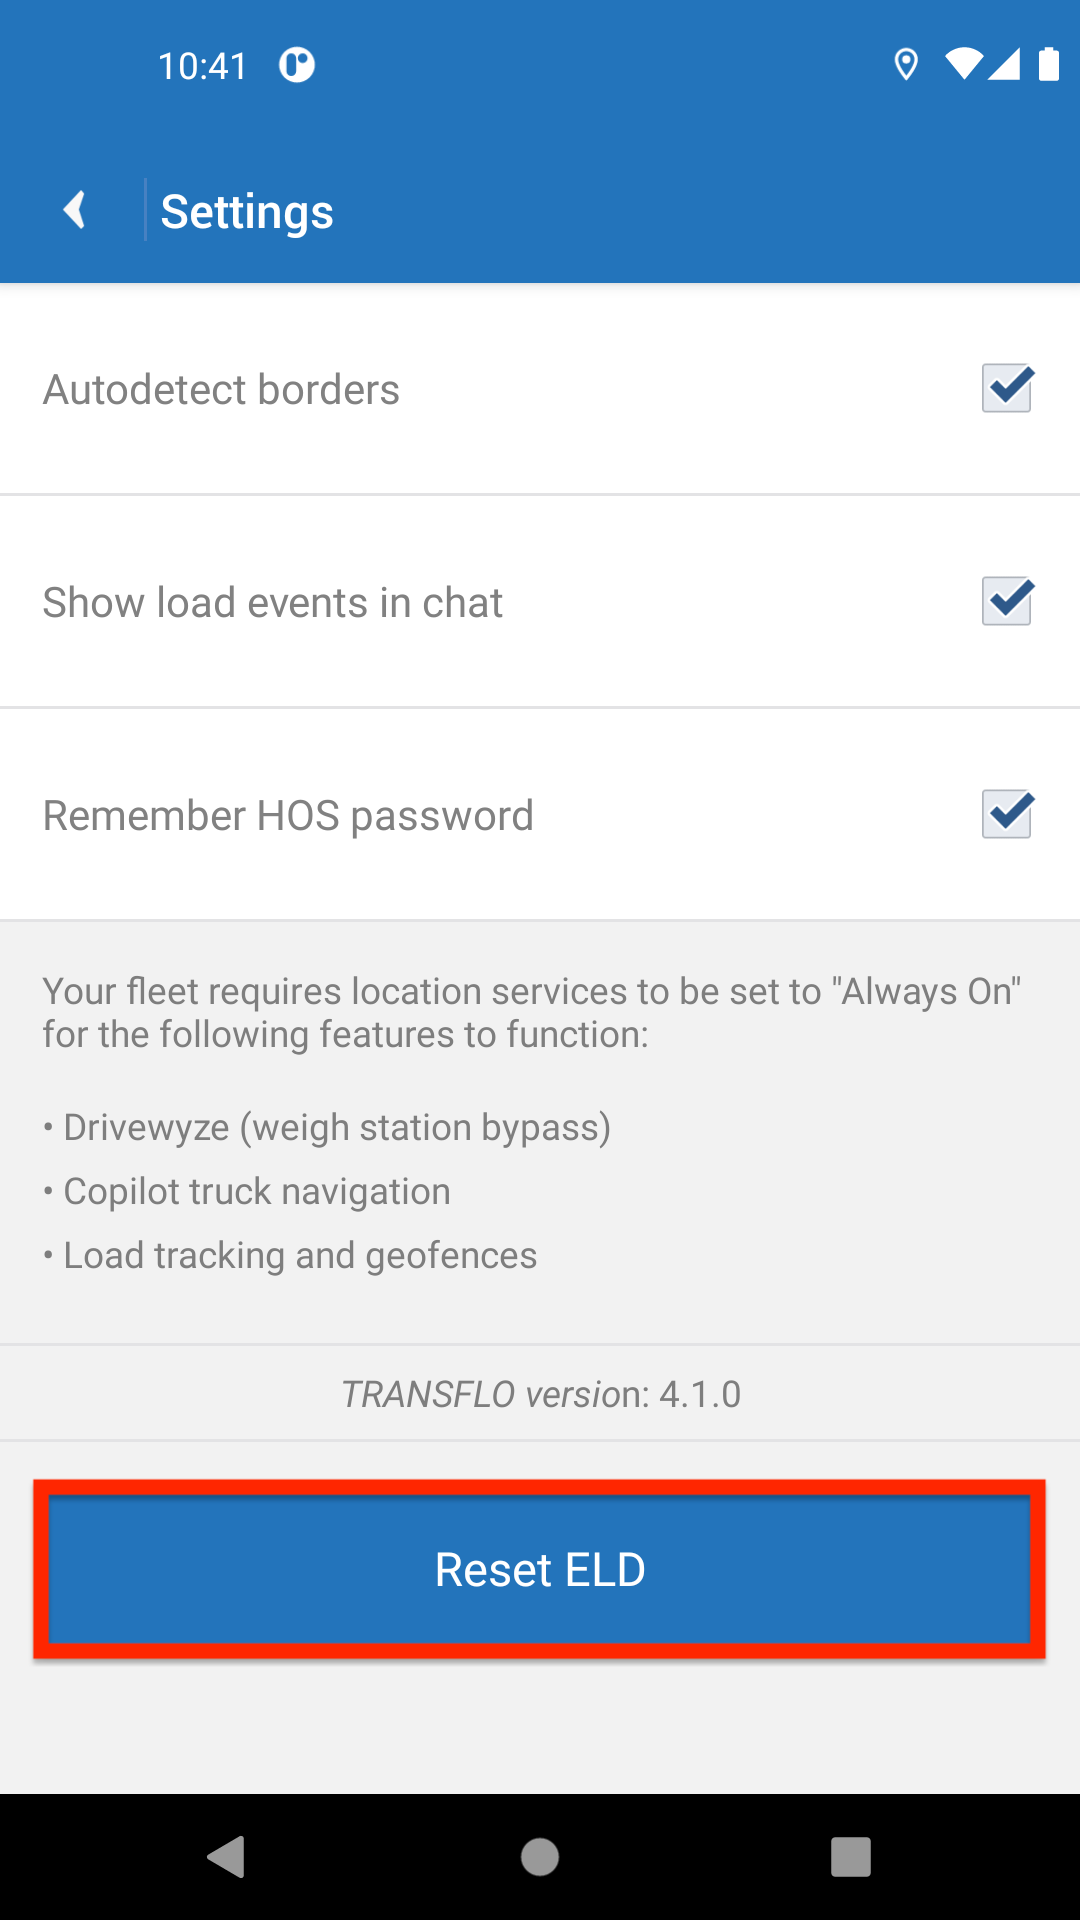
To reset your Electronic Logging Device (ELD), follow these steps:
-
Tap the blue Reset ELD button.
-
Tap OK in the confirmation message box.

-
-
On some devices, you can refresh your configuration:
-
Tap Device Settings.
-
Tap Refresh Configuration.
-
![]() View a demonstration of these steps in one or more Transflo videos:
View a demonstration of these steps in one or more Transflo videos: