New! Define Geofence Polygon Borders Around a Location [fleet administrator gtportal]
As a driver, you don't need to do anything for geofences to work—they are triggered automatically as you drive. Geofences automate your location tracking, arrivals, and departures for you. Location can be tracked through the Mobile+ app on a phone or tablet. It is also possible to track the location of the electronic logging device (ELD) and for greater accuracy, some applications such as Transflo Loads 2.0 use both!
Geofences eliminate outdated requirements to notify others when you are approaching, entering, or exiting a site. As a driver, you can learn more at Transflo Geofences.
As a fleet manager or loads workflow designer, you can use Transflo Telematics (myGeotab) to define and manage geographical fences (geofences) around your shipping locations. Based on GPS coordinates, your geofence zones help automate driver arrivals and departures and can be used for tracking, reporting, and analysis of vehicle activity. Your geofences can be circular shapes or custom polygons that you draw:
-
Circular Shapes: You set the radius around a point on a map or a street address. For example, 300 yards.
Example A:
-
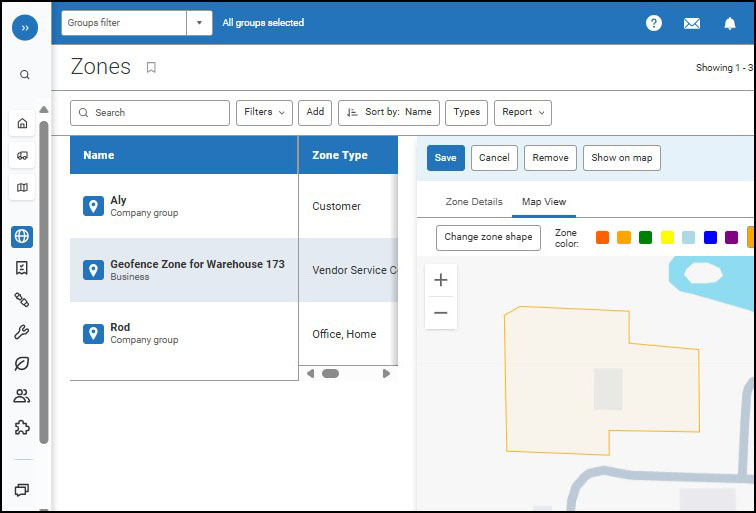
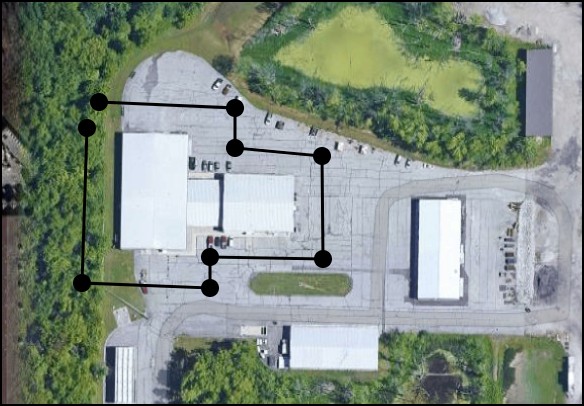
Polygons: You draw a custom shape to define the geofence around a building, terminal, or site.
Example B:
You can create your geofence zones manually on the map or import them using a template in Excel or a similar spreadsheet. To get the most value out of your geofences, don't forget to use the geofence triggers in your load workflow steps and actions in Transflo Loads 2.0.
As a fleet administrator, you can define geofence zones around specific load pickup and delivery locations.
-
Log in to myGeotab or Transflo Telematics. Use the URL link and database name you were given in your original welcome e-mail from Transflo.
Example: https://my.transfloeld.com
-
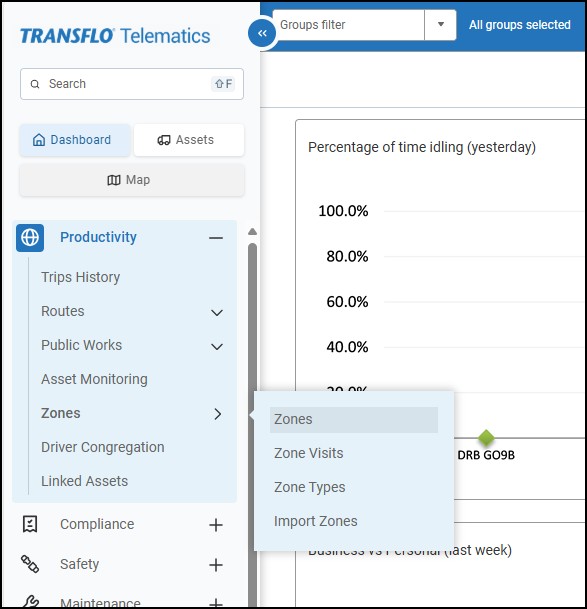
In the main menu, expand Productivity, click Zones, and then choose Zones.
-
On the Zones page, click the Add button.
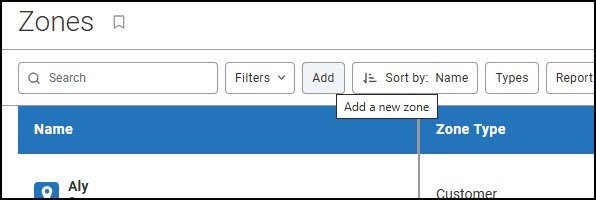
You can also switch to map view and click the Add Zone button.
-
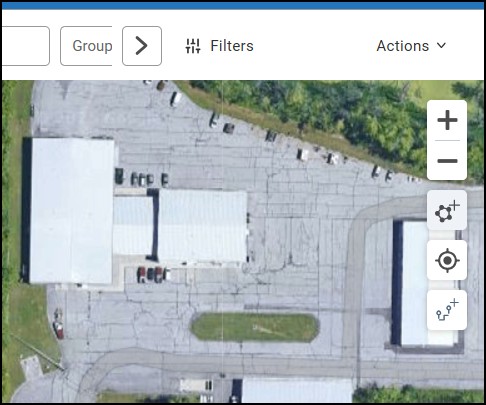
To center the zone around a specific address, enter the number and street address in the search bar.
-
For better visualization of roads and landmarks, switch to Satellite view.
-
To position geofence border points that form the outline of your zone, click around the target location on the map. Continue clicking to draw a shape.
-
To finish drawing your geofence, click the first point you placed (where you started).
-
-
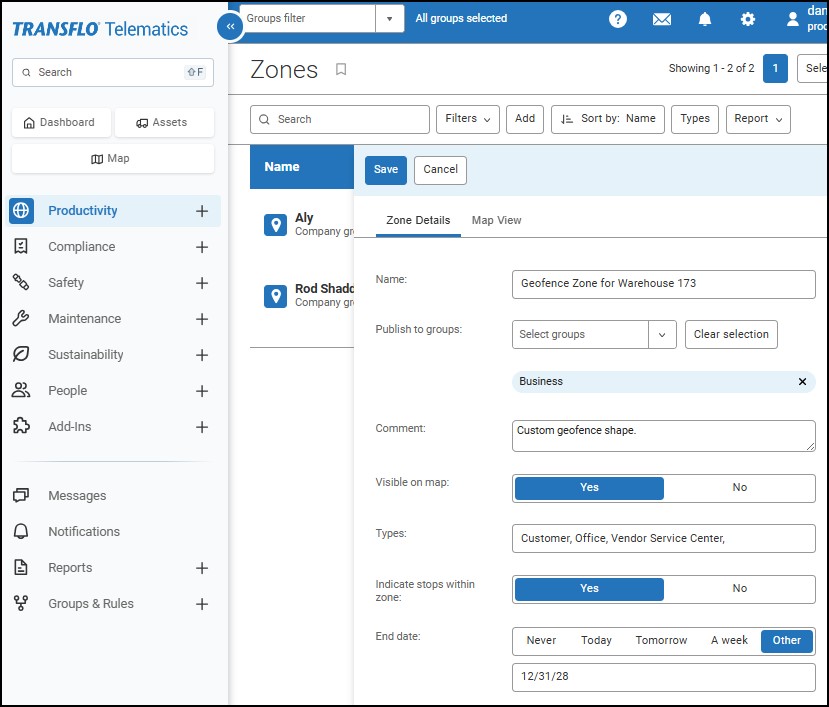
Complete the Zone Details tab:
-
Enter a descriptive Name for the zone.
-
Under Publish to groups, select the user and vehicle groups that should have access to view and use this zone.
-
Use the Visible on map setting to determine whether the zone boundaries are displayed on the map.
-
Assign an appropriate Type to the zone for accurate organization, filtering, and reporting. Types help you categorize and group your geofences with similar zones.
-
(Optional) You can indicate stops within a zone. If enabled, a star icon appears on the map for vehicles that stop inside the zone.
-
(Optional) Specify an End Date for the zone. Data recording for the zone will cease after this date. The zone is not deleted after the end date and can be reactivated at any time.
-
-
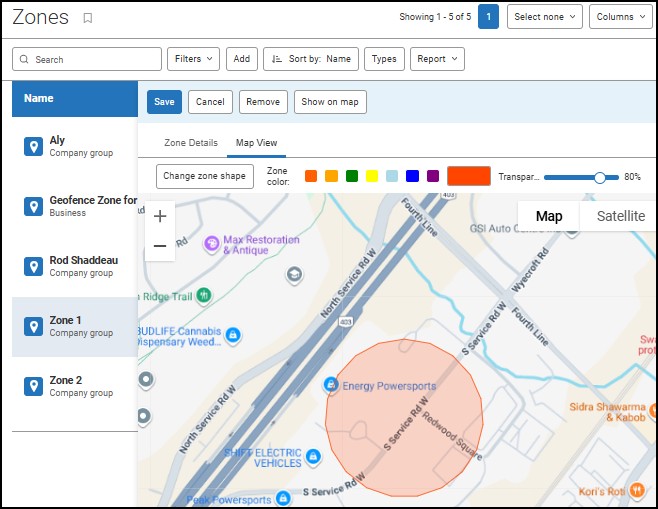
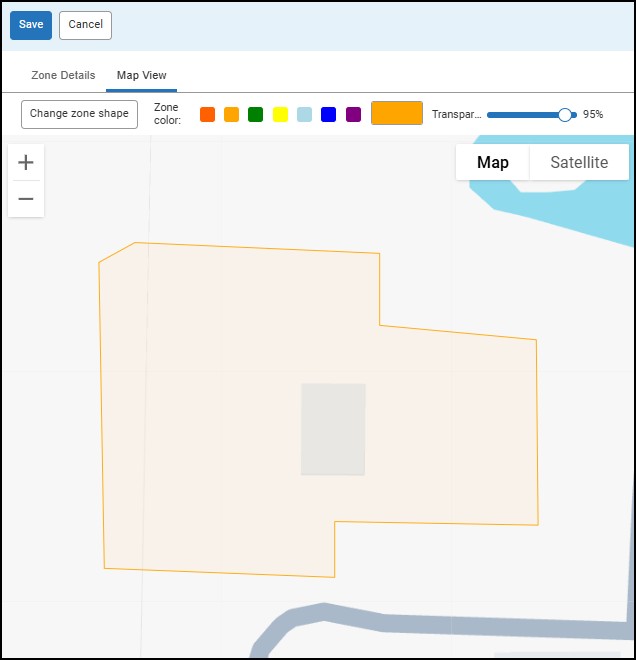
Click the Map View tab to modify the zone shape, color, and transparency. To lighten the shading, slide the transparency setting to the right (for example, 85%).
-
Click the Save button.
You can set up a list of zones in your TMS, a database, or a spreadsheet application and then import the list. It must conform to the required template. In Transflo Telematics or myGeotab, this method supports the following imports:
-
Coordinates
-
Addresses
-
Polygons
-
Log in to myGeotab or Transflo Telematics. Use the URL link and database name you were given in your original welcome e-mail from Transflo.
Example: https://my.transfloeld.com
-
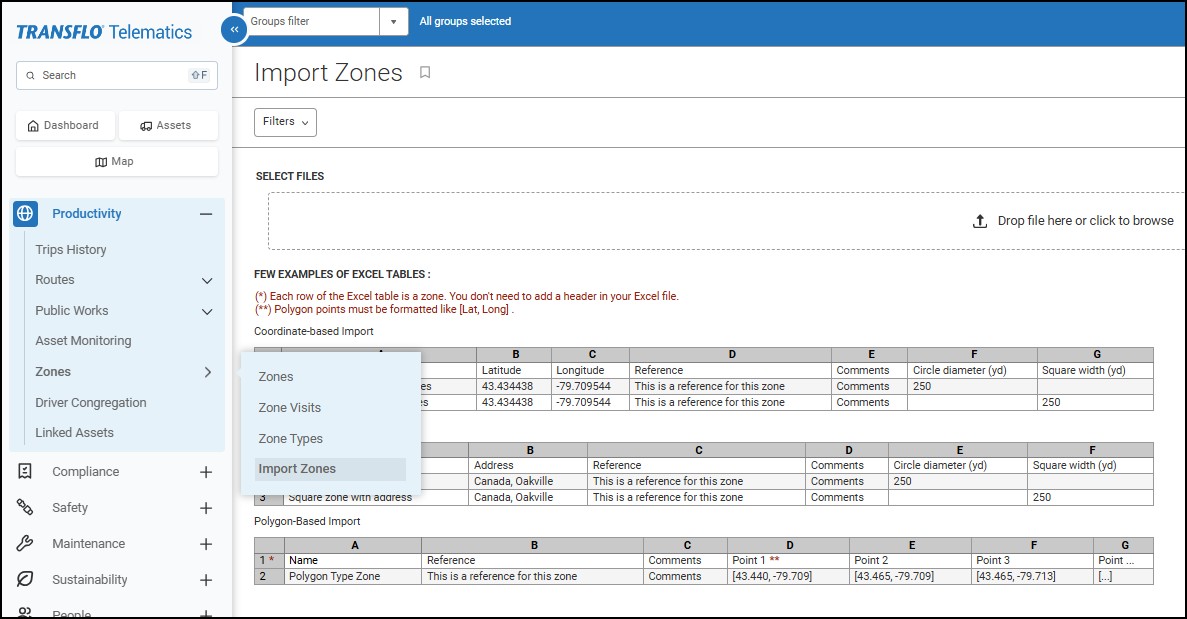
In the main menu, expand Productivity, click Zones, and then choose Import Zones.
-
Set up your template. Each row of your Excel, Google Sheets, or other spreadsheet will be imported as a geofence zone. Decide which format you want to import: street addresses, coordinates for simple circular zones, or coordinates for polygons.
-
For addresses, enter the Name of the Zone, Address, Reference (optional), Comments (optional), and Circle diameter (yd).
-
For circular zone coordinates, enter the Name of the Zone, Latitude, Longitude, Reference (optional), Comments (optional), and Circle diameter (yd). Use tools like Google Maps to find the latitude and longitude of the center of your circular zones. The coordinates appear after the "@" symbol in the URL.
-
For polygons, each point must be formatted with a [Lat, Long] entry.
-
You can import XLS, XLXS, or CSV file types. Your spreadsheet can have a header row or no header row.
-
-
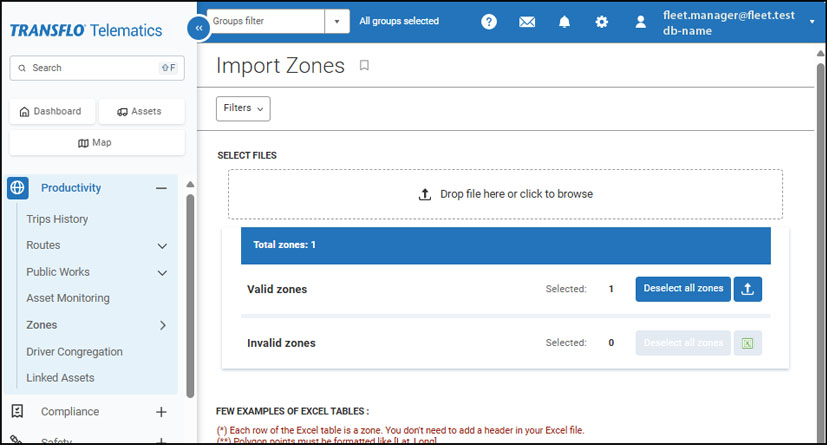
On the Import Zones page, drag your import file into the browser window where it shows Drop file here or click to browse. You can also click in this area to browse your PC to select your import file for upload.
-
Review and verify the pre-import data. When ready, click Import Selected Zones.
-
Your zones appear in the list where you can edit transparency and adjust other settings.
As a fleet designer, you can create your geofence zones manually on the map or import them using Excel or a similar spreadsheet as a template. You can design workflows with steps and actions that are triggered by these geofences.
Loads 1.0 only supported radial or circular shapes. The new Loads 2.0 solution supports both radial circular shapes and the more precise new polygon shapes.
-
Circular Shapes: You set the radius around a point on a map or a street address. For example, 300 yards around the point on a map defined at 40.233 (LAT), -74.848 (LONG).
-
Polygons: You draw a custom shape or provide a series of specific points to define the geofence around a building, terminal, or site.